
DIY // How to Add a New Door to an Old Cabinet Box
We recently added a new cabinet to an old cabinet box at the Dexter House (during our kitchen refresh) and I was surprised just how easy it was. After receiving lots of questions about the process, we decided to put together a DIY. Read on for this easy tutorial plus a video.

DIY: how-to add a new door to an old cabinet box
Time: 1 hour (after new cabinet door arrives & is preped)
Level: beginner
Format: Video + Blog Post
materials:
new cabinet door (we used this company)
hinges
cabinet knob or hardware
tools:
electric drill
video
See the whole process in this video.
You can can read more about the process below.
Step 1 // Order the new cabinet door
First thing first, order the new cabinet door. We bought our’s from this site.
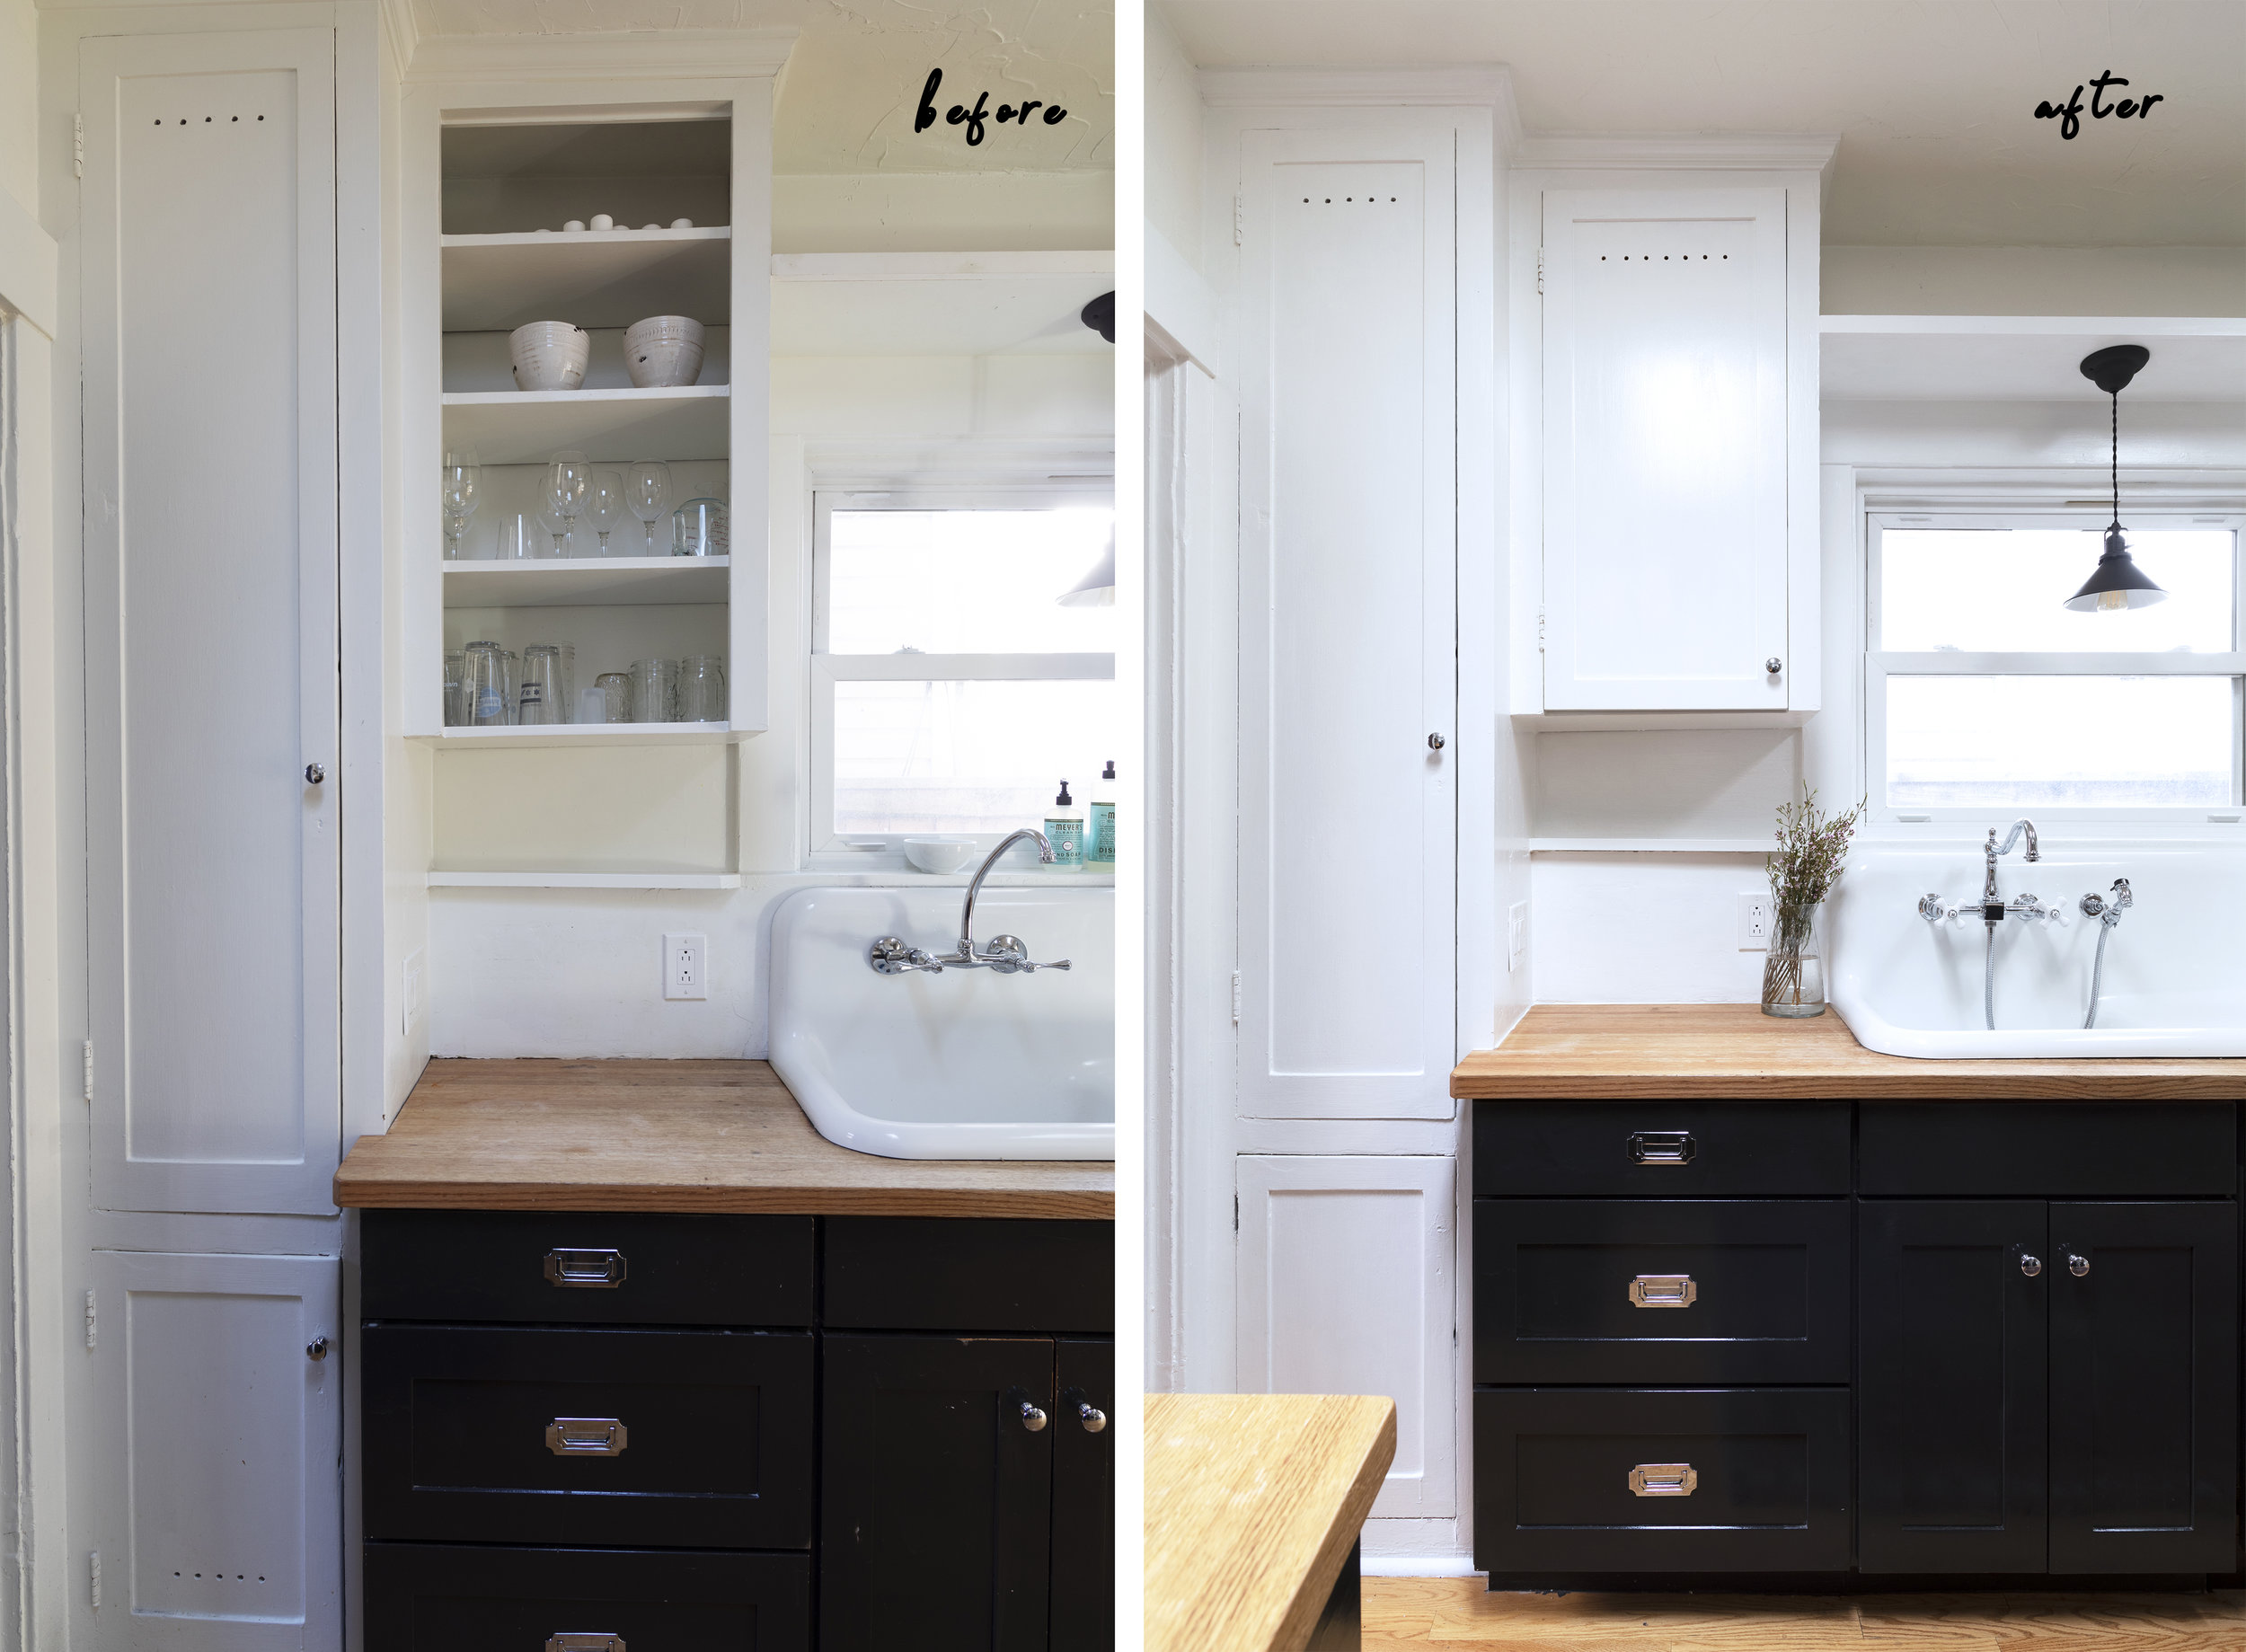
Measure the width and height of your opening. You’ll also want to take note of the style of the surrounding cabinet doors (if there are any) so you can match them. We opted for a ‘shaker, inset panel’ door and specified the width of the stiles and rails to match the neighboring cabinet (stiles and rails are the raised border of the cabinet).

Also note the hinge style of the cabinets you already have. If you have exposed hinges like we do at the Dexter House, you should select “no boring”. Most newer cabinets would have the circular boring in the back of the cabinet. We goofed up on this step and ordered our door with a boring in the back. But we were able to drill hinges in the side of the cabinet door so it turned out fine.
Our door cost around $60 and came within 2 weeks.
Step 2 // prepare the door
Once the cabinet door arrives, you’ll want to paint/stain/treat the cabinet door. We opted for a coat of primer and then painted the door using Benjamin Moore’s Advance paint in semi-gloss (color is Simply White).
Adding the hole detailing: Since the Dexter kitchen boasts a pie safe adjacent to this cabinet, we decided to mimic the hole detailing in this cabinet. Which basically means we just drilled a row of holes in our new cabinet door. To achieve this, we first laid the holes out with a pencil and tape measure (making sure to align them with the neighboring cabinet), placed blue painters tape on the back of the cabinet to reduce blow out, and then drilled holes from front to back. We were able to match the drill bit dimension to the neighboring cabinet’s holes as well. The goal here was for this cabinet door to look as original as the neighboring one.


Step 3 // install the door
Depending on the type of hinges you have, this process will look different. We installed the exposed hinges on the door and then test fit the door in place. Our old cabinet box was a bit wonky so we had to shave a bit off of the spots where the hinges attached. Then we attached the hinges to the box, added the cabinet hardware, and voila…


sources
All sources for the Dexter kitchen are here.
We hope you enjoyed this DIY! And please, let us know if there’s another DIY project you’d like us to share.


