
Old Radiators, New Heating System
THE DEXTER HOUSE When we bought the Dexter House, it had a series of baseboard and wall-mounted heaters in varying states of decay. We knew we were going to replace them with something more efficient and functional, but we didn't know what. After a lot of internet research and debate, we decided to create a hydronic radiant heating system on the main floor.
You may or may not know (or care) that hydronic radiant heat works efficiently and comfortably by sending hot water to radiators through a series of pipes hidden in the walls and floors. These days some hydronic systems forego the old time radiators and use creative heat distribution methods like floor tubing, but we plan to stick to radiators for this job. Traditionally the hot water is heated using a boiler, but we plan to use a hot water heater to save money and space. We'll keep the domestic water (the water that goes to the faucets and plumbing fixtures) separate from the water used in the hydronic radiant heat system, by installing a heat exchanger. The hydronic system will thus be 'closed loop' meaning that the domestic water and heat water will never touch. We did a similar system (albeit a heated concrete floor instead of radiators) in the basement of our Wallingford house for about $1000 and couldn't have been happier with it!

Yup that's me circa 2009 working on the hydronic radiant heat system in the Wallingford house ;)
Back at the Dexter House, the next step was to determine the heat output method. We had originally found these vintage-inspired new radiators and planned to use them, but after finding a listing for antique radiators on Craigslist (as I showed you last week) we switched our approach.
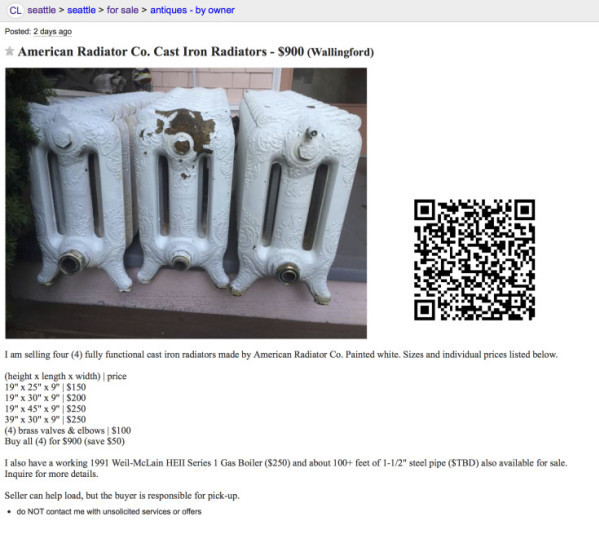
Lovely, aren't they?! We bought these from the homeowners of an old craftsman in Seattle, who are prepping for a massive remodel. The entire set cost us $750. I checked pricing with a local salvage shop and they sell these ornate-style radiators for $18/fin, which would have totaled $864 for this batch, so we got a good price. Plus it turns out I actually used to work with the Craigslist seller too...always fun to see what a small world it is!
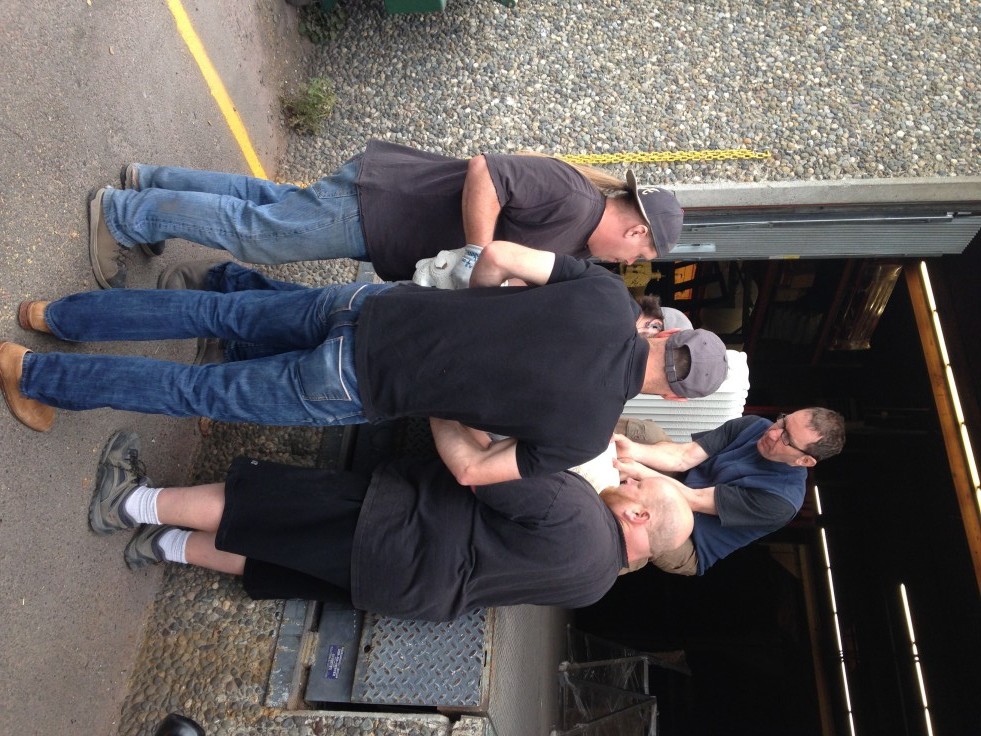
Once the radiators were in our car, we took them straight to a local sandblaster to remove the 100+ years of peeling paint and grime and prep them for a new finish, which cost us $350. Did I mention that these radiators are heavy?! It took 5 guys to get the largest radiator out of our car and onto the loading dock.
Here's what the radiators looked like after the sandblast.

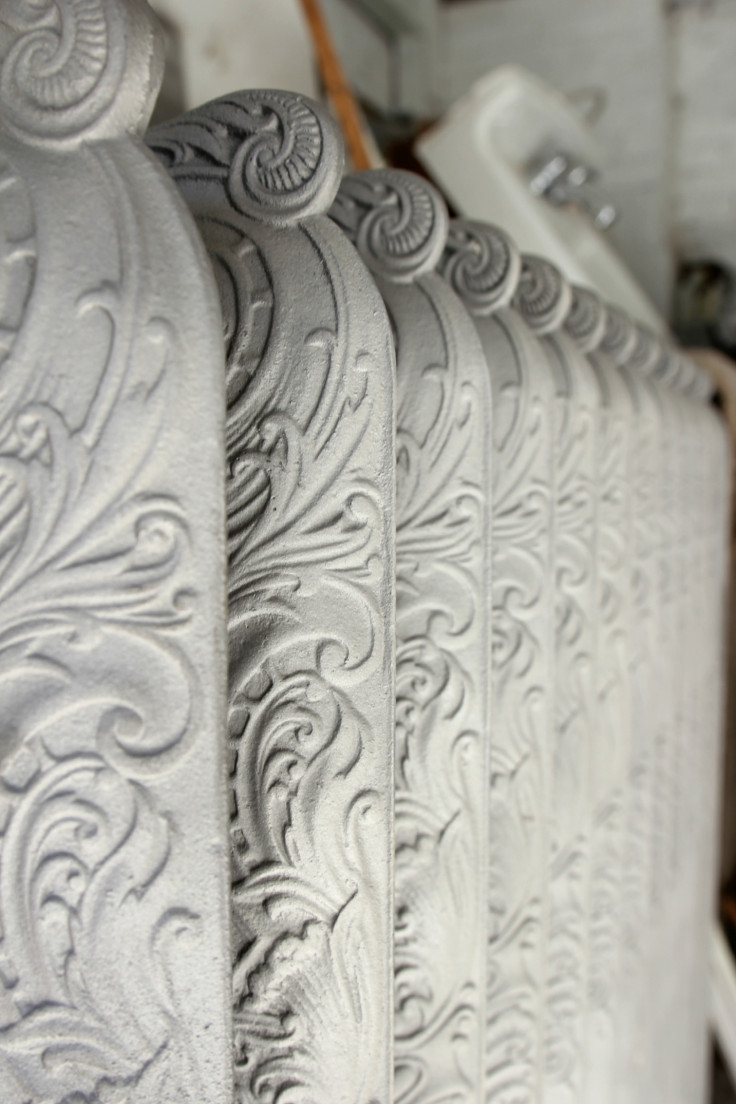
Beautiful, aren't they?! The sandblasting roughed up the cast iron a bit so the dull-grey metal is the texture of fine-grit sandpaper. I read online that you have to finish bare cast iron quickly or it rusts (even from just the moisture in the air) so the next step was to decide on a finish...quick.
It had been our plan all along to finish the radiators with some sort of oil to maintain a natural-looking cast iron finish. But what oil? When I looked online for some examples or tutorials, I had a really hard time finding anyone who had attempted something similar. Turns out most people just paint their radiators.
So which oil did we choose? Tung oil. Don't worry, I'd never heard of it before, either. But Garrett informed me that tung oil is a natural product with zero VOCs and most importantly, it's nonvolatile meaning it won't off-gas when heated. Here's where I should mention that hydronic radiators get over 120-degrees (and steam radiators get even hotter) so you can't just put anything on them or you risk releasing chemicals and not-so-healthy smells into your house when the heat kicks on.
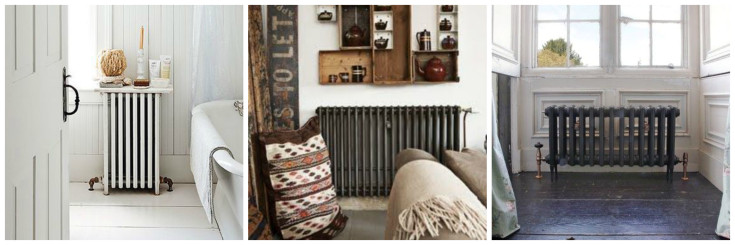
Not willing to commit to an oiled finish without knowing how it would look, we tried out the tung oil on a small patch on the backside of one of the radiators. If I hated it, I knew we could still do what everyone else seems to do and paint the radiators to look like one of these:
Resources: SF Girl by Bay | Down that Little Lane | Castrads
Well turns out the tung oil looked...amazing! So we went ahead and finished the rest of the radiators using a thin first coat. I plan to add a second coat once the first layer is totally dry, in a few days. Since I had such a hard time finding information on natural radiator finishes online, I will put together a DIY on our approach once we're all done. In the meantime, take a look at what our first coat of tung oil looks like:
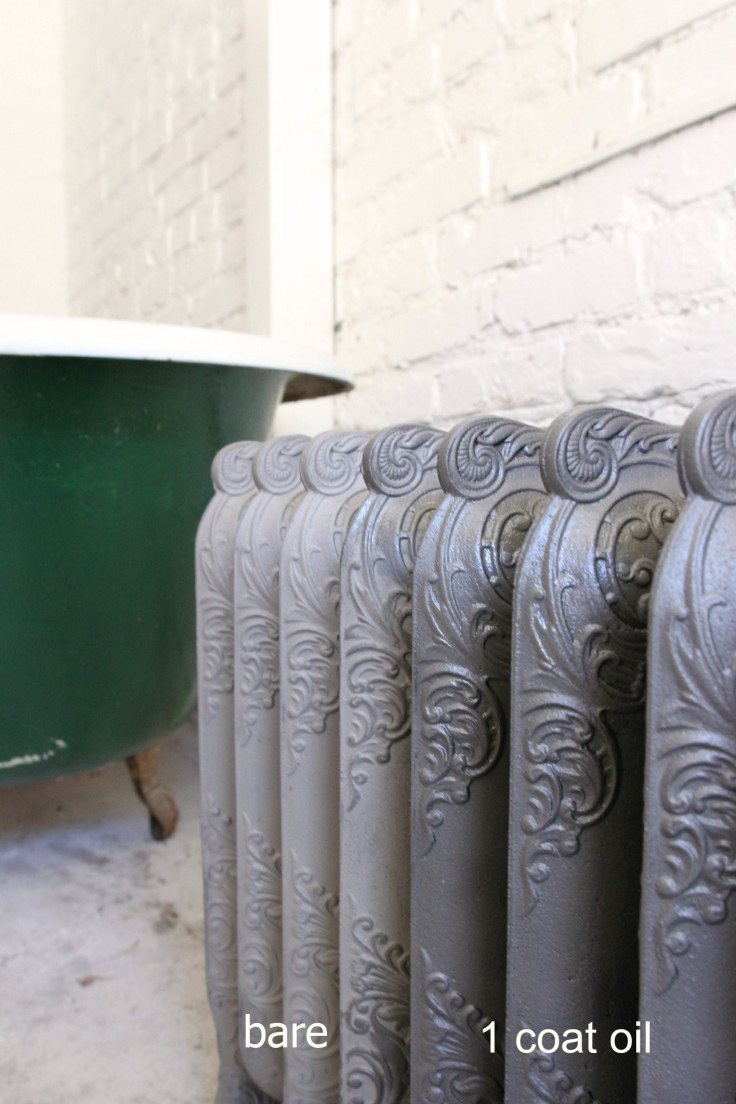
Seriously gorgeous, right?! I'm pretty excited about how these radiators are shaping up!
One thing I should probably mention, which I've glossed over until now, is the sizing of the radiators. Turns out this is a tricky and technical step, which we did before purchasing the radiators. First step to sizing radiators is determining the heating requirements of each room you plan to heat, also known as the demand. There are online calculators (like this one), which will provide a heat demand in BTU's by taking into account room characteristics like size, windows, and construction type. The next step was to figure out how many BTU's each radiator puts out. For new radiators this is really easy to do because the manufacturer lists that info in the specs. But for old radiators it's a whole different ball game. You have to figure out how much heat each radiator will produce...and it requires more calculations. If you're tackling something similar, let me direct you to Daniel who walks through the math here using this guide. We did the calculations and found that our radiators will provide ample (dare I say too much) heat for each room. I feel extra confident because we saw the size of the rooms the radiators originally heated, where they produced plenty of heat for the space according the home owners. Since our rooms are way smaller than those rooms, our radiators should work for heating Dexter. It was a nice double check.
Whew! Glad we made it through all of that! I'm sure excited to be using old radiators for our new heating system, but what do you think?
xoxo
-Cathy
p.s. A little more about old radiators from Manhattan Nest.
p.p.s. John Derian's really amazing home. It's has the perfect patina...gorgeous!
p.p.p.s. This dinner party! I want to be there or better yet, I want it in my backyard!