
A Cement Tile Backsplash in the Kitchen
THE DEXTER HOUSE
Well guys the big moment finally arrived... I tiled the kitchen backsplash! What did you think I was going to say we had our baby??! ;)
If you remember, I ordered these cement tiles a few weeks ago and was out-of-my-mind excited when they arrived:
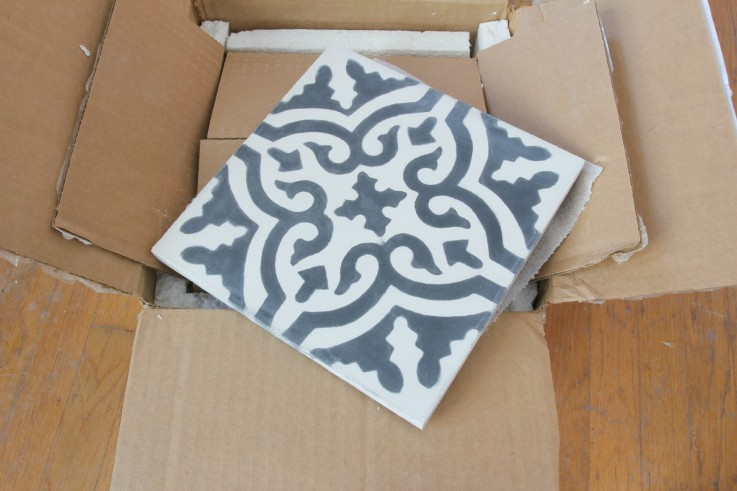
The Grit and Polish - Dexter Tile
Leaving those beauties stacked in the corner while Garrett finished drywalling was akin to torture. Okay, that's probably a little harsh, but I'm just not a patient person when it comes to finishing a kitchen. It's only a hair easier than waiting for your baby to arrive after they've been cooking for over 41 weeks (not going to happen this time...right baby?!).
Anyway...back to the tiles. Garrett really wanted to inset the backsplash into the wall so the edges of the tile would be concealed by the surrounding drywall. I wasn't really concerned about seeing the tile edges, but I let him go after it anyway ‘cause marriage is all about compromise. And I like to compromise on the small stuff ;). So Garrett put up 1/4" hardiboard behind the backsplash and 5/8" drwyall around it. He pushed out the drywall immediately on either side of the hardiboard with 1/8" furring strips so I had a solid 3/4" of depth to work with for laying the mortar and tile.

The Grit and Polish - Kitchen Drywall
Then it was my turn! This was my first time installing cement tiles and I found it to be...well...pretty easy. I used an acrylic, pre-mixed tile adhesive (mostly because I'm lazy and HATE mixing up mortar) and a trowel with large teeth. Per the tile manufacturer's instructions, I cleaned the back of each tile prior to laying them on the adhesive. Cement tiles are heavier than any tiles I've worked with before, so I put extra care into making sure the backing was evenly applied with large grooves from the trowel. I don't want any of these suckers popping off the wall and falling into a pot of stew when I finally get the chance to cook in this kitchen!
What I loved about working with these cement tiles (besides them being fabulous!) is the size. They're each 8”x8”, which made the install go fast. I did the whole kitchen backsplash in about an hour. After spending two full days laying the marble herringbone backsplash at Ravenna, I was overjoyed by the simplicity of this project. The only added difficulty I found with these tiles was aligning the pattern. It's not rocket science (I'm looking at you, Jamie), but I did spend a little extra time laying them out. I started by marking a vertical line at the center of the backsplash and then laid the first row beginning with the middle tile and working outwards. After laying the center three tiles all the way to the top of the backsplash and checking that each row was level, it was time to cut the edge tiles.

The Grit and Polish - Kitchen Tile Backsplash Progress Collage with numbers
Cutting cement tiles takes a bit of extra patience because they're harder and thicker than the ceramic tiles I'm used to working with. I found that cutting them face-up allowed for fewer chips on the face of the tile. When cutting these beauties, you have to be aware of the pattern. I cut the right and left edges off of 4 tiles. Then I laid these 3" strips into the backsplash and called my work done.

The Grit and Polish - Cement Tile Backsplash
Everything I've found online recommends an impregnator/penetrating sealer for cement tiles. Cement tiles are super porous meaning they'll stain easily, so you have to seal them prior to grouting. I plan to use this sealer product. And then I'll grout them with either a bright white grout or an off-white grout that matches the field color of the tile. We ended up with 1/4" grout lines (which is 1/8" thicker than the manufacturer recommends...oops), so I'll use a sanded grout. Stay tuned for that.
So what do I think about the backsplash? I LOVE it! It was easy to install and adds big impact. It's like a giant Spanish/European moment in this house. Of course at $18/sf, these tiles are not cheap, but I think they're worth every penny! What about you guys? Are you feeling my patterned cement tile backsplash???
Seeing the backsplash done has made me even more eager to finish this kitchen up (see previous comments on patients...)!!!!
xoxo
-Cathy
p.s. Speaking of patterned tile backsplashes...I really dig this one! That image was what finally persuaded me to go for broke on cement tiles!
p.p.s. Another stunning kitchen by Jessica Helgerson...she can sure design them!
p.p.p.s. Wilder is into dinosaurs right now and I think it's amazing! 26 months has got to be my favorite age yet! Also, yes...he's running with scissors.