
The Planking we Use to Hide Ugly Ceilings
THE POPLAR COTTAGE
When we first bought the Poplar Cottage, most of the rooms had a not-so-lovely acoustic tile glued to the ceilings. The thought of removing it felt like a lot of work, but thankfully we had another much easier (and stylish) solution…cover the ugly ceilings with planking! We’ve gotten a lot of questions about the planking (and acoustic ceiling tile removal alternatives in general), so we’re sharing all the details today.
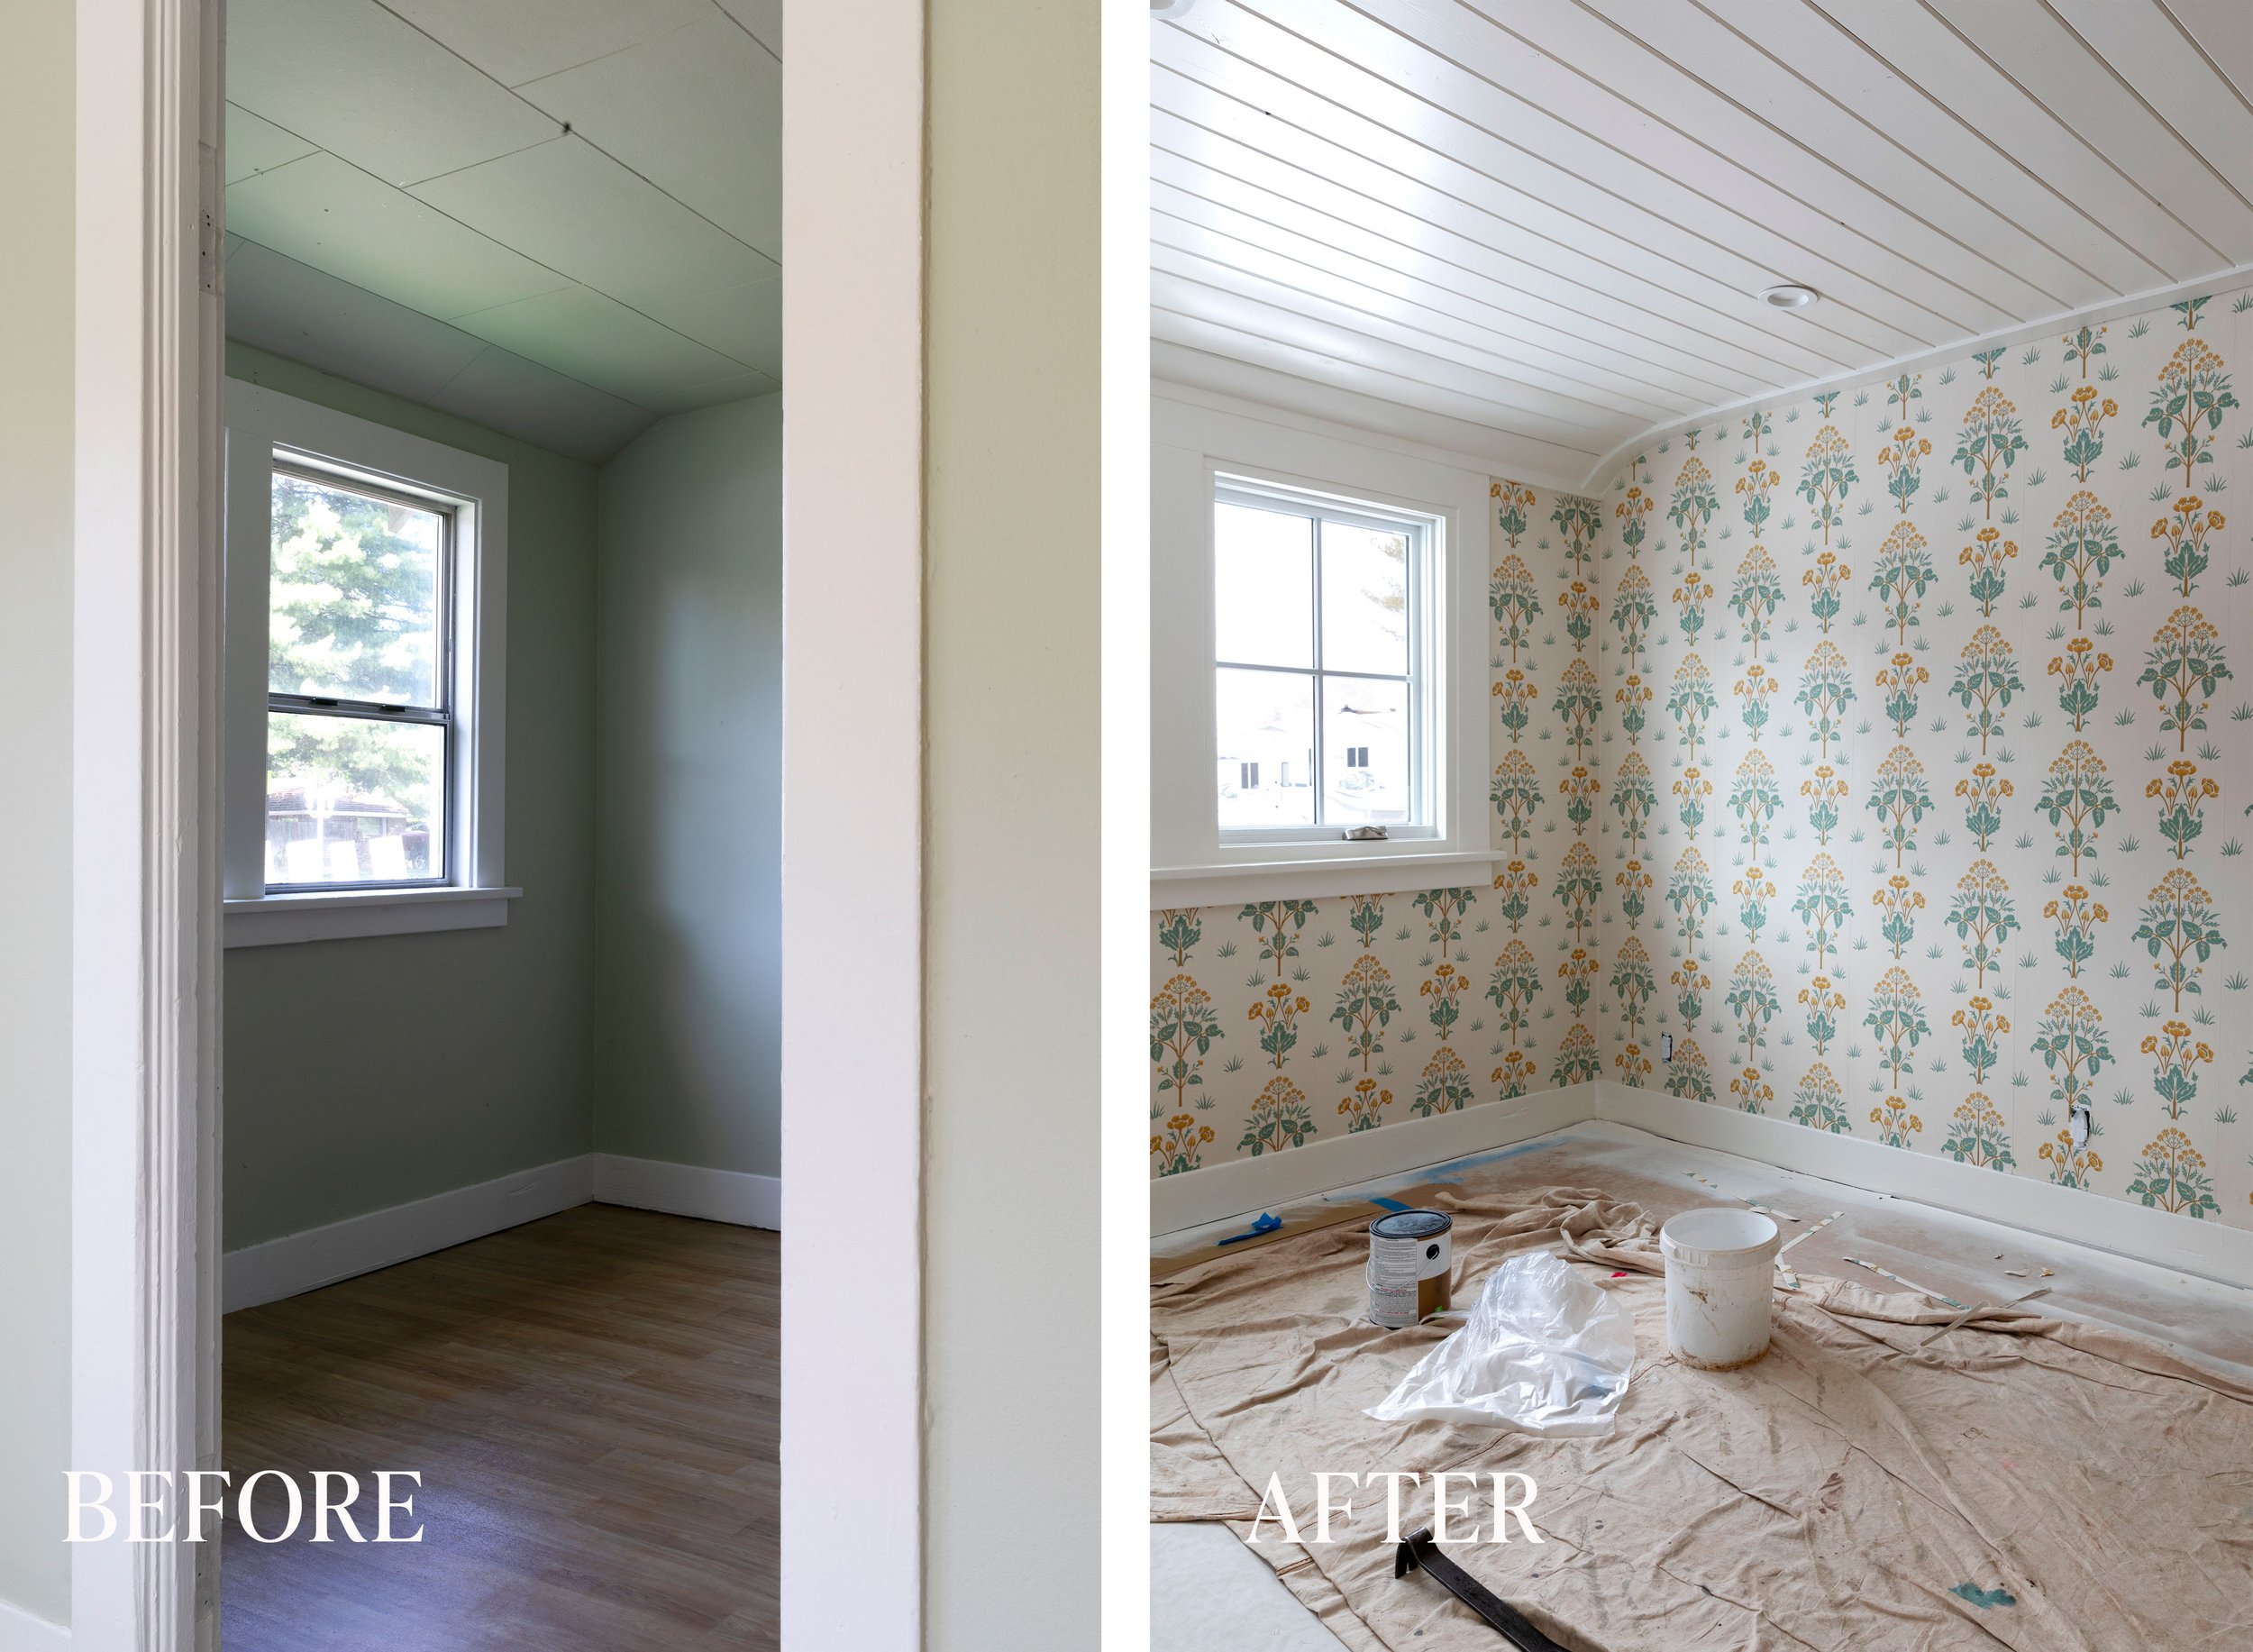
after: wallpaper, windows, paint color is BM Swiss Coffee
Why cover ugly ceilings?
Acoustic tiles, popcorn ceilings, and other unfortunate ceiling finishes of eras past can be a serious eye sore. But removing them can be an incredibly expensive and messy proposition (and unsafe if asbestos is suspected). Sometimes covering them is the best solution.
At the Poplar Cottage, the prospect of removing the tiles felt like a lot of unnecessary work for us, especially considering we had a whole house to renovate. Plus, leaving the acoustic tiles in place could provide additional sound insulation between floors. So we decided to cover them with panelling and leave them be.


the planking product we used
We used 1x6 pine tongue-and-grove from our small town’s lumber store (Knudson’s Lumber for the locals). This product is on the rustic side with plenty of knots, and came as raw wood (not primed). We ended up filling a few of the larger imperfections to decrease the rustic vibe, but this planking worked great in the casual Poplar Cottage! For a more polished option, I’d definitely recommend the pre-primed, finger-jointed pine panelling we used in the Farmhouse kitchen. It has no visible knots and the factory-finished primer job gives a really nice finish.
Tongue-and-groove is a common enough product and should be readily available at local lumber stores. I also found a similar product at Home Depot, except it’s 4” instead of 6” wide. And if you want to get creative, there are some deals to be had on planking on Facebook Marketplace, Craigslist, salvage shops, and the like. Garrett is picking up some bundles of pine tongue-and-groove for the upstairs ceilings that he found on FBMP today!


For anyone who doesn’t know, tongue-and groove is a plank with a tongue on one side and a groove on the other. Pieces ‘snap’ together (often with a little coxing). Here’s what two pieces look like together. One plank is primed and the other is natural, just as we bought it.


Prep
Wood is one of those wonderful natural products that will change over time, so prep is extra important. Here are two things we always do for planking…
1 // condition the wood
Since wood can expand and contract over time, you should condition it to the space it’ll be installed in to get some of that out of the way. We usually set it on blocks on the floor in the house for a month or so. That’ll help dry it out and do some initial shrinking (we also do this with hardwood flooring).

2 // prime and paint the wood before installing
You’ll also want to prime the wood on both before installing it. A good coat of primer will ensure the wood is protected and shouldn’t warp or bow. And in most cases, we recommend painting the visible side of the panelling before install too. This is a purely for aesthetics. When the wood acclimatizes to the house over time, IT WILL SHRINK and the tongue will slowly become visible. If the tongue isn’t painted (or say just primed white when your panelling is painted a color) you’ll have mini skunk stripes down your ceiling. Painting the tongue will make sure your ceiling looks great for a long time. (If we’re going with a white paint color that’s similar to the primer, we often wait to paint until it’s installed.)
To prime the planks for the Poplar Cottage, Garrett set up a paint station in the bedroom and sprayed all the boards with primer. We then propped the boards up all over the house to allow them to dry. Garrett then repeated on the second side.


Install
Installing tongue-and groove is definitely a DIY-friendly project, but takes some upfront thinking on attachment. We were lucky because there’s solid fir ship lab behind the ceiling tiles so we could nail the planks into that. But in the past, we’ve had to pull out a stud finder to find framing members to nail the planks to or added firing strips when the planks were parallel to the studs/joists.
To install the planks nice and tight, we fastened a 2x4 to the ceiling a little ways ahead of our working area and converted our bar clamps to spreader mode to press between the 2x4 and planks. After getting each plank in position, we attached it to the ceiling with nails driven diagonally through the tongue. We then removed the clamps, placed the next plank, repositioned the clamps, and nailed the next plank in position. We worked our way down the room doing this, one plank at a time.


What our planking cost
This was defiantly a budget-friendly ceiling renovation. Our lumber cost for the tongue-and-groove was about $1/lf at our local hardware store. That’s about $2 per square foot, before paint and all the little bits. Really reasonable for a beautiful ceiling IMO and certainly worth every penny for this little cottage. And don’t forget to look at FBMP and Craiglist, Garrett just scored a few bundles of this product for $0.55/lf!


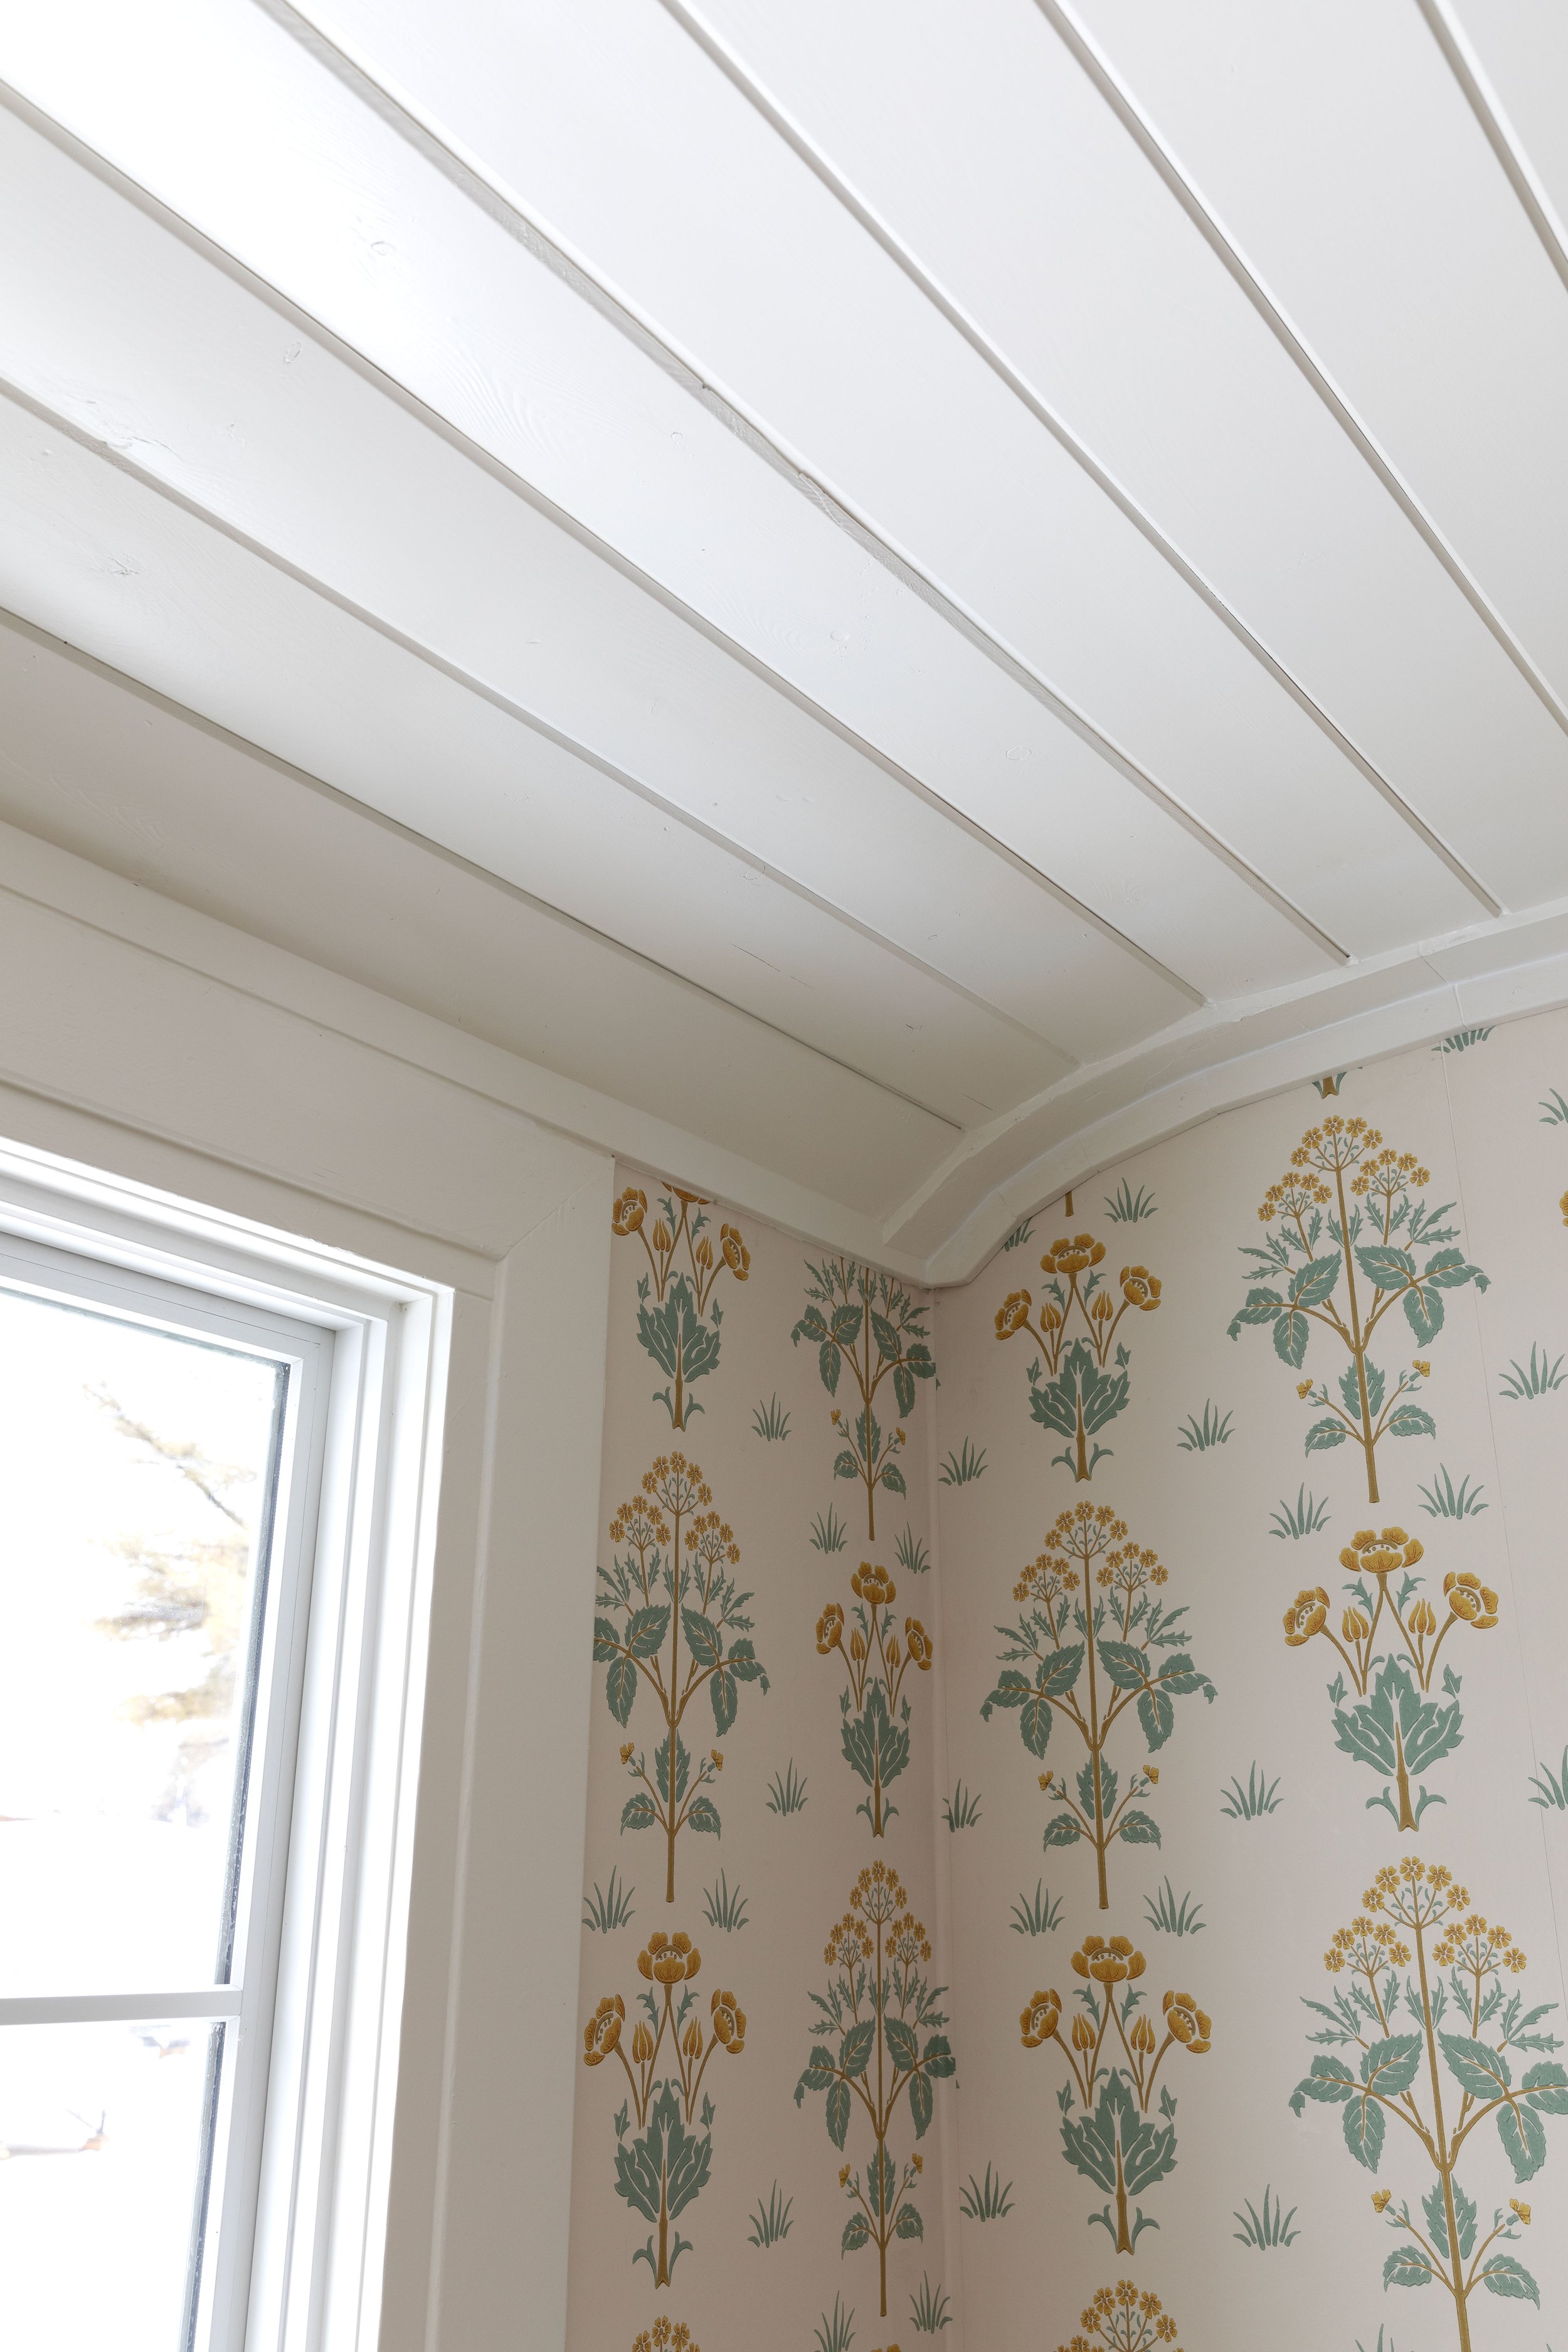


And one more before-and-after just to really hit home how much better these ceilings look now.

And my love for paneled ceilings isn’t going anywhere. I was just telling Garrett that I’d like to do the same thing at the new house (which also has acoustic tiles on the ceilings 🙄). It’s a classic look and a great way to cover the ugly!


