
Tacoma Converted Garage // DIY Picture Frame Molding in the Dining Nook
TACOMA CONVERTED GARAGE This post is sponsored by Metrie.
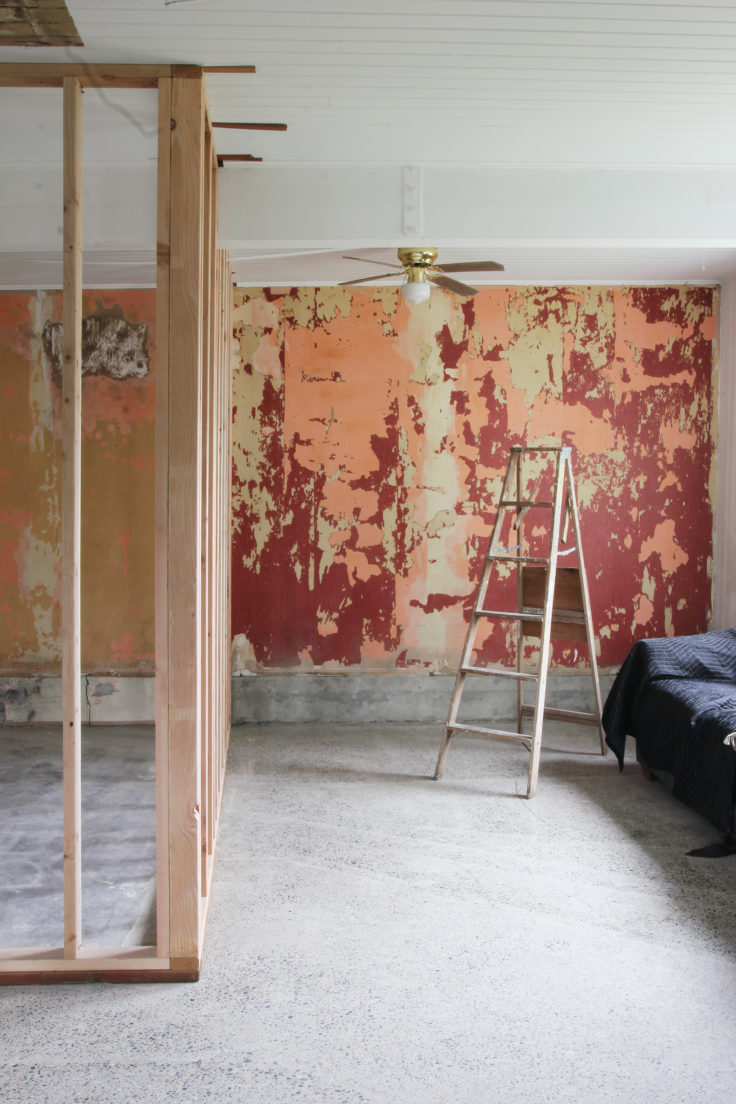
The dining nook at the Tacoma Converted Garage project started out rough. It had vinyl flooring, peeling wallpaper, and a general feeling of neglect. But this Spring we changed all of that. We demo'd, framed, wired, drywalled, and had the concrete floors polished. Then Garrett and I came back for a weekend in May and turned this 10'x10' room into a real dining nook.
The Design Plan
Our design for this space centered around the molding. We opted for base and picture frame molding to add a little interest to the back wall. Metrie's Option {M} Vintage Industrial line was perfect for this project. It's bold and edgy and the opposite of fussy. Here was our plan:
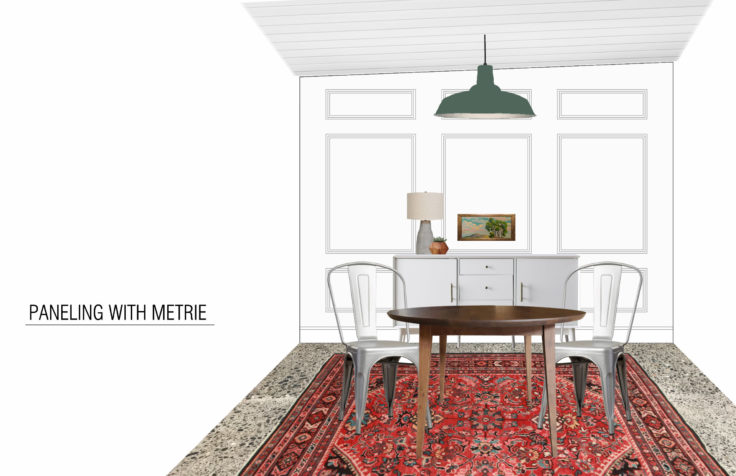
(elevation by Bella Young)
For reference our back wall is 10' wide and the ceilings slope from 9' to 9'-5".
To achieve this look, we selected 1 1/2" Primed FJ Poplar Panel Mould and 6" MDF Baseboard from Metrie's Option {M} Vintage Industrial Line. As first time Metrie customers, we loved how easy it was to pick out these profiles from the curated Option {M} lines. Within each style, all of the profiles are designer matched so it takes out the guesswork. The Vintage Industrial line is all about clean-lines and sharp angles to create a contemporary look - just what we were going for.
Planning Out the Picture Frames
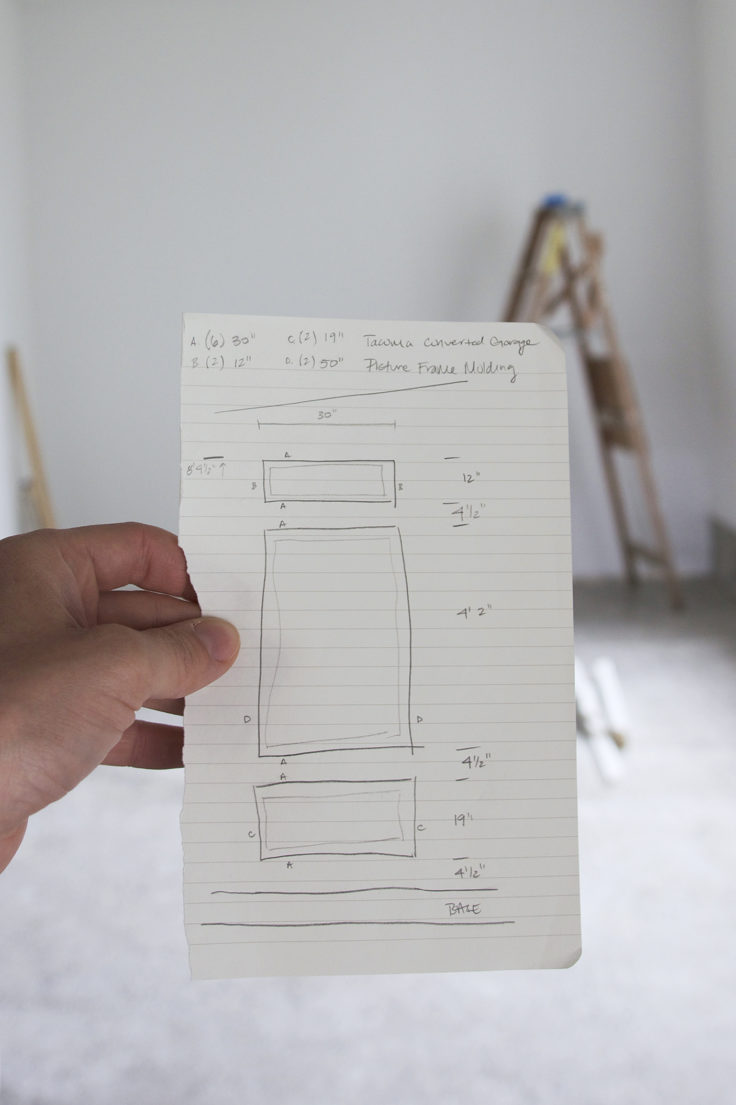
This was the first time that Garrett and I have installed picture frame molding so we opted to do a 'practice round'. We cut one column of picture frames and taped them to the wall with blue paint tape. Then we stood back and himmed and hawed. And adjusted. And then adjusted some more.


Once we were happy with the size and spacing of each frame, I drew up the plan and Garrett took the 'practice round' down. Then we cut all of the molding, stacked it on the ground, and prepped for installation the next day.

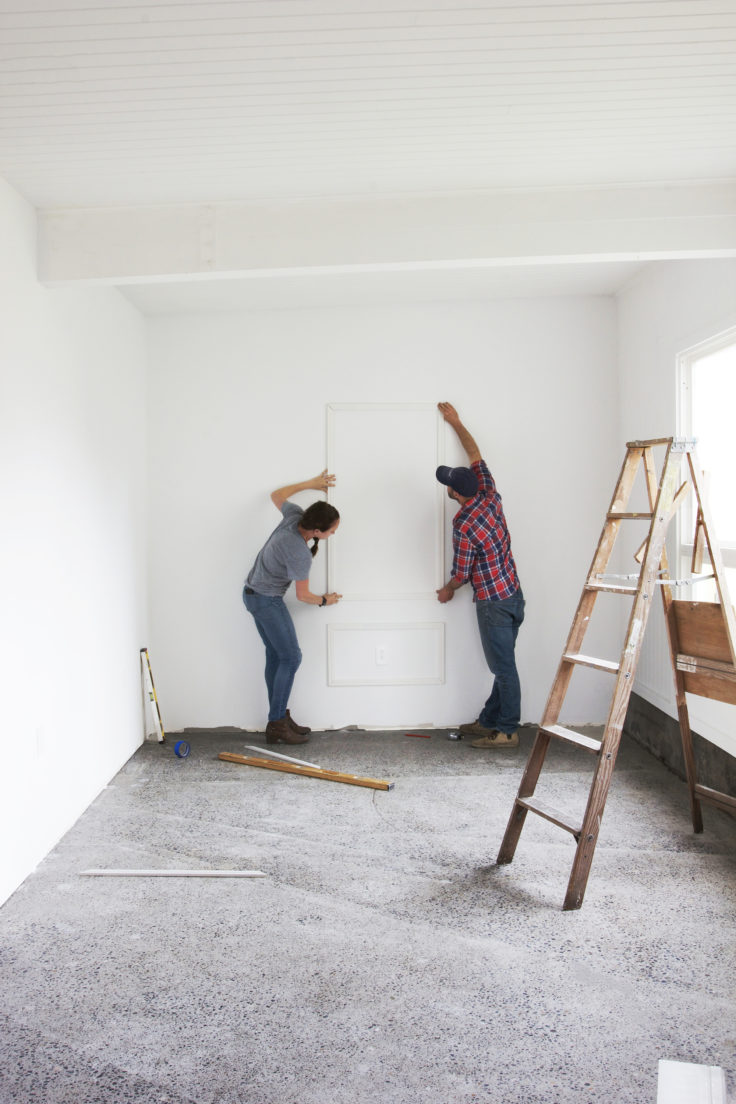
Installing the Molding
On day two, we got busy with the actual install. It took us a couple of hours to put up 38 pieces of molding (pre-cut the day before) using glue and a nail gun. We started with the base and then moved on to the picture frames.

We used a tape measure, pencil, level, construction adhesive, and a nail gun to create the picture frames that we drew up during the previous day's 'practice round'. We started at the bottom center picture frame, and worked our way up and out from there. We began by marking the corner of each frame and leveled every piece of molding before gluing it and nailing it in place.


Finishing the Picture Frames with Caulk and Paint
Next we caulked all the seams and nail holes and then painted. We opted to paint the walls and molding the same color to get just the right amount of interest and a modern look. The color is our go-to white, Benjamin Moore's Simply White.


Our goal was to finish this space in a weekend, both because we're busy and because we wanted to prove that you could too. Spoiler: you totally can! I can't wait to show you how the dining nook turned out next week.
Thank you to Metrie for sponsoring this post and for having great molding!