DIY Pinch Pleat Curtains // How to Make Budget IKEA Curtains Look Like a Million Bucks

THE FARMHOUSE
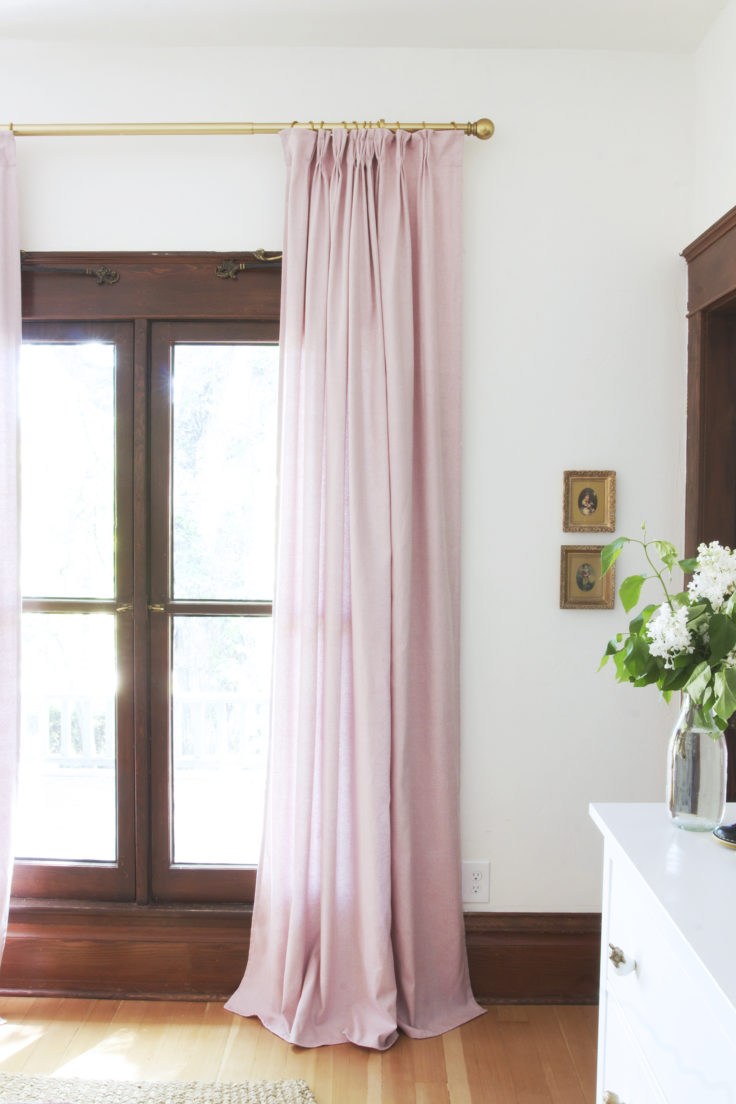
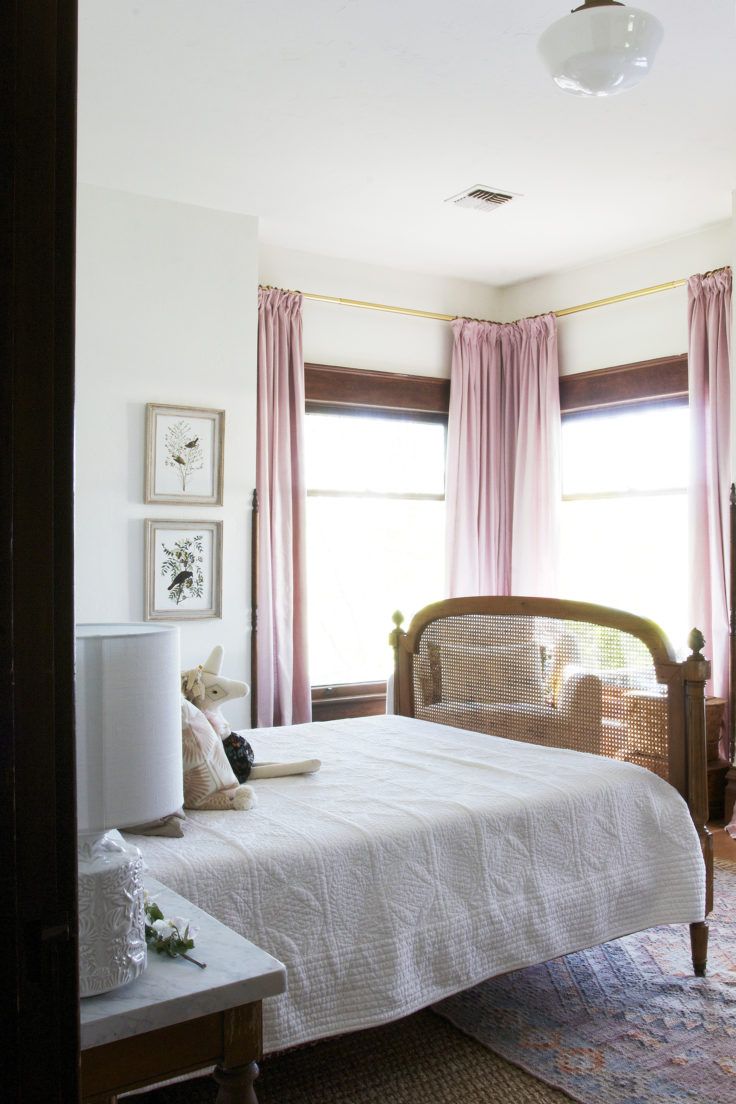
I wanted to circle back to Daphne's nursery today and share how we made her pinch pleat curtains on a budget. All told they cost us about $50 per window, which includes the IKEA Tibast panels. Originally, I had been planning to sew my own pleated curtains, but this is way cheaper than I could have made them for (and no sewing machine required!).
Read on to see how to create beautiful pinch pleat curtains yourself on an IKEA budget (these curtains came in at just $25/panel!). And don't forget to pin this image for easy reference later!
DIY Pinch Pleat Curtains
Time: 1 Day
Level: easy
Format: Blog Post
Materials
IKEA Tibast curtains (or panels + pleating tape)
Iron
Needle and thread (optional)
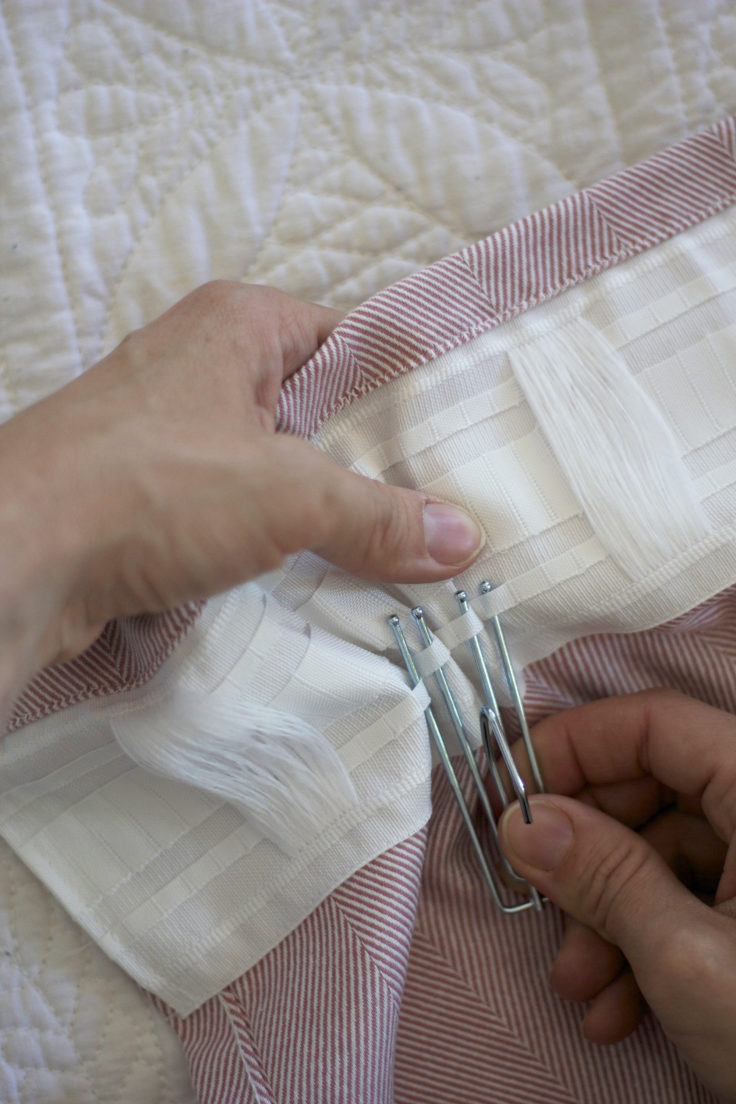
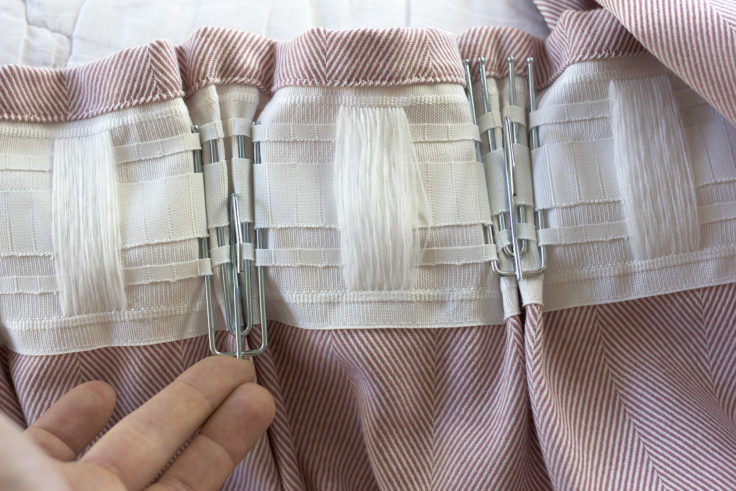
Step 1 // Attach the Pleating Hooks
IKEA's Tibast curtain panels already come with pleating tape on the back of the panels. If your curtains don't have pleating tape, you can buy it (here) and sew the tape on the back of your panel (here's a tutorial on that). Pleating curtains requires pleating hooks, which can be found on Amazon or at Ikea. The main thing about the hooks is being consistent with a pattern. With our four-pronged hooks, I put the first prong in the 4th slot, and than a prong in every 3rd slot after that. I repeated this for every pleat, and then used a single-pronged hook at each end of the panel. Consistency is key. And patience. This is definitely the longest step and best done on a couch with a movie and glass of wine (just don't spill!).
One quick note about this step, make sure your curtains will cover your window once pleated. Pleating will considerably narrow your panels, so if your curtain will be opened and closed, make sure the curtain ends up wide enough to cover your window.
Step 2 // Add a stitch in each pleat
You could stop here and leave the curtains pleated, but adding a stitch gives them the pinch. Turn the curtain panel over and with a needle and thread, synch the pleat near the base of the pinch. To do this, I tied the base of the thread, ran it through the pleat once and then back, pulled tight, and tied the thread. Hot tip: pick a color of thread that's similar to your fabric so you won't see it (I used white)!

Step 3 // Iron!
I hate ironing. In fact, it's been a solid 3 years since I pulled one out. But if you want these curtains to look like a million bucks, this step is key.
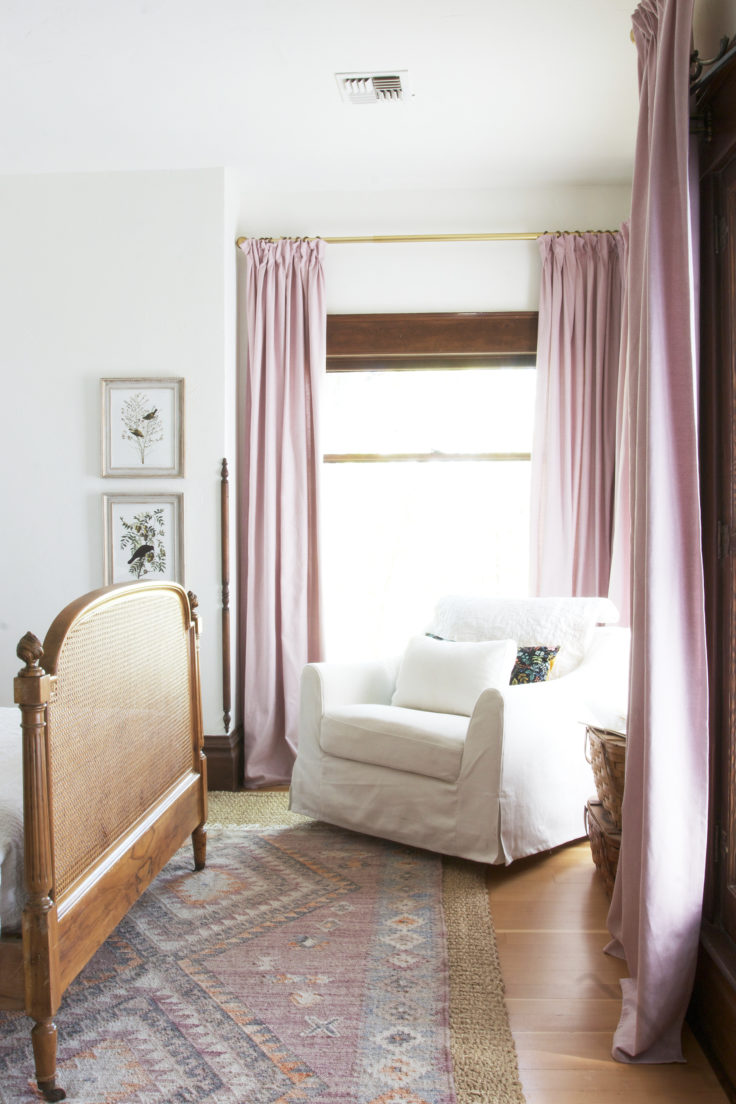
Step 4 // Hang curtain panels using rings with eyelets
I hung our curtain panels from rings with eyelets (found here in different finishes). If you find that the hook on the leading edge of your curtain comes out of the eyelet easily, just tighten the hook down with pliers (i.e. close the hook into a loop). I find it's necessary if you use your curtains a lot.


That's it! Please let me know if you try this tutorial. I'd love to hear how it goes! And if you have any tips, leave them in the comments so all of us can benefit from your experience.
Sources
curtains / curtain rods / white quilt and shams/ bed sheets / overhead light / jute rug (similar) / Skyline rug / dresser / dresser knobs / bird pillow fabric / unicorn stuffie / nightstands (DIY) / lamps / dresser / dresser knobs / black pillow fabric / glider / bird prints (Crow and Orange Crowned Warbler, free downloads from here) / picture frames (DIY) / paint color: BM Simply White