
Porch House // Lessons Learned from Finishing the Hardwood Floors Ourselves
THE PORCH HOUSE A couple of weeks ago I mentioned that we made some mistakes while finishing the Porch House hardwood floors. Three mistakes to be exact, and it led to some stress-filled days and extra work for Garrett. In an effort to prevent you from making the same mistakes, I wanted to share exactly what it is that we did wrong. OR, if you like how our floors turned out (because, honestly I do!), what it is exactly that we did right ;)
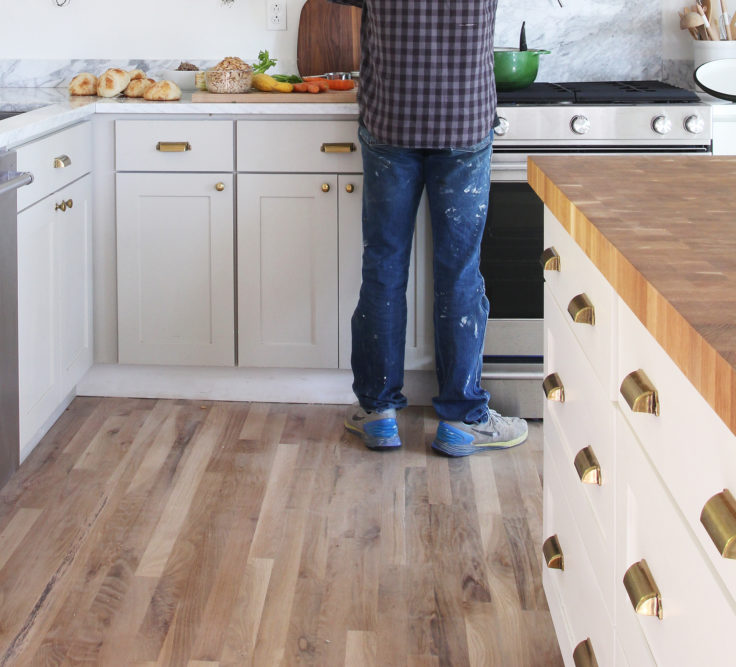
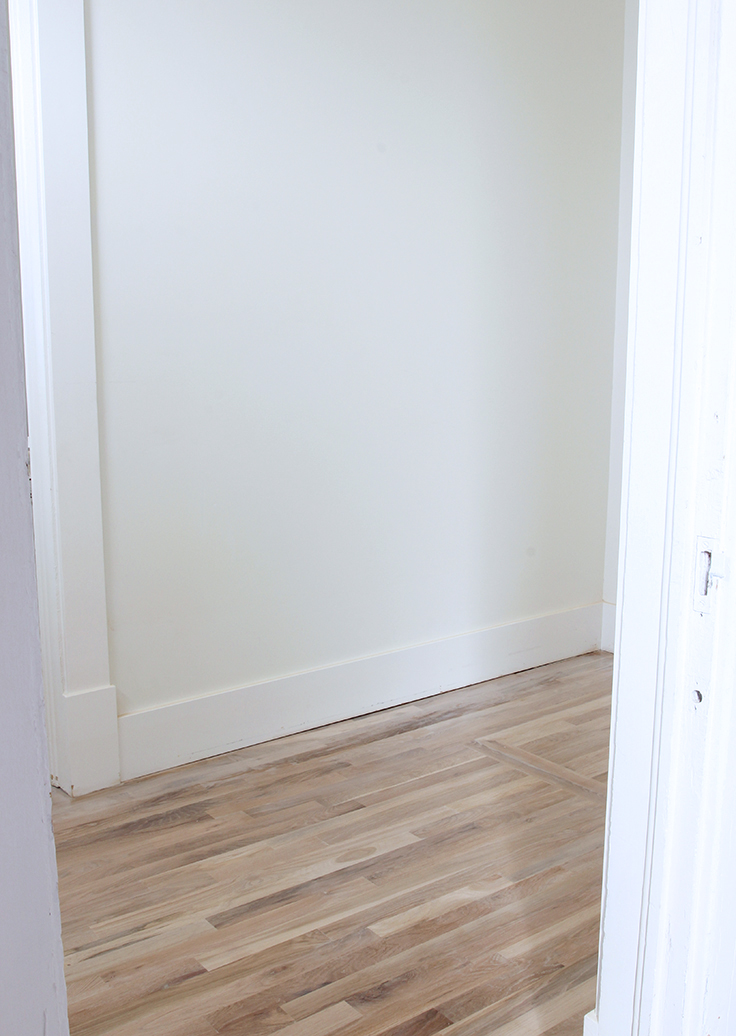
All is well that ends well, as you can see from the photo below.
Before we talk about the finish, let's talk about floors. A few months ago, we laid white oak hardwood floors throughout the main floor (minus the master bathroom). If you've been following the Grit and Polish for long, you know that we usually save the original flooring in our old houses - for character, economic, and environmental reasons - but sadly the Porch House's 117-year-old fir floors were too far gone for a refinish. So, we called up Uncle Dougie and placed an order for 1100sf of 2 1/4" wide, grade #2, white oak flooring.
We selected white oak because it's timeless (though it seems to be having a moment in the design world right now) and inexpensive, and that goes for the 2 1/4" width as well. We selected #2 grade, which meant lots of color variation and imperfections, a look that fits the bill in our rural community, but was also the least expensive option. We wanted to stretch our dollars as far as we could since we're reselling the Porch House and any way you shake it, hardwood flooring will cost more than other options like vinyl or laminate.

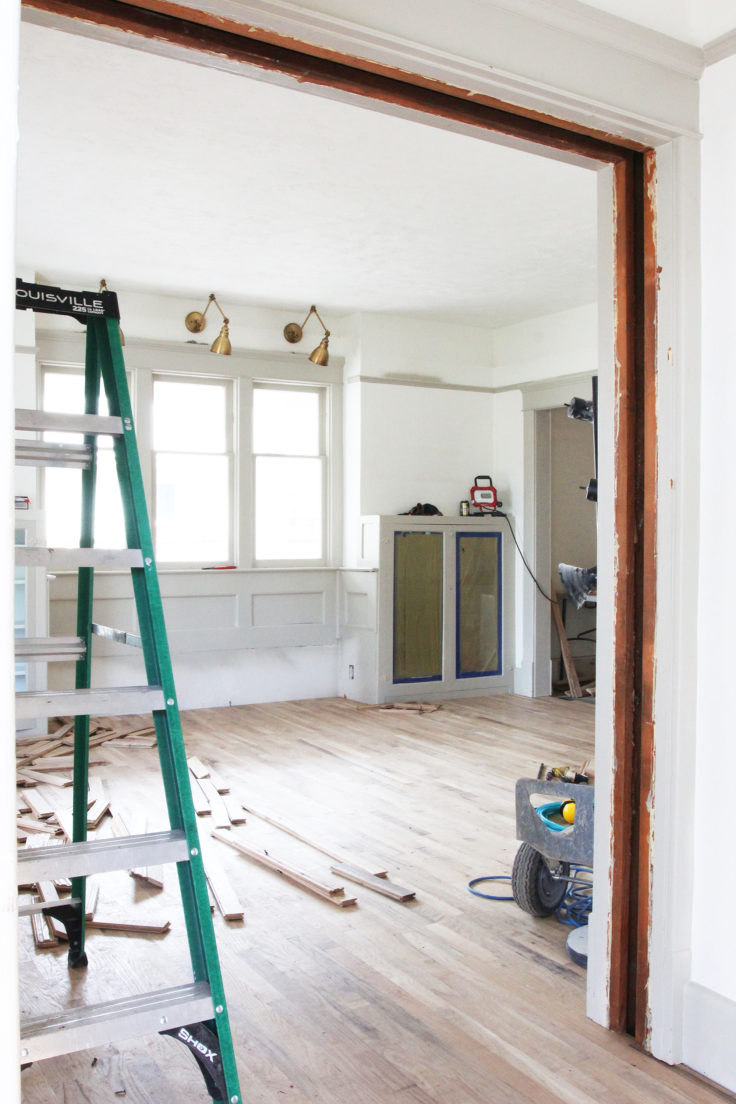
We laid the white oak flooring right over top of the existing hardwoods with a layer of tar paper in between. The new hardwood floors sat unfinished for a couple of months while we worked on the rest of the house. And then it was time to finish the floors, and that's where things went south
LESSON ONE // avoid drum sanders (or use one you're comfortable with)
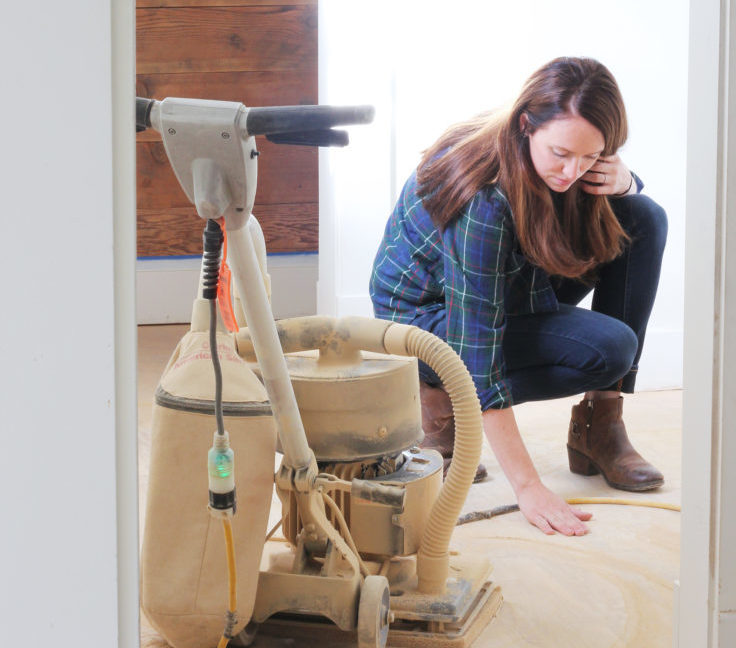
The finishing process began with renting a drum sander, an aggressive sander that removes the top layer of wood. The only drum sander I could find locally was a Silverline. I'm not sure if anyone's had good luck with this type of drum sander, but Garrett didn't like it and he ended up with some 'drum marks' or 'chatter marks' in the floor. The marks aren't horribly obvious and not too big of a deal, but nonetheless, they're there. Sorry, they're tough to catch with a camera, so I don't have a picture to show you. FYI, Garrett prefers any of the drum sanders that don't rely on velcro to attach the paper.
Along with the drum sander, we rented an edger and sanded the floors with both sanders using 36, 60, and 80 grit paper. Next Garrett filled holes/gaps/seams with wood filler and let that set overnight. An orbiting floor sander was next with 80 and 100 grit paper.

At this point the floors were reasonably smooth and ready for their finish. So we cleaned up the dust and then cleaned again (because man there's a lot of wood dust and it gets everywhere!) and picked out a finish product.
LESSON TWO // Watch out for non-clear sealers called 'Natural'
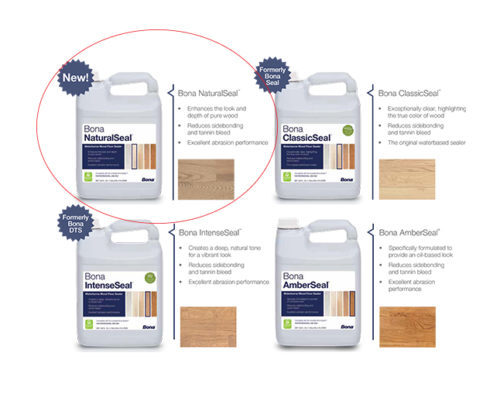
We opted to find a different finish than what we used at the Farmhouse last year, because those turned out a bit slippery. Garrett did some google research and landed on a water-based Bona system that had great reviews. Bona recommends that a foundation be applied prior to the finish to seal the grain and they offer several sealer color options. He picked out the Bona NaturalSeal sealer and the Bona Mega Clear HD finish in Satin. Garrett picked the 'Natural' sealer since the name and description implied a natural-looking finish. But wouldn't you know it. Natural isn't 'natural'. It's a cloudy sealer that leaves the wood looking slightly white-washed.
Thankfully, the 'natural' finish is actually really beautiful and works well in this house. But it wasn't what we were planning on. Our original goal was a clear finish similar to the floors at my sister's old house, shown below.

The walls in both rooms are the same color (BM Simply White) and both floors are white oak. But you can see that the Porch House floors have a slightly white-washed look with less grain showing while my sister's floors are warmer and have a lot of grain showing through. For the record, my sister's white oak floors are wider and a *little* nicer grade than the Porch House's floors (#floorgoals). Here's a side by side comparison:

Garrett was initially really bummed with the Porch House floor finish. After a week of sanding the floors and dreaming about warm wood tones and grains, he couldn't quite stomach the cloudy finish. But if he wanted the finish of his dreams, he'd have to start from square one with the drum sander. Honestly, he considered doing just that, but I strongly suggested he reconsider (that's wife talk for I told him not to do it). I assured him that the finish really was beautiful and I really liked that it evened out the high-variation in color of our grade #2 floors. Eventually he wrapped his mind around it and we moved on.
LESSON THREE // buff at your own risk (and if you risk it, do it evenly)
Because the oak grain raised a bit when we sealed the floors, we decided to rent a buffer with a 220-grit screen to knock it down prior to applying the finish coats. The dangerous part about buffing after the sealer is already applied, is that you have to buff the entire floor completely evenly. If you don't, or if you have any unevenness in the hardwoods due to say, chatter marks leftover from the drum sander, than the buffing is going to create an uneven finish. And that's just what happened to our floors. There were small areas where you could see more of the wood color and small spots where the sealer was a thicker. Based on our experience, a tip is that buffing after applying a non-clear finish should be done with the utmost care, super light and evenly. Our unevenness was fixed, at least mostly so, by Garrett applying another coat of sealer to the light areas and he feathered it into the already-coated areas. After it dried, he applied two coats of finish to the entire floor. In the end, the finish isn't perfect, but after all that work, it looks good.
Hopefully sharing this process helps someone else from making the same mistakes. And if you're wondering if finishing your own hardwoods is worth the headache, I will say, it's not a task we like to do. But, and this is a big but, the total cost of finishing the Porch House's 1100sf of hardwoods ourselves rang in around $1200 for sander, rentals, and product. That's a savings of over $4,000 from the professional quote we got.
xoxo
-Cathy
p.s. What the Farmhouse floor refinish cost us