Farmhouse Kitchen // Paint! (the Tools and Process We Use With A Paint Sprayer)
THE FARMHOUSE
We painted the entire Farmhouse kitchen over the weekend in our favorite color, Benjamin Moore Simply White. And it looks so good!
I shared a lot of the painting process on Instagram this weekend and we got a ton of questions about the products we used, the nitty gritty of using a paint sprayer, why we painted the cabinet doors in place, and generally “why on earth would you use a sprayer instead of a brush/roller?”. Turns out there’s a lot that goes into using a paint sprayer. So today we’re answering all of those questions and sharing lots of photos of the process and our ALMOST FINISHED kitchen!!!

Farmhouse kitchen | sources here
Isn’t the kitchen looking good?! I took that photo after our second coat of paint (we did 3 in total) and I’m kinda obsessed with how nice the finish is! So let’s talk about how we achieved it…
the paint
We used Benjamin Moore’s Advance Paint in Satin. It’s a really nice paint that we like to use for cabinets, trim, and paneling. We went through 5 or 6 gallons to paint our kitchen including the pantry and all the ceilings (3 coats).

Our Sprayer
We own our own paint sprayer. We bought it back when we were painting the entire first floor of the Ravenna House and have used it a handful of times since. Honestly, our sprayer is total overkill for DIY homeowners like ourselves. It’s pretty bulky to move around and not what we’d recommend. But it’s our’s and it gets the job done.
Because I know some of you might want a recommendation for a paint sprayer, I’ve set Garrett on that task. He’s working on a post with his favorite paint sprayers and will be sharing lots of technical tips about operation and maintenance. So stay tuned for that.

Why use a Sprayer instead of a brush/roller?
Paint sprayers require a ton more masking and prep than a traditional brush/roller. So why use one? We do for two reasons…
A large space
We’ve found that it makes sense to spend the extra time masking for a sprayer when you have a really large space. Like a whole house or a big room like our kitchen/pantry. Because once you have the space masked, each coat of paint goes up super quick. Our kitchen took an hour or less for each coat…and that was just one person working on it.
A Really Nice Finish
We also use a sprayer when want a really nice finish that’s smooth and doesn’t have any brush strokes. Woodwork, cabinetry, and uneven surfaces like paneling look really nice when sprayed!
Yup, we painted our cabinet door fronts in place
You might have noticed that we left our upper cabinet doors in place while we sprayed. I know, that’s not the usual way of painting cabinet doors (in fact we’ve never done it before), but we wanted to try it this time around. We had already prepped the cabinets for paint - removed the doors, taken off the hardware, sanded them, primed everything, and painted the backs and sides. So all that was left to do was paint the fronts of the doors. Why not do it while they’re hanging in place?

Did it work? Yes, I think it did! The only issue we ran into was forgetting to mask inside the cabinet doors so we ended up with a small white stripe in the center of the shelves. But it was nothing a little Goof Off couldn’t remove.
Our Process for painting with a sprayer
One // prep, prep, prep
Prep is the incredibly large downside of a sprayer. You have to mask off every little surface you don’t want to get paint on. And then hang double layers of plastic at the doorways to rooms you’re not painting. We also removed all the light fixtures so as not to paint them. When it comes to a sprayer, if you don’t mask it, it will get paint on it (including your skin!)!

We use a combination of blue tape, plastic, paper, drop cloths, floor protection mats, tarps, cardboard, and really anything else we can find as masking. Here’s what the masking looked like before we started painting…
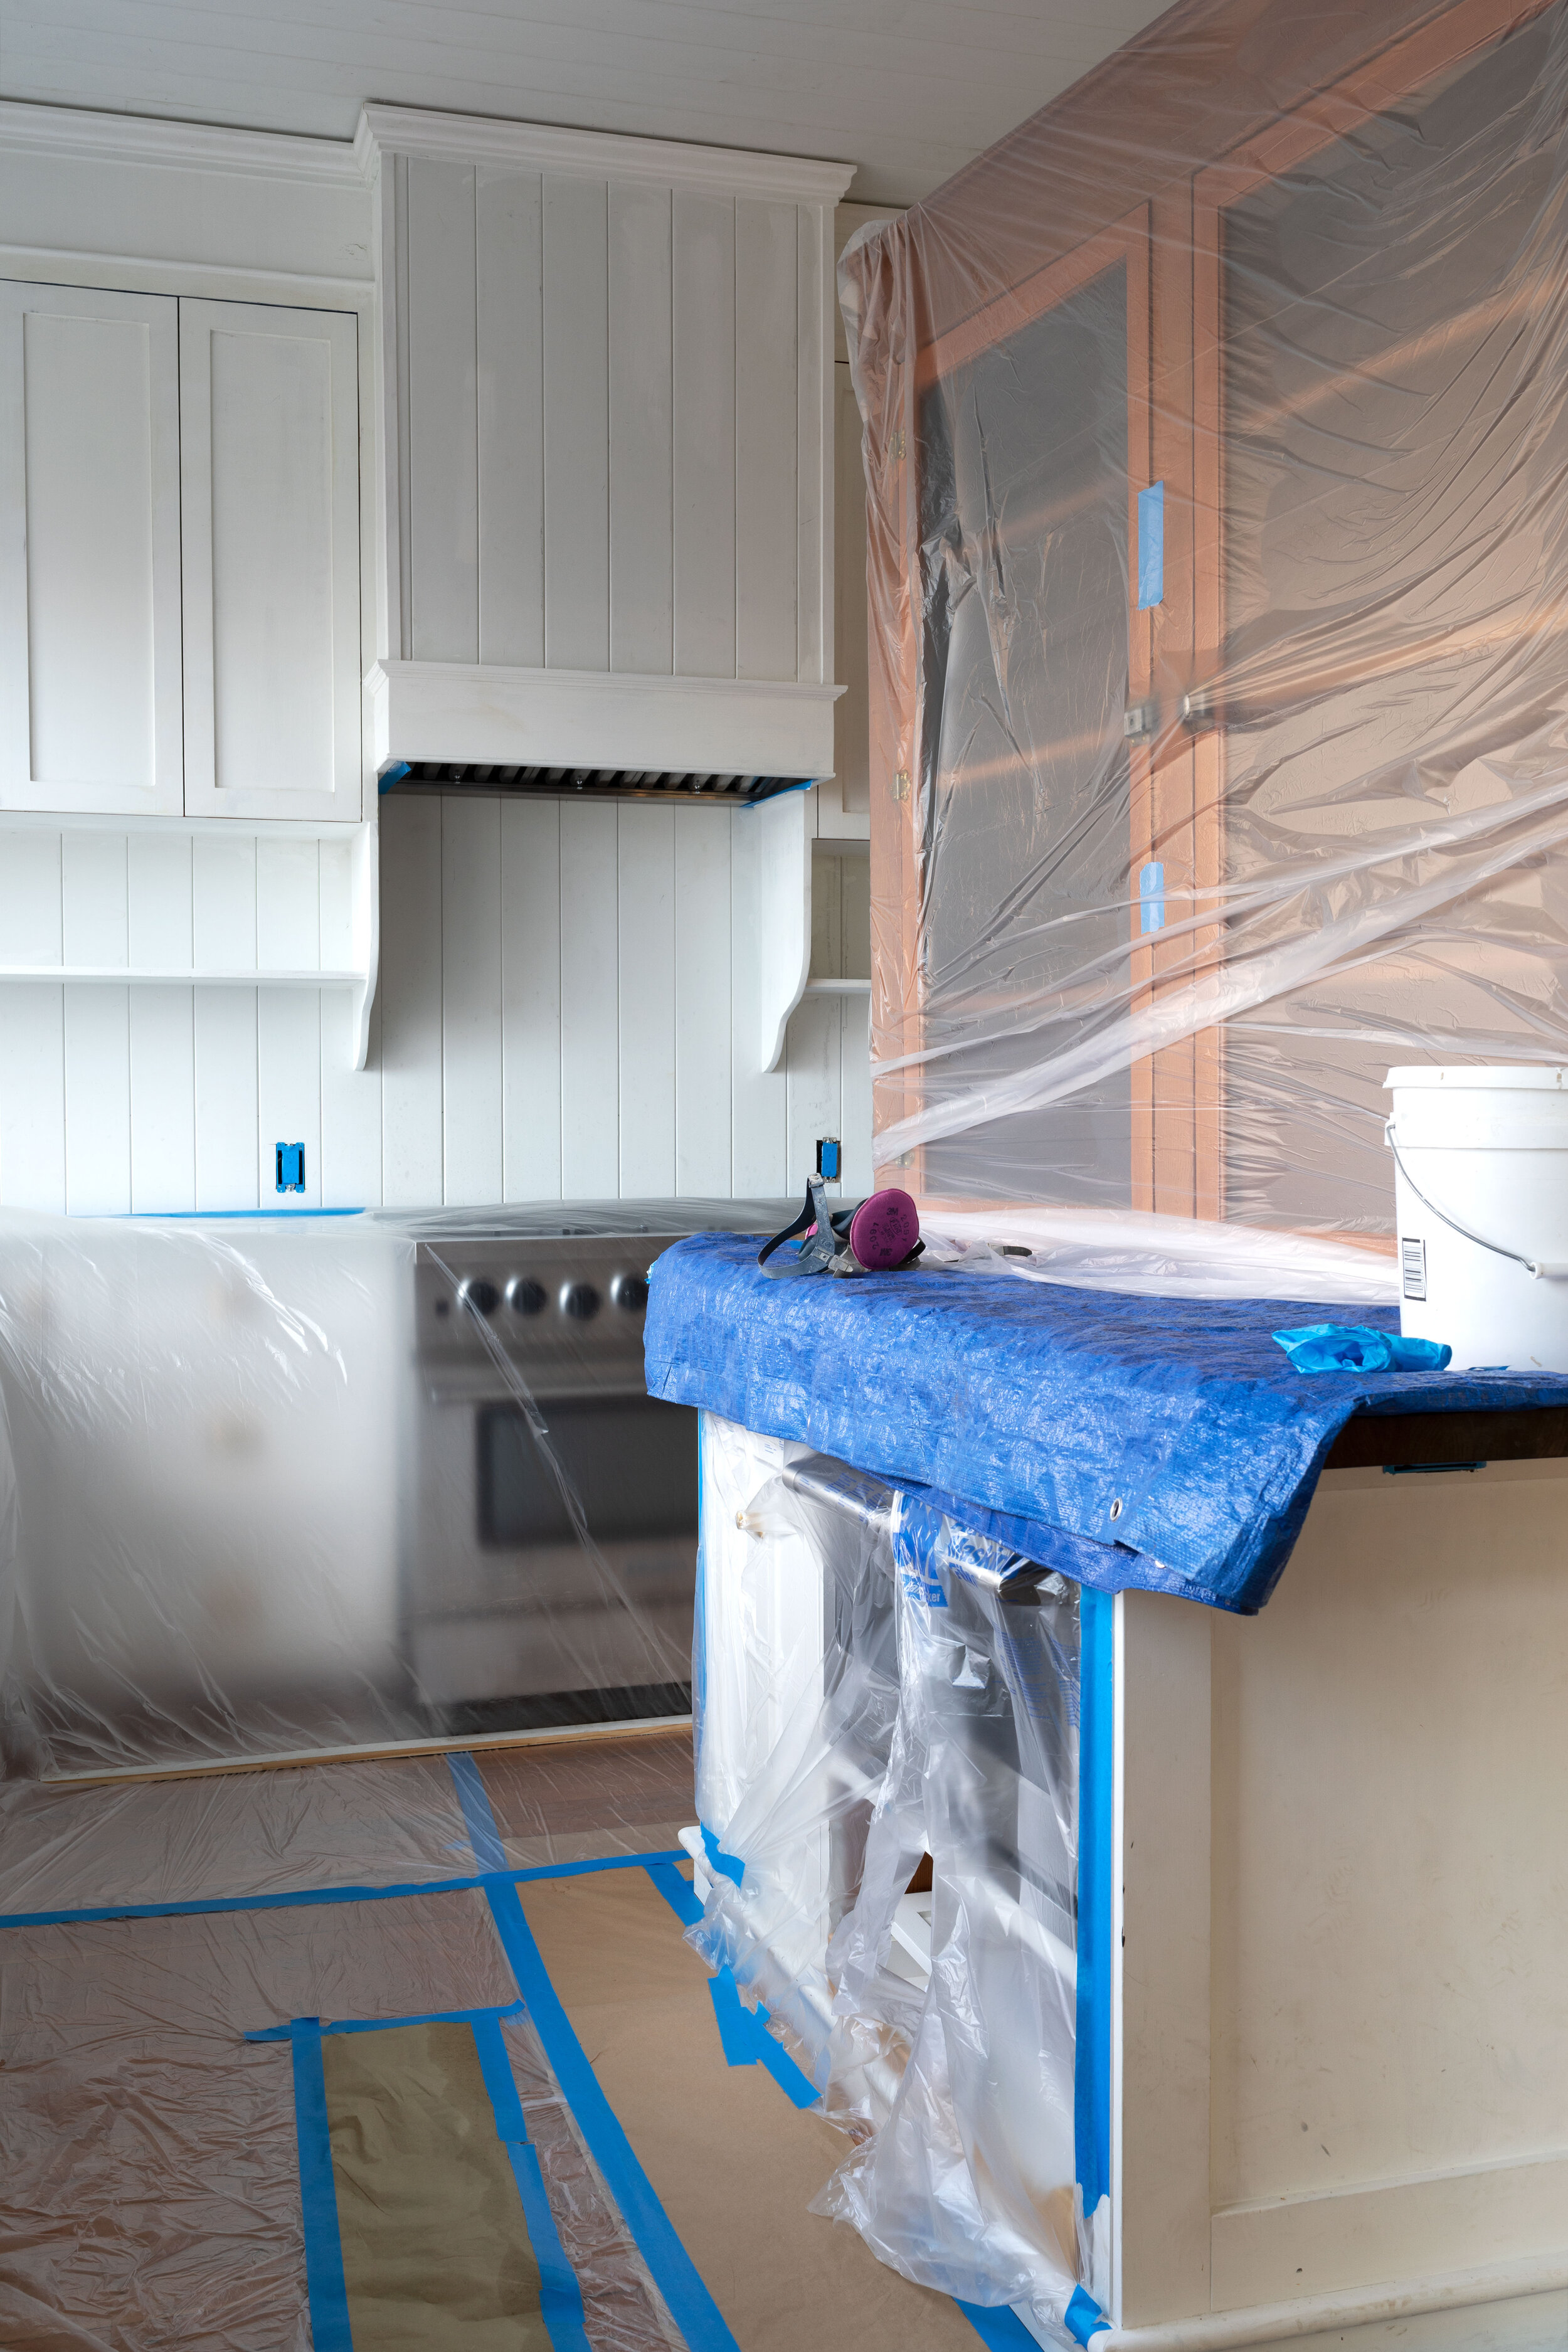


Two // Prep the Sprayer & Suit up
Once everything was masked, we sent the kids to Nana’s for a sleepover, closed all the doors in the house (to keep the fumes from traveling), turned off the heating system to keep air from circulating through the work zone, and prepped the sprayer for action.


Garrett painted this space by himself (I stayed nearby to lend a hand if he needed it). He wore a respirator, hat, paint clothes, and boots. If you’re wondering why he’s not wearing glasses it’s because they usually end up covered in so much paint that it’s hard to see through them. So instead he ended up with white eyelashes and a light dusting of white paint all over his face.

Three // Spray A Light Coat
The trick with spraying paint is to do multiple light coats. If you leave too much paint on any one spot, it will run and look pretty awful (see the next step for a solution to that). So we started with one light coat on Saturday evening just before the sun went down. We let it dry overnight, and added two more coats the next day, allowing each to dry completely in-between (about 2 to 3 hours).

Here’s what the first coat looked like after it was dry.


Step 4 // Sand any issues and continue applying light coats
We found some drips on a doorway after the paint was dry so lightly sanded them down with “kinda old 100 grit” sandpaper (the grit was a bit worn down).

Once the drips were smooth, Garrett added another coat of paint to the kitchen. We ended up with 3 coats in total and that gave us a really nice finish!


We took the masking off last night and we’re REALLY happy with the paint job! This kitchen is SO close to being done!
Tools & materials for using a paint sprayer
Here are the tools and materials we used for spraying our kitchen and pantry (including the ceiling).

1 Paint sprayer (we have this one, other recommendations above) | 2. Seal Throat Lube | 3. Paint (we used Satin) | 4. wrench | 5. Blue tape | 6. drop cloths | 7. Respirator | 8. vapor filters | 9. Paper | 10. Paper masking tool | 11. Plastic | 12. locking pliers | 13. Sand paper (for any drips) | 14. Plastic masking tool | 15. 3-gallon bucket | 16. pump protector (storage fluid)
Let us know if you have any questions about painting, sprayers, or the process and Garrett will answer them in his follow up post!