Holiday Crafting :: Sisal Bottle Brush Trees
I’ve been eyeing sisal bottle brush trees everywhere this year. They’re festive and beautiful and have a rustic charm that I really love. But the nice ones, like these at Anthro, can get pretty pricey. So I figured I’d just make my own. And it’s surprisingly simple. Let me show you how…

latch (in unlacquered brass), advent calendar + similar, mugs
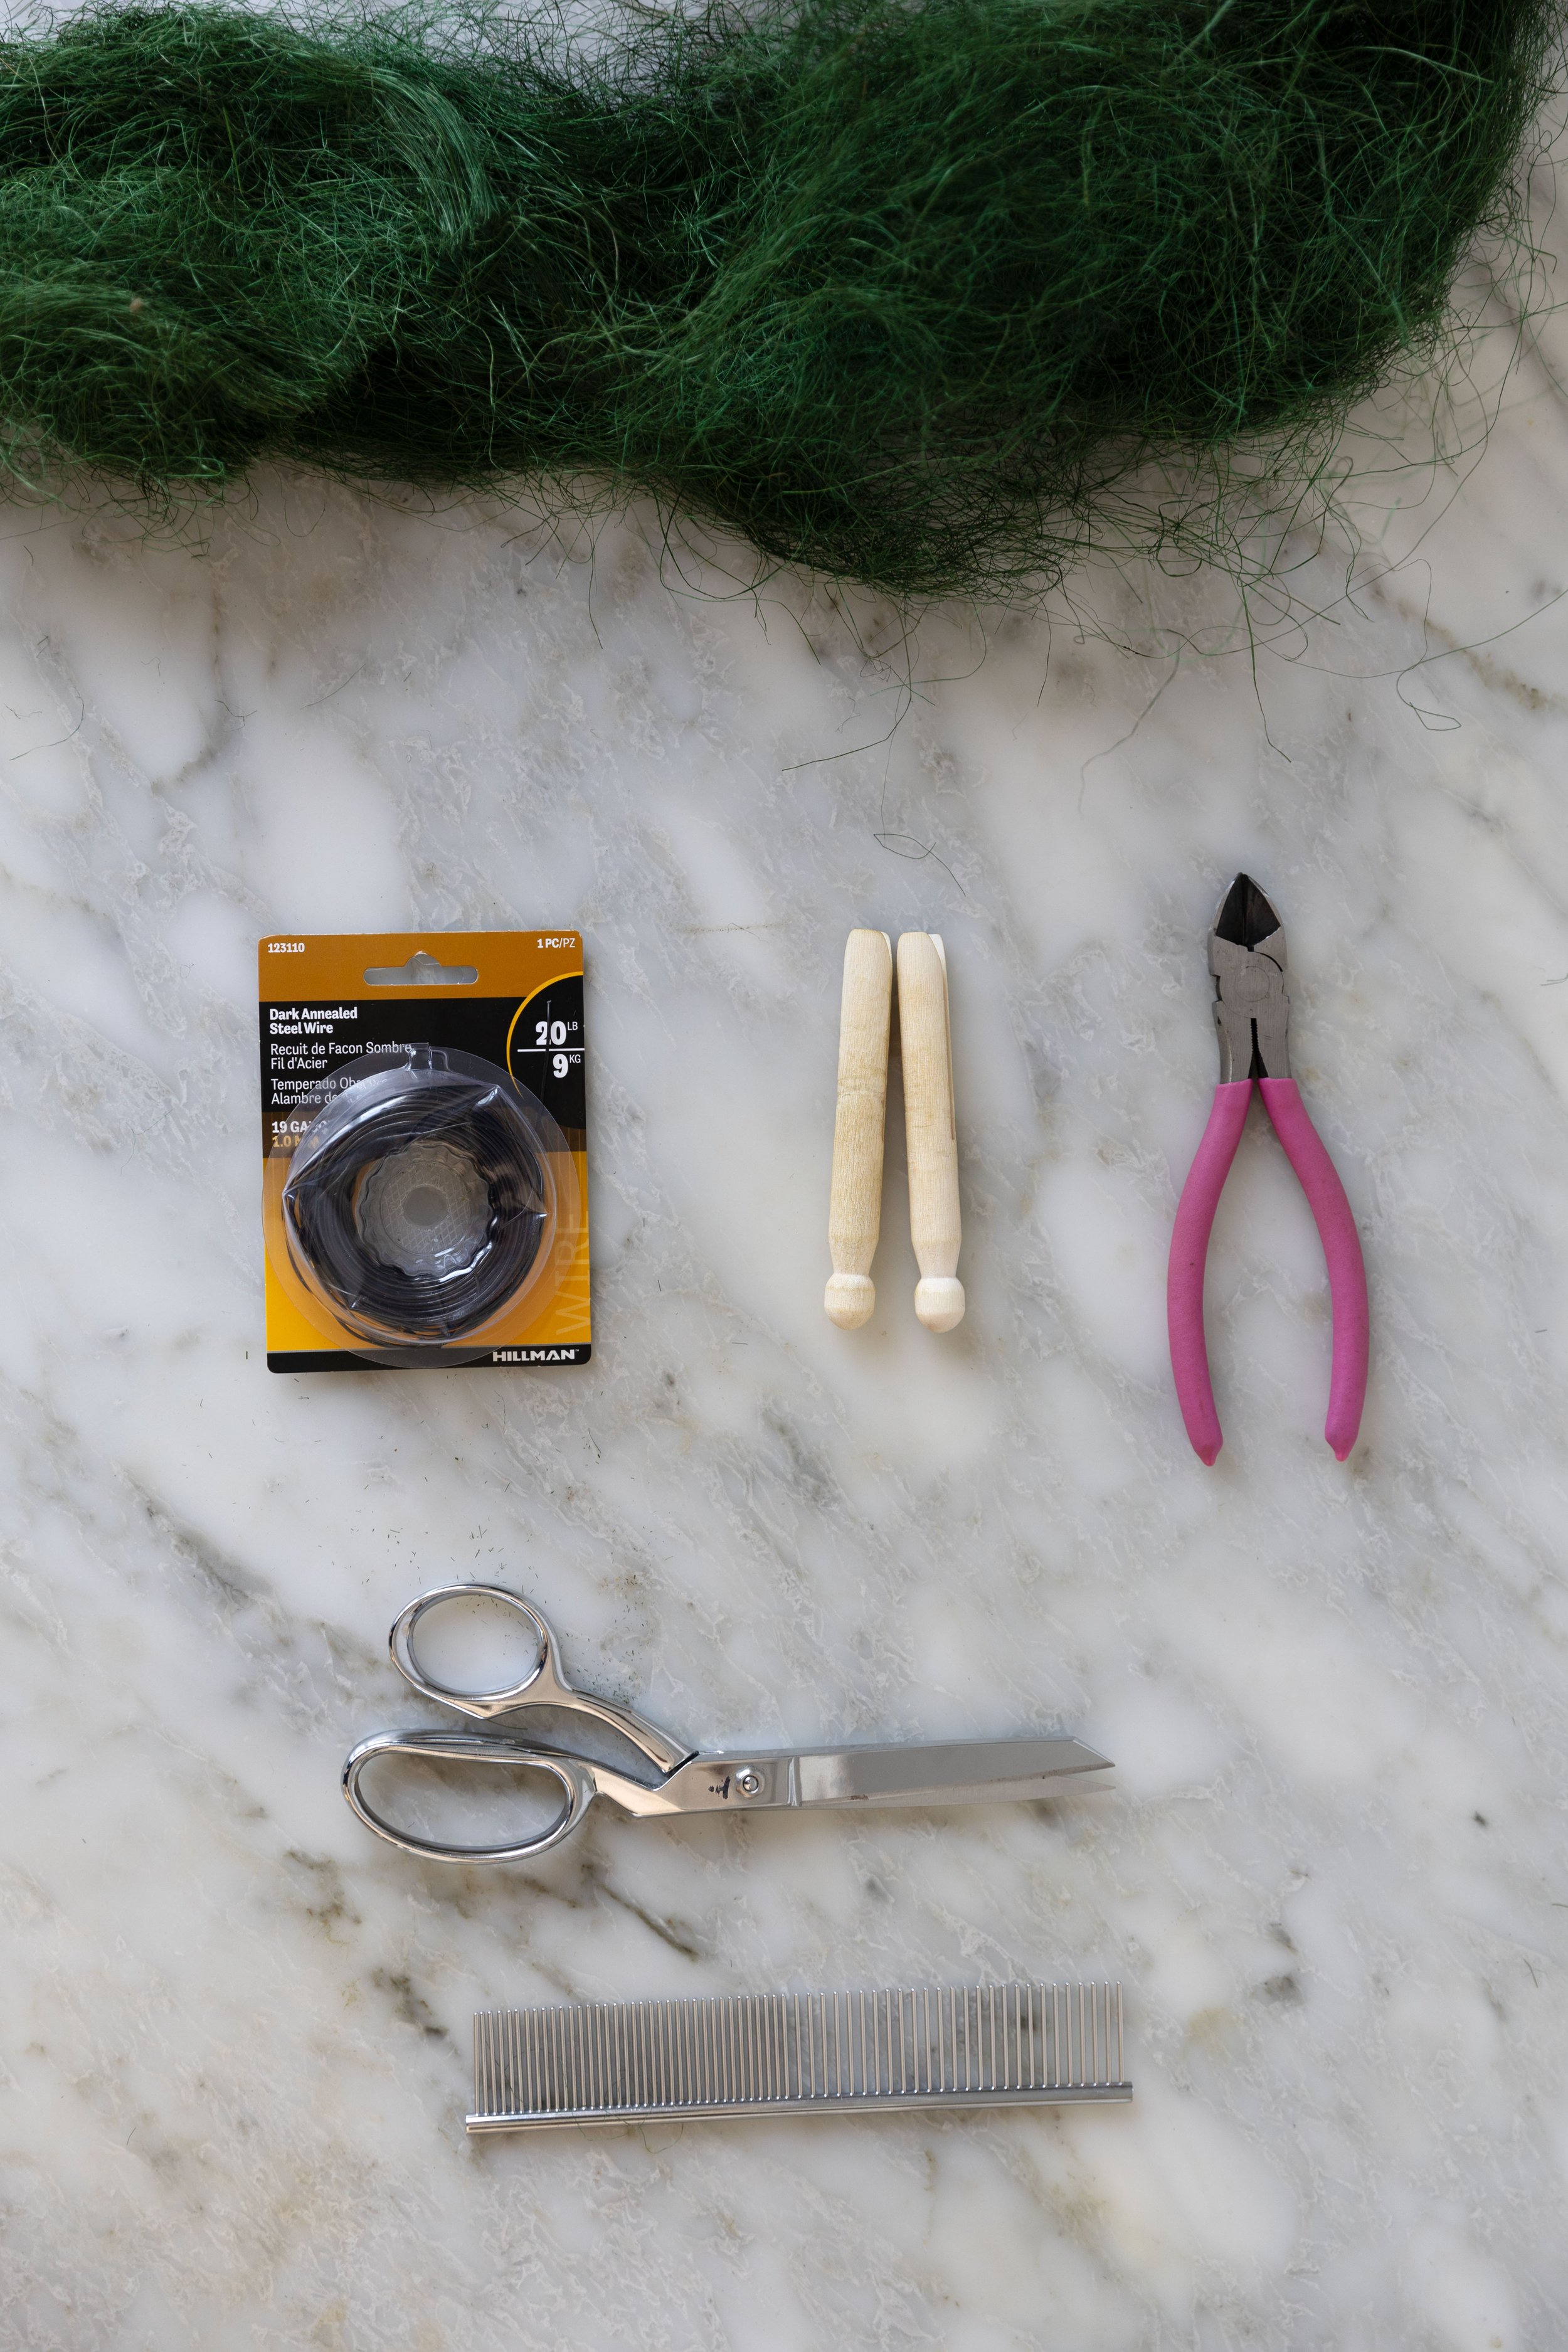
This diy uses sisal fiber, which was a first for me. I ordered mine online (as a small town gal does) but you could also look at craft stores. I ordered a natural color too, which feels holiday-ey, but I’ve seen it in blues and pinks and everything in between.
Full disclosure, the first tree I made with this method was more of an experiment and not fit for photographing ;) Like anything new, there’s a bit of a learning curve so I’d plan on making at least two.

diy sisal bottle brush trees
metal wire, 20 gauge or more
tree branch for base
clothes pins
scissors, wire cutter, sturdy comb (like a pet comb), circular saw, drill
Step 1 :: Build your frame. Cut a long section of wire, mine were about 24”. The length of the wire will determine the height of your tree, so if you want a larger one, cut your wire longer.
Place a clothes pin in the center of the length of wire, fold the wire over it and secure by spinning the clothes pin to wrap the wire around itself. Place the second clothes pin about an inch above the loose ends of the wire and secure above and below the clothes pin by spinning the wire. It should look like this.

Step 2 :: Pull off a large chunk of the sisal fiber. It should pull off in lengths, but if not you can cut it. You can layer a few pieces if need be too, the key is to keep it pretty uniformly long. Fold the sisal into thirds so it’s about 2/3x to 1x the length of your wire frame. Cut the sisal at the folds and then spread it between your wire frame like so…

Adjust the sisal so the wire is right at the center and so that the sisal is distributed as uniformly along the length of the wire as possible. This will help you tree look full at the end.

Step 3 :: Twist the clothes pins in opposite directions. Twist and twist so that the sisal ends up splayed in a circle and securely twisted in-between the wires. Your essentially twisting the sisal into the wires while you twist the clothes pins.


Step 4 :: Now it’s time to shape the tree. Comb the sisal out from base to tip. This will get a bit messy and you’ll likely pull some sisal out, but If you’re pulling excessive amounts out, that means you need to twist more to get the sisal really pinched between the wires before combing.
Trim the tree into the shape you want, ideally wider at the base and narrower at the top. I found it’s easiest to comb and cut in tandom until you get the shape you want. Comb a bit. Cut a bit. Comb some more. Cut some more…


Step 5 :: Once the tree is a shape you like, cut the wire with your wire cutters near the top of the tree and again near the bottom clothes pin (make sure to leave enough wire at the bottom to slide the tree into your base).


Step 6 :: Make the base. You can use anything for the base, but we opted for a chunky wedge of branch with the bark still on. Whatever you’re using, drill into your base about 1/2 way through the material with a 1/8” drill bit. And then slip your tree into the base.


And voila!


Happy holiday crafting!