
Dexter Hardwoods Part I
THE DEXTER HOUSE
Garrett and I have gone round and round on what to do with the hardwood floors at the Dexter House. We originally hoped to have all the existing oak and fir floors refinished, but those hopes were dashed when I brought in a professional refinisher to have a look and she informed me that the floors were beyond refinishing.
Turns out the oak floors that are in the living and dining rooms are top-nailed, and they can't be sanded without countersinking all one-billion nails first (she actually said it'd be cheaper to replace them). The fir floors that run throughout the rest of the house have been butchered over the years - either by painting them a hideous maroon color or, even worse, covering with lineolum or tile. Garrett pulled up the lineolum and tile a couple months ago, but what was left was not pretty. And there was no way a sanding drum could deal with all the gunk and residue.

The Grit and Polish - Kitchen Demo Floors
We briefly considered replacing all the floors with new hardwoods. Uncle Dougie had a lead on some inexpensive walnut (I know, it sounds like a unicorn...inexpensive and walnut), but the thought of removing the original floors - you know, one of the things I love about old houses - just didn't sit well. Plus our schedule and budget are tight enough as is.
So we were back to square one. How could we make the existing hardwoods work and not spend a billion hours and dollars on cleaning them up?
Well we've decided to do a few things: first we'll replace the kitchen floors with matching oak, then we'll host a "countersink party" where we shamelessly ply our friends with booze and have them help set the nails, then we'll have all the oak floors professionally refinished, and lastly we'll paint the rest of the hardwoods ourselves. It sounds like a modge-podge, and it kinda is, but trust me, it's going to look great! At least I'm pretty sure it will...
So last weekend we kicked off operation hardwood clean up by installing the new oak floors in the kitchen. We went with 2 1/4" red oak floors from Uncle Dougie, which runs about $4/sf (we got 100sf). I originally wanted to match the living and dining room floors exactly, but turns out that 2" wide floors are really rare (even back in 1905) and would have required a custom order, which means $$$$$. So we went with the 2 1/4" wide standard flooring, and I doubt anyone will notice the difference.
This is how the kitchen floors looked on Saturday morning.

THe Grit and Polish - Hardwood Install Before
We started by cutting back the edge of the dining room floors so that we had a straight line to lay the new floors against.

The Grit and Polish - Hardwood Install 1
Then we laid down red rosin paper on the subfloors. Felt paper would have been ideal, but we didn't have any of that, so went with the rosin. It should work the same as felt to minimize squeaks.
Next we got to work laying floor. We started on the wall by the sink and worked our way across. We have a handy dandy flooring stapler already, a very necessary tool for laying hardwoods, so no need to invest in any rentals.

The Grit and Polish - Hardwood Install Start
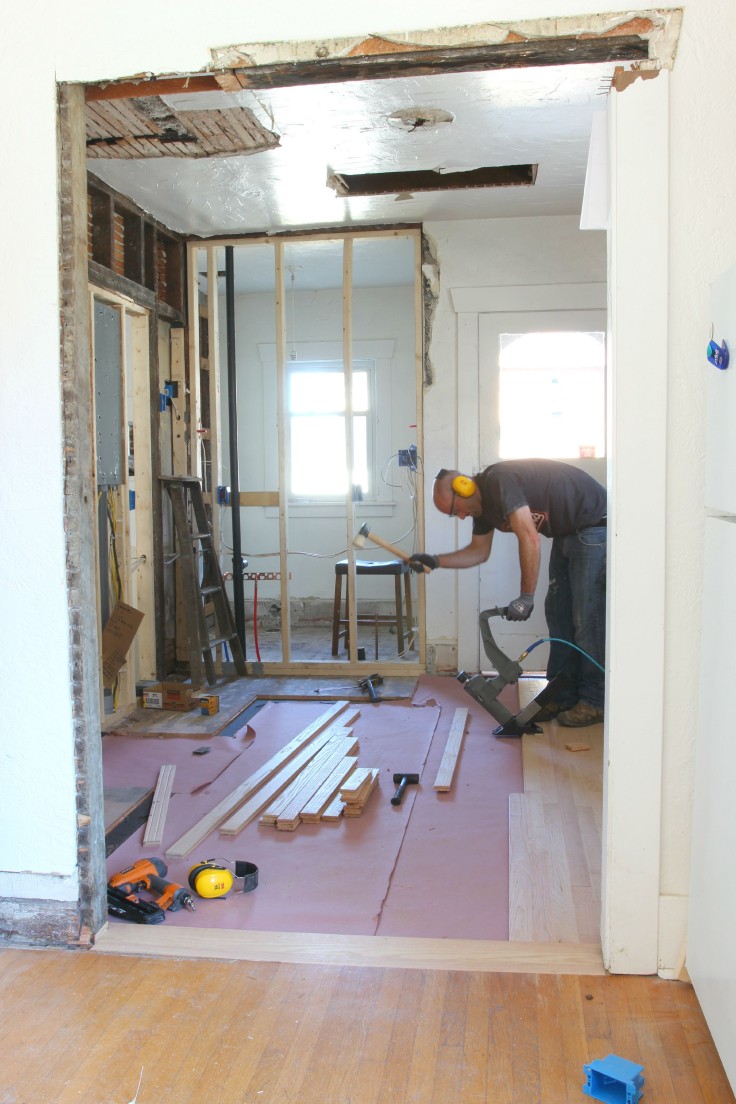
The Grit and Polish - Hardwood Install 2

The Grit and Polish - Hardwood Install 6
The hardwood install was definitely a two person job. One person laid out the wood and cut the sections to length (we set up a chop saw in the adjacent dinning room for this purpose) while the other person nailed the wood in place using the flooring stapler.
Here's what the space looked like after one day of work. We still have smiles on our faces so it obviously wasn't that bad...

The Grit and Polish - Hardwood Install Garret and I
This was actually my first hardwood floor install, and even though I'm 6 months pregnant and can't see my toes, I have to say it was a really fun project! We don't get to do a lot of new floors - old houses tend to come with hardwoods as a standard - so it was a special treat. Garrett and I both had sore hamstrings and banged up knees on Sunday, but totally worth it. Wilder even got in on the action for a bit on Sunday morning, while we finished the floors up. My how that kiddo loves his tools...!

The Grit and Polish - Hardwood Install W and G

The Grit and Polish - Hardwood Install with Wilder
Our new oak floors are solid, stunning, and match the old house feel I always strive for. In a word, they're perfection! Here's the finished product:

The Grit nad Polish - Dexter Kitchen Hardwood Install
Next up, the epic "countersink party" and then a professional refinish on the oak floors in the living room, dining room, and kitchen. In the meantime, Garrett will be working on getting the fir floors in the bedrooms and hallway ready for paint. I'm thinking black. It may show every spec of dust, but they'll look awesome!
xoxo
-Cathy
p.s. Love Jersey Ice Cream Co's renovation work! Check out Percy and Tara's interview on Design Sponge.
p.p.s. I made this grilled peach salad last week and it was incredible. This recipe is going in regular rotation at the Poshusta household! As a side note, how come no one told me about burrata before...?!
p.p.p.s. This Spanish style home in LA! Check it out, it's gorgeous.