Our Primary Bathroom Tilework
THE FARMHOUSE
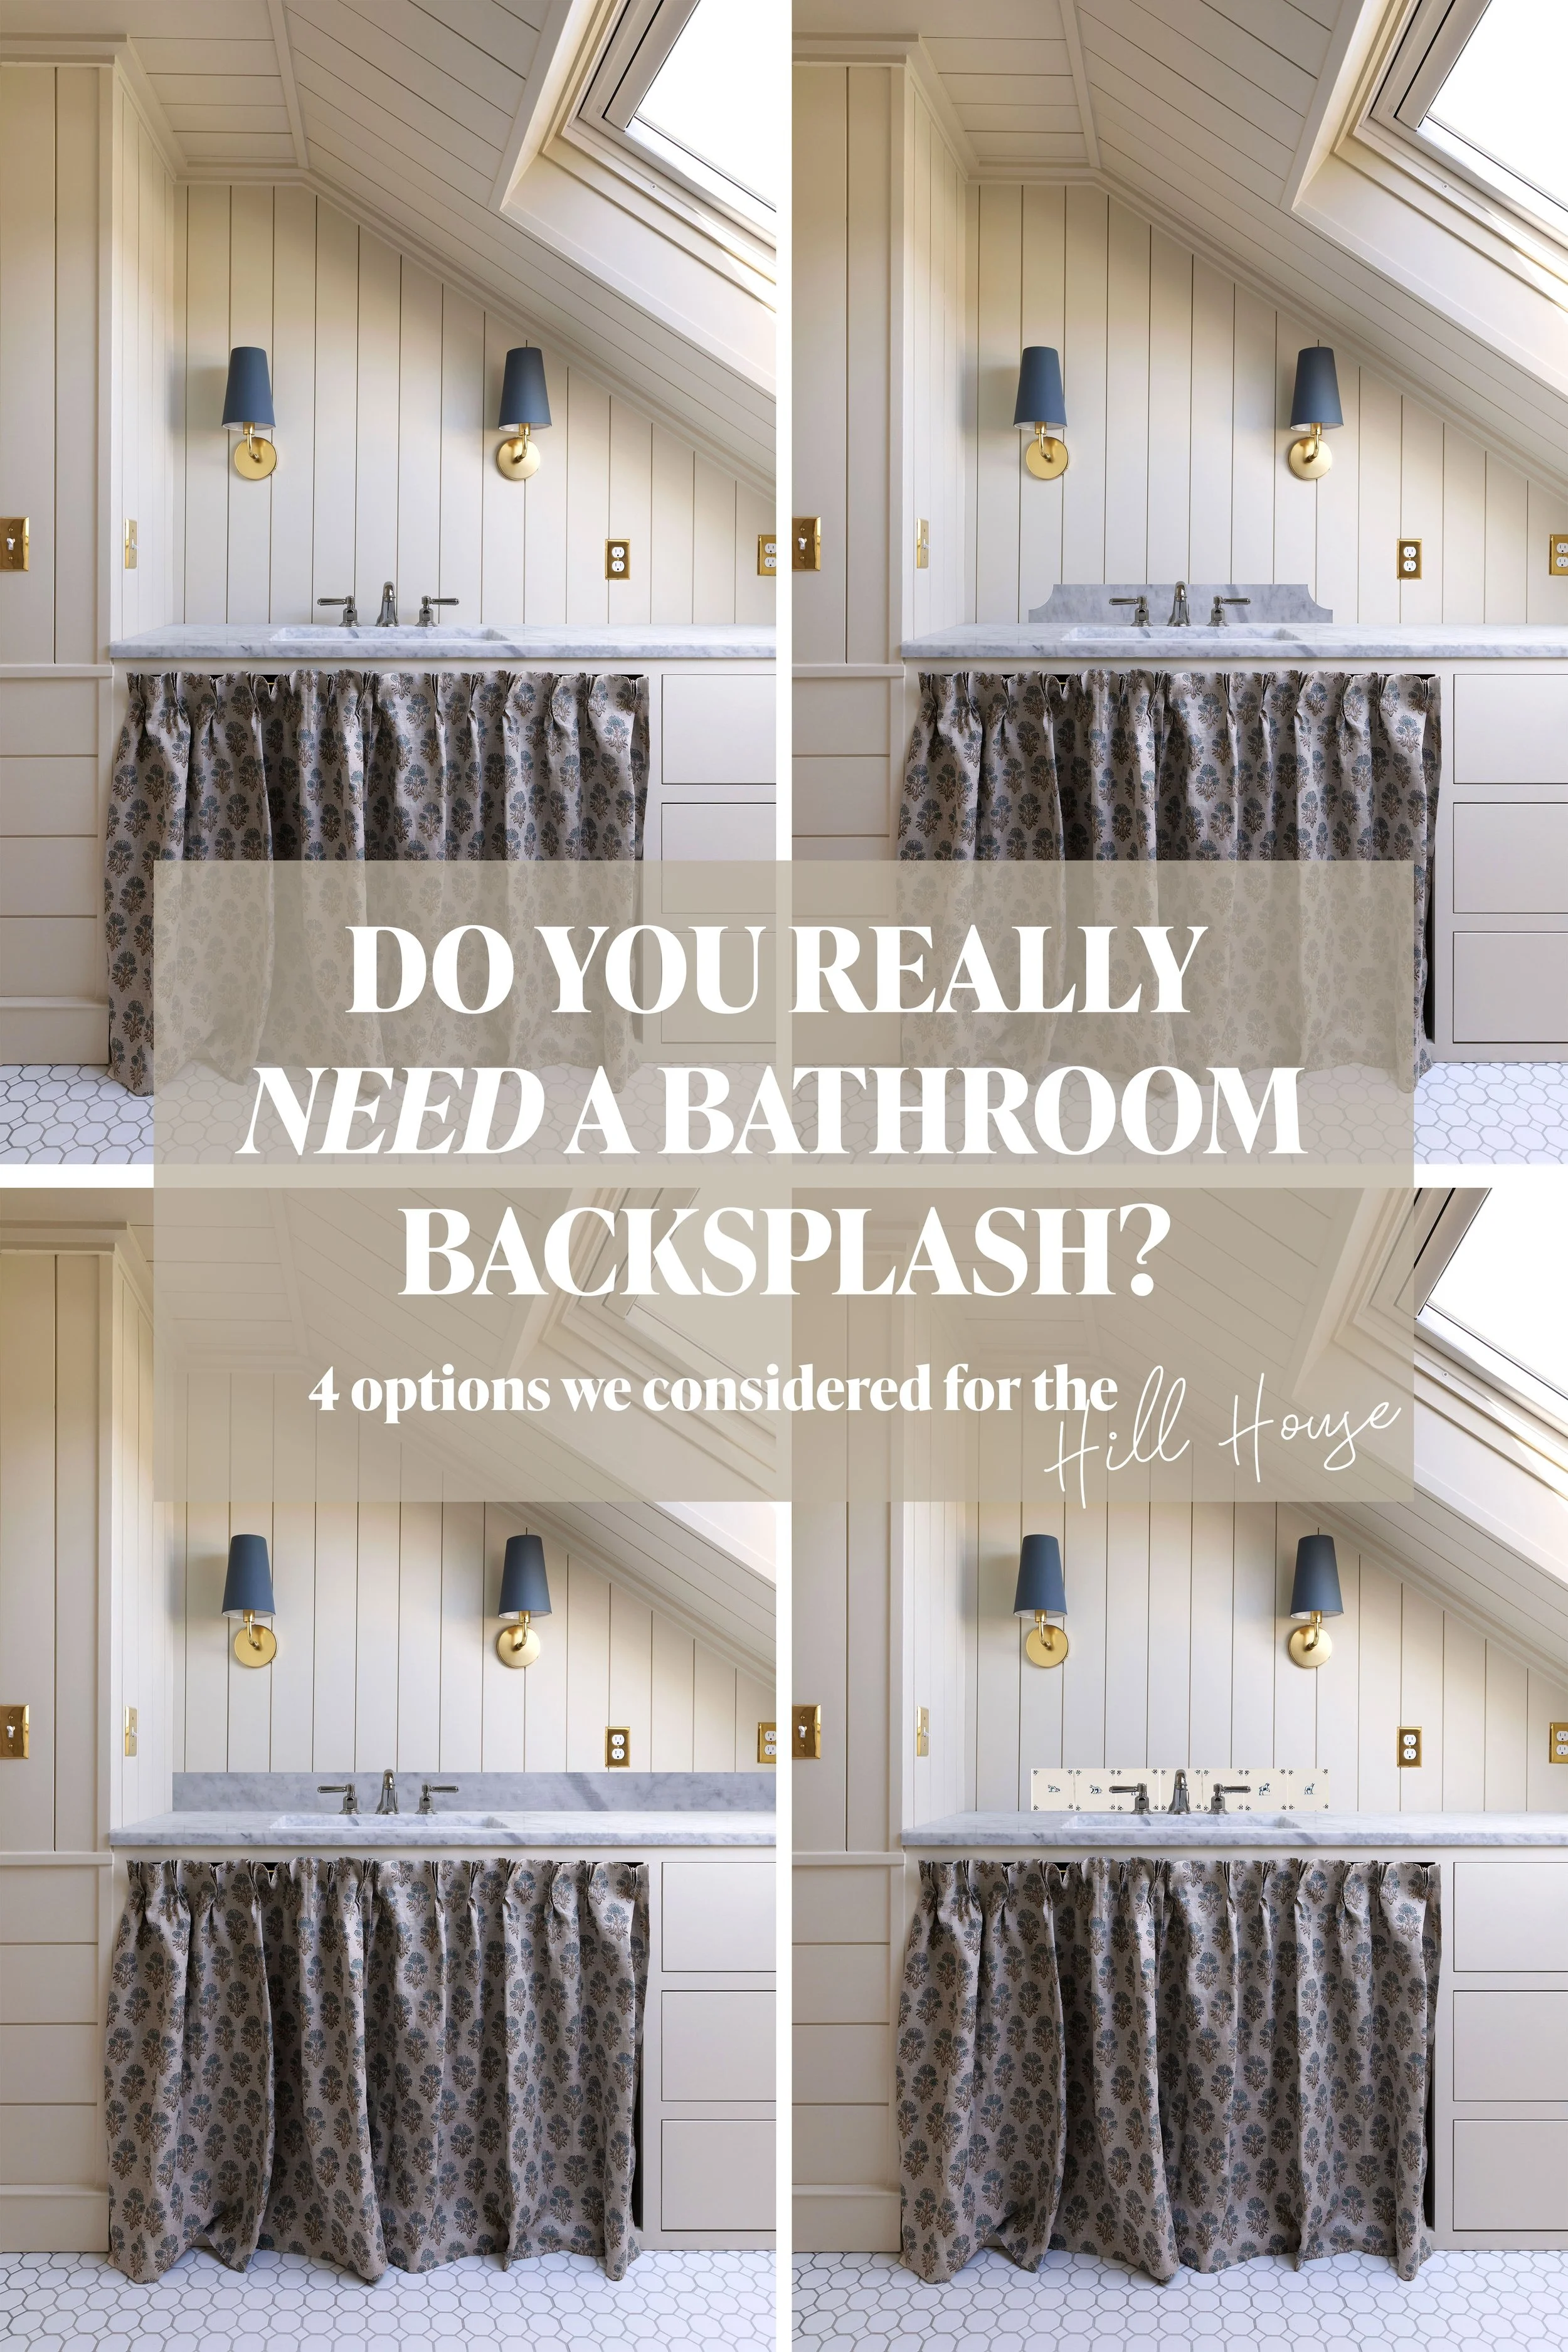
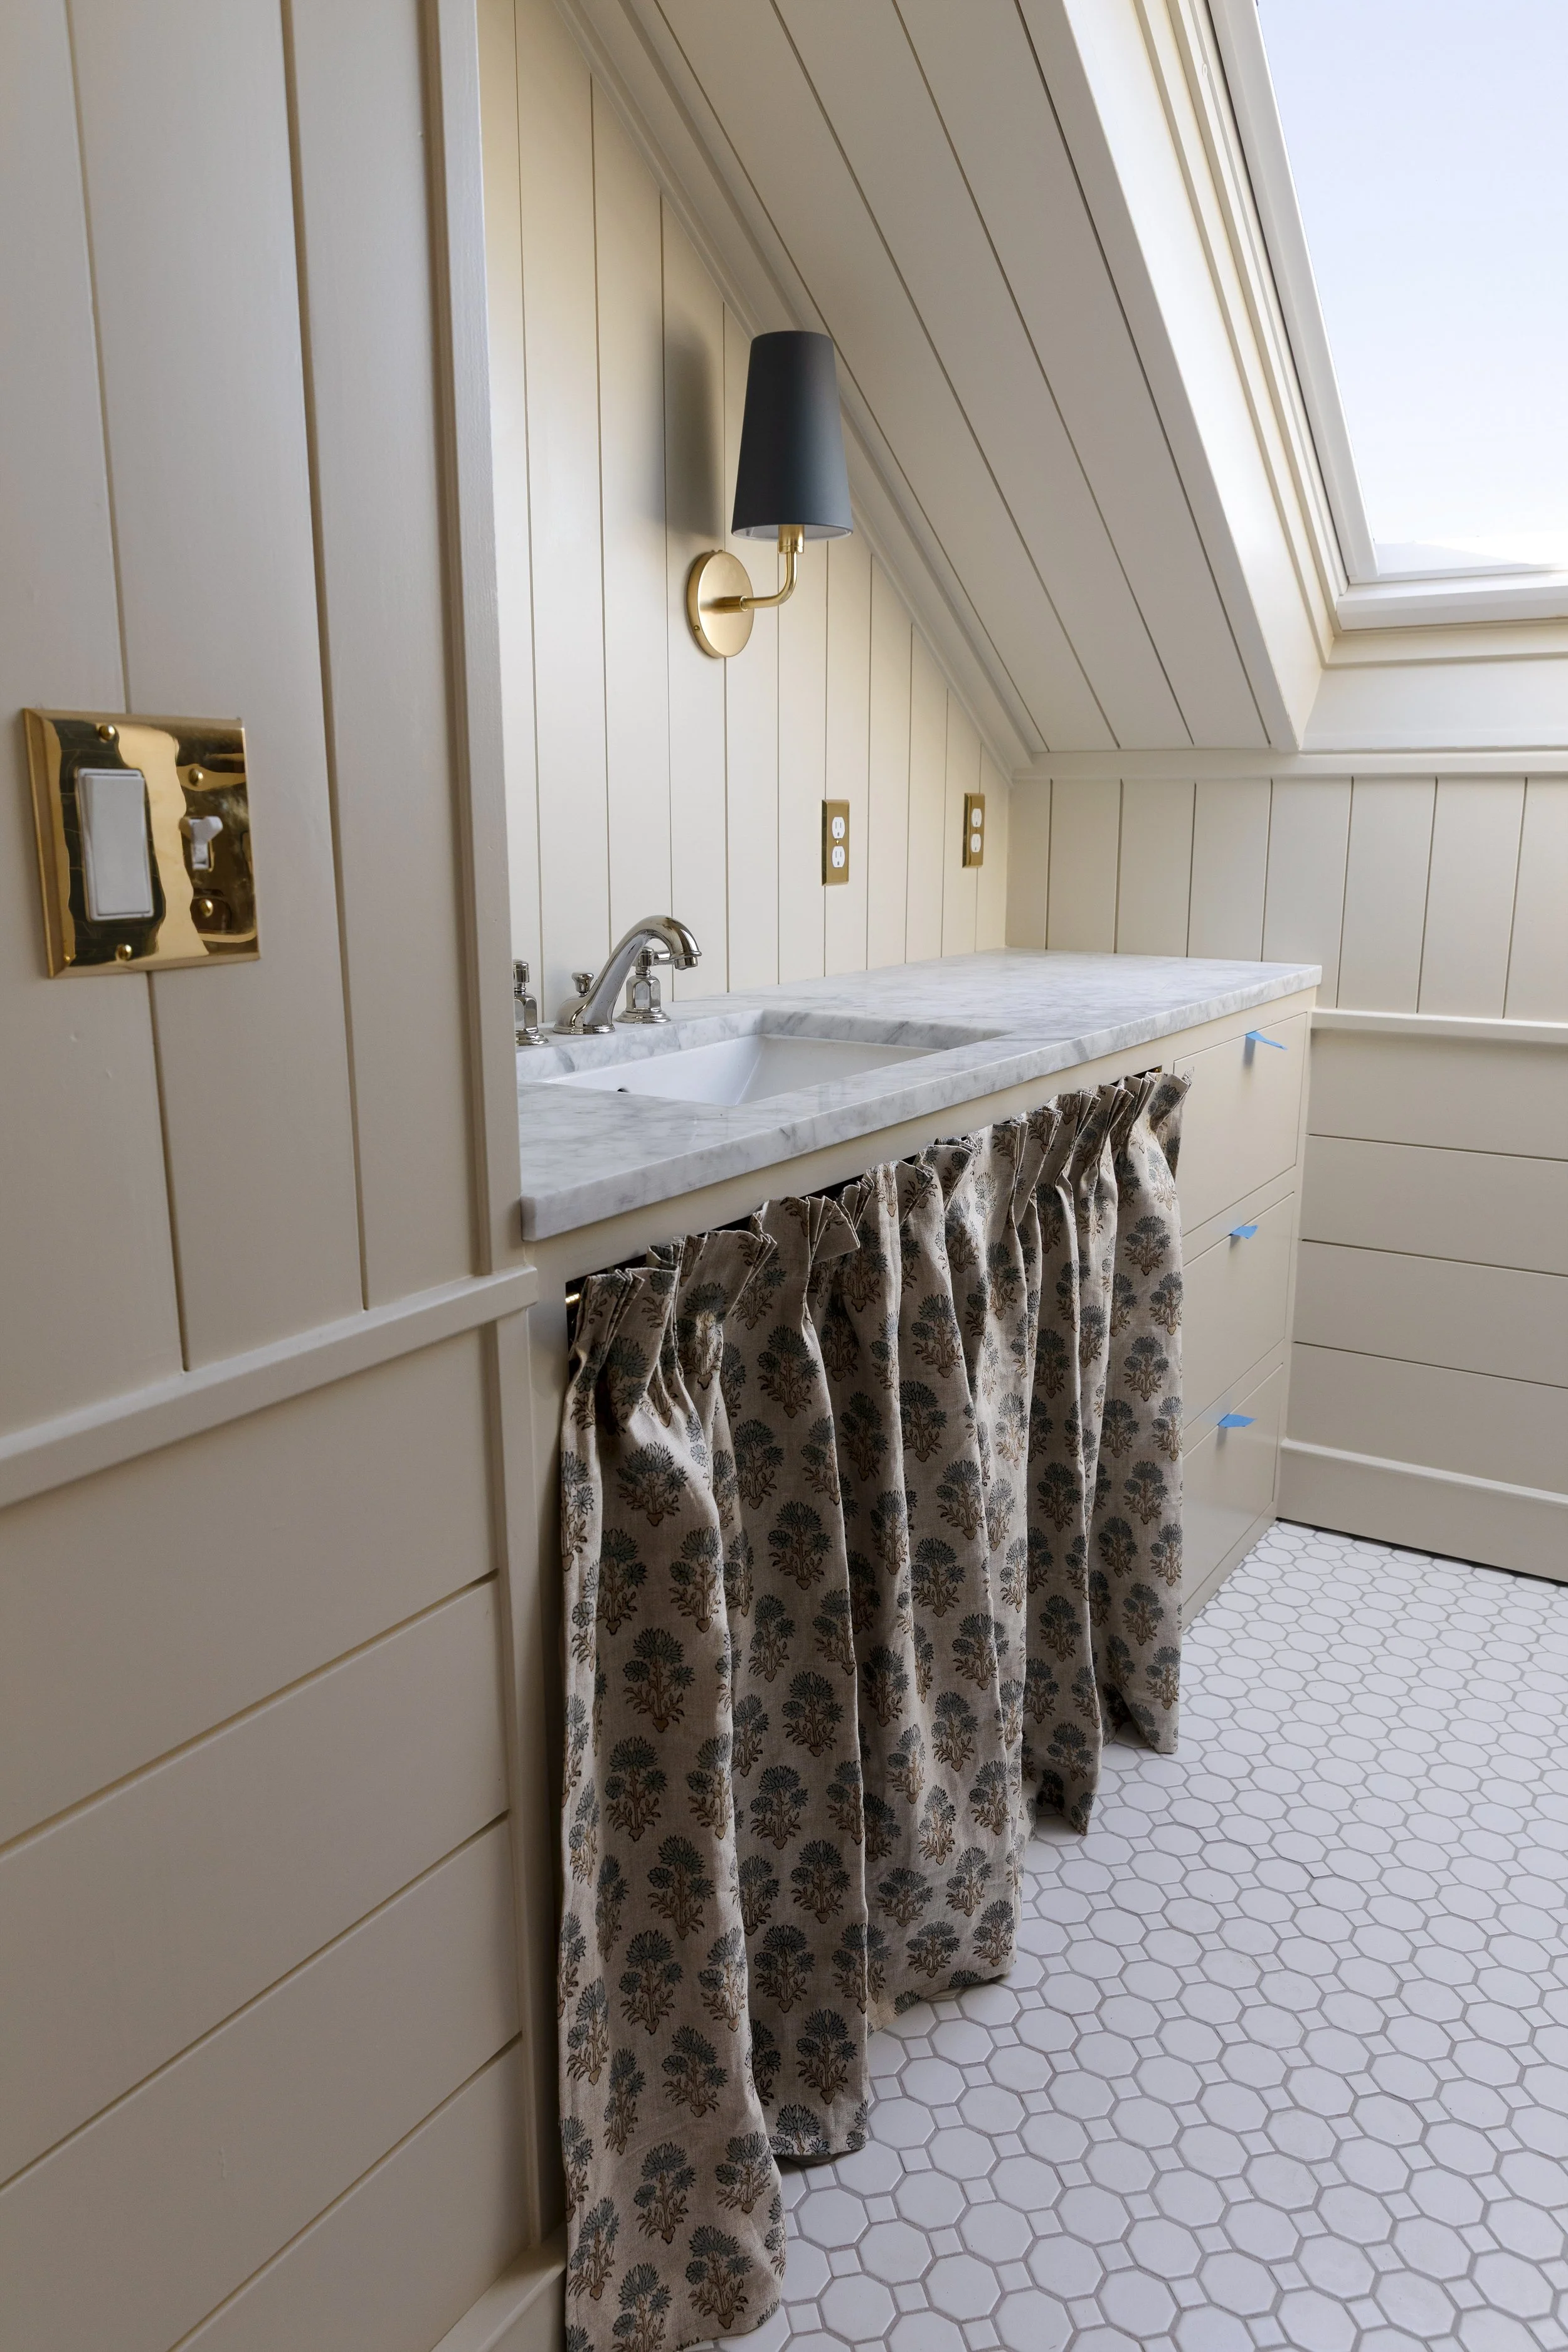
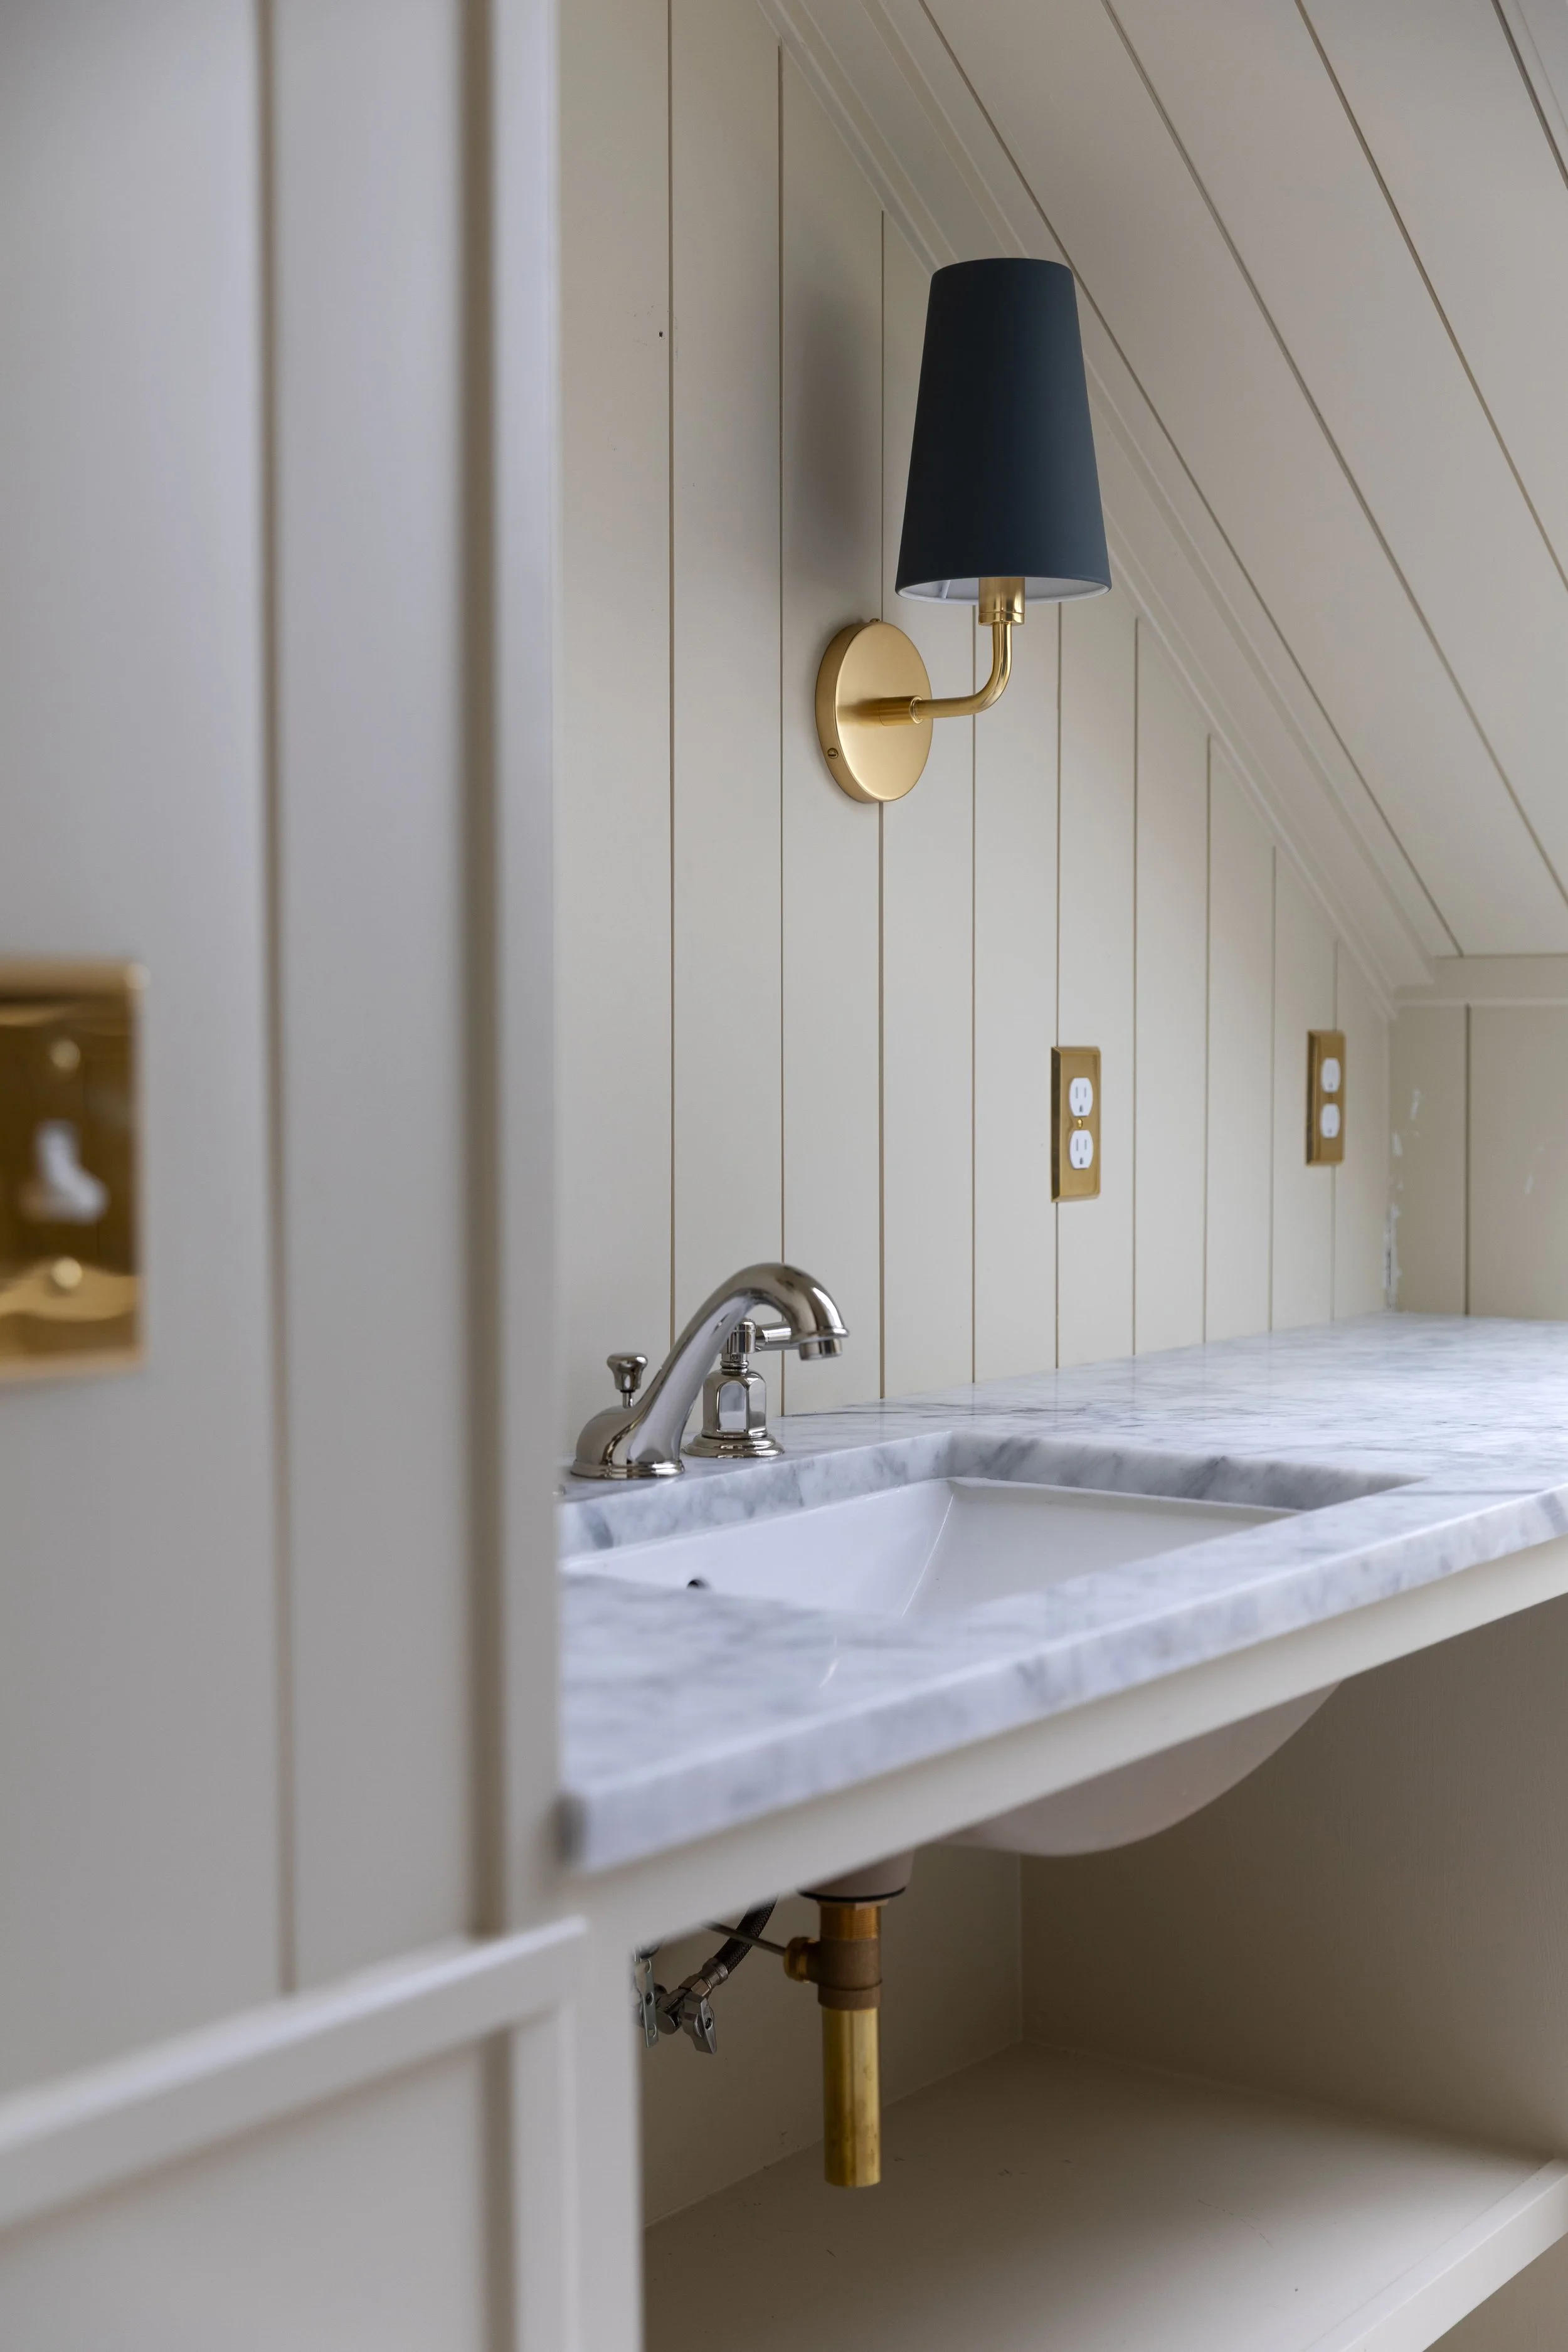
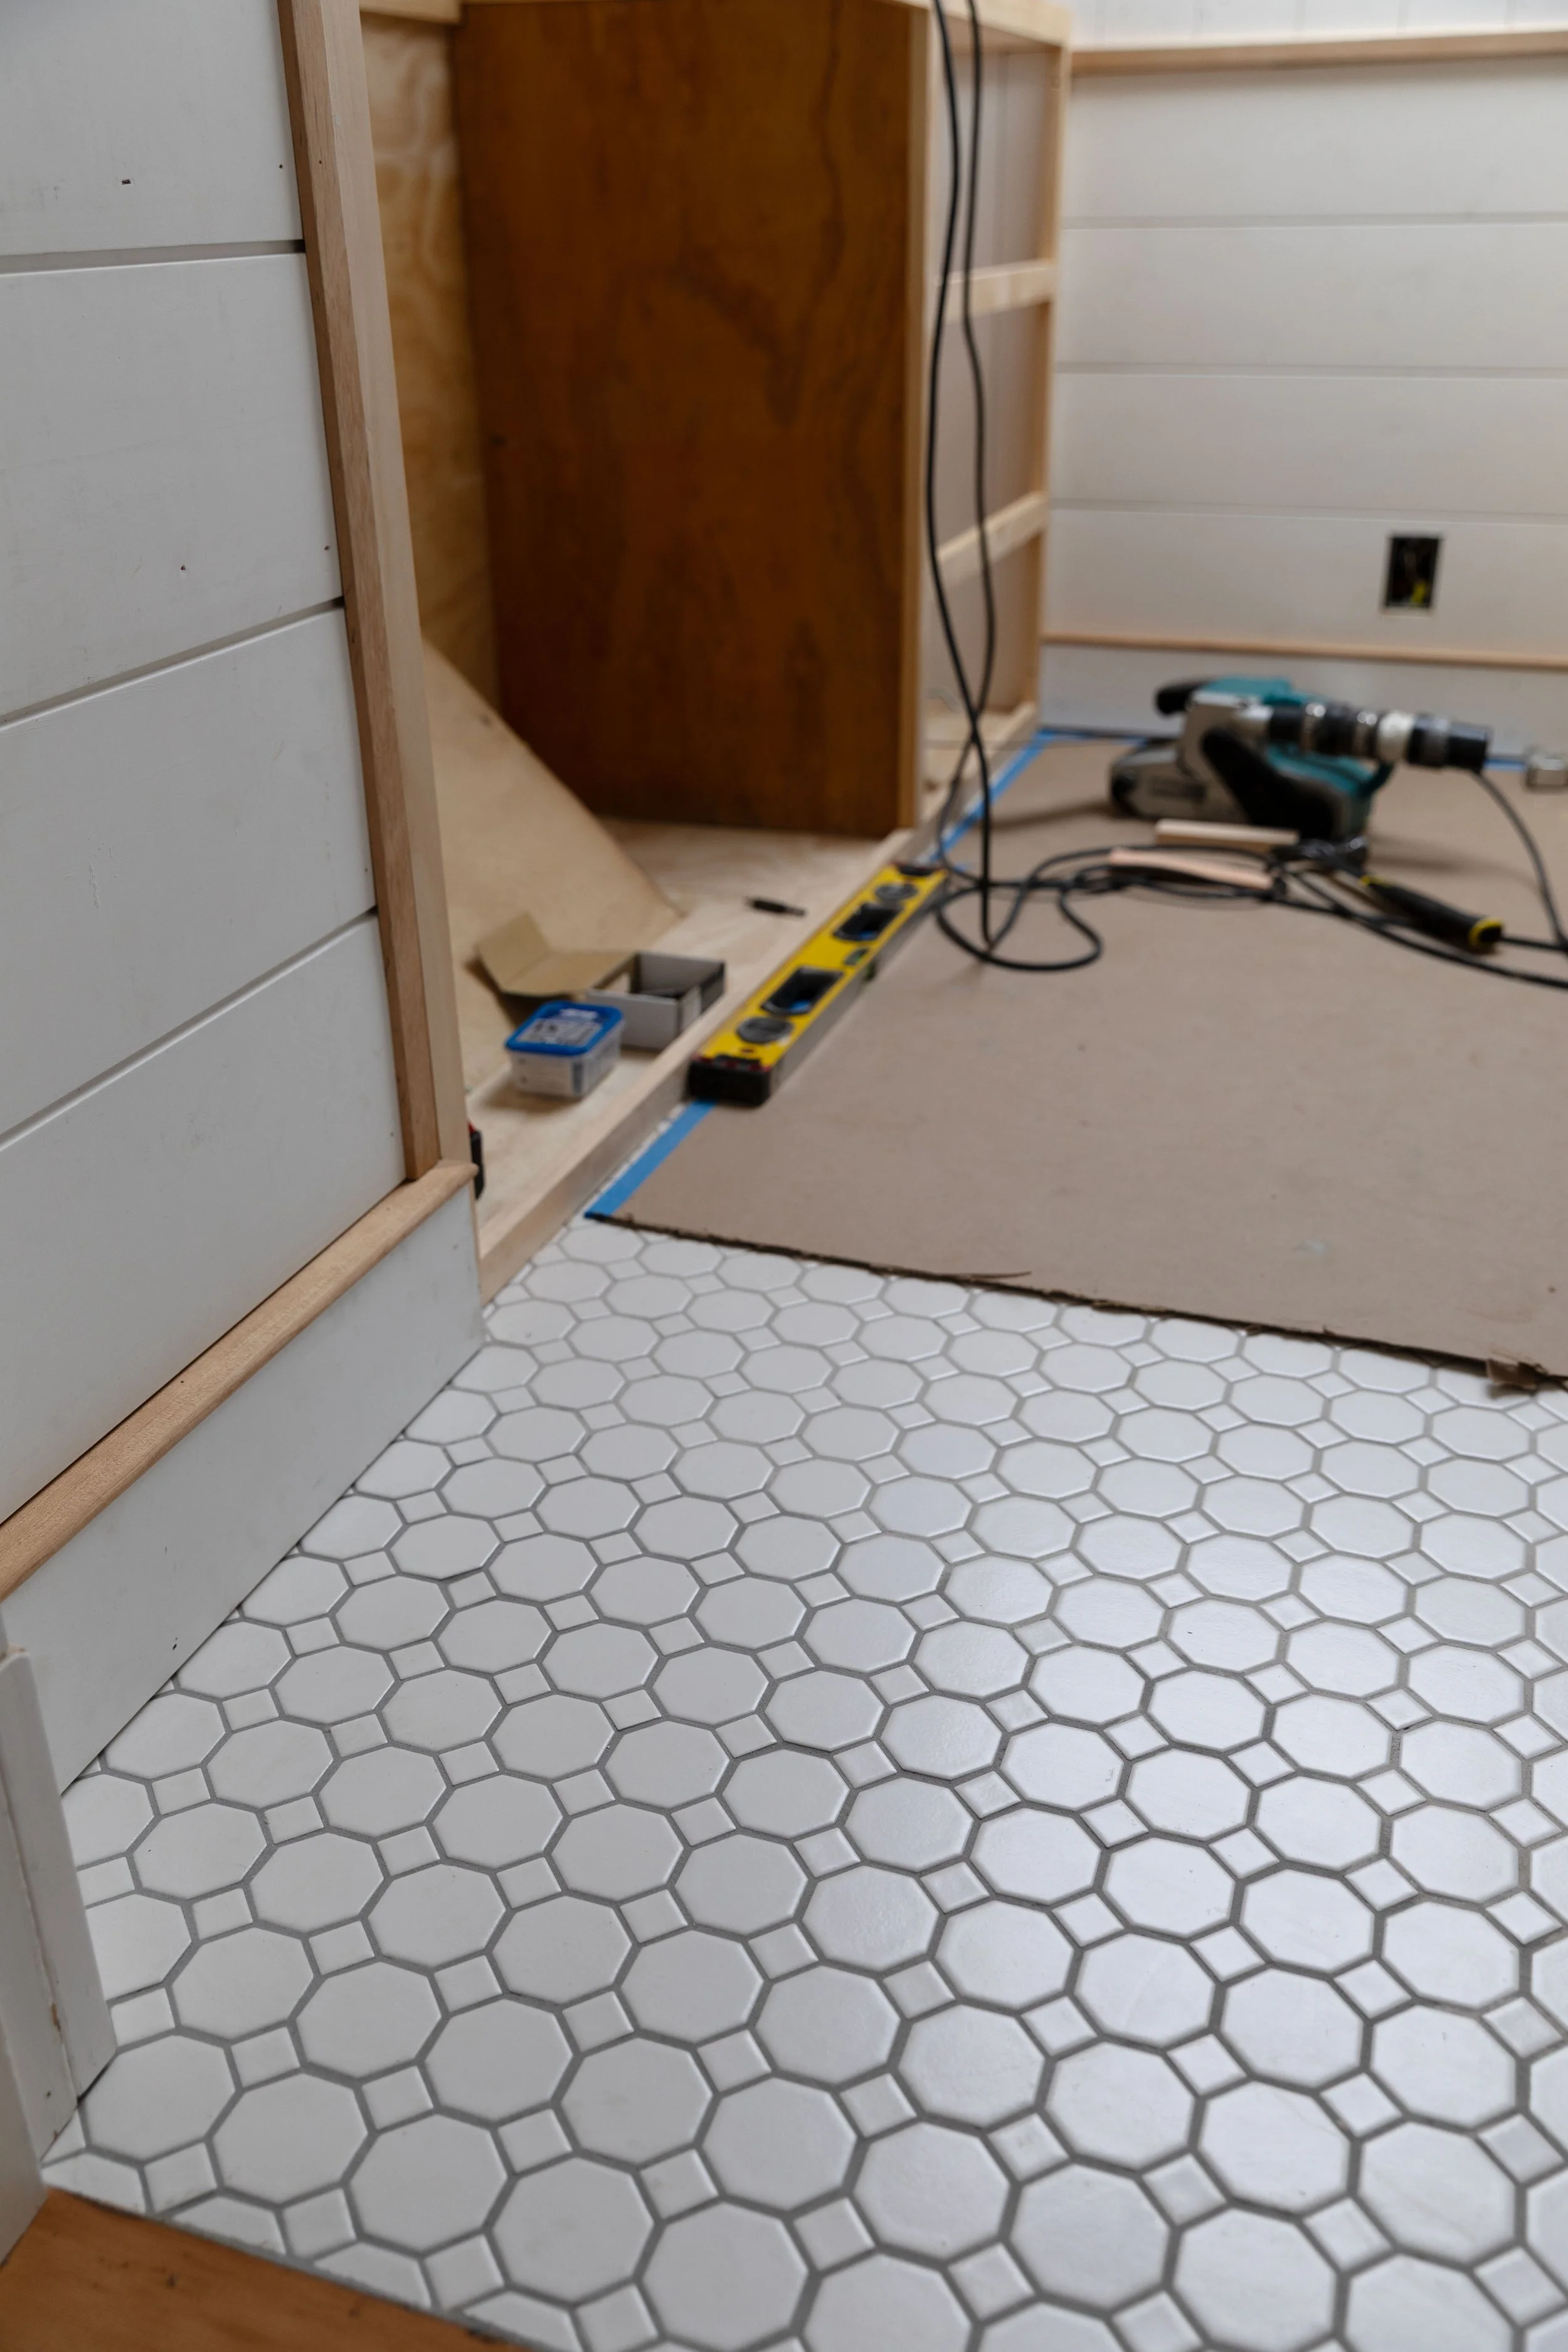
The tilework in our primary bathroom is finally done and we are thrilled with how it turned out! We opted for traditional and timeless tiles – simple white subways, hex floors, and marble accents all from The Tile Shop. Tiling was a big job so we’re catching our breath before grout, but we wanted to show you how it all came out today.
*this post is sponsored by the Tile Shop


I’m so in love with these classic (but fun!) tiles! Let’s walk through the design, tile selection, and tile plan….
Design
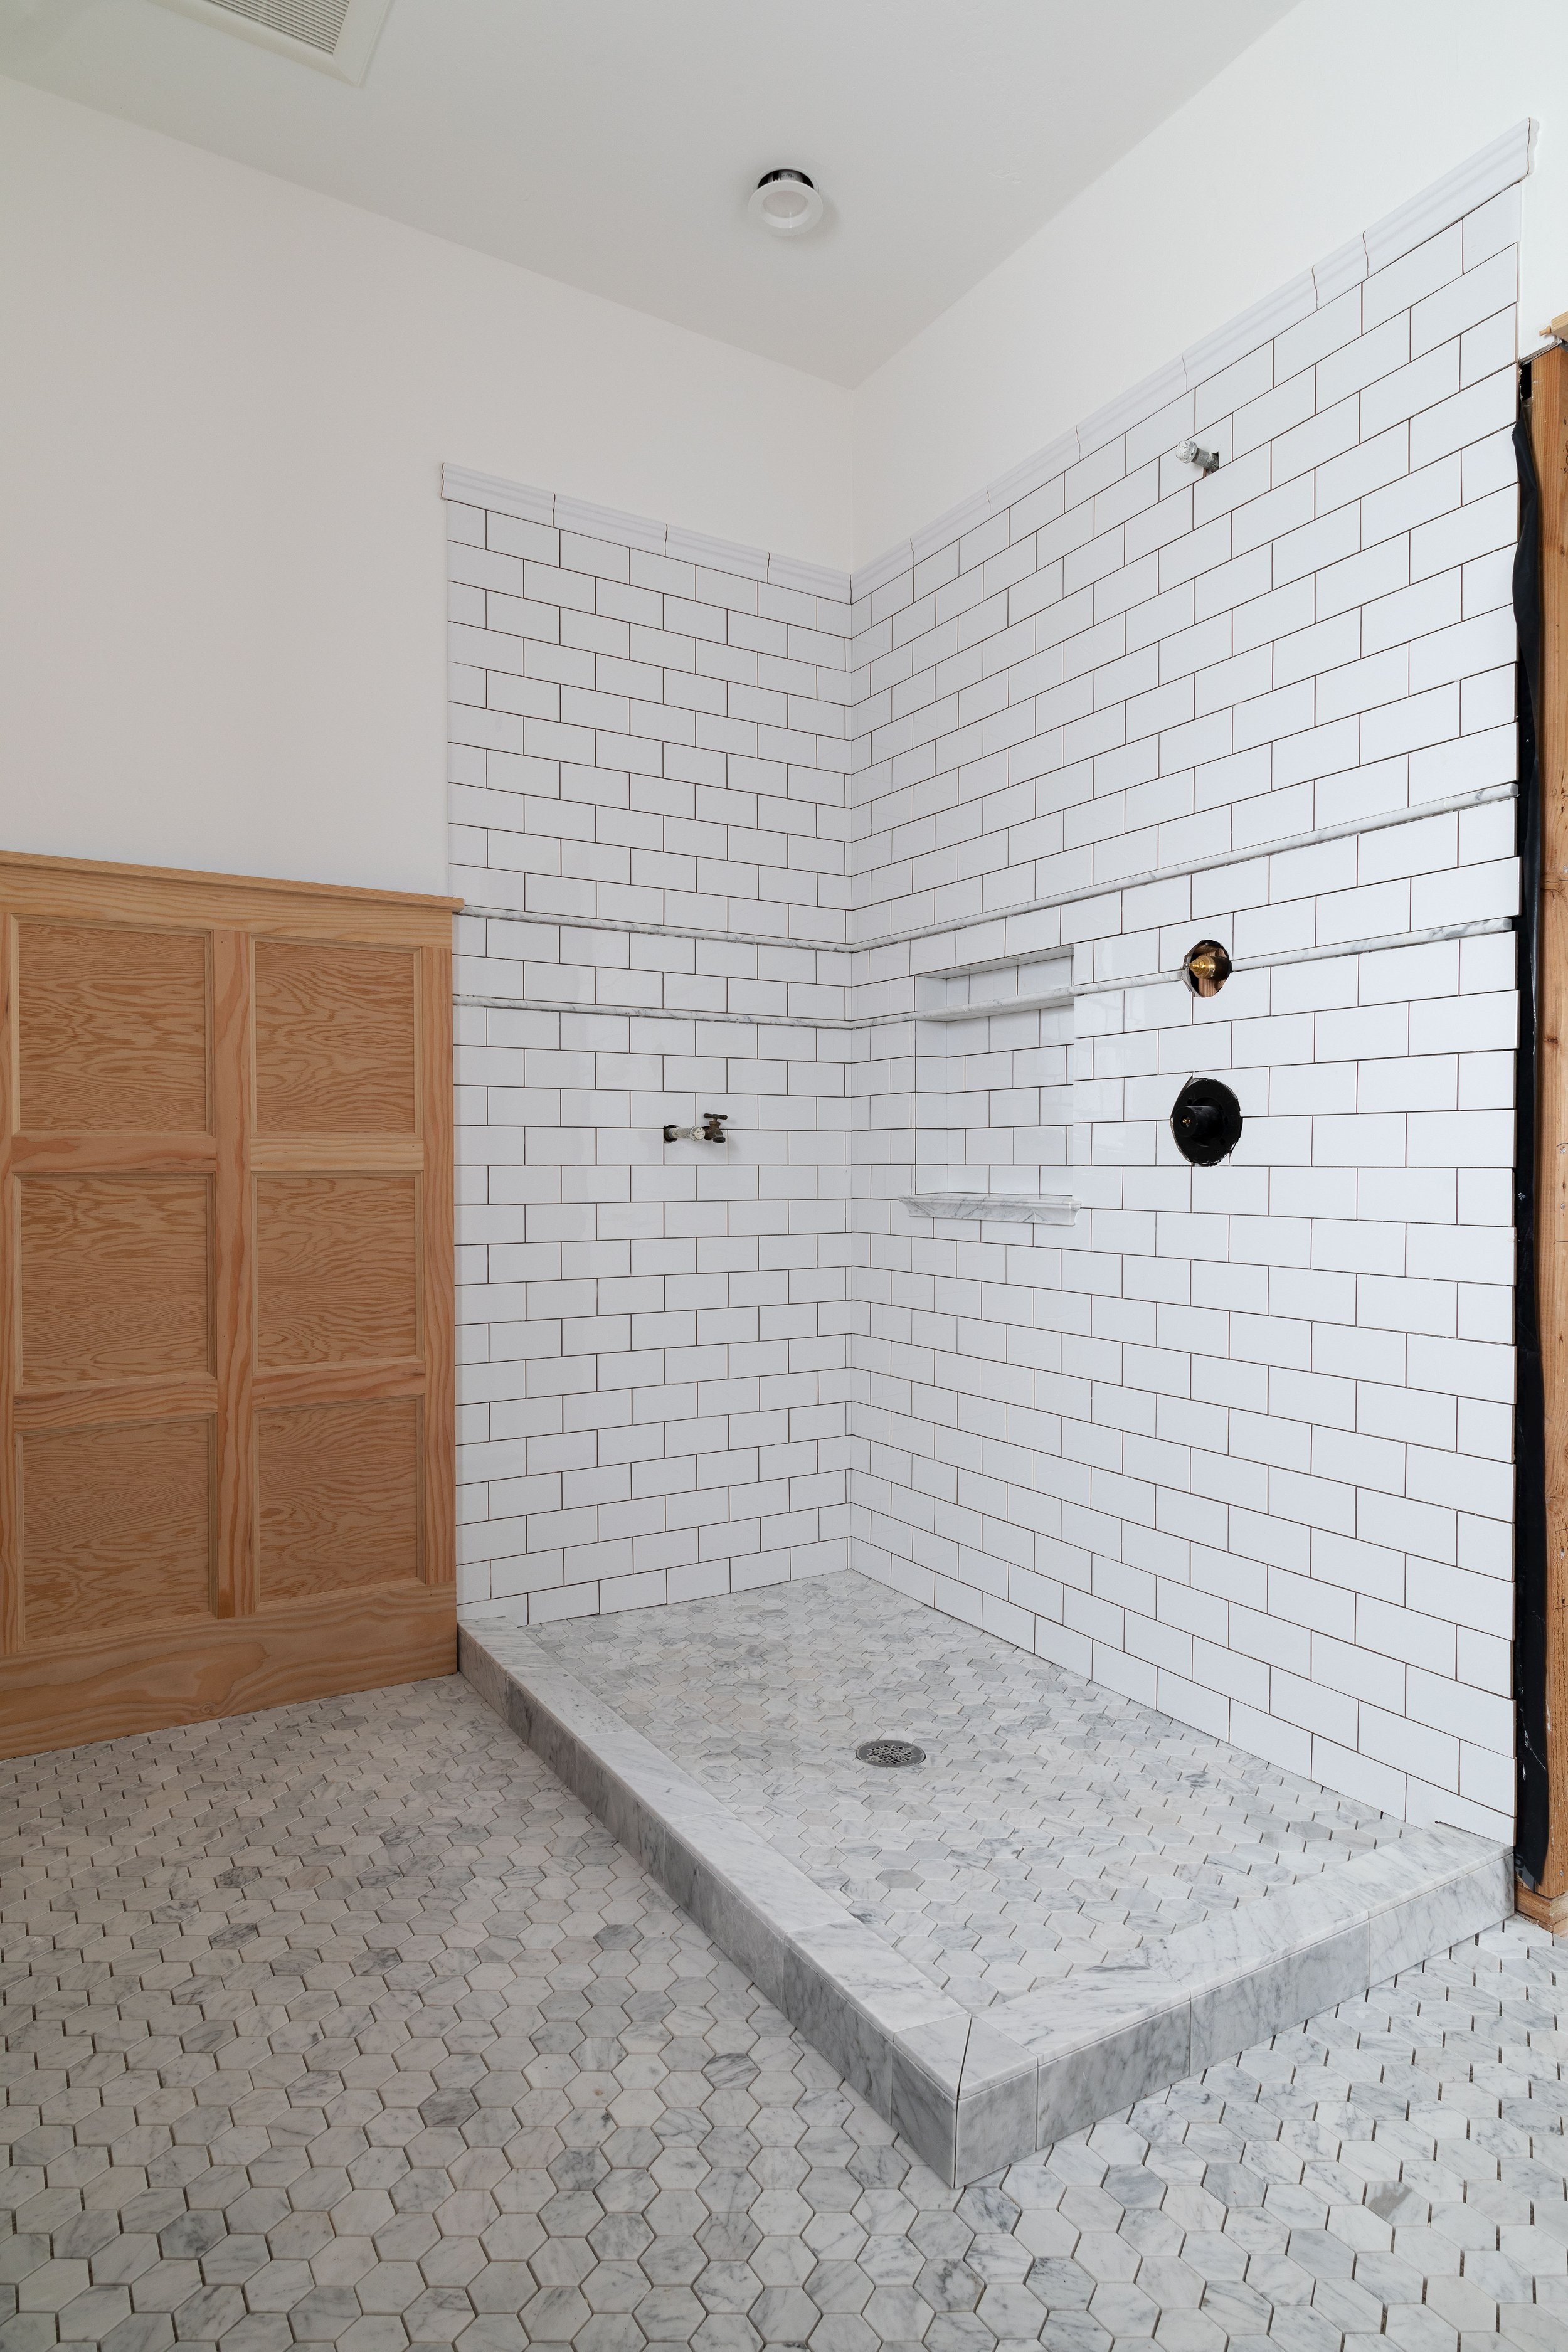
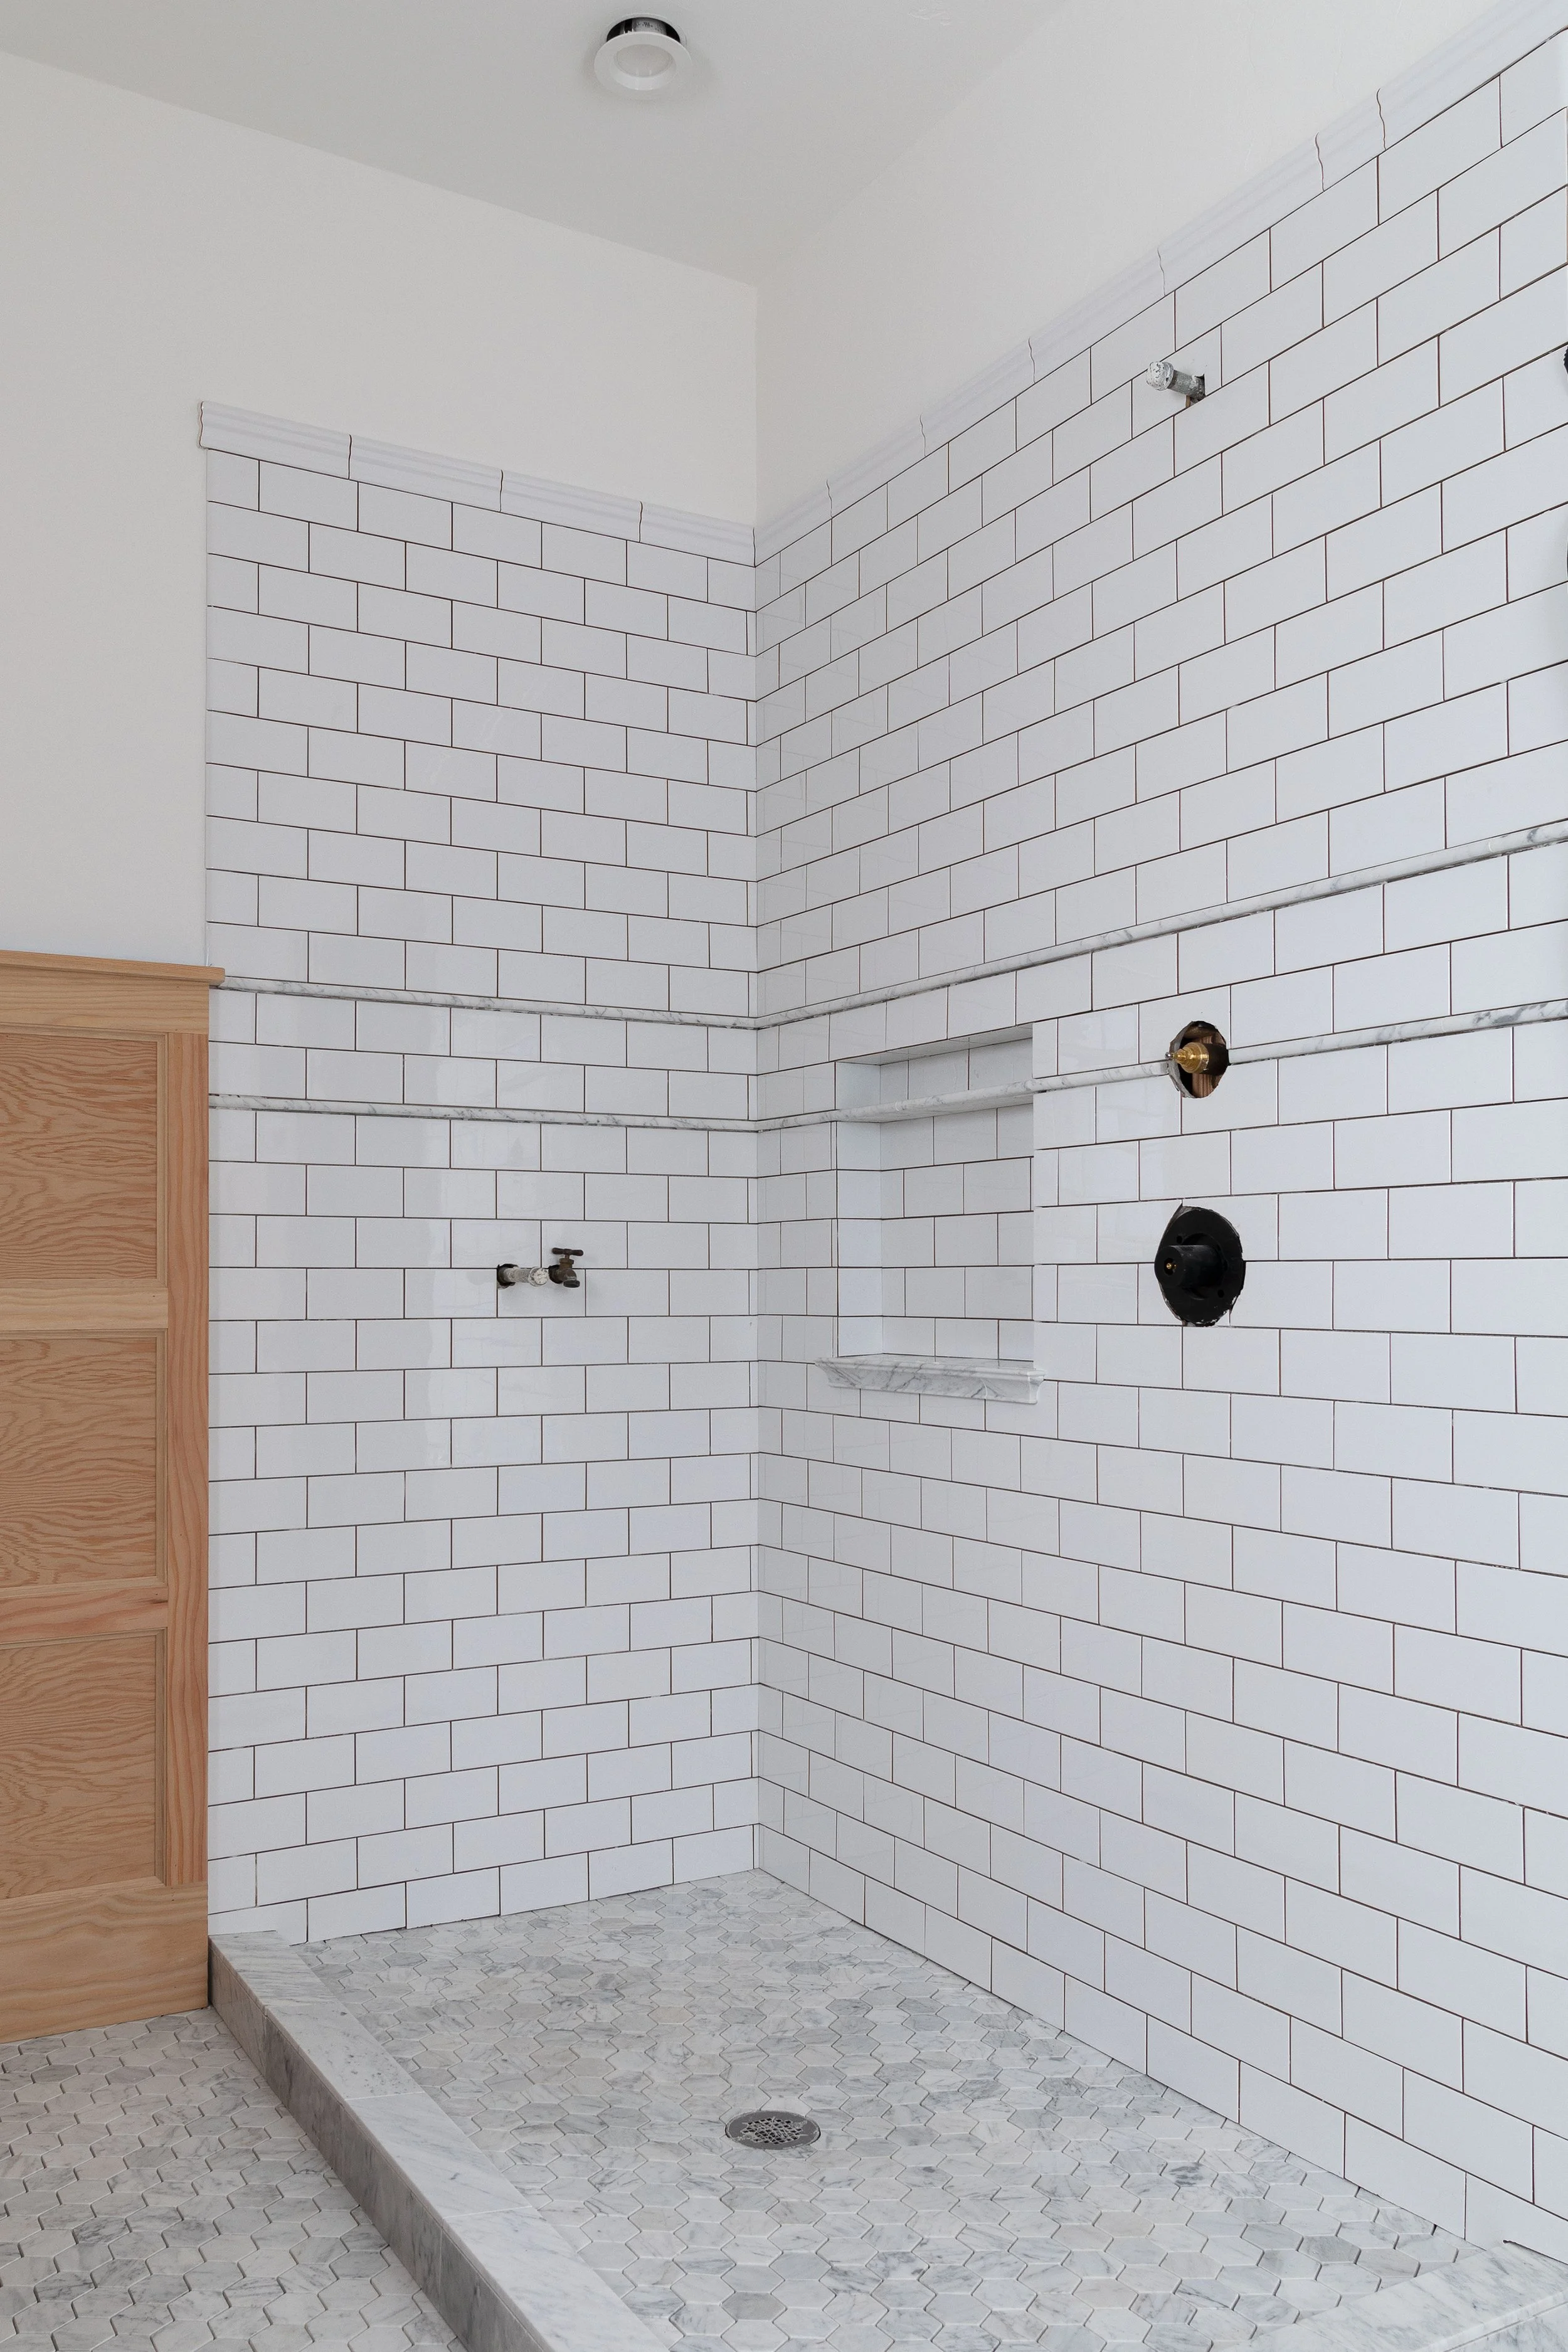
First and foremost, we wanted this shower to look at home inside a 110-year-old farmhouse. That meant picking traditional shapes and layouts. The subways were installed in a running bond rather than stacked or chevron (which would have read more modern) and the horizontal lines add a fun detail, without the shower feeling out of character or overly-ornate. And while the tile work doesn’t look exactly original, I’m hoping that maybe, just for a second, you might think it is.
Another goal with the design was to keep the shower tile light and bright. This bathroom will have dark wood wainscot running around the perimeter and we didn’t want the tile work making the room even darker. We also wanted to keep the shower’s color palette simple and harmonious so it wouldn’t compete with the wainscot. Garrett and I see the wainscot as the star of this bathroom, and we wanted the tile to play a supporting role rather than fight for attention. And after seeing the tile in place, I think the shower really complements the wainscot but is also totally stunning on it’s own!


Tile Selection
We opted for classic materials and finishes throughout this bathroom and did the same with the tiles. We ordered a bevy of samples and picked our favorite white gloss subway tiles for the body of the shower. We briefly considered doing white marble subways on the walls, but the ceramic should be easier to clean.
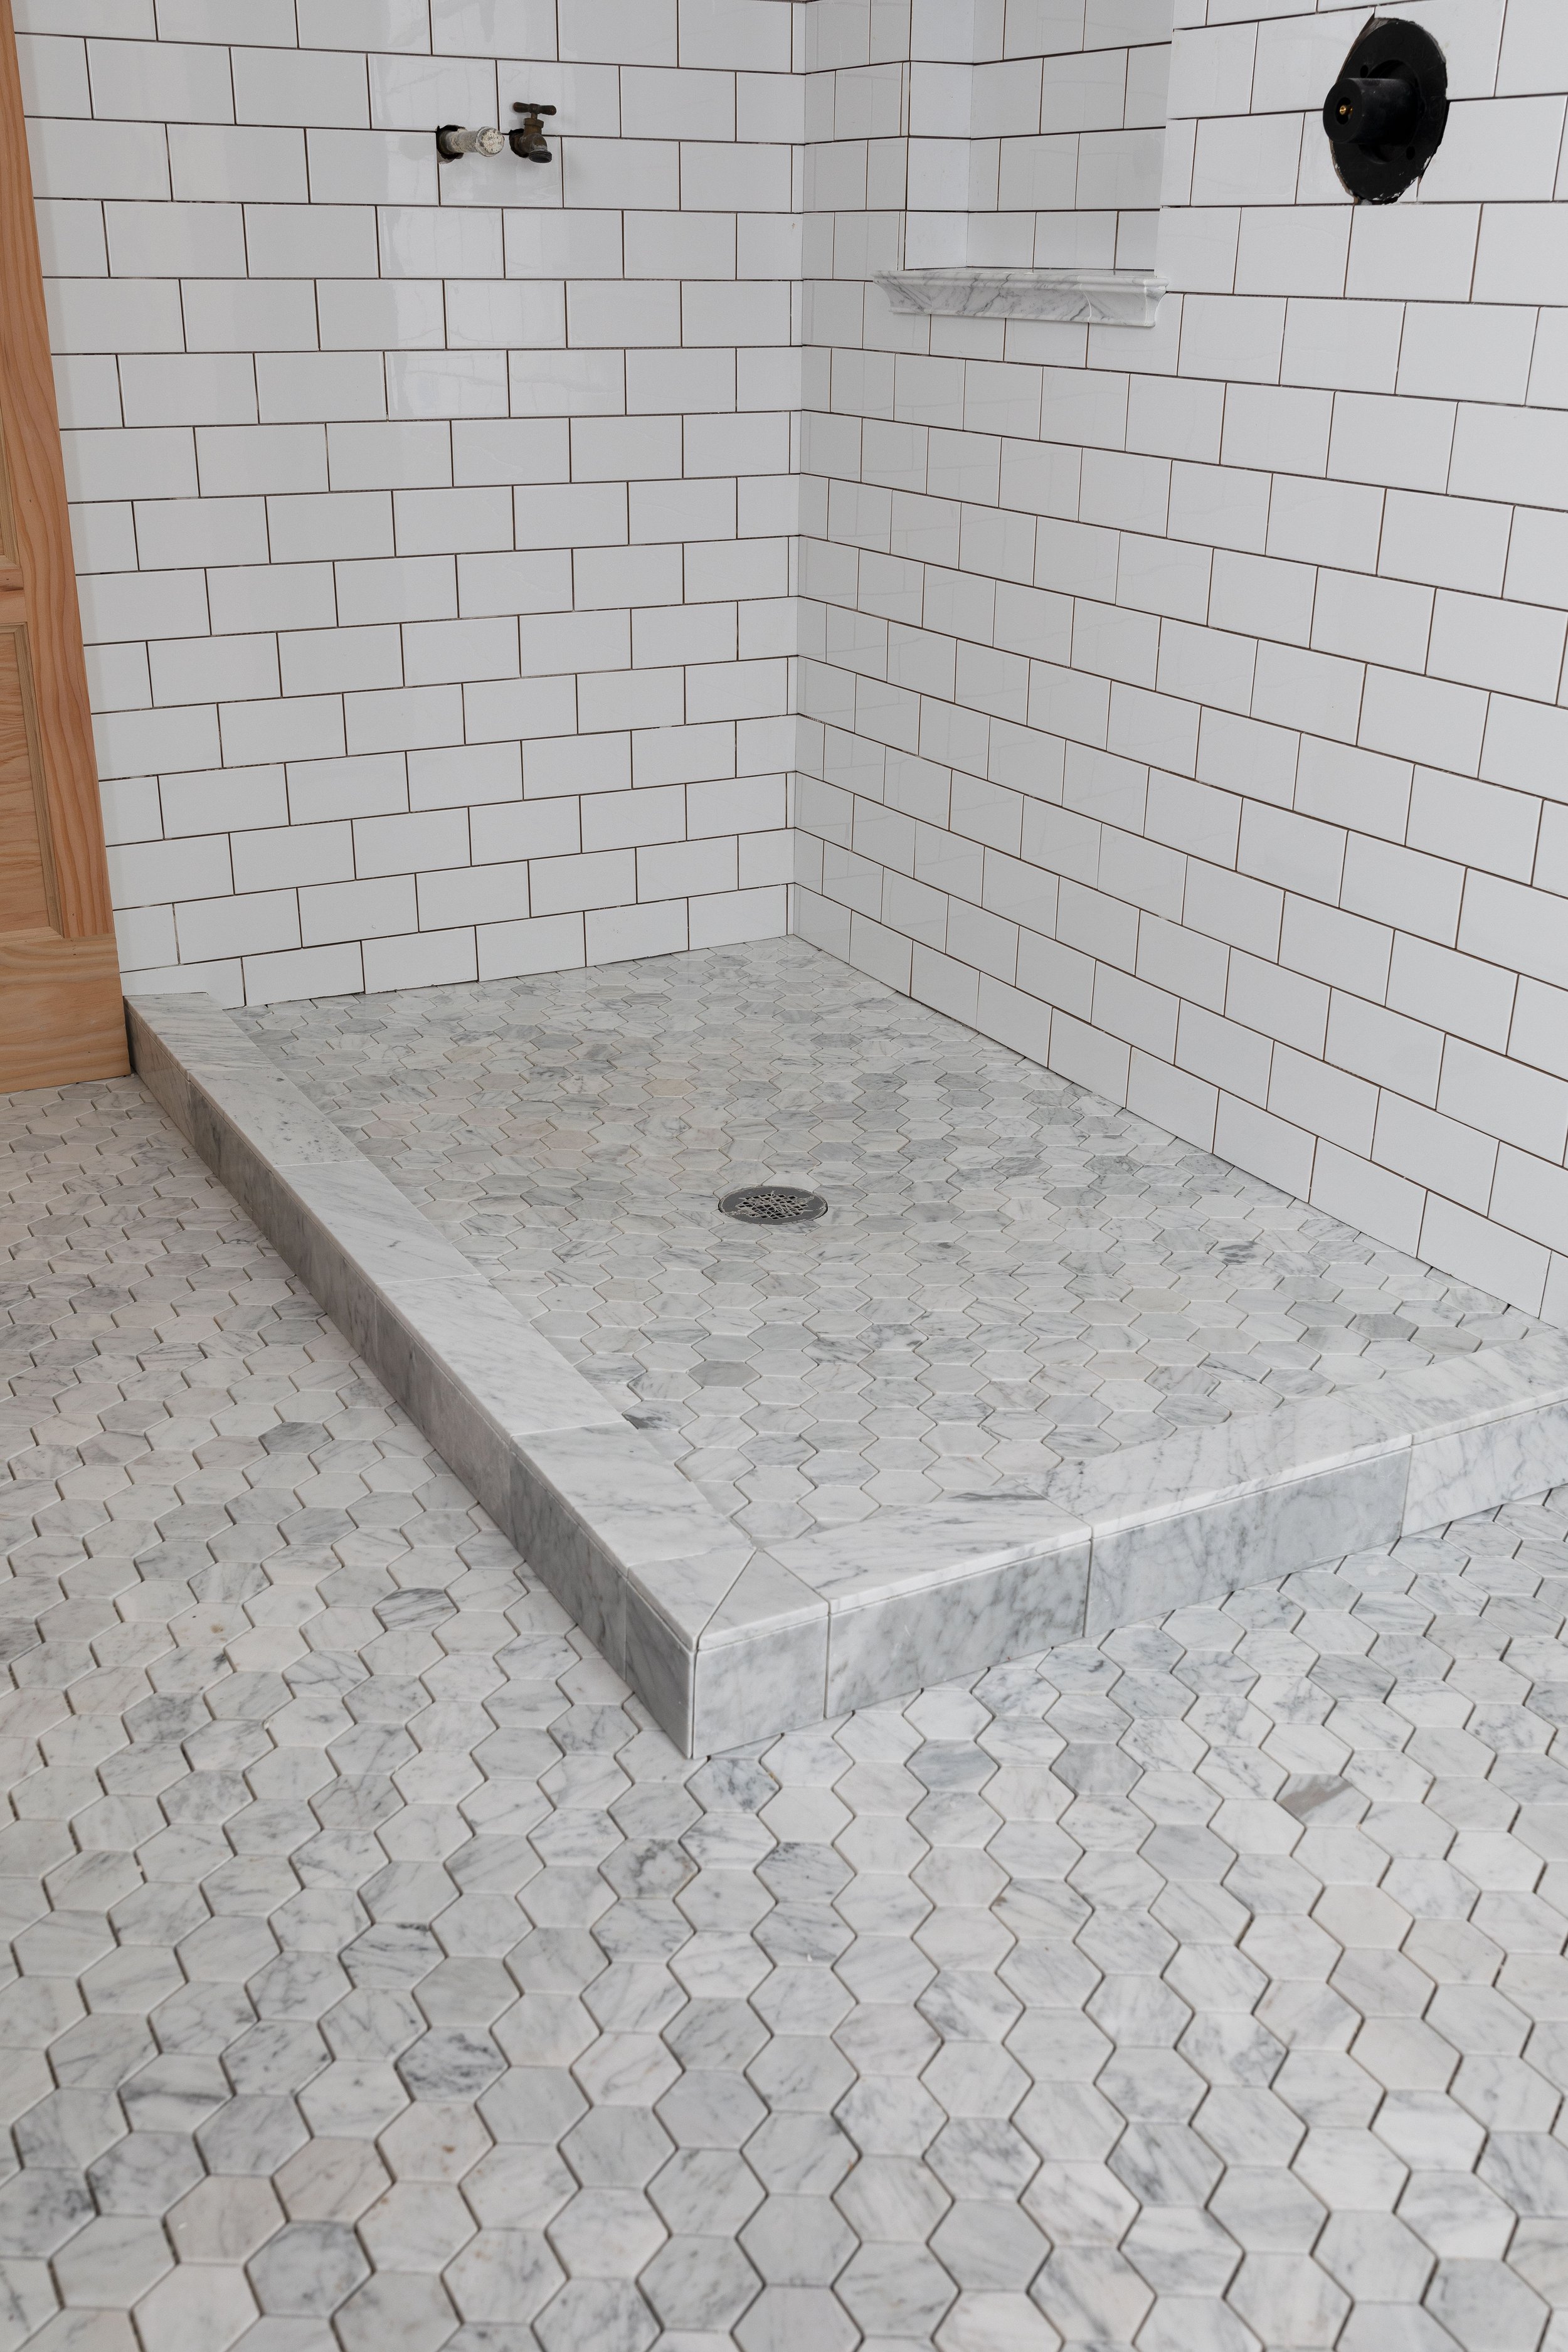
The marble hexagon tiles on the floor were carried into the shower pan to keep the bathroom feeling large and harmonious. Funny enough, when we originally ordered samples of hex floor options, I liked a lighter marble option based on the pictures online. But after seeing the tiles in person, there was no question that this Carrara marble was the right choice. So here’s a tip for anyone renovating a bathroom…ordering tile samples is ALWAYS a good idea 😉
After the floors were set, we selected coordinating marble accents to add a little interest to the walls. We didn’t want a plain white subway shower in here because I was afraid it would read more modern than I wanted plus we’ve done approximately 10,000 white subway surrounds and I wanted (needed!) to do something different. The marble accents and traditional profiles are meant to add a little interest and keep a historic feel.
The floors, the curb, the horizontal lines, and the shelf ledge are all part of the Tile Shop’s Firenze Carrara collection and match perfectly. Can we all give The Tile Shop three cheers for offering coordinating tile lines like this?! It makes the whole design process SO much easier!


It’s hard to believe that in such a simple shower there are 7 different tiles, but sure enough there are. Here’s a breakdown of all of the tiles we used.

1 // Imperial Bianco gloss wall trim – subway exposed sides
2 // Chantilly white cornice – subway top
3 // Honed marble Durand wall trim – horizontal lines
4 // Honed marble capital wall trim – shelf trim
5 // Imperial bianco gloss subway – subway field tile
6 // Honed marble 2” hex - floors
7 // Honed marble wall and floor 4x12 – curb and shelf
We’re really happy with each of these tile selections and we’d use any of them again in a heartbeat!
Plan
The overall dimensions of the shower are 3’ wide by 5’ long by 7’6” tall. And while we aimed for a simple look, 7 different tiles certainly isn’t as simple as it looks. The marble accents and nook took time to plan out and install, but I love how it all came together. Here are the dimensions of the tile features…


The Nook
We knew we wanted a nook in this shower from the beginning. It will provide such a pretty spot to house shampoo and soap and the like. We played around with the location and did some math to try to line it up with a tile row, but since we had to rough-in the nook long before we tiled or even built the shower pan, we didn’t know exactly how it would all line up. Thankfully the bottom of the nook ended up sitting at the top of a row of tiles so it turned out as good as we could have hoped.
We sized the bottom shelf to house our biggest bottle of shampoo and the top shelf leaves just enough room for bar soap, razors, and the like. I haven’t seen a lot of nooks with two shelves, but it seemed like a great way of doubling the shelf space with only a little extra effort. BTW we opted not to put a grout line between the marble wall accents and installed them with white epoxy glue.


Install
The tile install took Garrett and I one day for the floors and three days for the wall. It probably could have been quicker, but we took our time, making sure that we wouldn’t have any crooked tiles or uneven grout lines burning our eyes for years to come 😆

And all that work and attention to detail was 100% worth it, because we are really happy with how this shower turned out!


What’s Next
We already sealed the marble tiles and next up we’ll be grouting with Ardex WA epoxy grout. I’m also looking for a glass shower surround that’s simple and elegant and doesn’t break the bank (any suggestions?).
Thanks to The Tile Shop for sponsoring this project!