How to make a pleated fabric lampshade (no-sew!)
THE POPLAR COTTAGE
I’m a big fan of fabric pleated lampshades - they’re just so charming! I wanted a couple for the Poplar Cottage main bedroom so I made two this week. These are definiately my favorite (and easiest!) DIY lampshades to date, so I’m sharing a tutorial for anyone else wanting to up the charm factor on their lamps. Let’s get into it…
I’ve made a few pleated fabric lampshades over the years, and I always like the idea of sewing them (it just feels like the ‘right way’ to do it) but between you and me, hot glue works best. So that’s how I made these. And it’s the easiest and cutest lampshade I’ve made to date. Decor projects don’t always have to be hard ;)
Let’s walk through lampshades, fabrics, and a step-by-step tutorial so you can make your own fabric pleated lampshade...
What type of lampshade do you need?
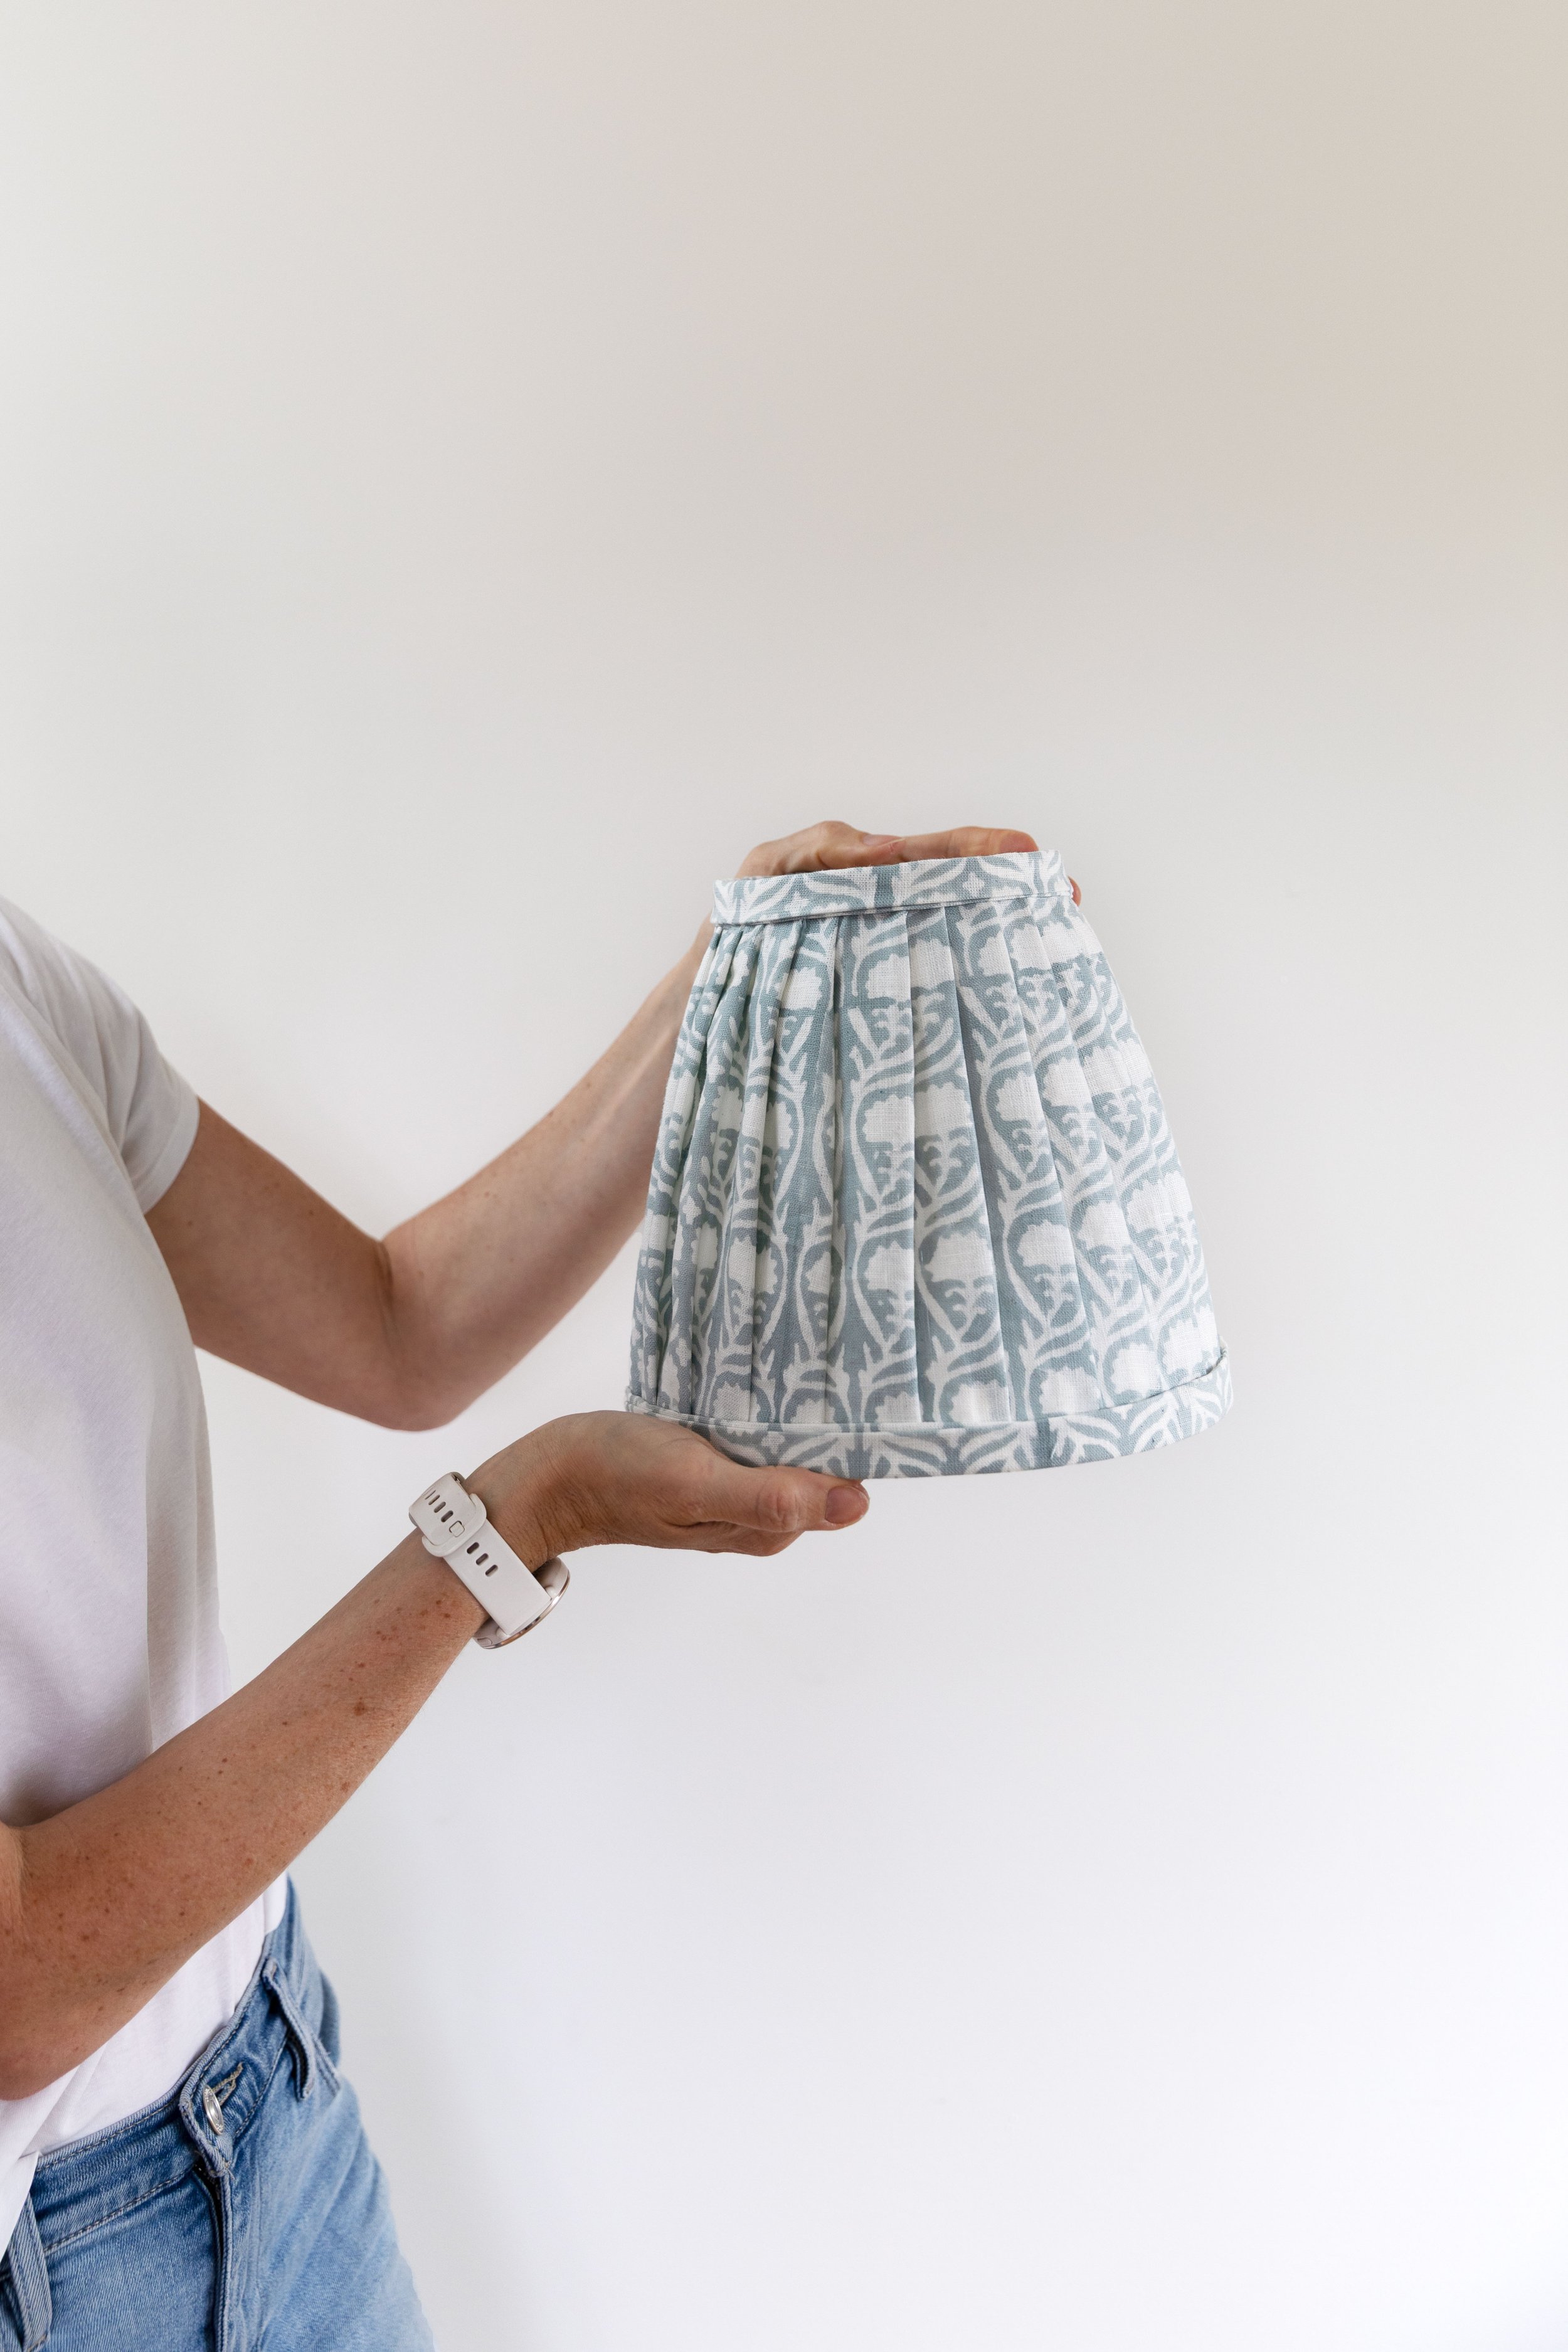
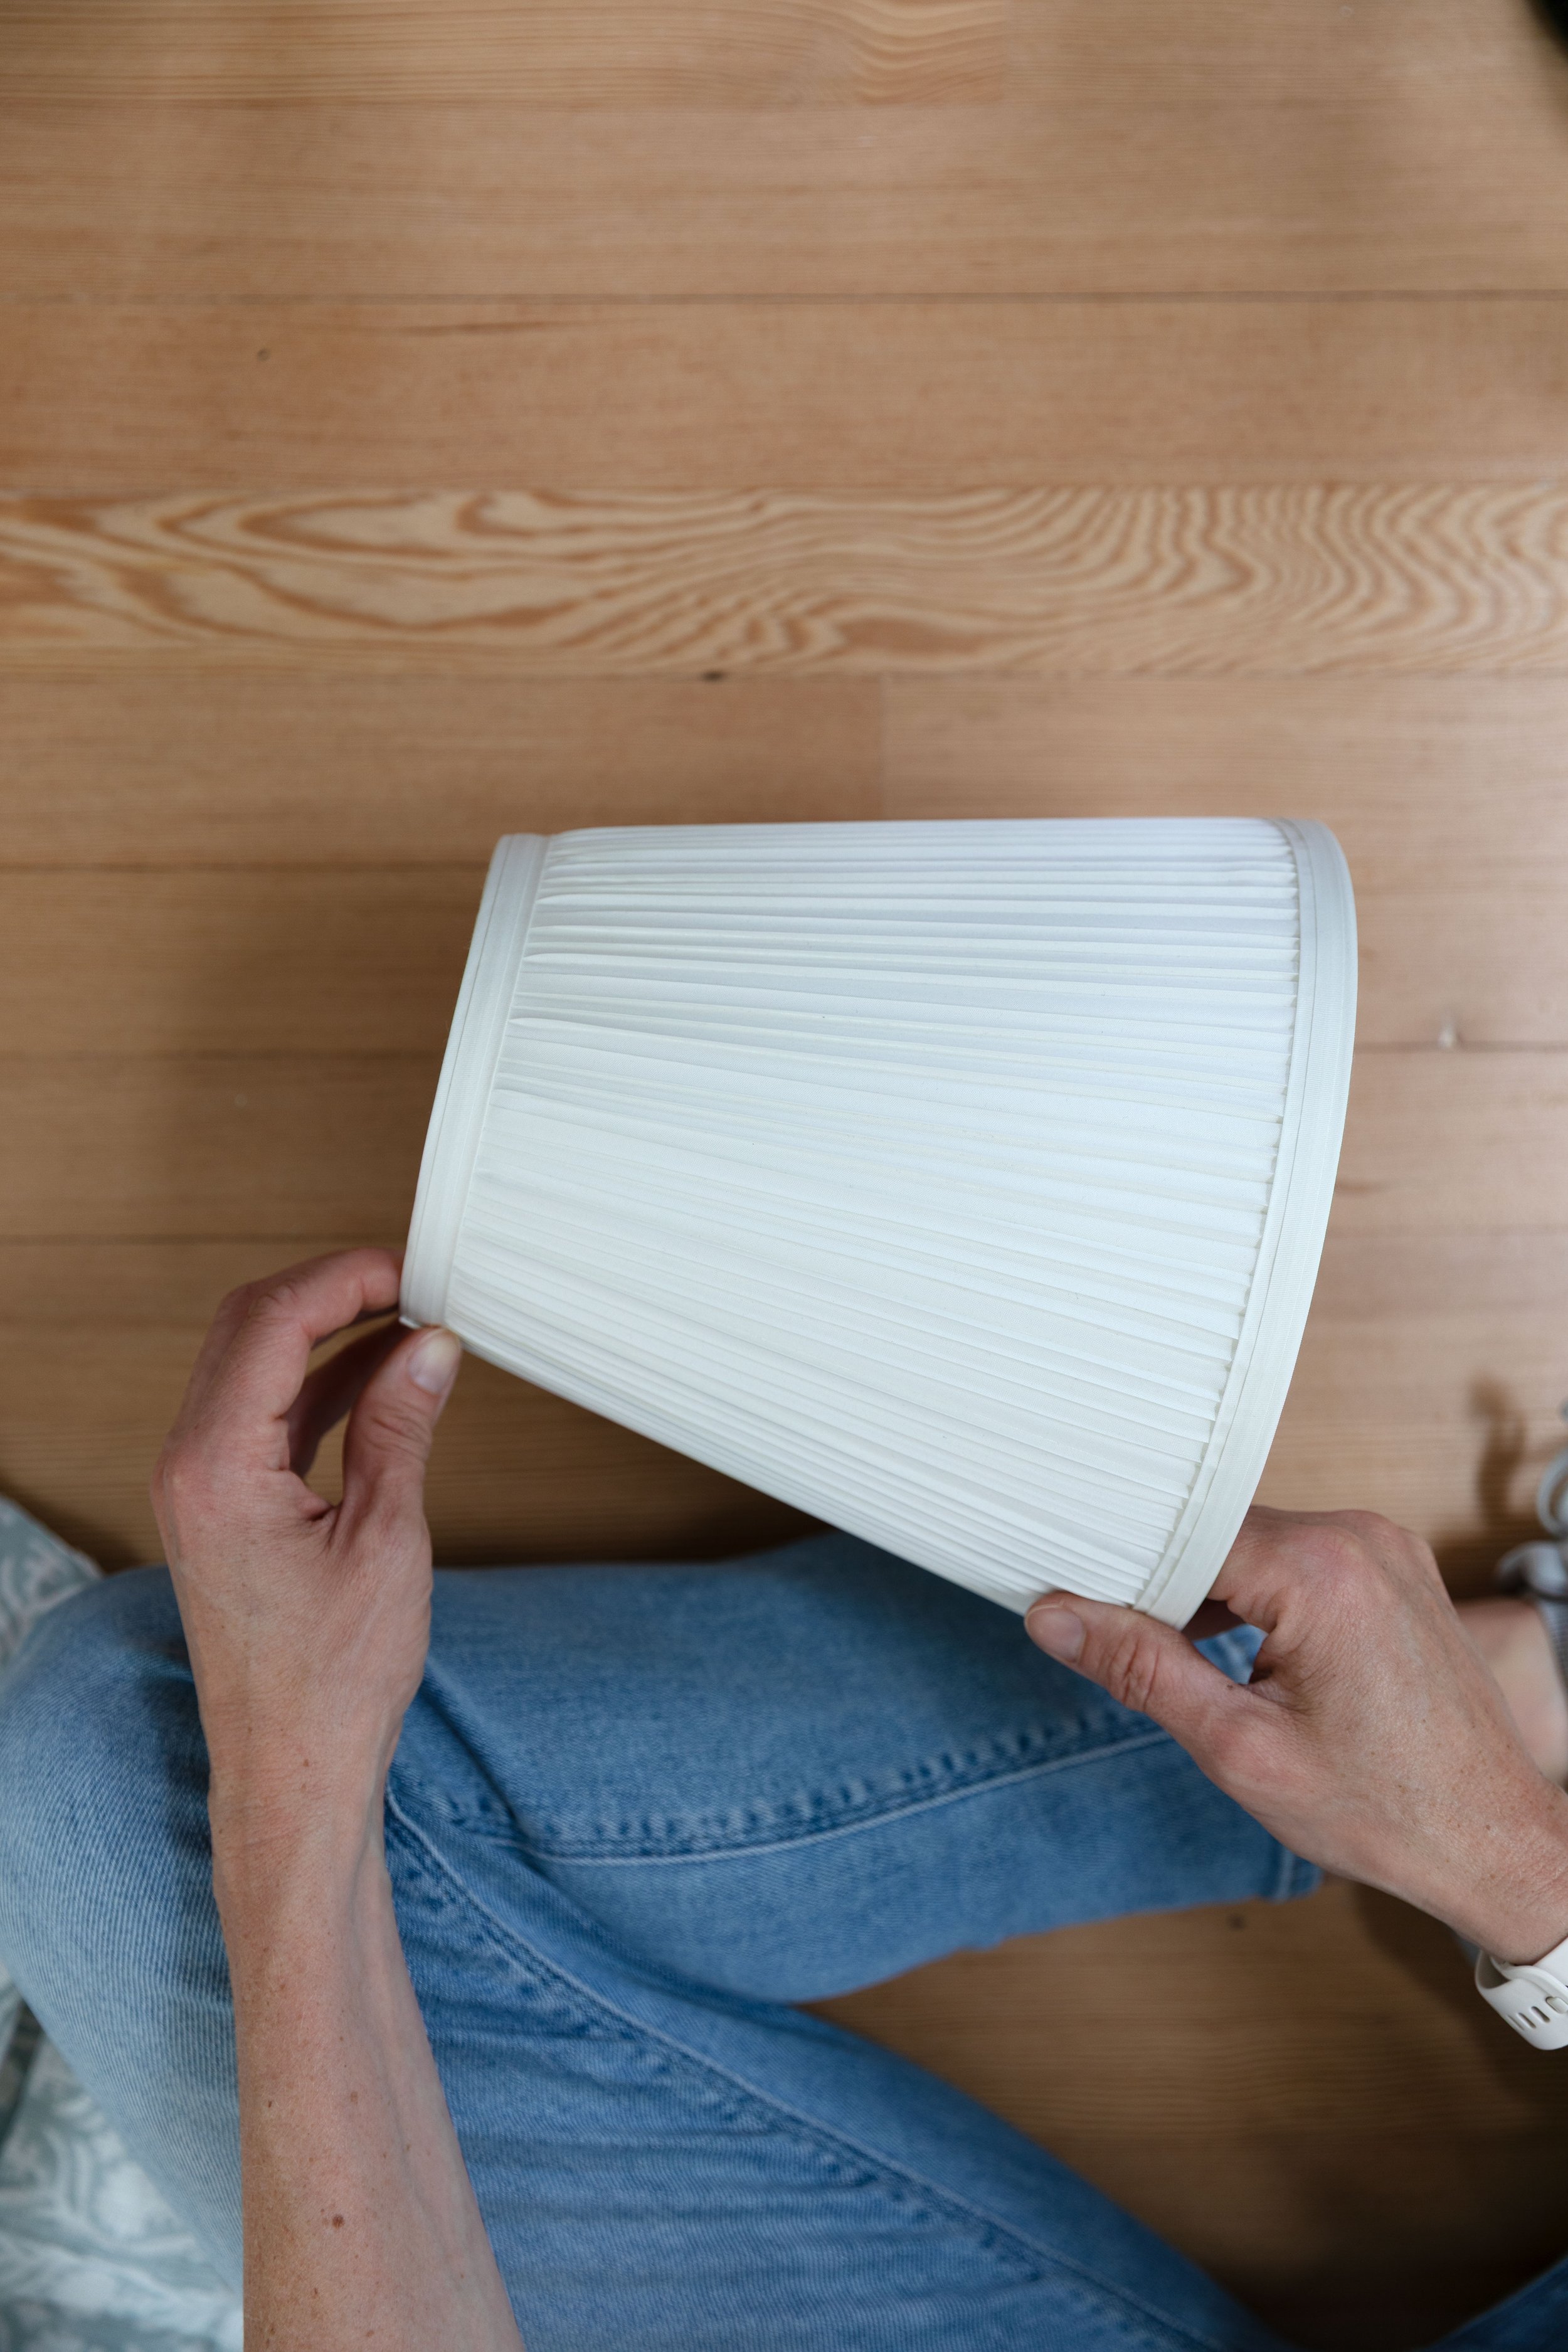
Most lampshades will work to cover in fabric, but for this DIY I’d pick a lampshade that is solid (as opposed to a metal frame). You can find one at the thrift shop or order new, but you’ll want one that isn’t too thick since adding fabric to it will limit the amount of light get through the shade. The shade I’m using came with my favorite Ikea table lamp (called the Arstid) and I just pulled off the original fabric. I’ve DIYed a fabric lampshade on these before so I knew it would work well.
One word of warning on lampshades… sloped sides make for a bit of added difficulty when it comes to pleating the fabric. I’ll walk you through that below but if you want the easiest lampshade possible, pick a drum-style shade that has the same top and bottom circumference.
What style of lamp looks best with a fabric lampshade?
Can I just say all of them?! Ha! But really, pleated fabric lampshades are really versatile. I’ve made them for vintage lamps I picked up at an auction and brand new lamps like these IKEA ones. Google ‘pleated fabric lamp’ for a world of inspiration.
The best fabric for lampshades
When it comes to fabric, think about the material and the pattern. Material should be natural - not too stiff and not too stretchy. The fabric I’m using for my lampshade is linen and I’ve also made shades out of cotton fabric in cute Liberty patterns. Speaking of patterns, I swear clear of heavy lines or geometric prints that will make pleating difficult. Here are a few fabric ideas to get you started…

DIY // how to make a pleated lampshade
Tools and materials
fabric (enough to wrap around your lampshade 2+ times + an 2” piece for trim)
lampshade (I’m using this one)
hot glue gun (I’m using this cordless one)
Iron

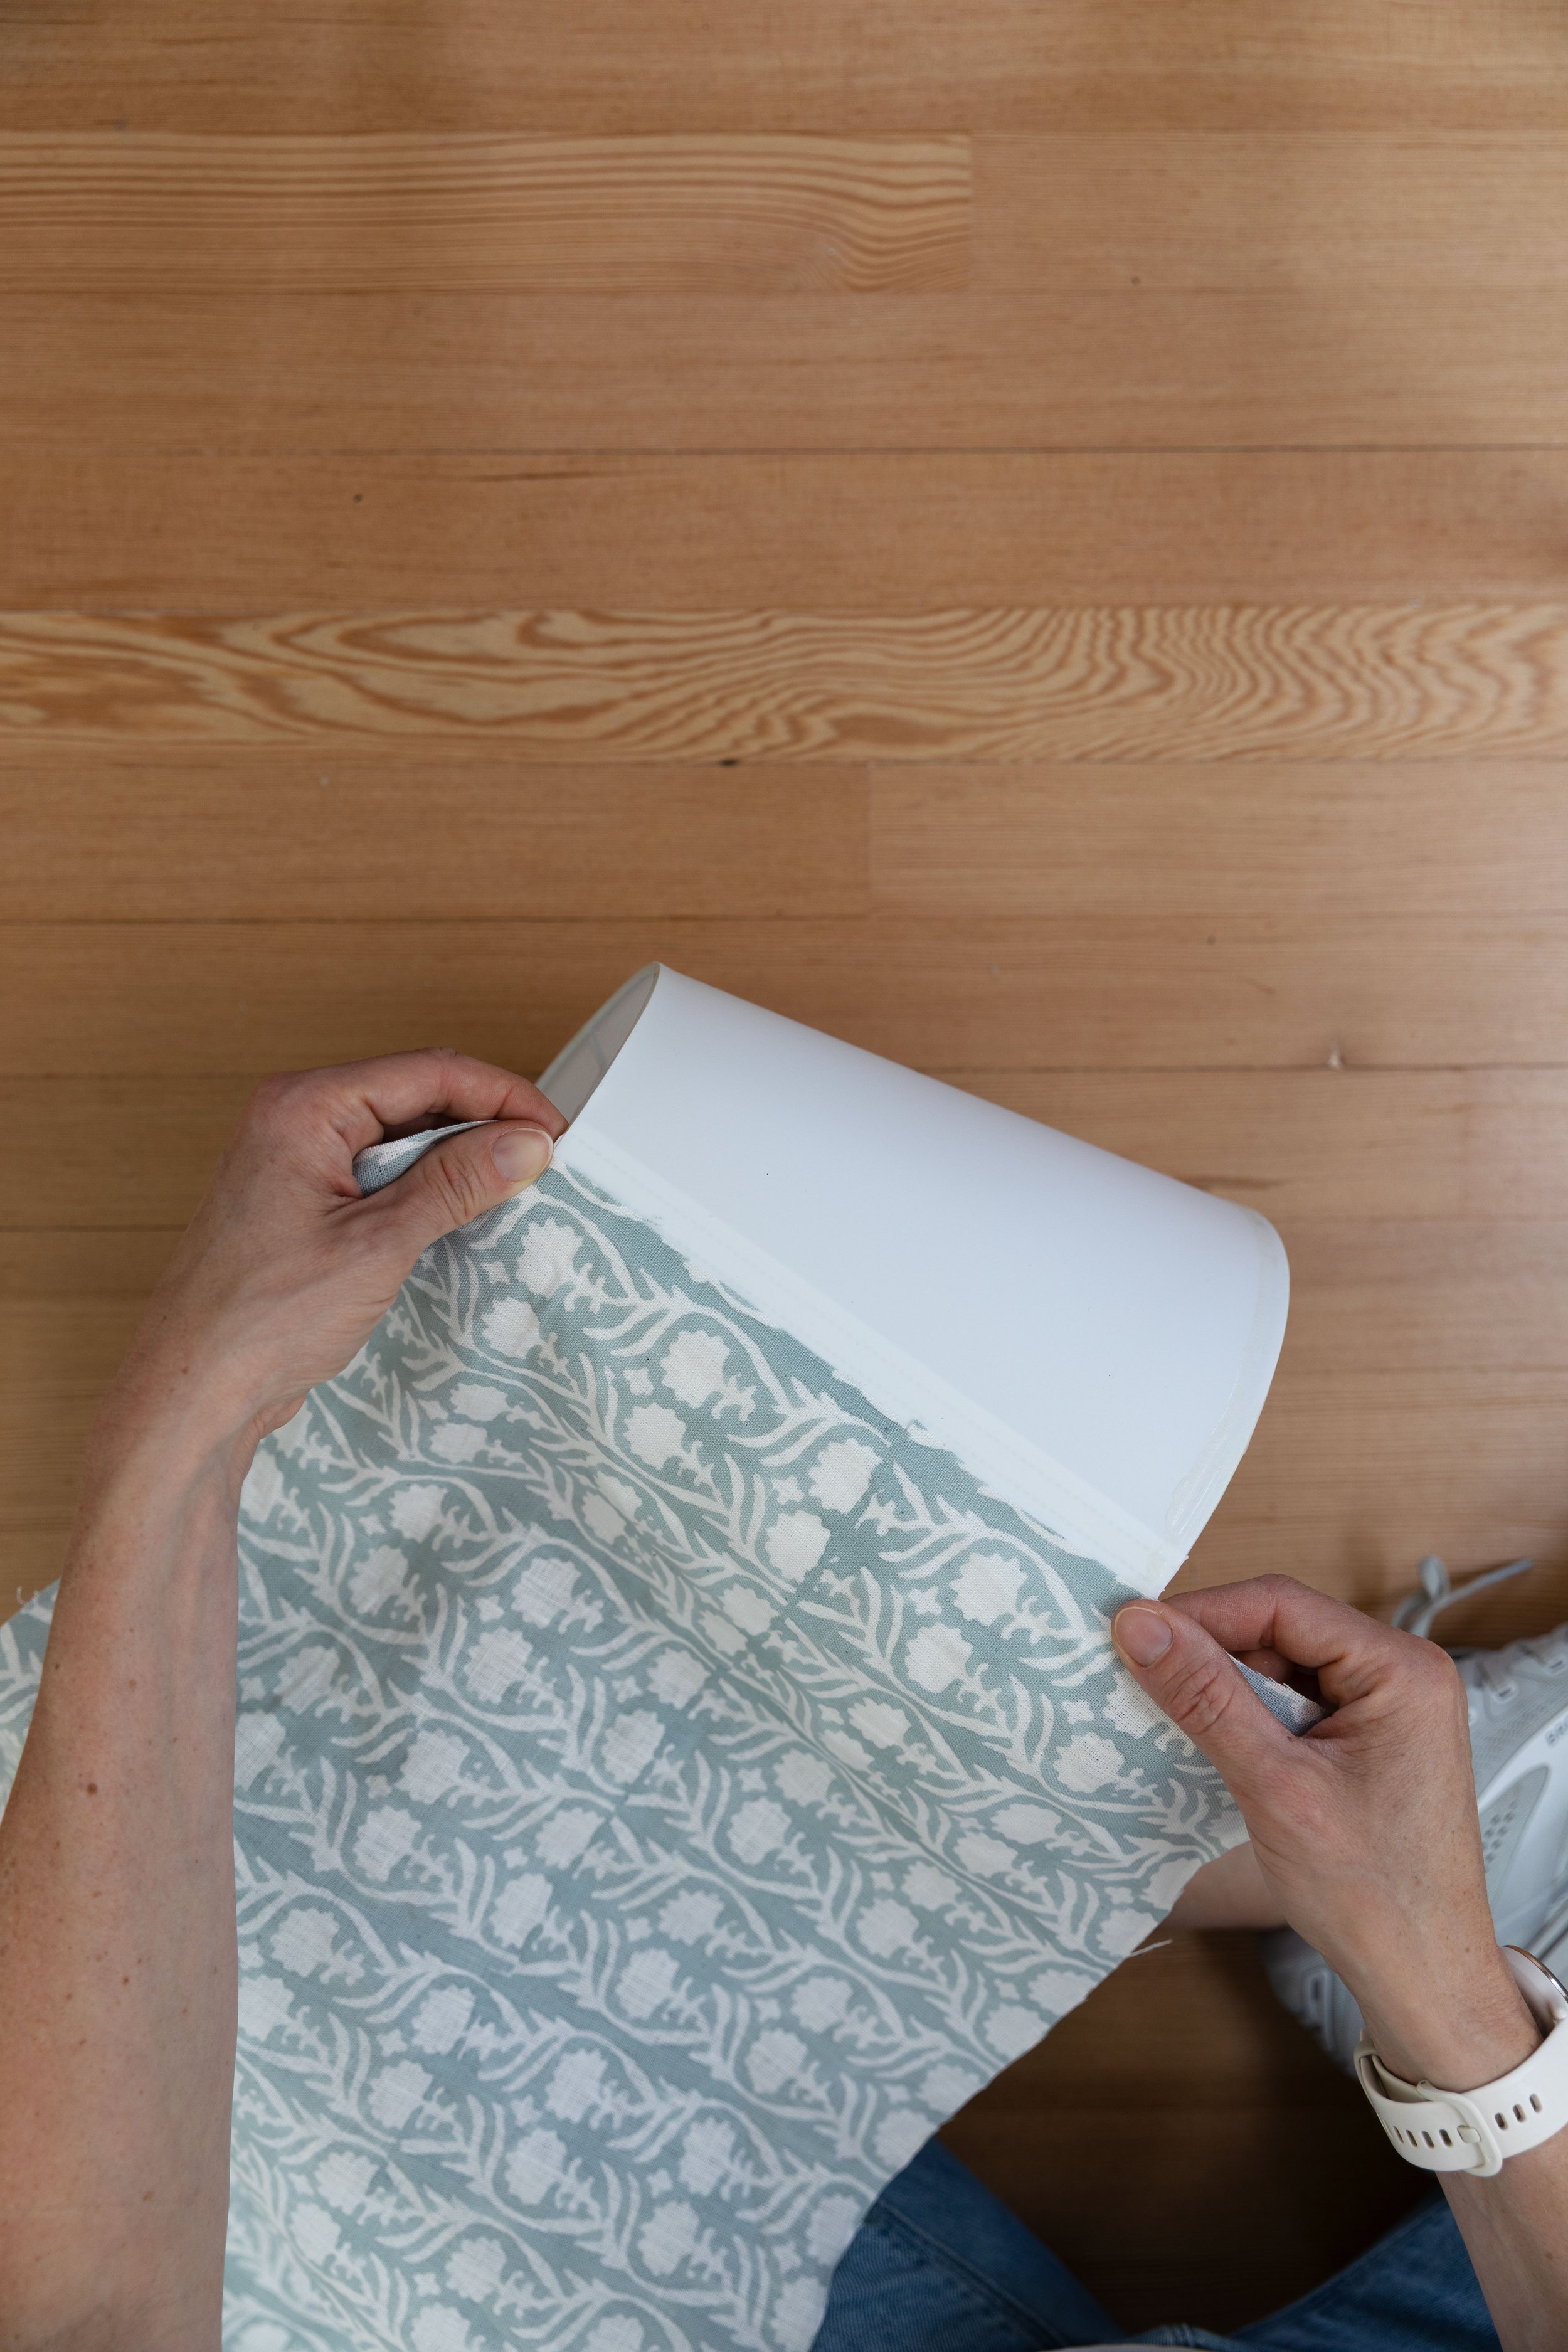
Step 1 // Cut fabric to size
To cut the fabric for your lampshade, you’ll want to measure the height of your lampshade and add at least one inch on the top and bottom (excess will get cut off at the end). Don’t cut the length of the fabric until you finish the pleats.

Now’s a good time to iron your fabric.
You’ll need another strip of fabric 2” tall for the top and bottom trim, but we’ll get to that in the last step.
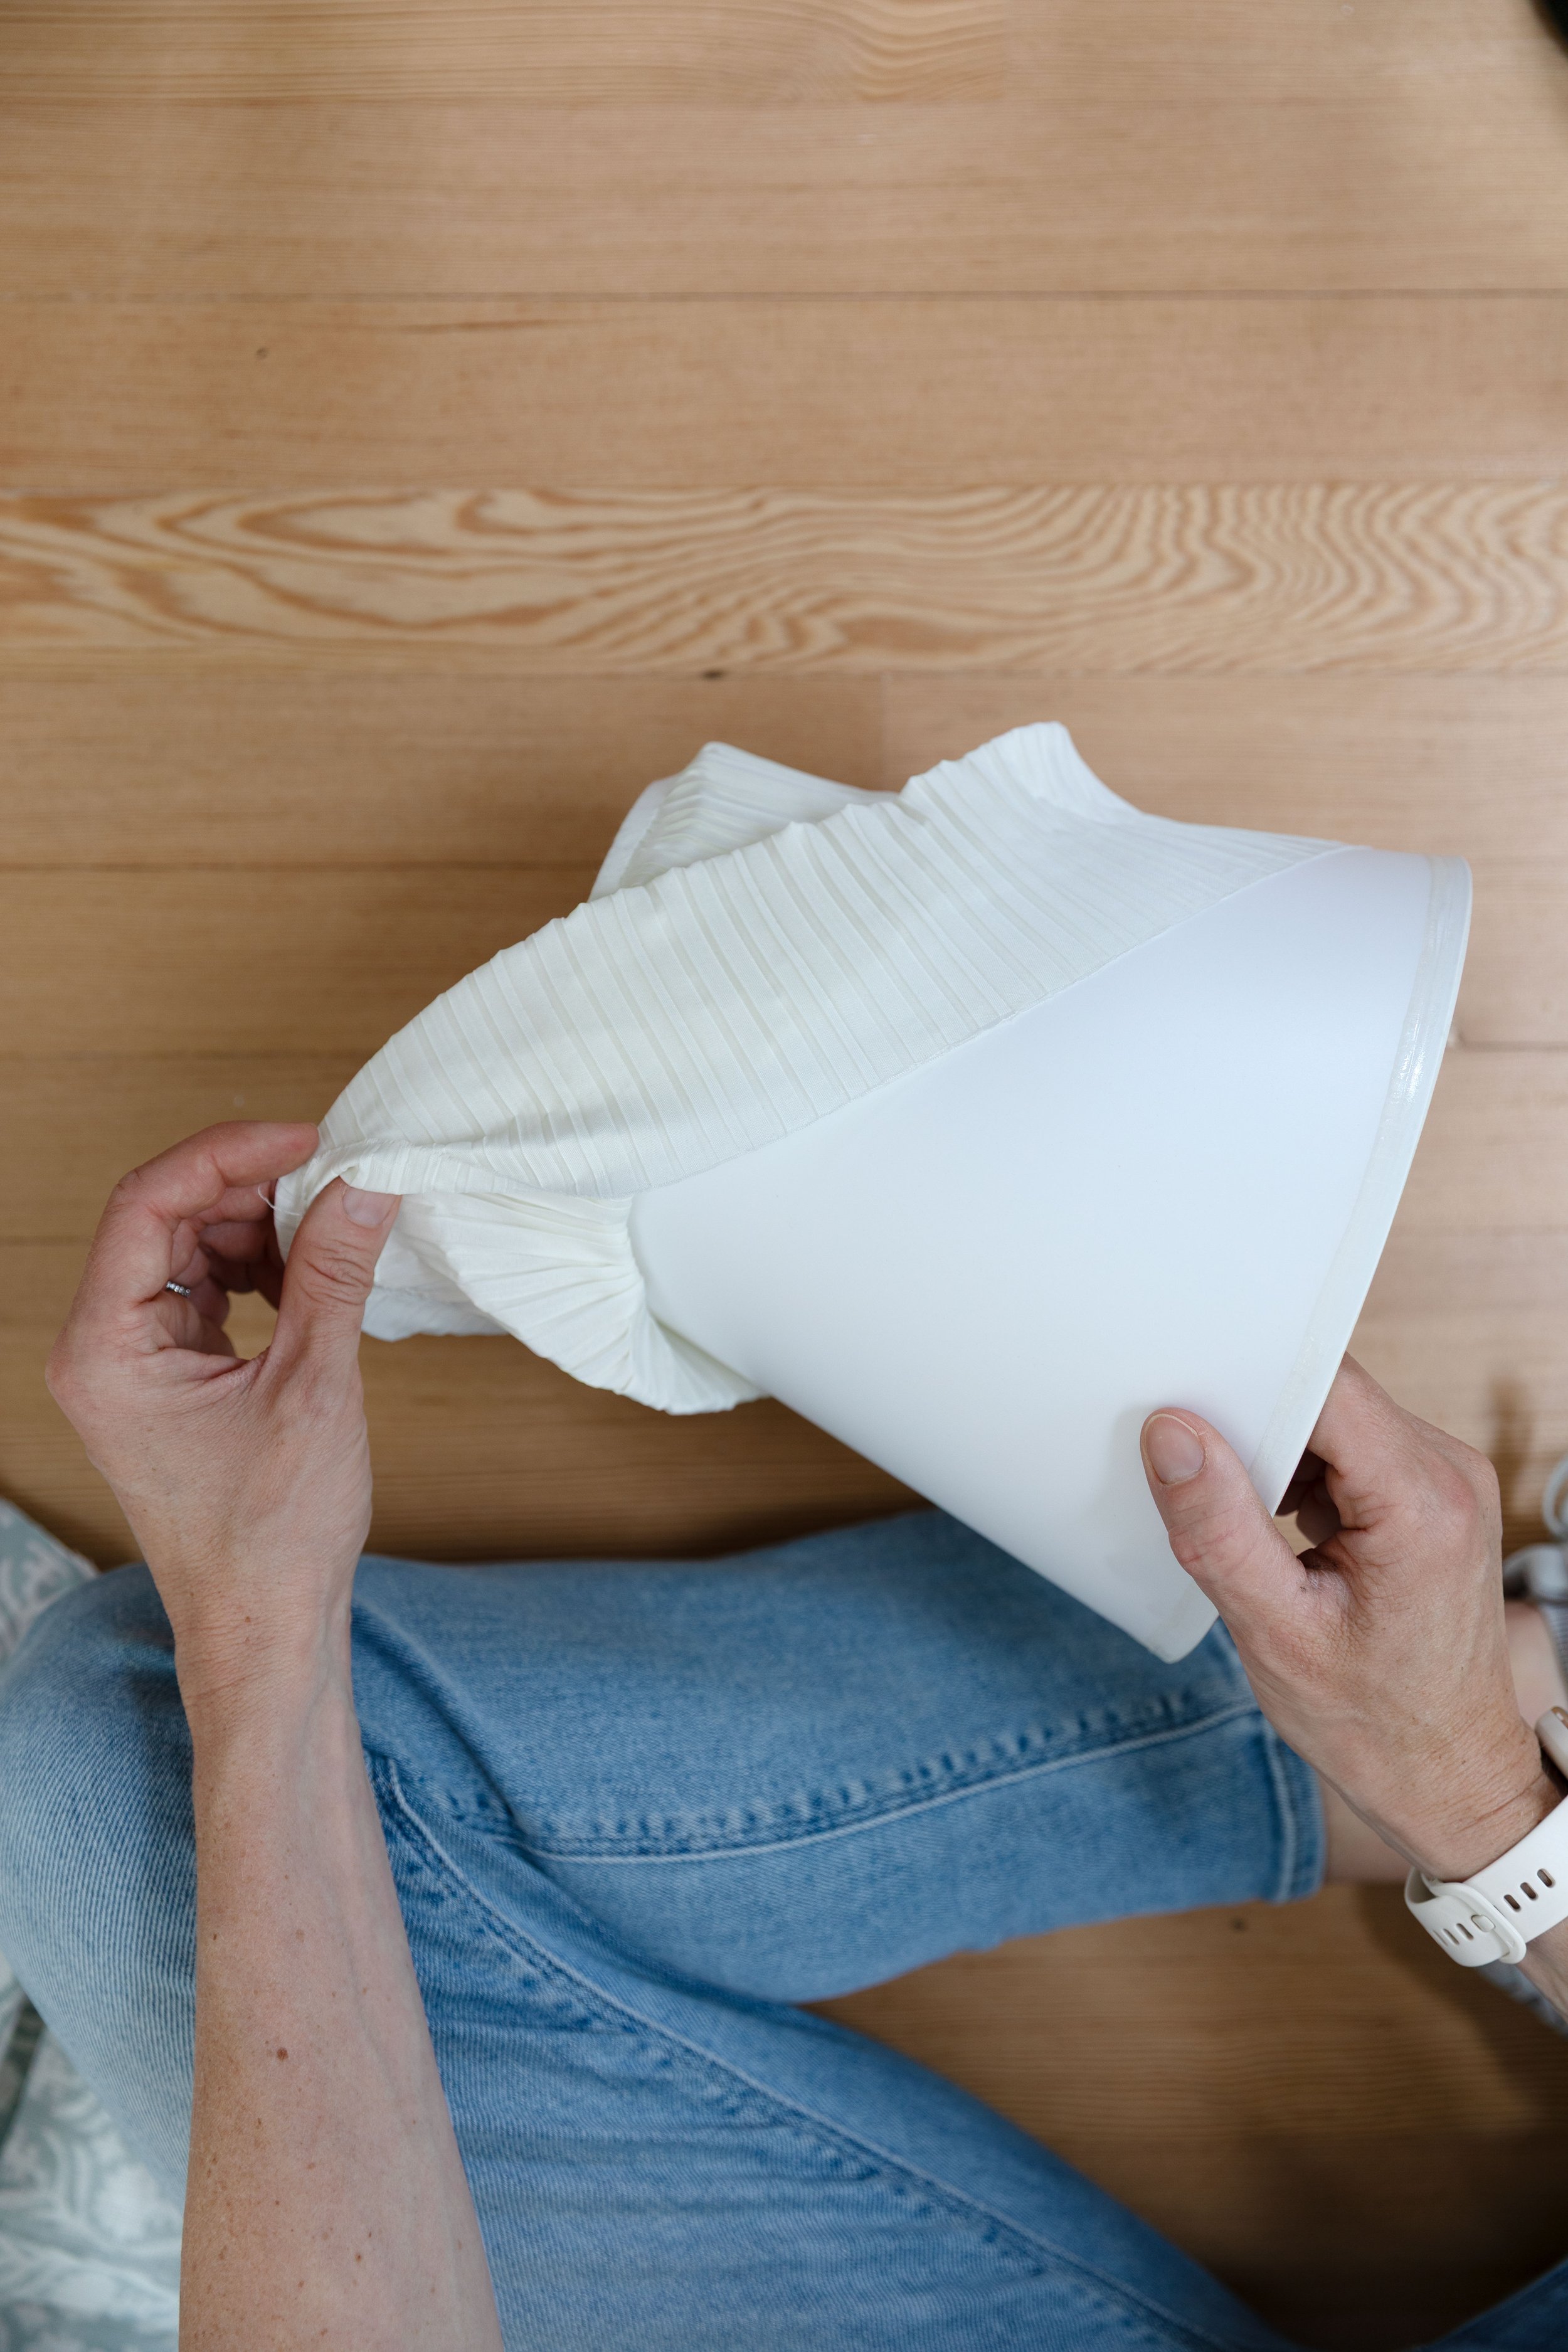
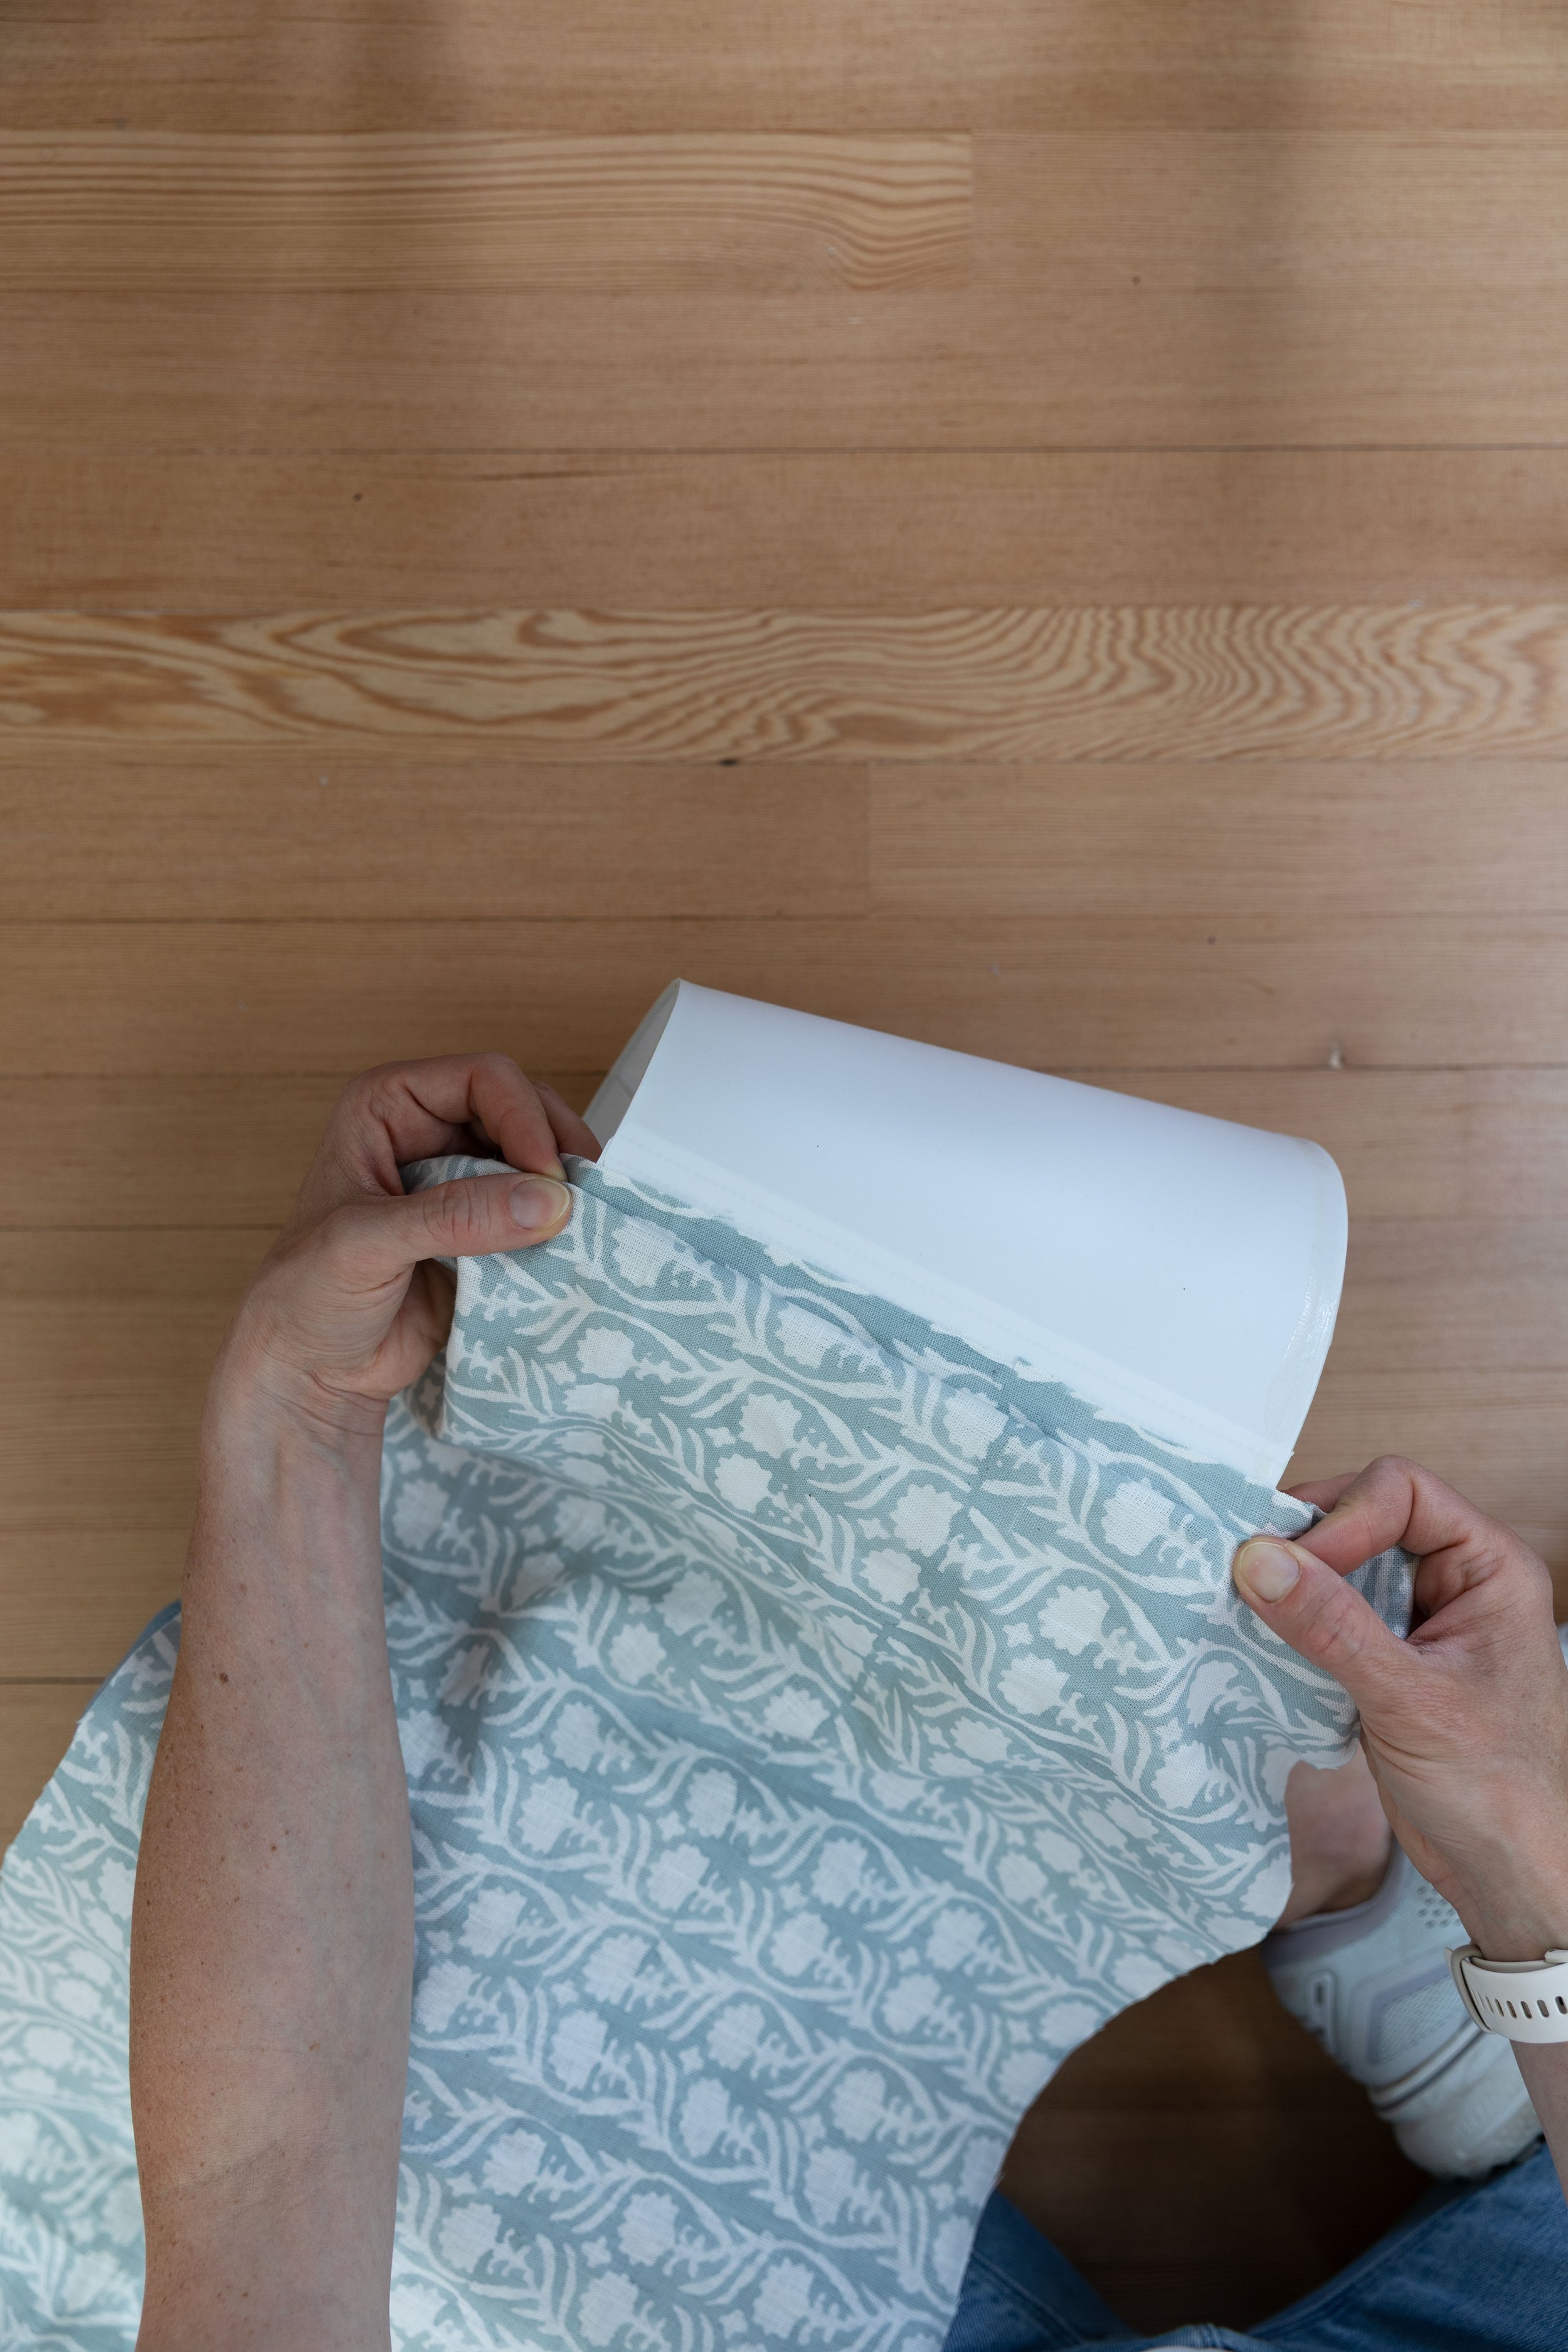
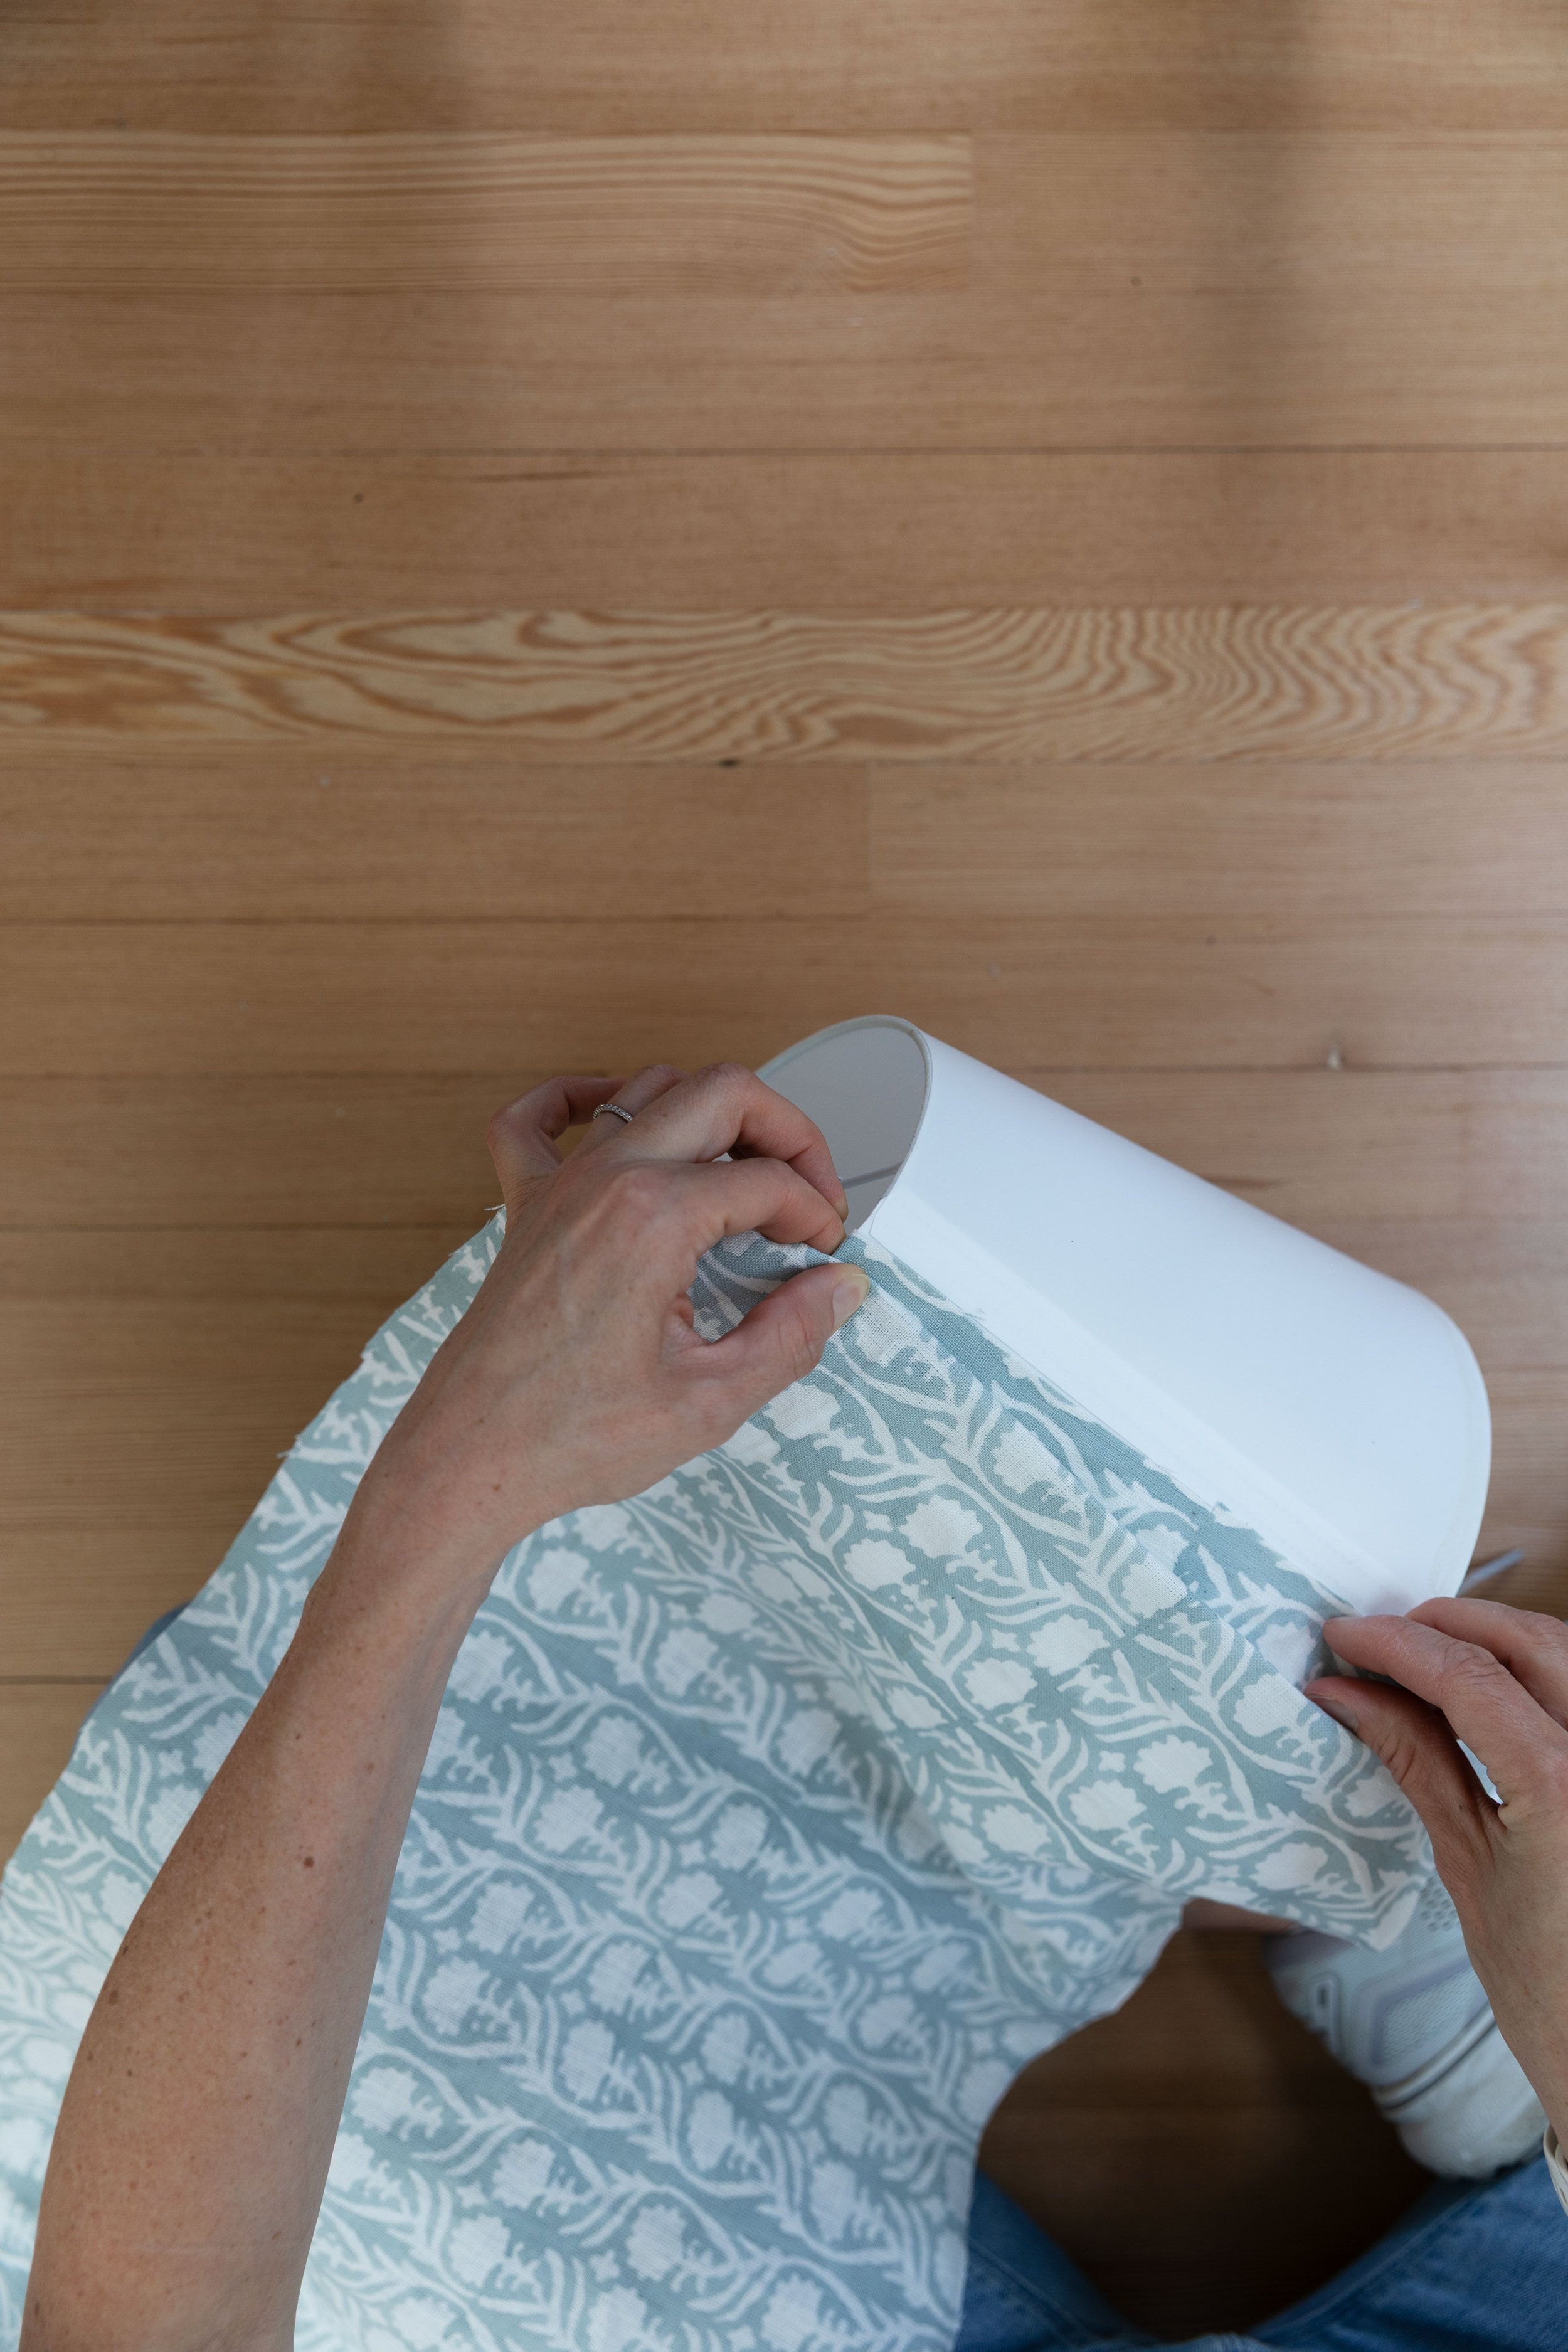
Step 2 // Glue fabric to lampshade
Position the fabric on the lampshade, making sure to leave excess fabric at the top and bottom of the shade. Add a strip of hot glue down the height of the lampshade at a seam (if you have one), and then gently push fabric down and pull it taut at the top and bottom so you don’t have any gaping. Hot glue sets up quickly so and fabric will be attached within seconds. Watch your fingers, hot glue is…well, hot!

Step 2 pleating
Making this lampshade is just a series of pleats, with the first and last taking a little bit of extra time. Here’s the general process of pleating and I’ll explain each step in more detail below with pictures…
Make pleat fold in fabric
Add glue to top of pleat
Hold down top of pleat while the glue to sets
Pull pleat taut to bottom
Add glue at bottom of pleat
Hold down bottom and top of pleat while glue sets
Easy enough, right?!
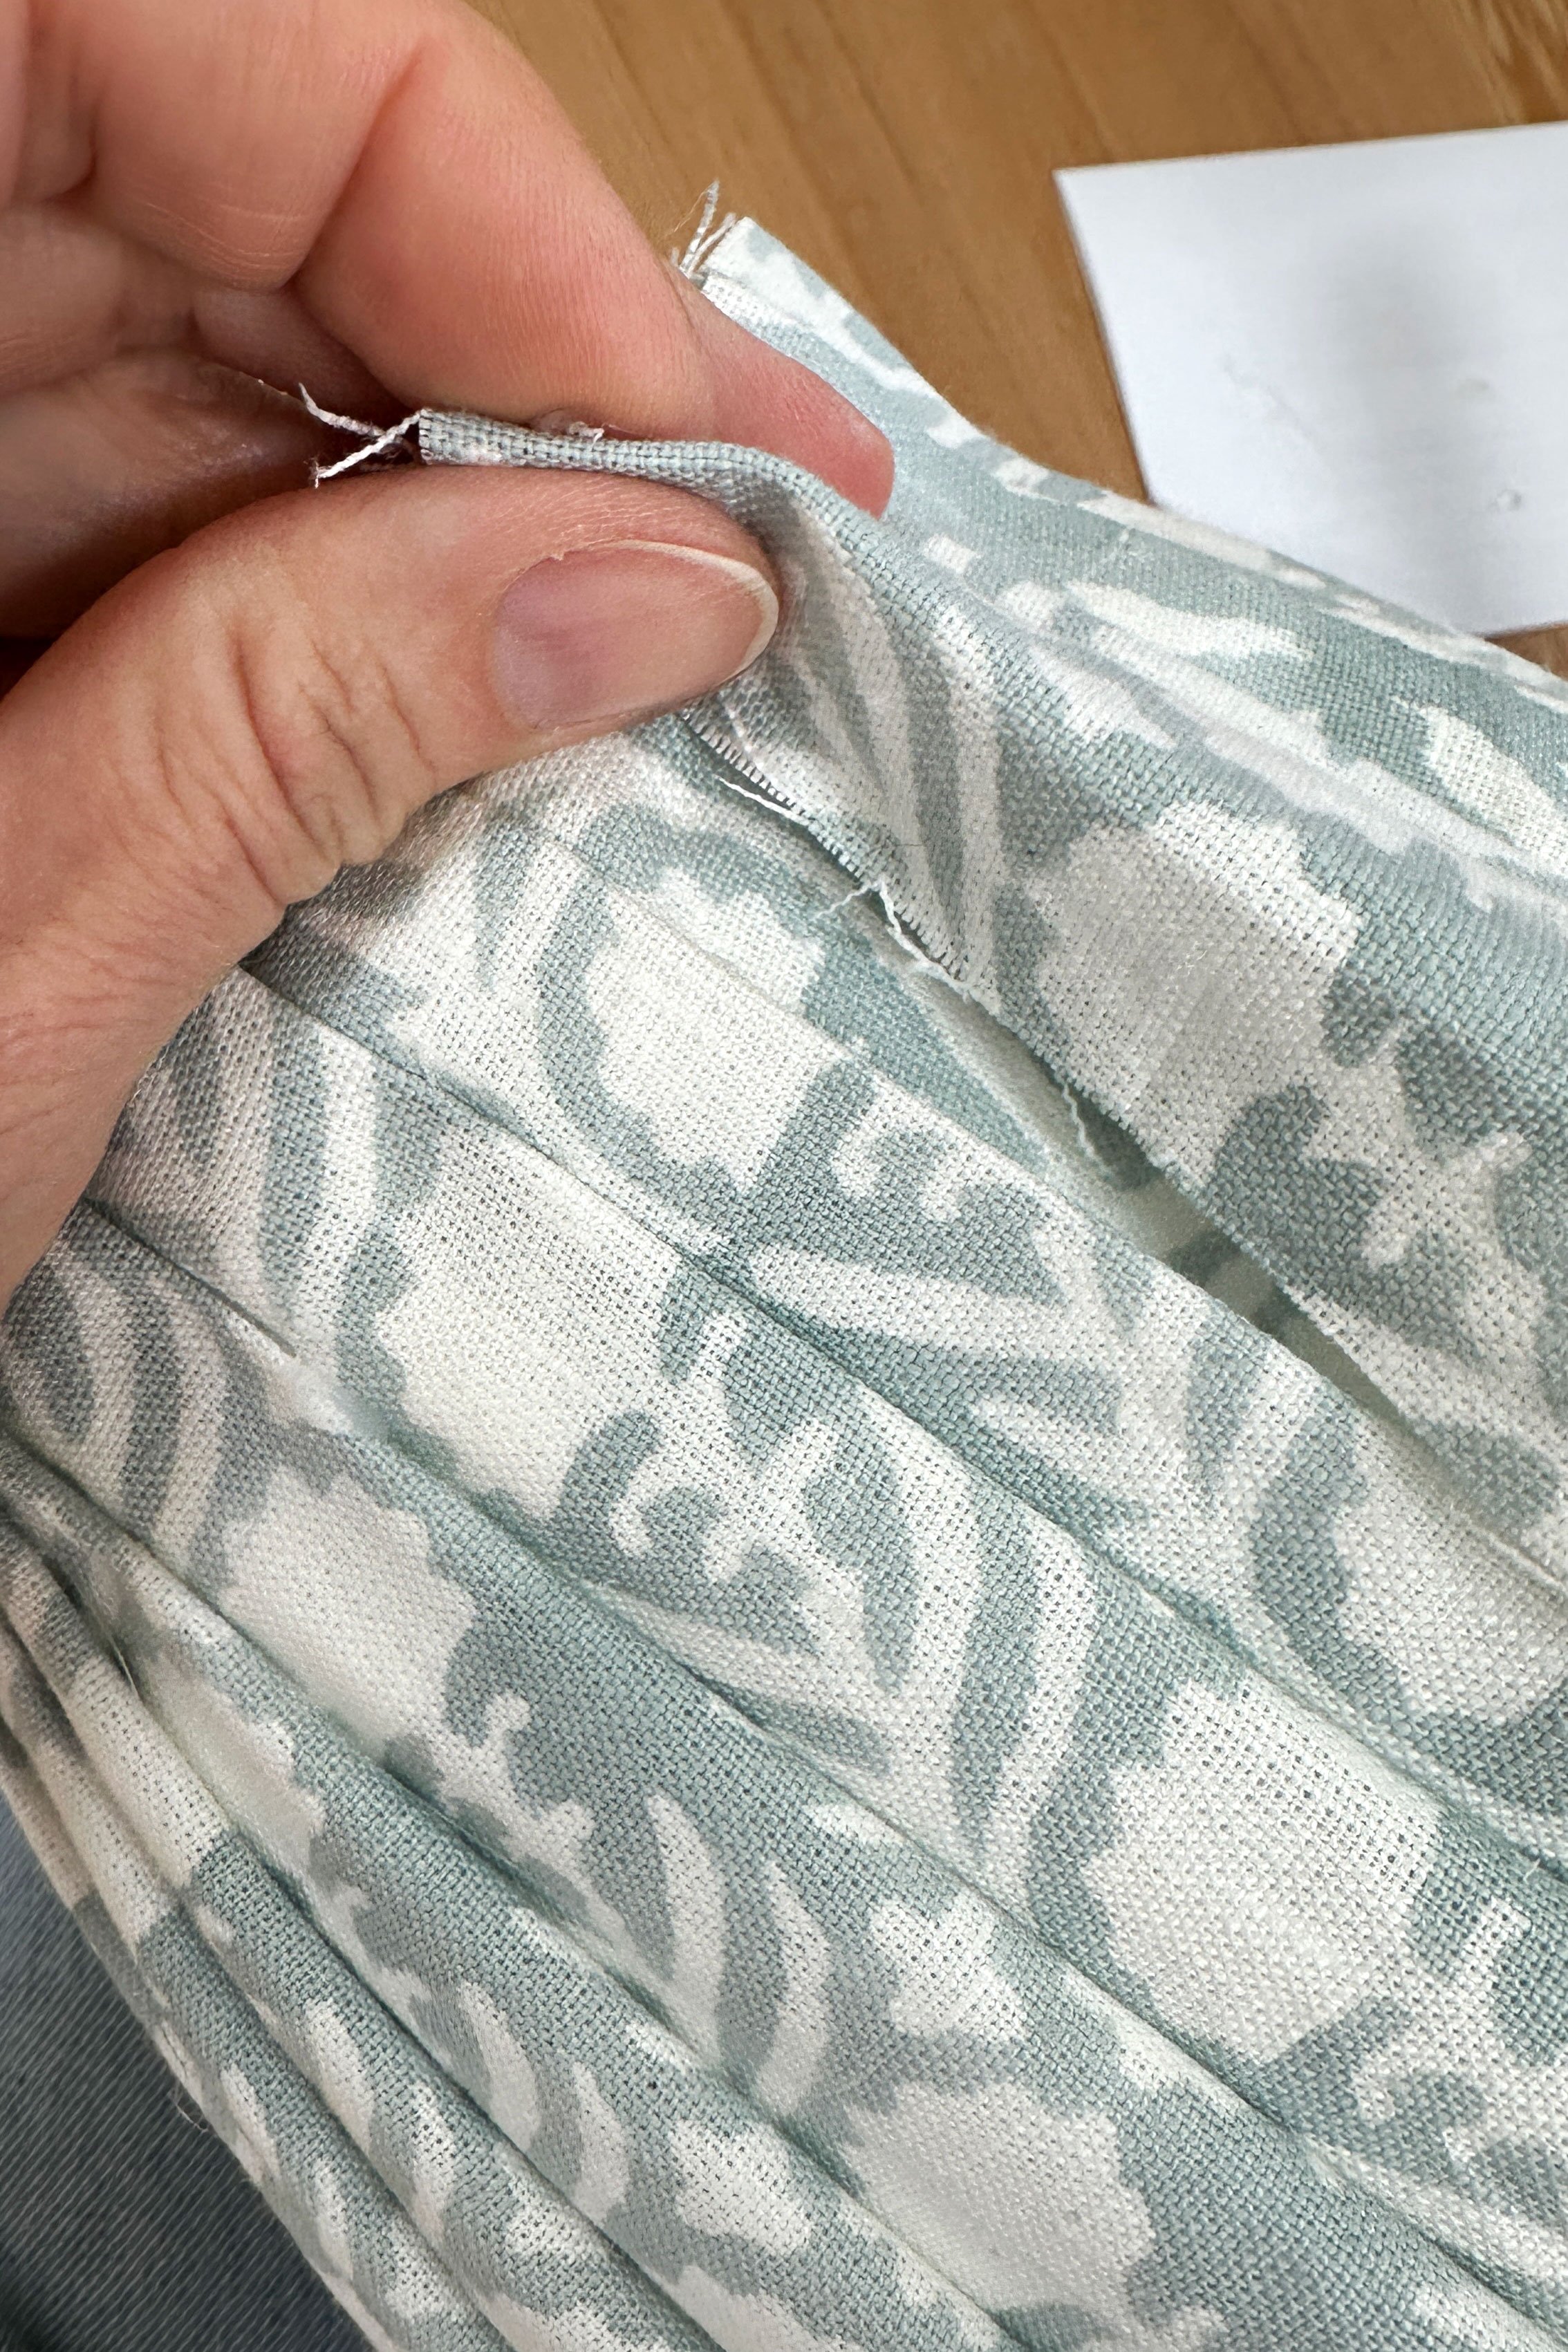
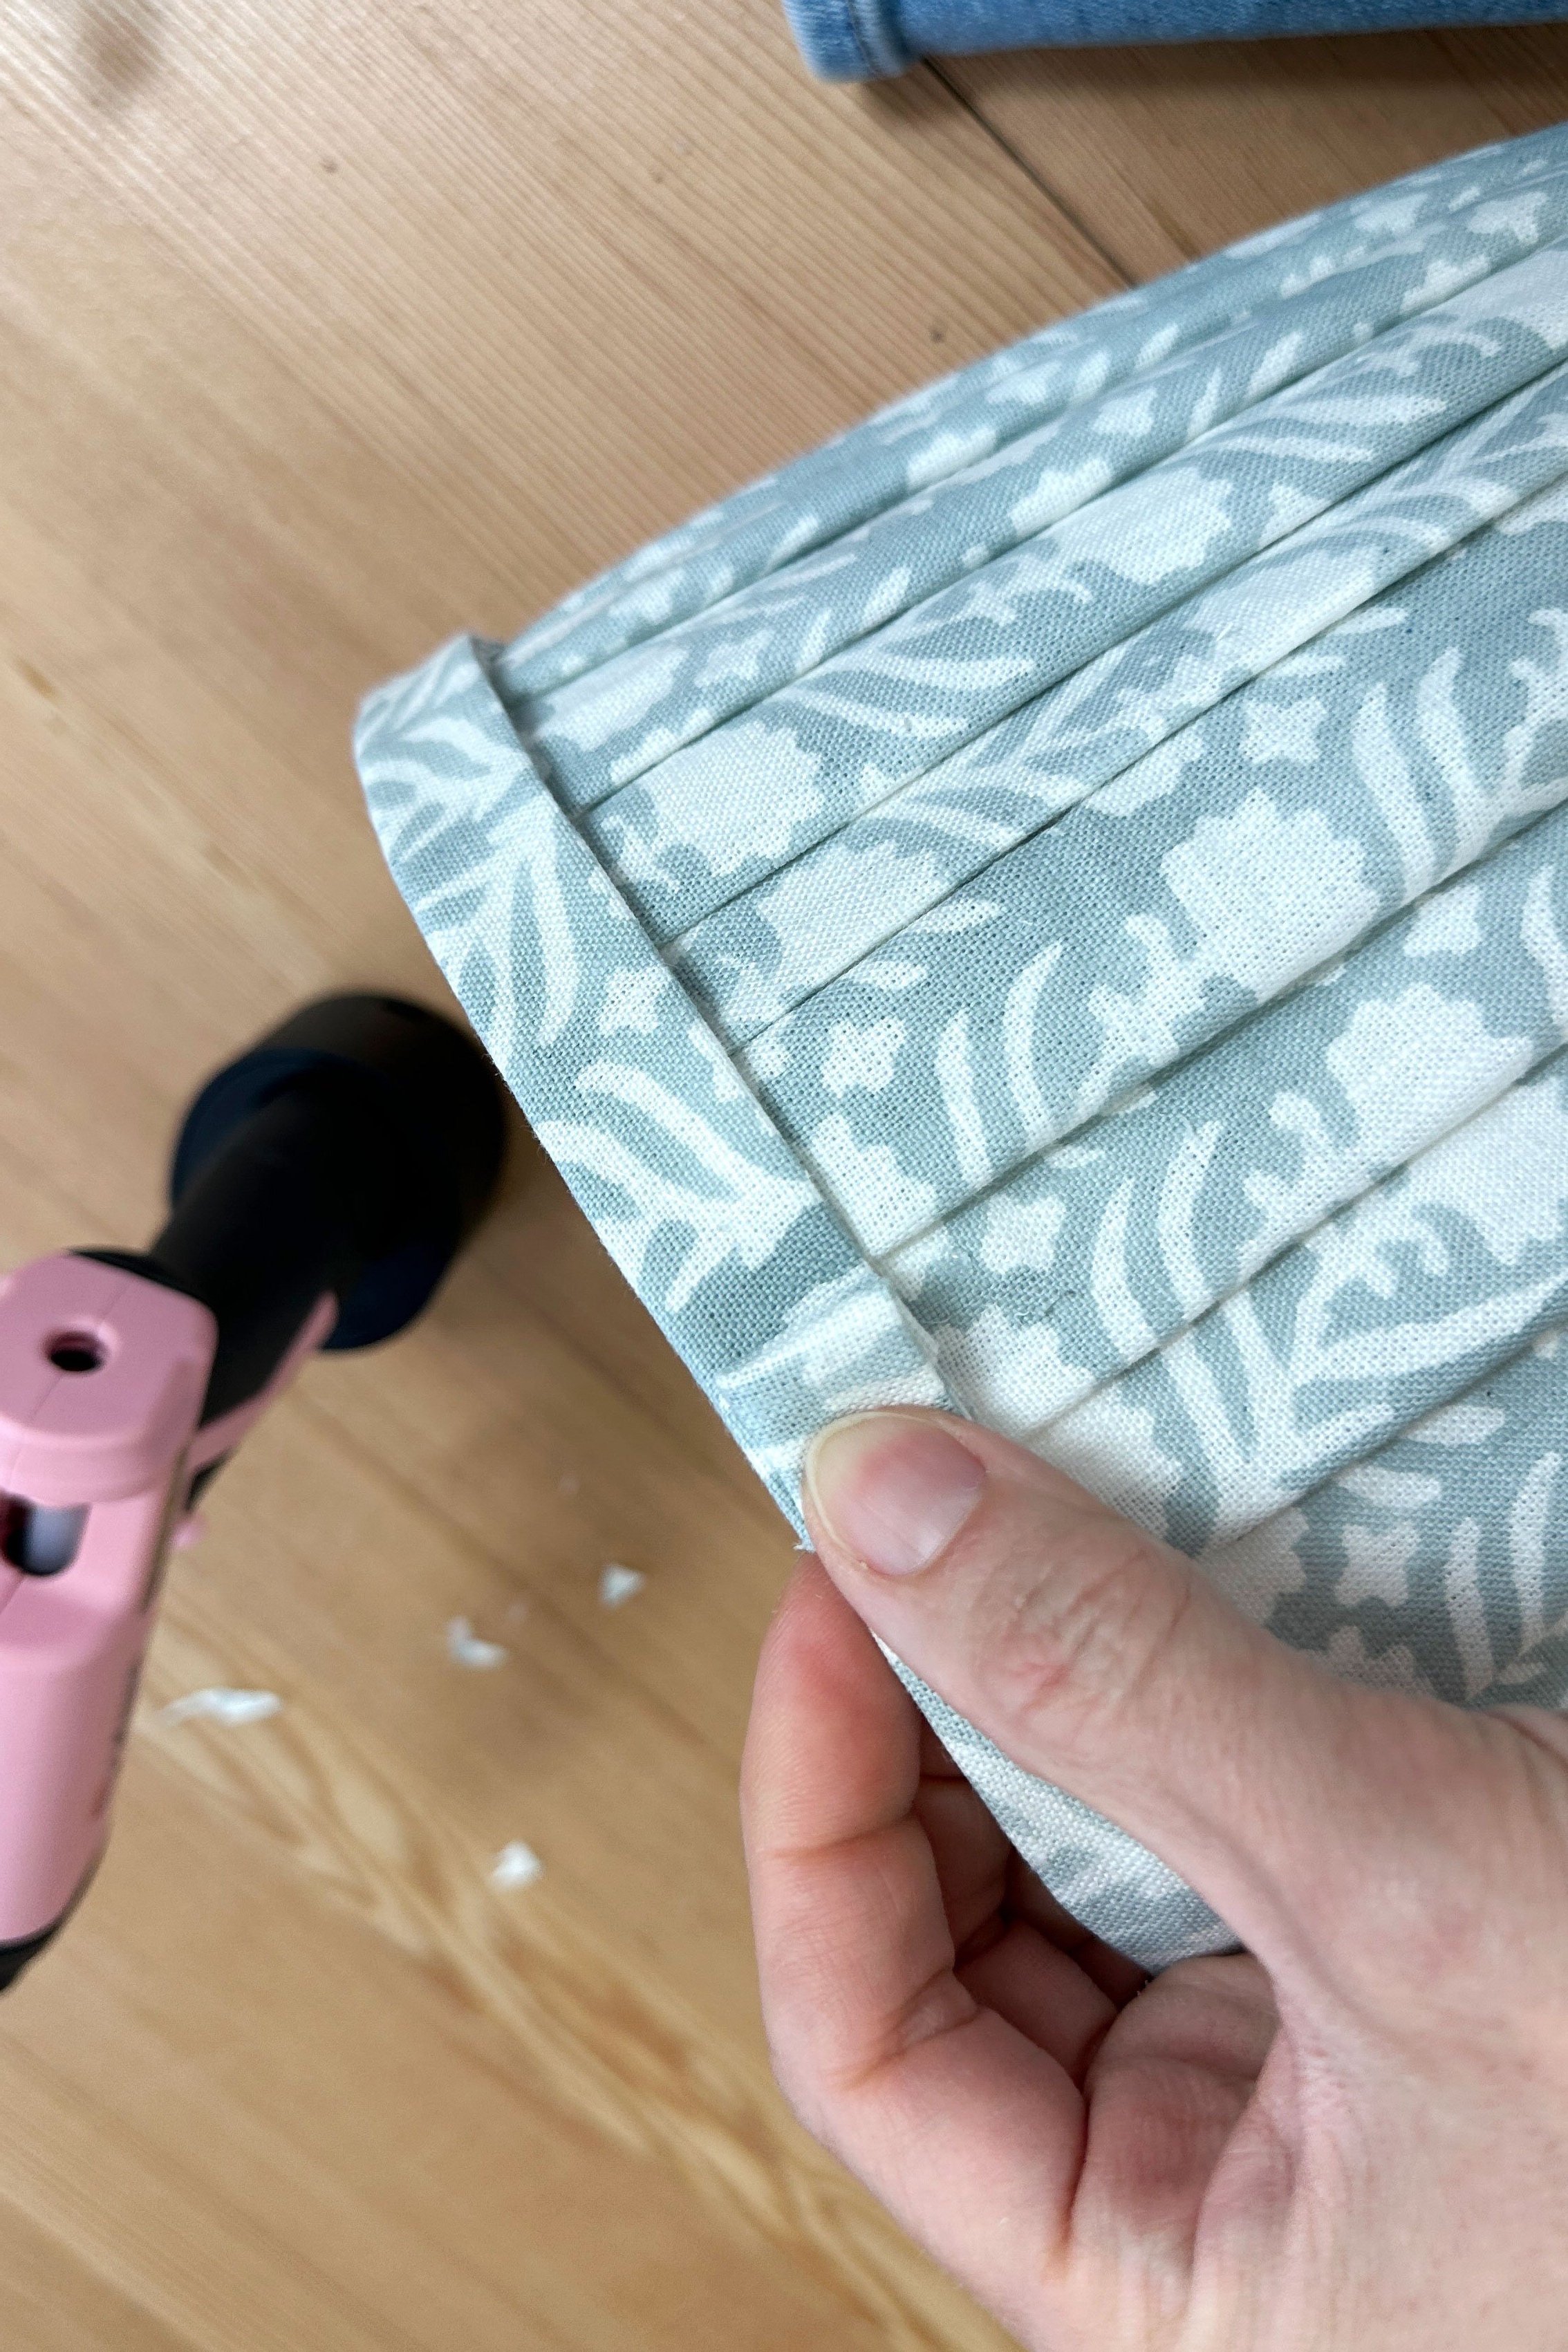
To make your first pleat, you’ll want to fold the fabric over itself like I did in the first pic below. The size of pleat is up to you, but you’ll want to keep them fairly consistent around the whole lampshade.
A note on non-cylindrical shades… If you’re lampshade isn’t cylindrical (meaning the top circumference is narrower than the bottom circumference) then you’ll need to adjust your pleat accordingly. Measure your top and bottom circumference and determine the ratio of top to bottom. My top circumference was about 15” and my bottom was 28” so that’s close to 1:2. So my pleat needed to be twice as big at the top as it did at the bottom in order for the fabric to stay horizontal. I used my fingers to guestimate the 1:2 ratio while making the pleats, but you could use a tape if you want to be exact. Another way to keep your fabric on track if you have a vertical pattern like mine, is to make sure the pattern continues to run along the height of the lampshade. You’ll know pretty quickly if you get off on your ratio since the fabric will move towards the top or bottom of your lampshade and your excess will become zero.
Once you’re happy with the size/length/look of your first pleat, add a small pea-size dab of glue on the underside of the pleat. Glue should be within 1/2” of the top so it’ll be covered by the trim. Hold pleat down with your fingers while the glue dries.
Add an additional dab of glue to the backside of the fabric to adhere it to the lampshade if needed (my fabric was thin enough that the initial dab usually seeped through to the back).

Next, add a dab of glue to the bottom of pleat (within 1/2” of edge of lampshade) and hold fabric taut along height of lampshade while the glue sets.


And that’s it, your first pleat is done! Now it’s production time. Make your second pleat and then your third and so on…


A reminder: your pleats don’t have to be perfect, they just need to look good. I had to adjust the size and fold a bit to keep my fabric from moving up or down on the lampshade (that pesky non-cylindrical issue). But no one’s going to notice small tweaks ;)

If you run out of fabric, no big deal! It’s easy to splice in another piece. Let me show you how…
Splicing two pieces of fabric together
If you run out of fabric, you can add another pice. Start by lining up the pattern and then fold the edge of the new piece of fabric over, like a pleat, and glue it on top of the end of the last piece of fabric. Add as many pleats as you need to finish the shade. Once you get to the first pleat, cut the fabric 1/2” long and then fold it back under to make a backwards pleat - essentially the final pleat will be double sided. The backside of your final pleat should touch the front of the first pleat. Glue down the front of the last pleat at the top and bottom like usual. And for the backwards pleat, glue top, bottom, and along the height of the shade (making sure the glue is hidden under the fabric fold). Here’s what that looks like in pictures…


At this point I like to look around the lampshade and add extra glue to any of the pleats that need it. And make sure the fabric is secured to the lampshade at the back of the pleats otherwise this next step will get interesting.
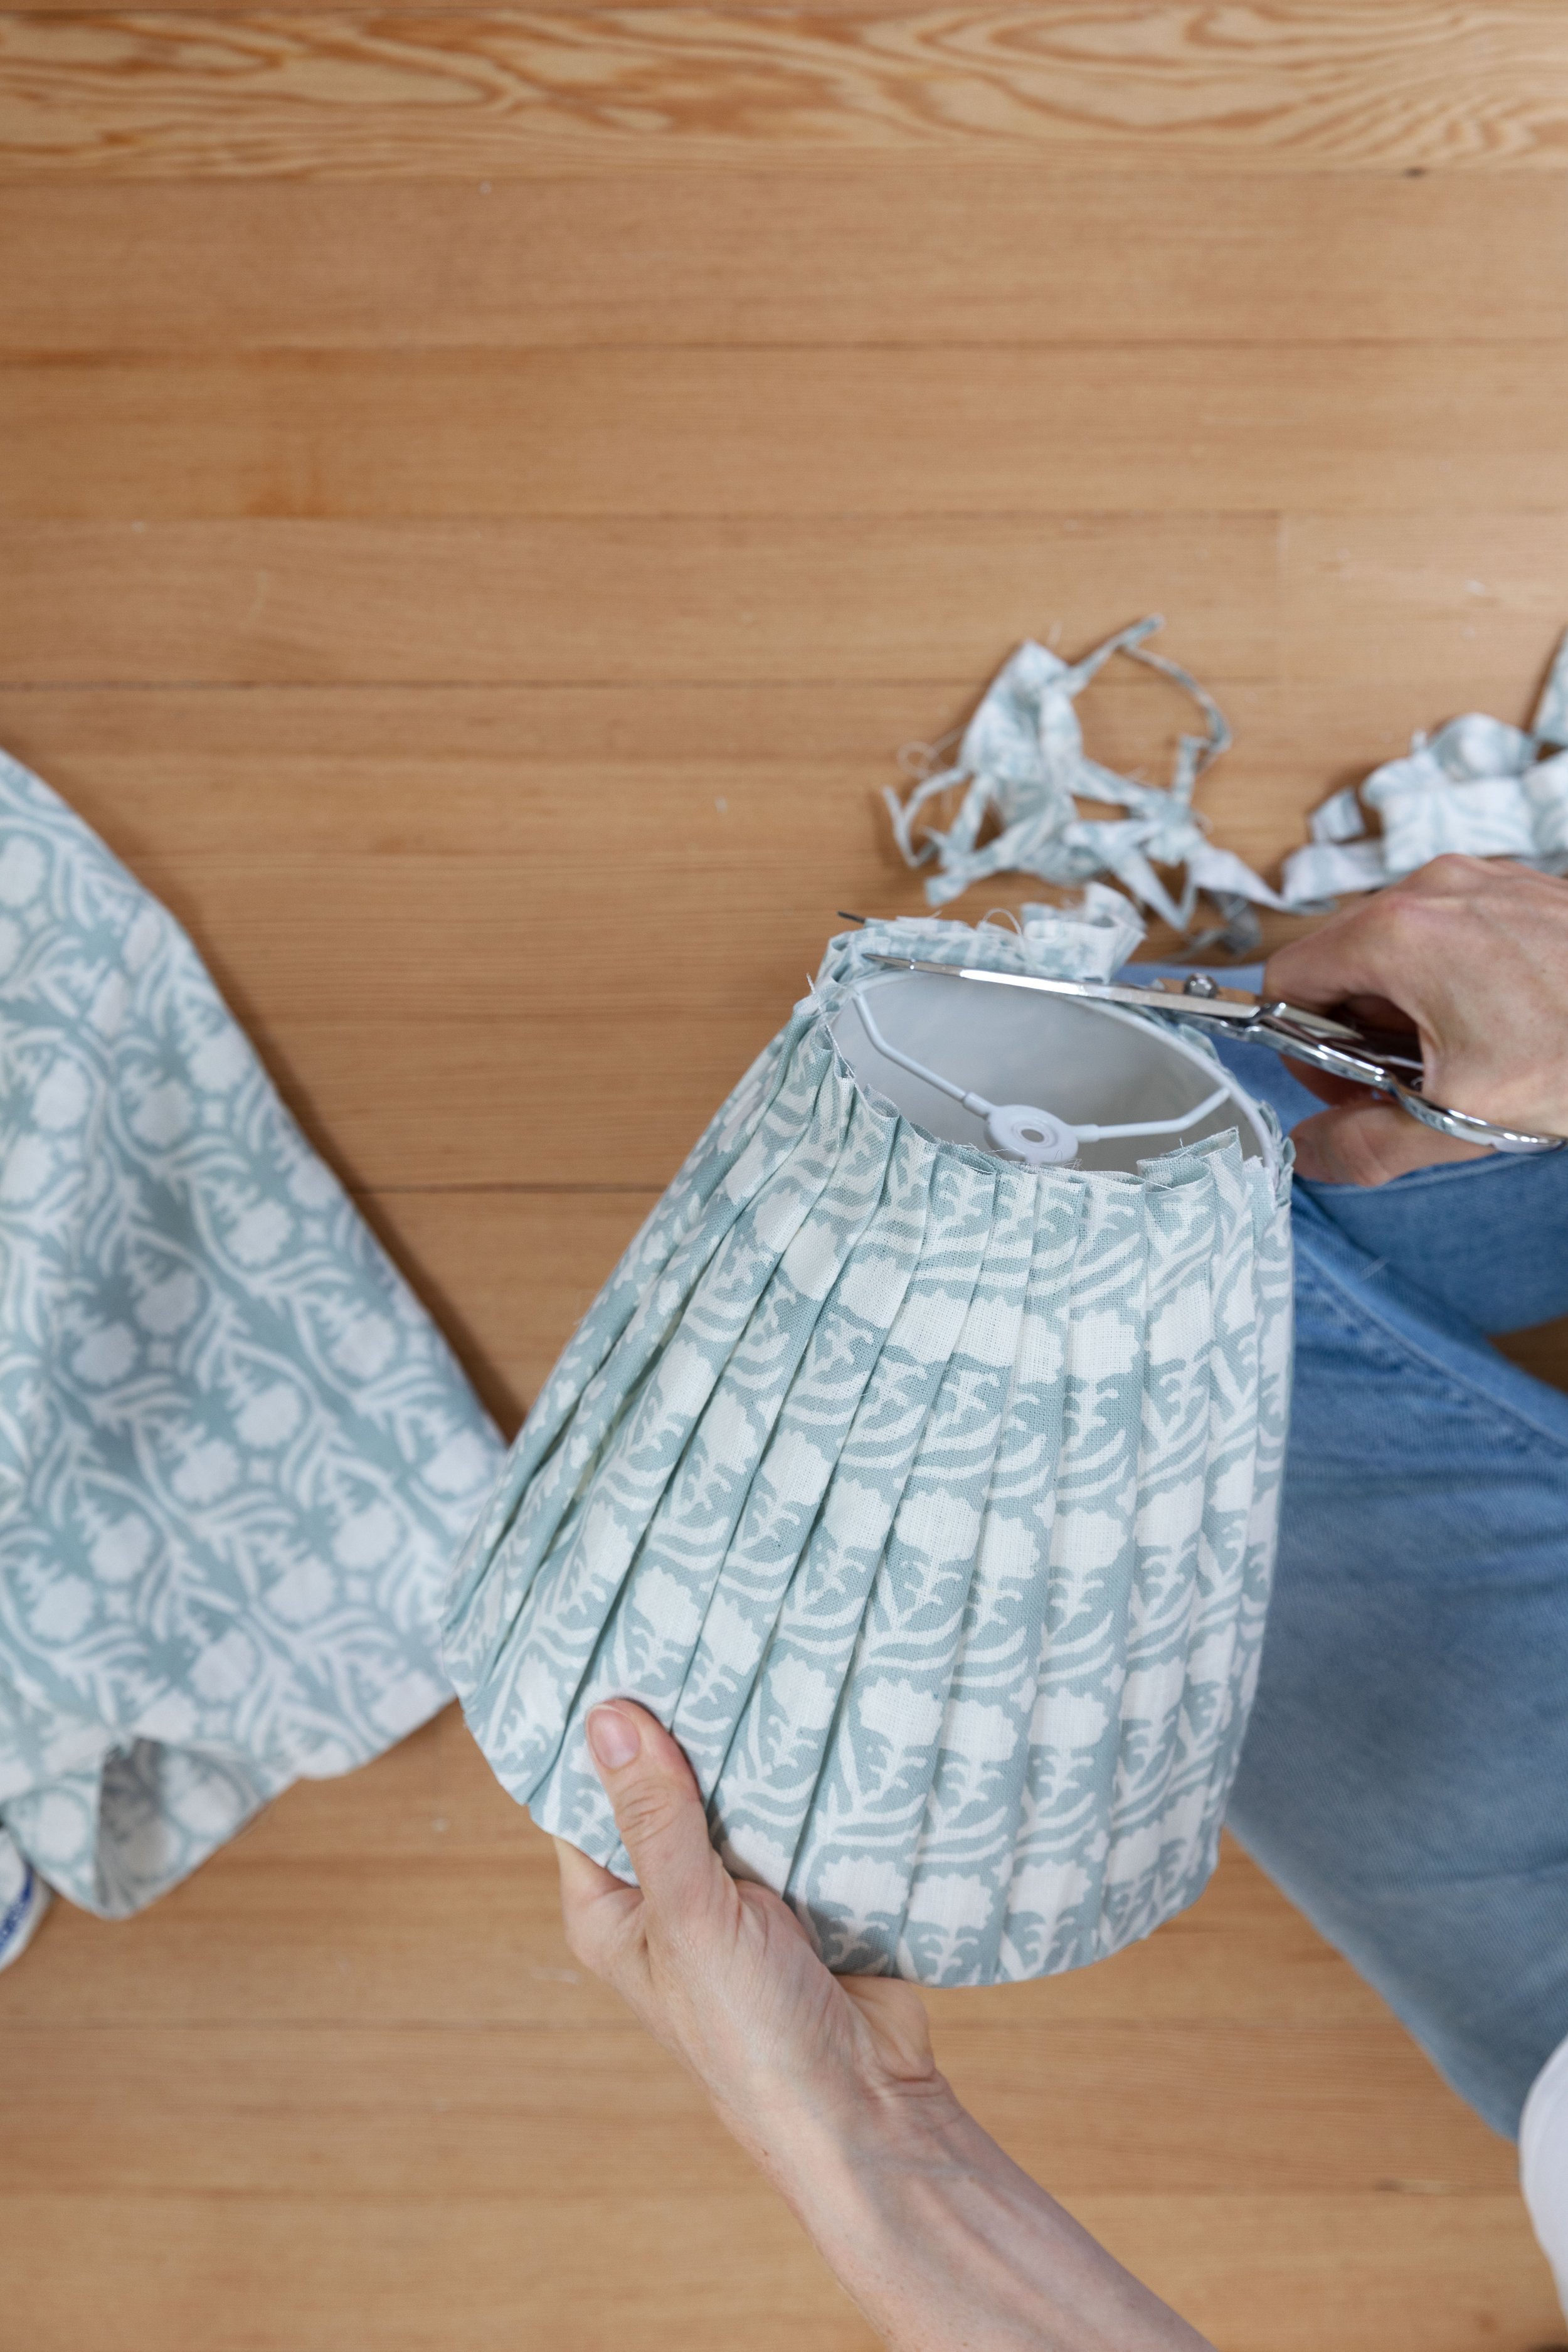
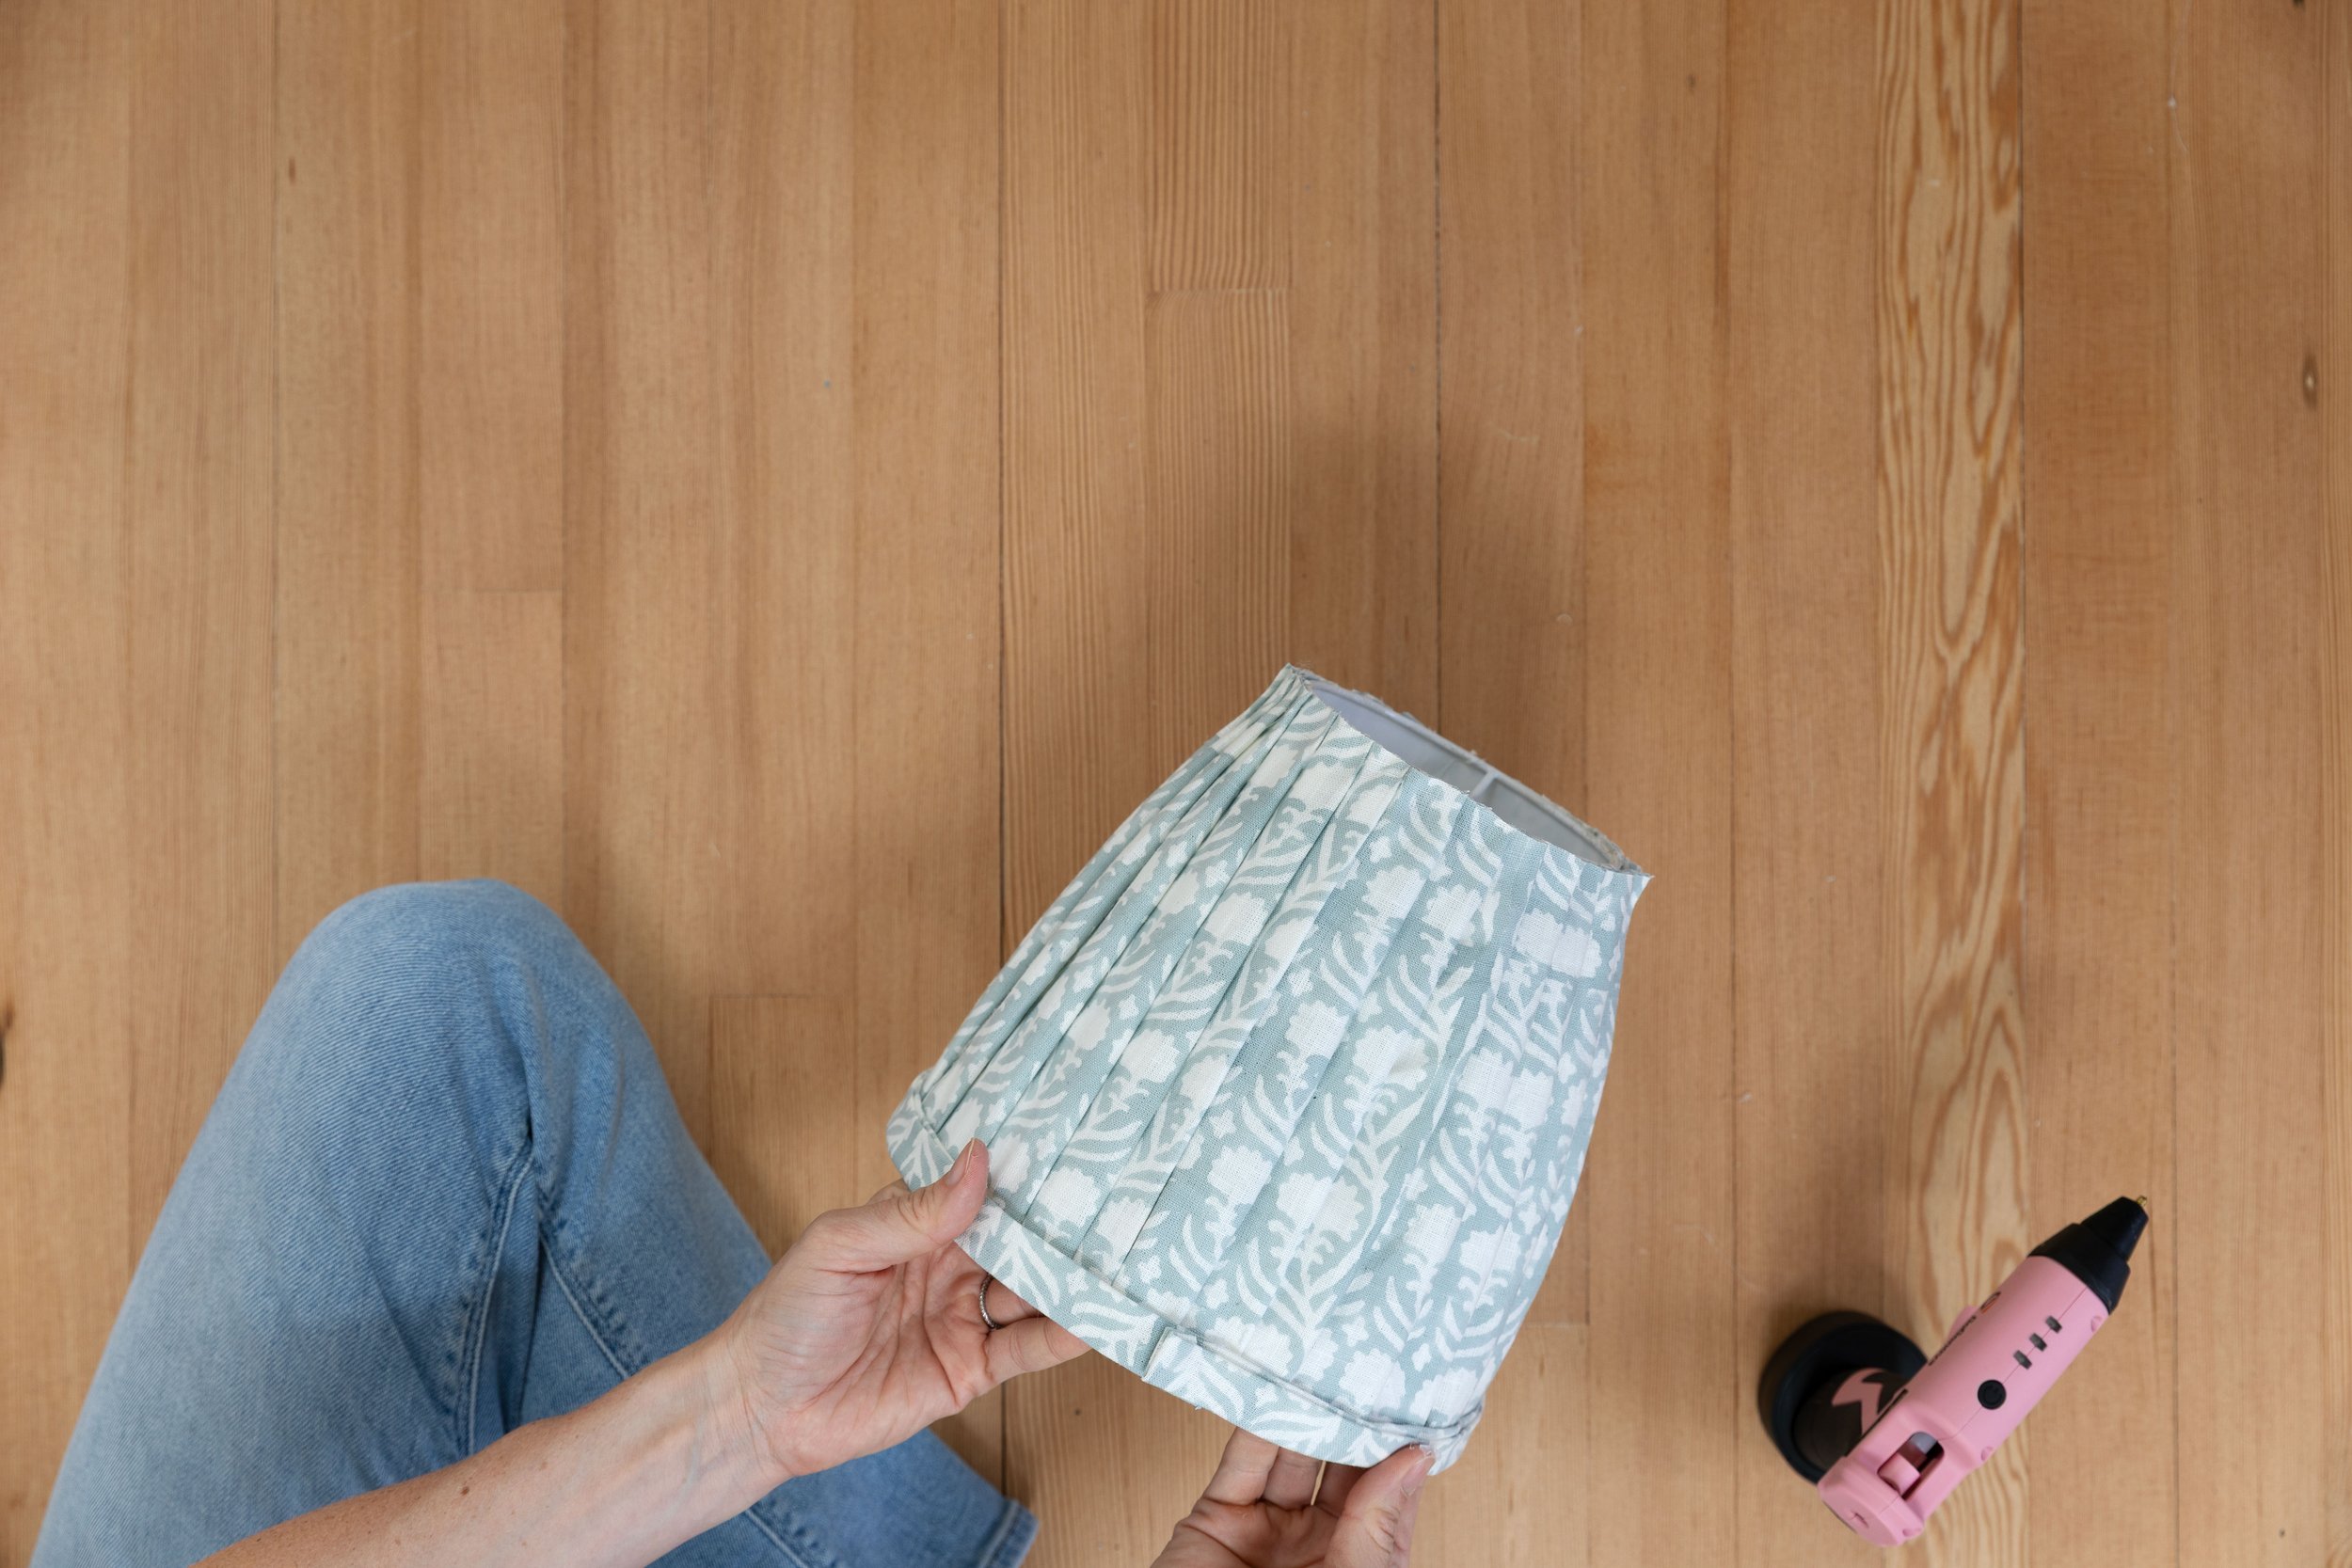
Step 3 // Cut excess fabric off
Now that all the pleats are in and the fabric is secured to the lampshade, you can cut off the excess fabric at the top and bottom of your shade. Use sharp scissors and cut as close to the frame as possible.


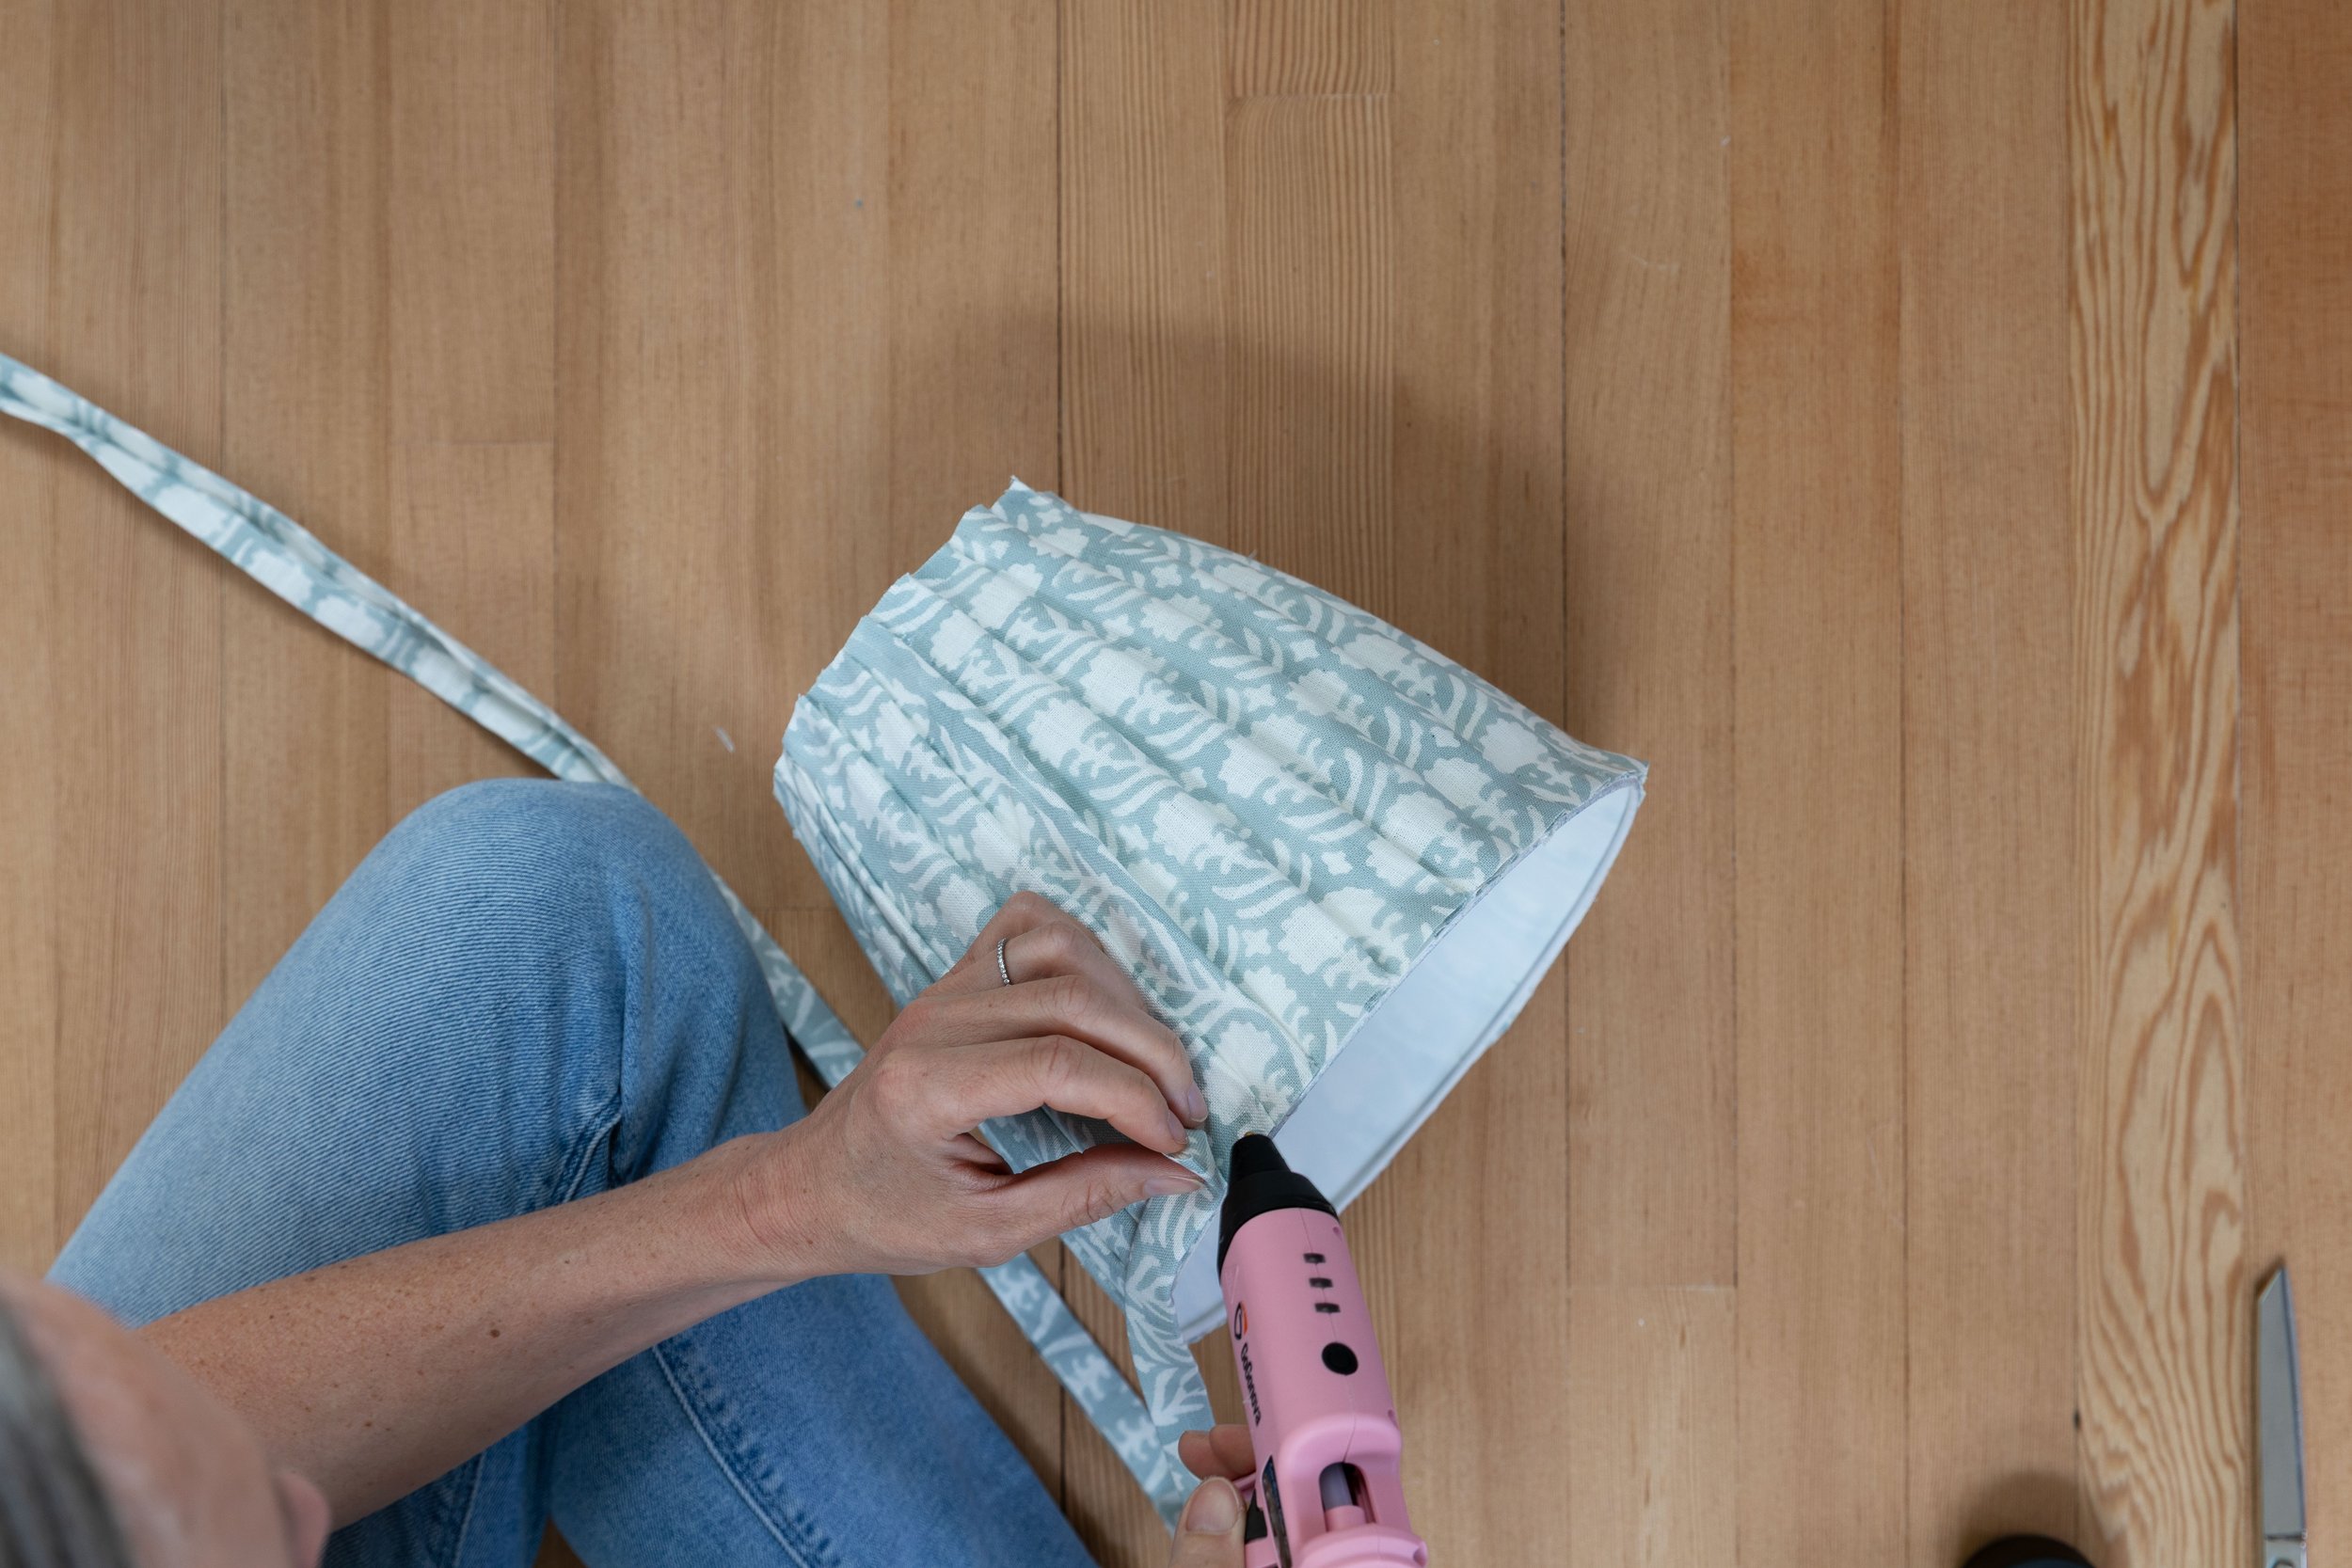
Step 4 // Trim
To make the trim, cut a 2” length of fabric long enough to go around the top and bottom circumference with at least a couple inches extra. Fold it in half with the good-side out, and iron that fold. Then bring the ends of the fabric into the middle, like a book jacket, and iron those folds in place.


Start the bottom trim near the seam where you started the pleats. I left my trim with the opening facing up (and the top trim facing down). Trim should be placed a bit below (~1/8”) the lampshade in order to hide the raw edge of the pleats. Glue down the beginning of the trim and then pull the trim taut as you continue to glue around the perimeter.

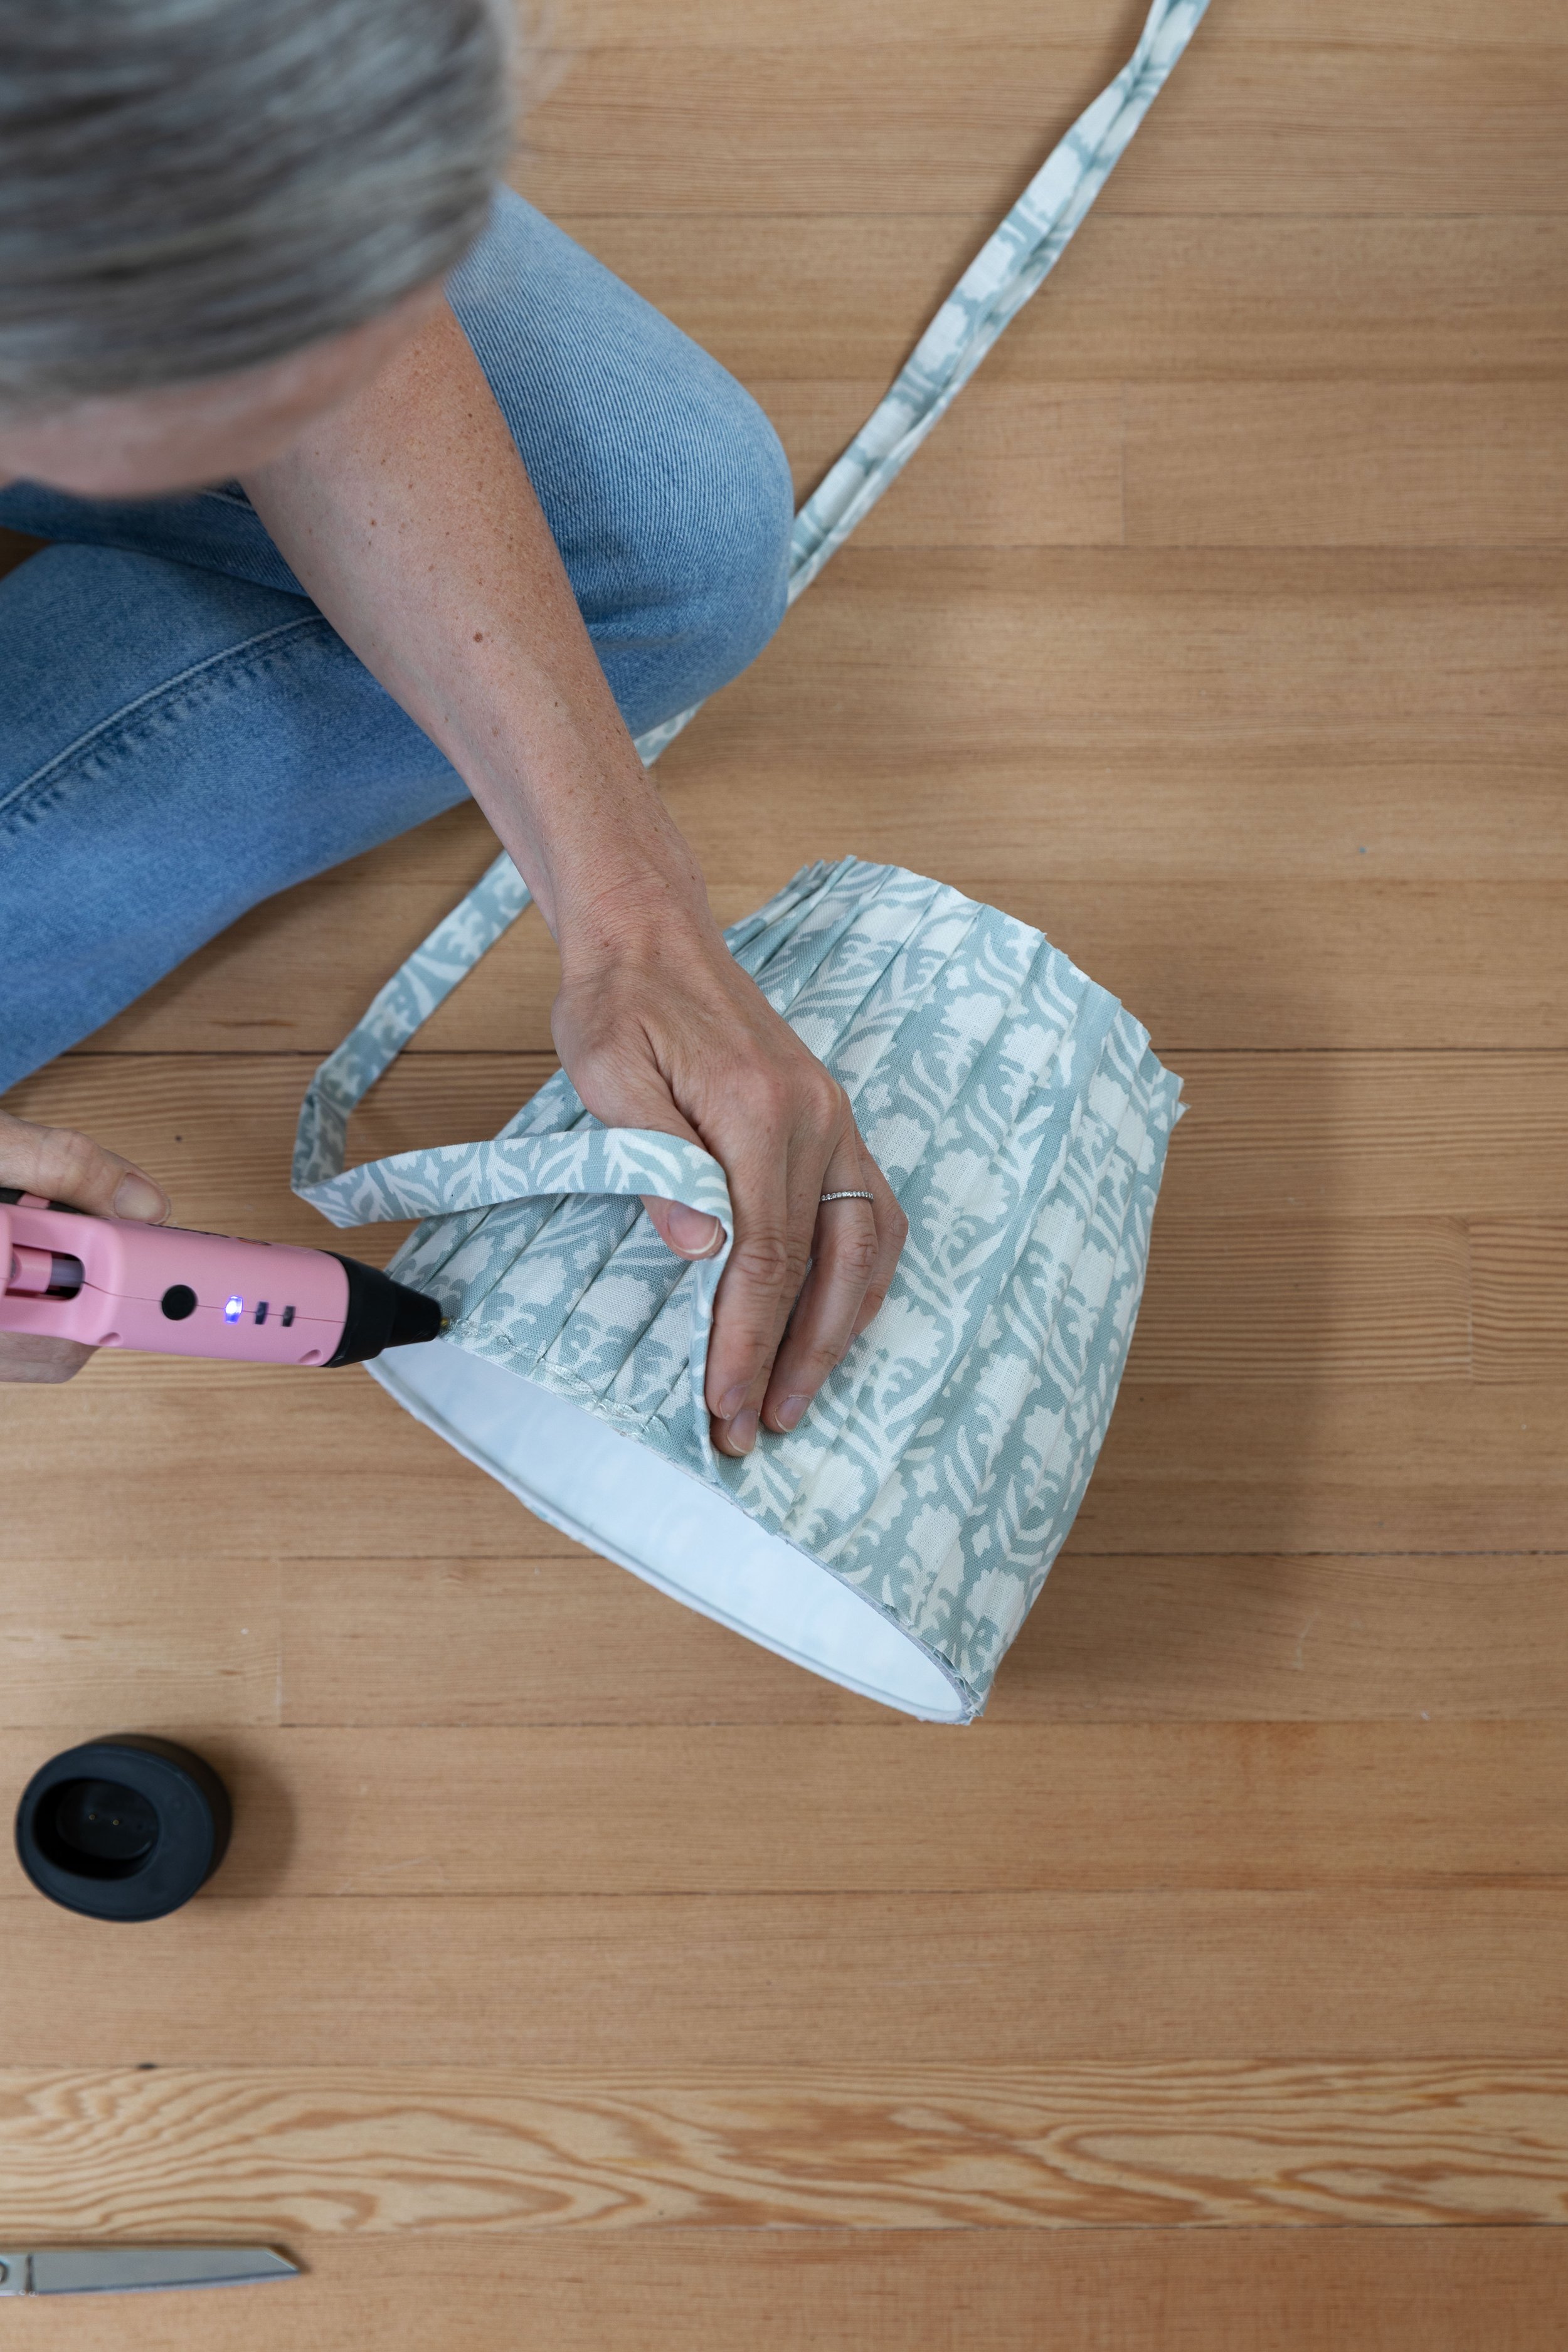
To finish off the trim, cut it so that it overlaps the beginning of the trim by about 1”. Open the trim and fold the end back 1/2” into itself and then close the fold up, securing with a dab of glue. The end of the trim should overlap the beginning by 1/2”. Glue the end of the trim over top the beginning of the trim.

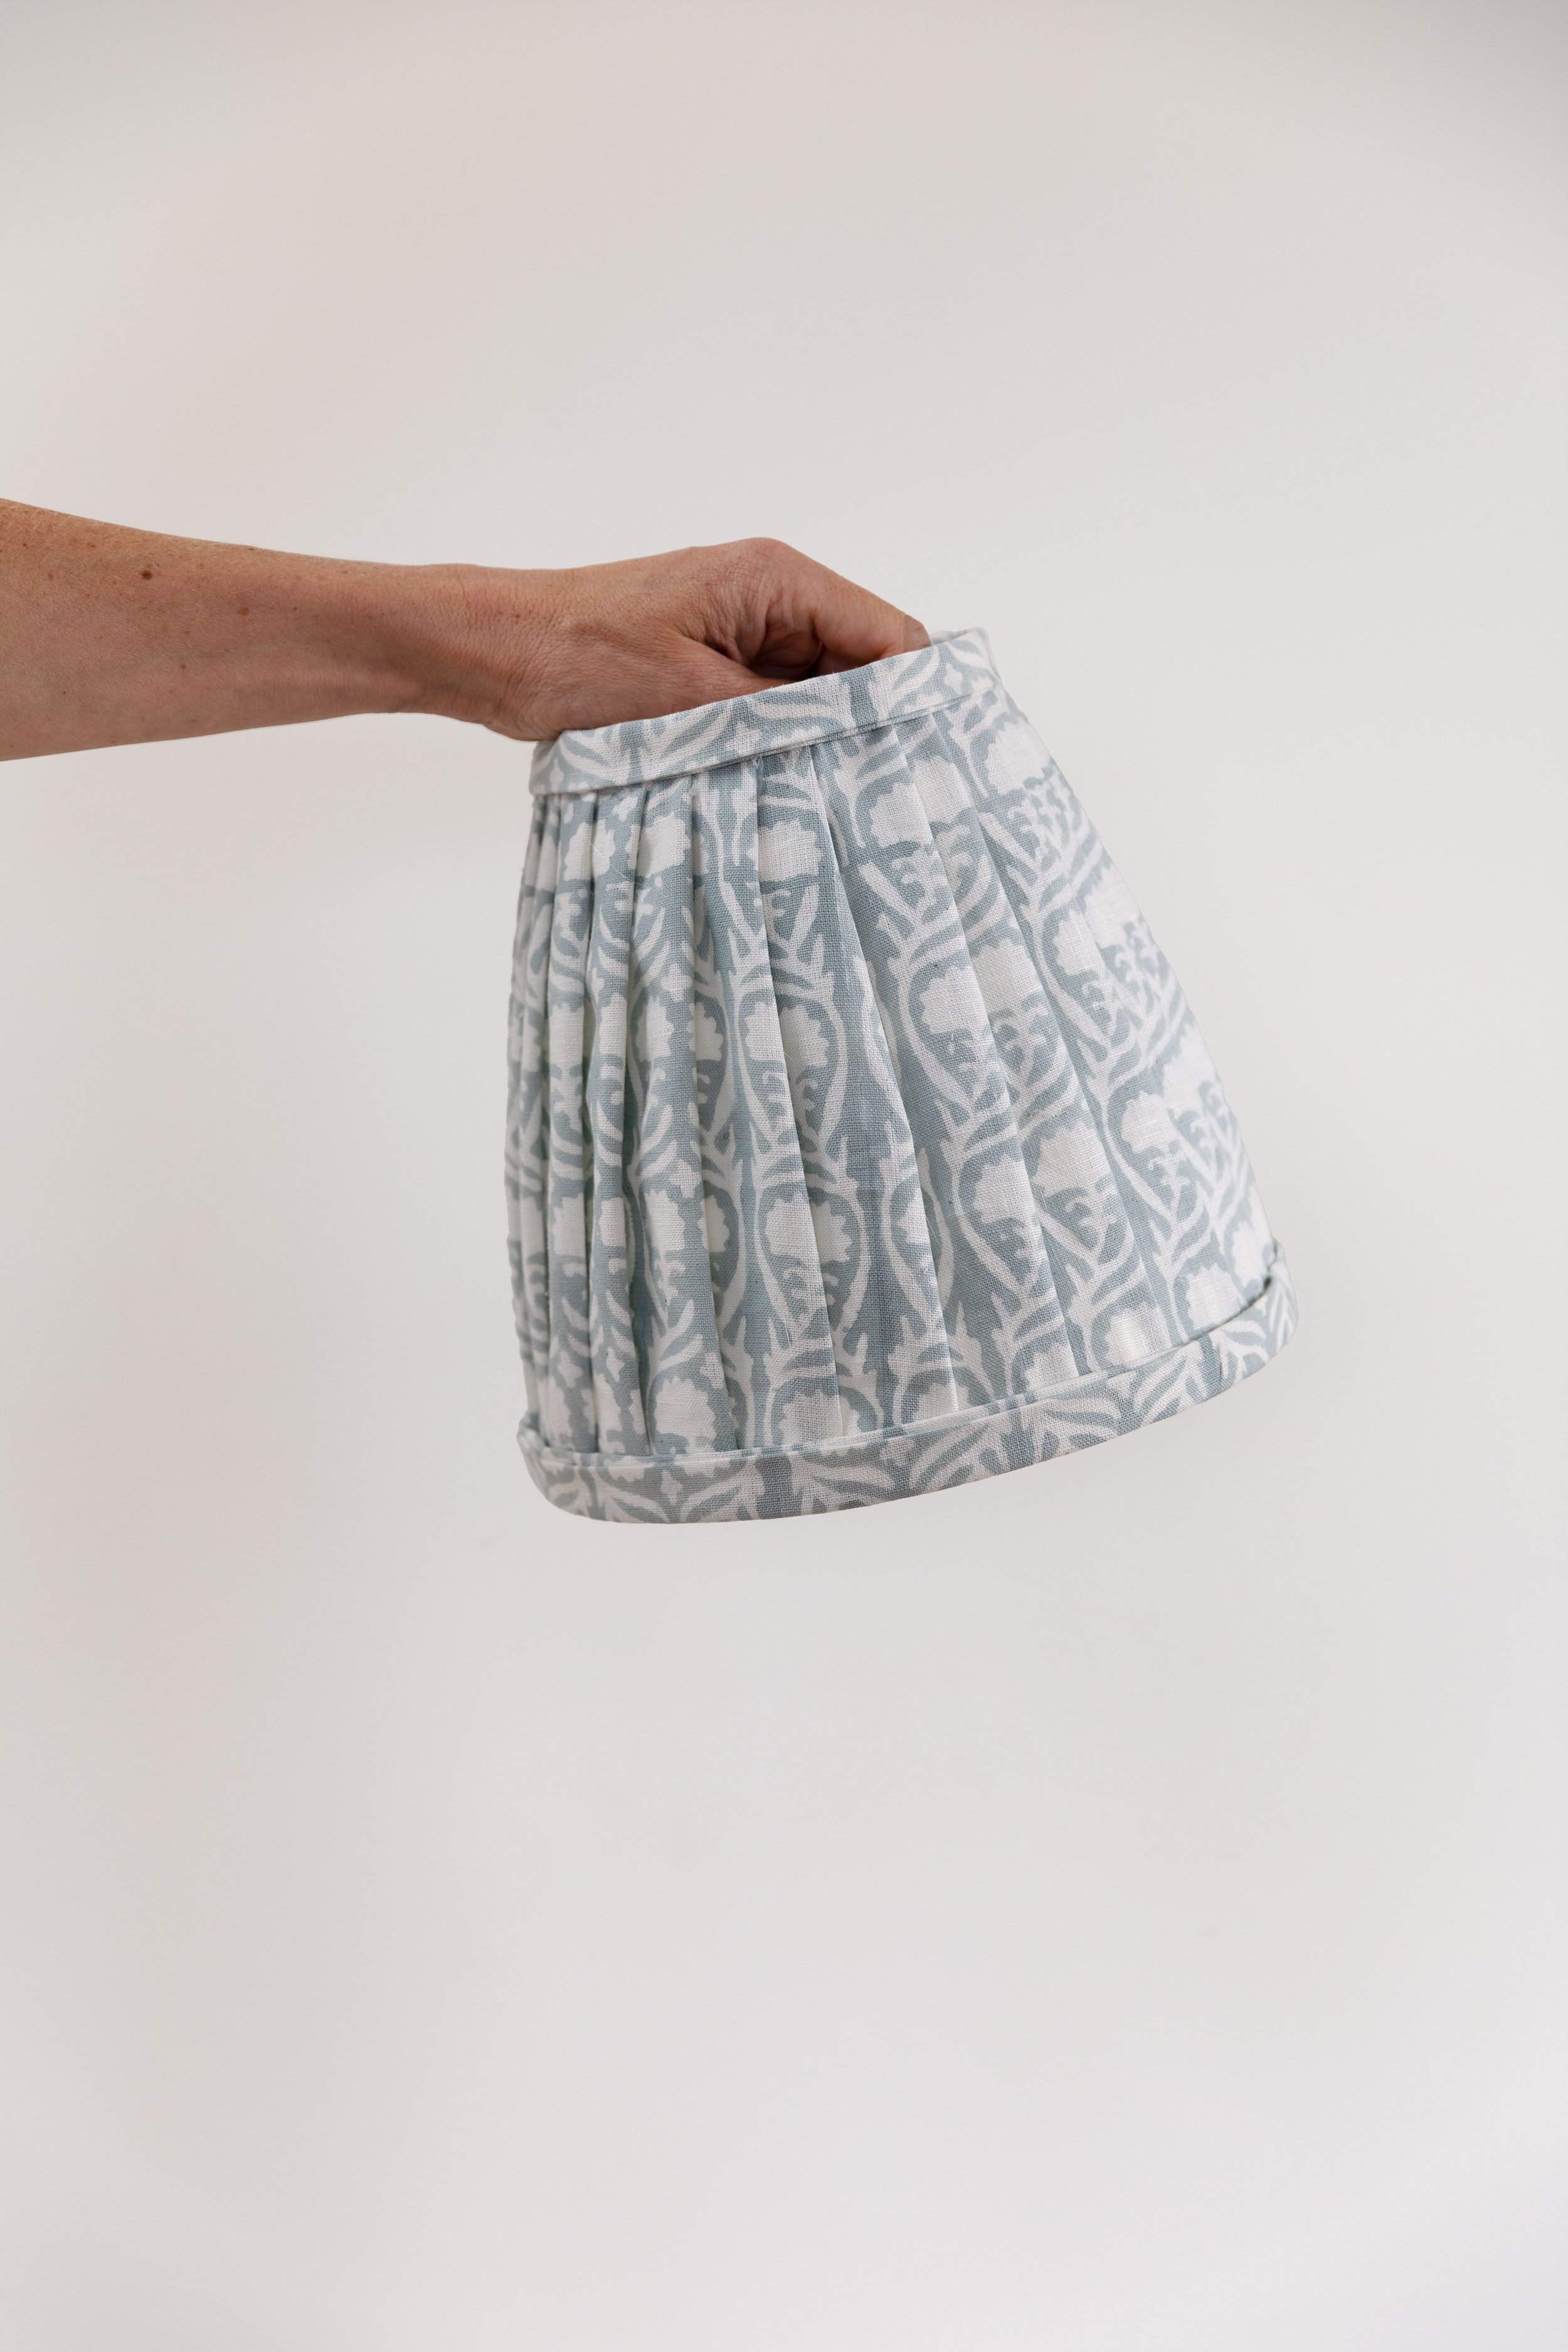
Repeat the trim at the top of the lampshade.

And voila! A finished fabric pleated lampshade.
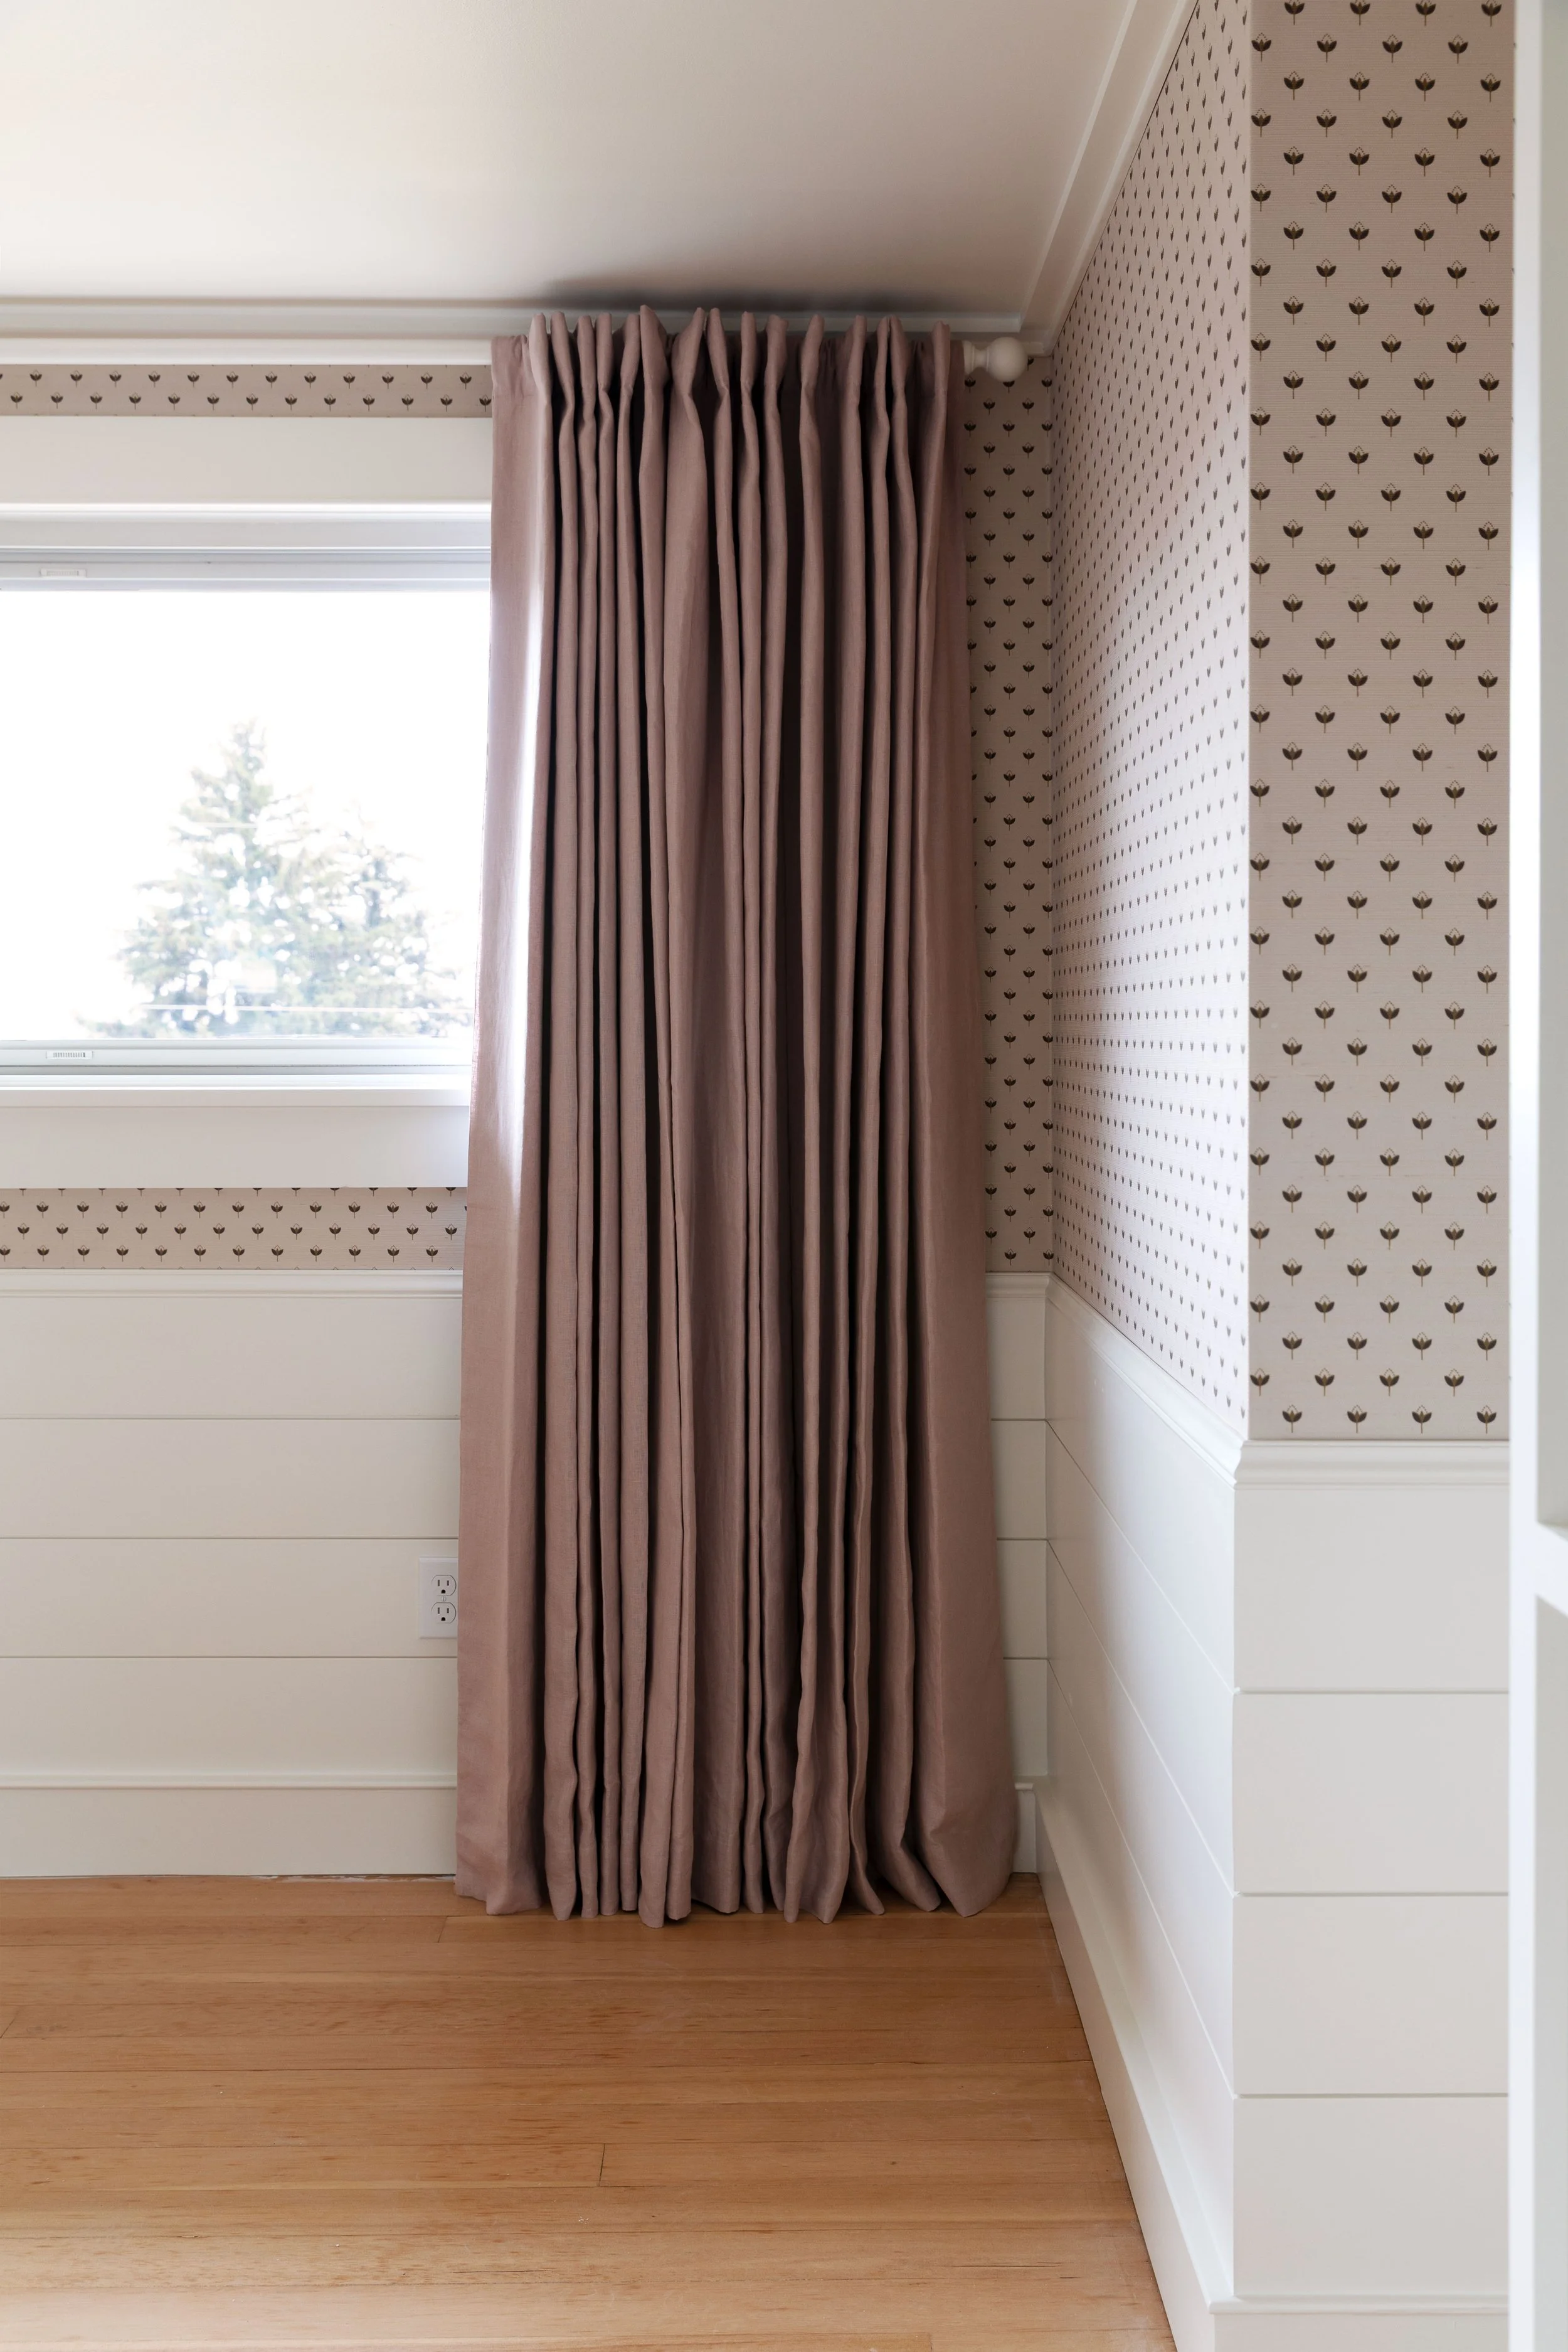
And here’s the finished lampshade in it’s little corner in the main bedroom at the Poplar Cottage…

wallpaper, nightstand, bed frame, linen curtain
Well that’s officially the last project I wanted to get done before calling this bedroom done! We’ll be sharing the final room reveal soon :)