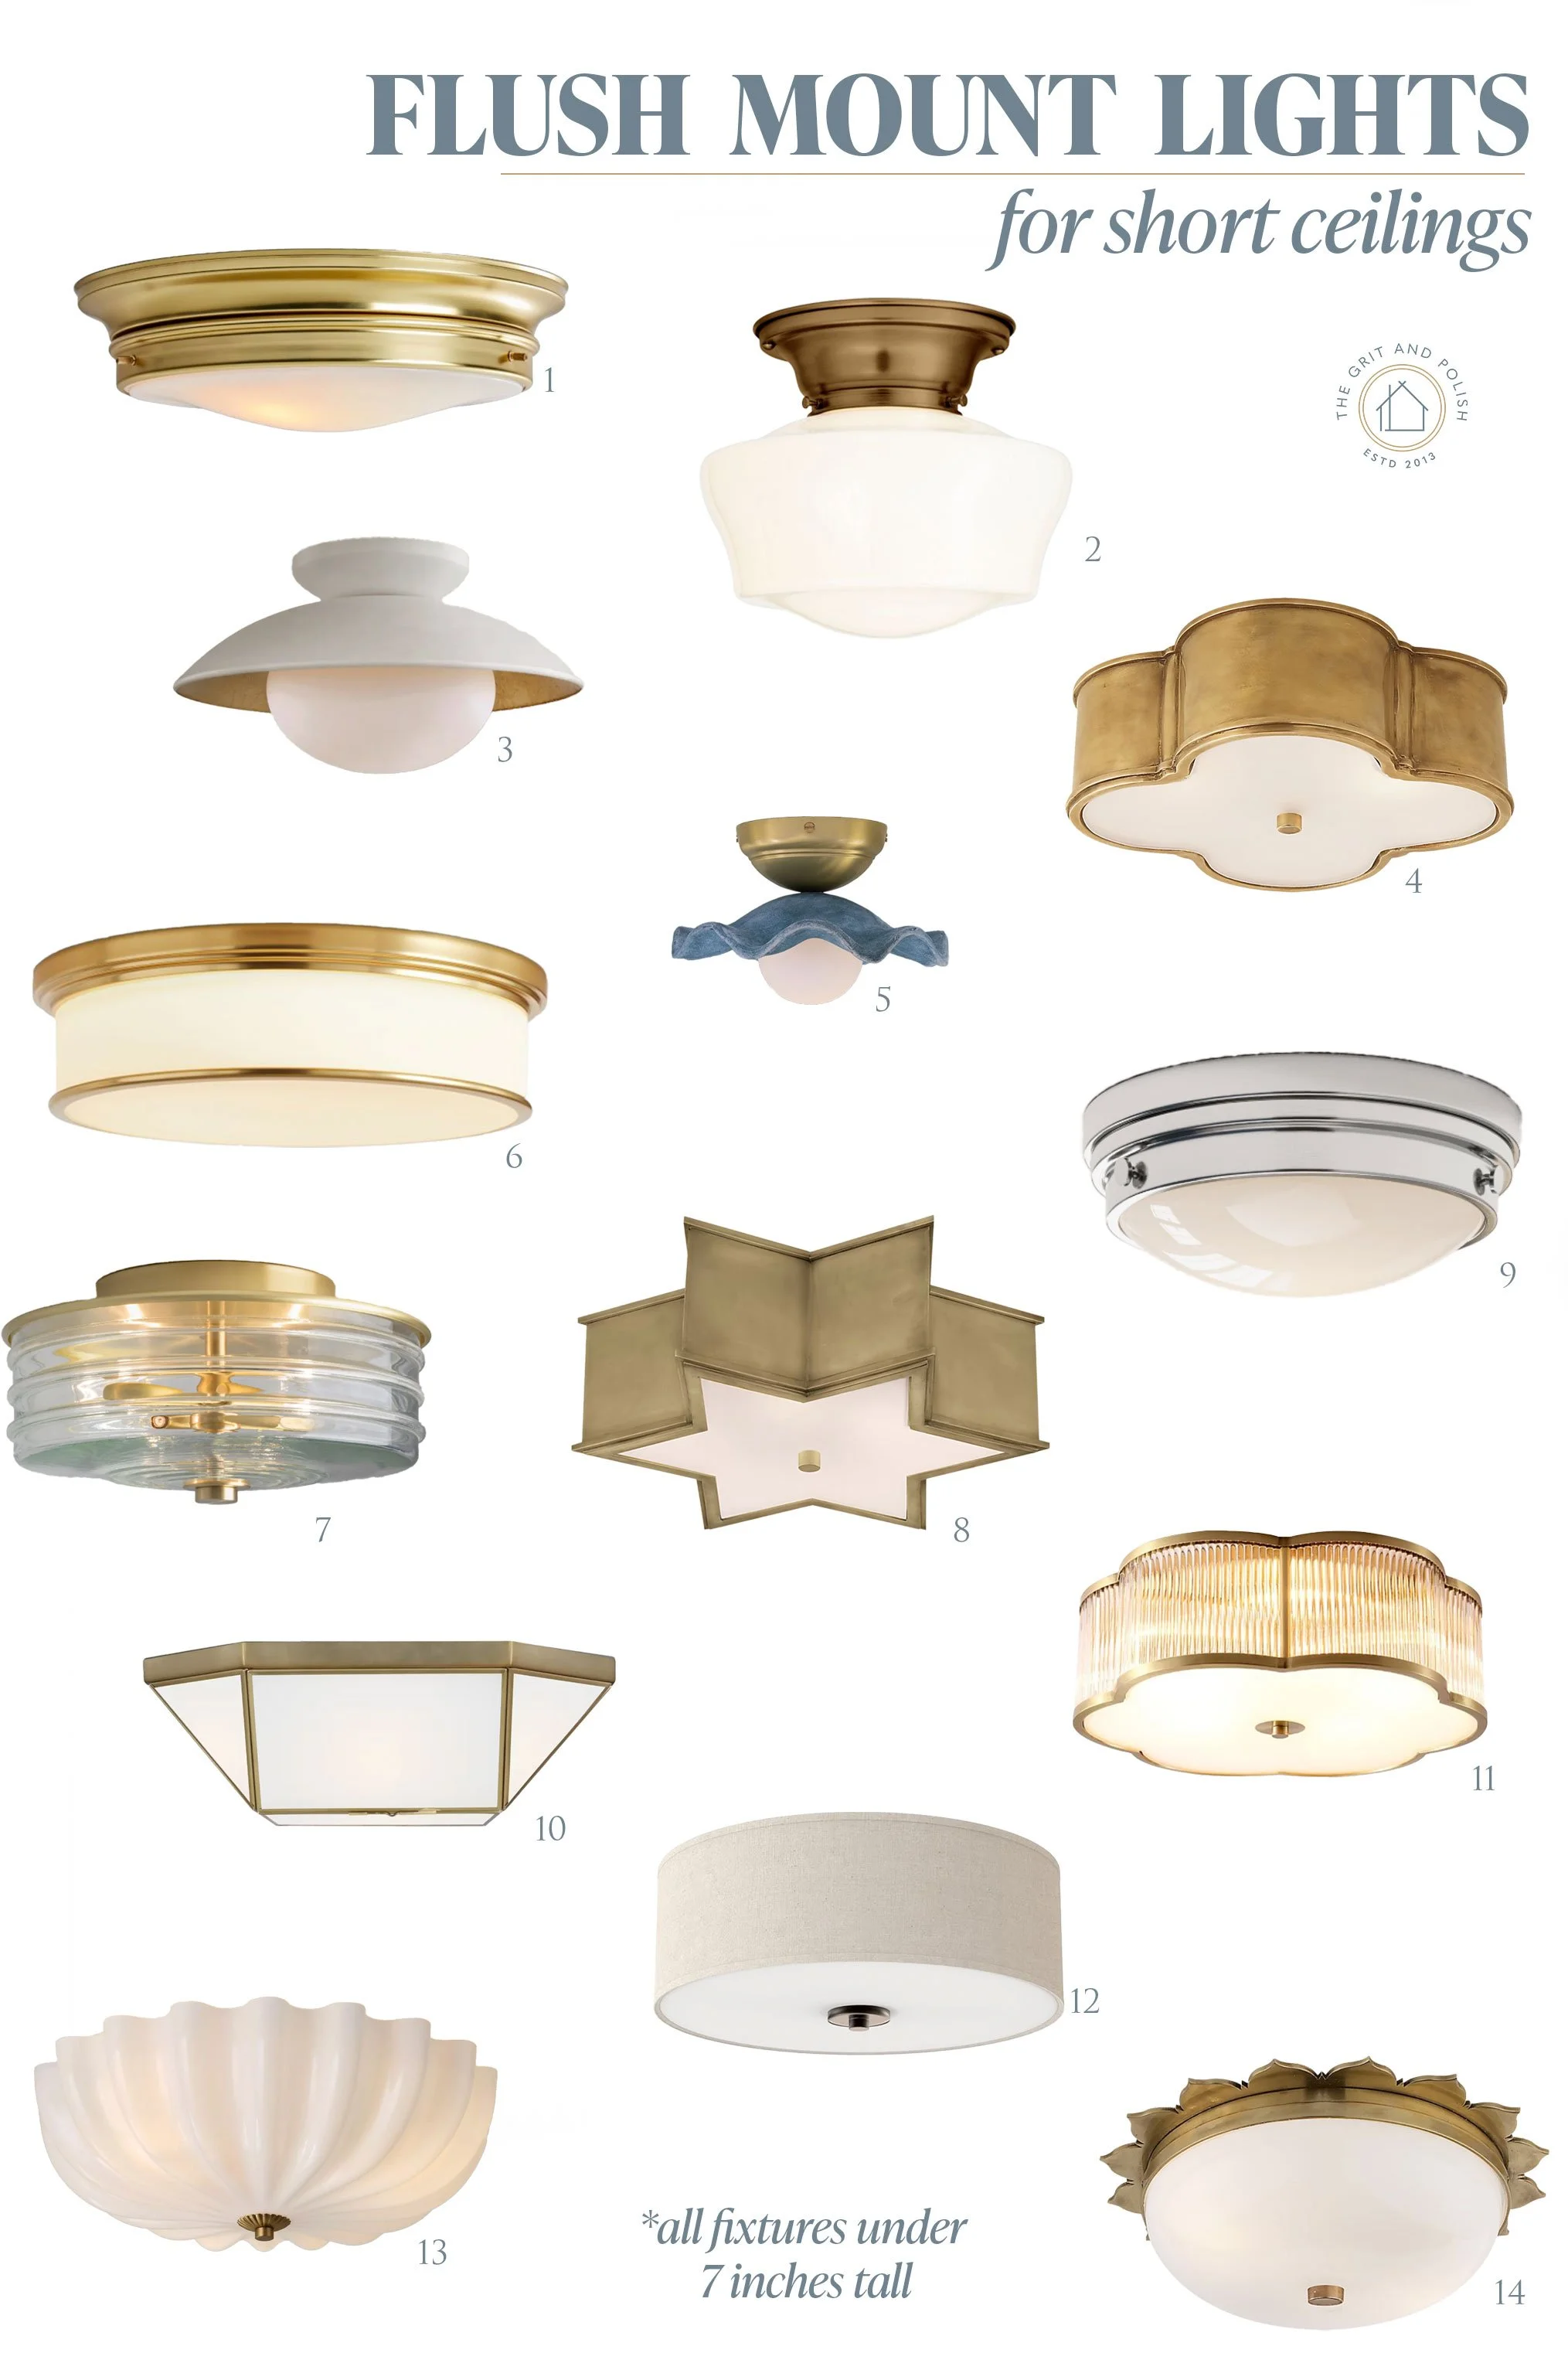
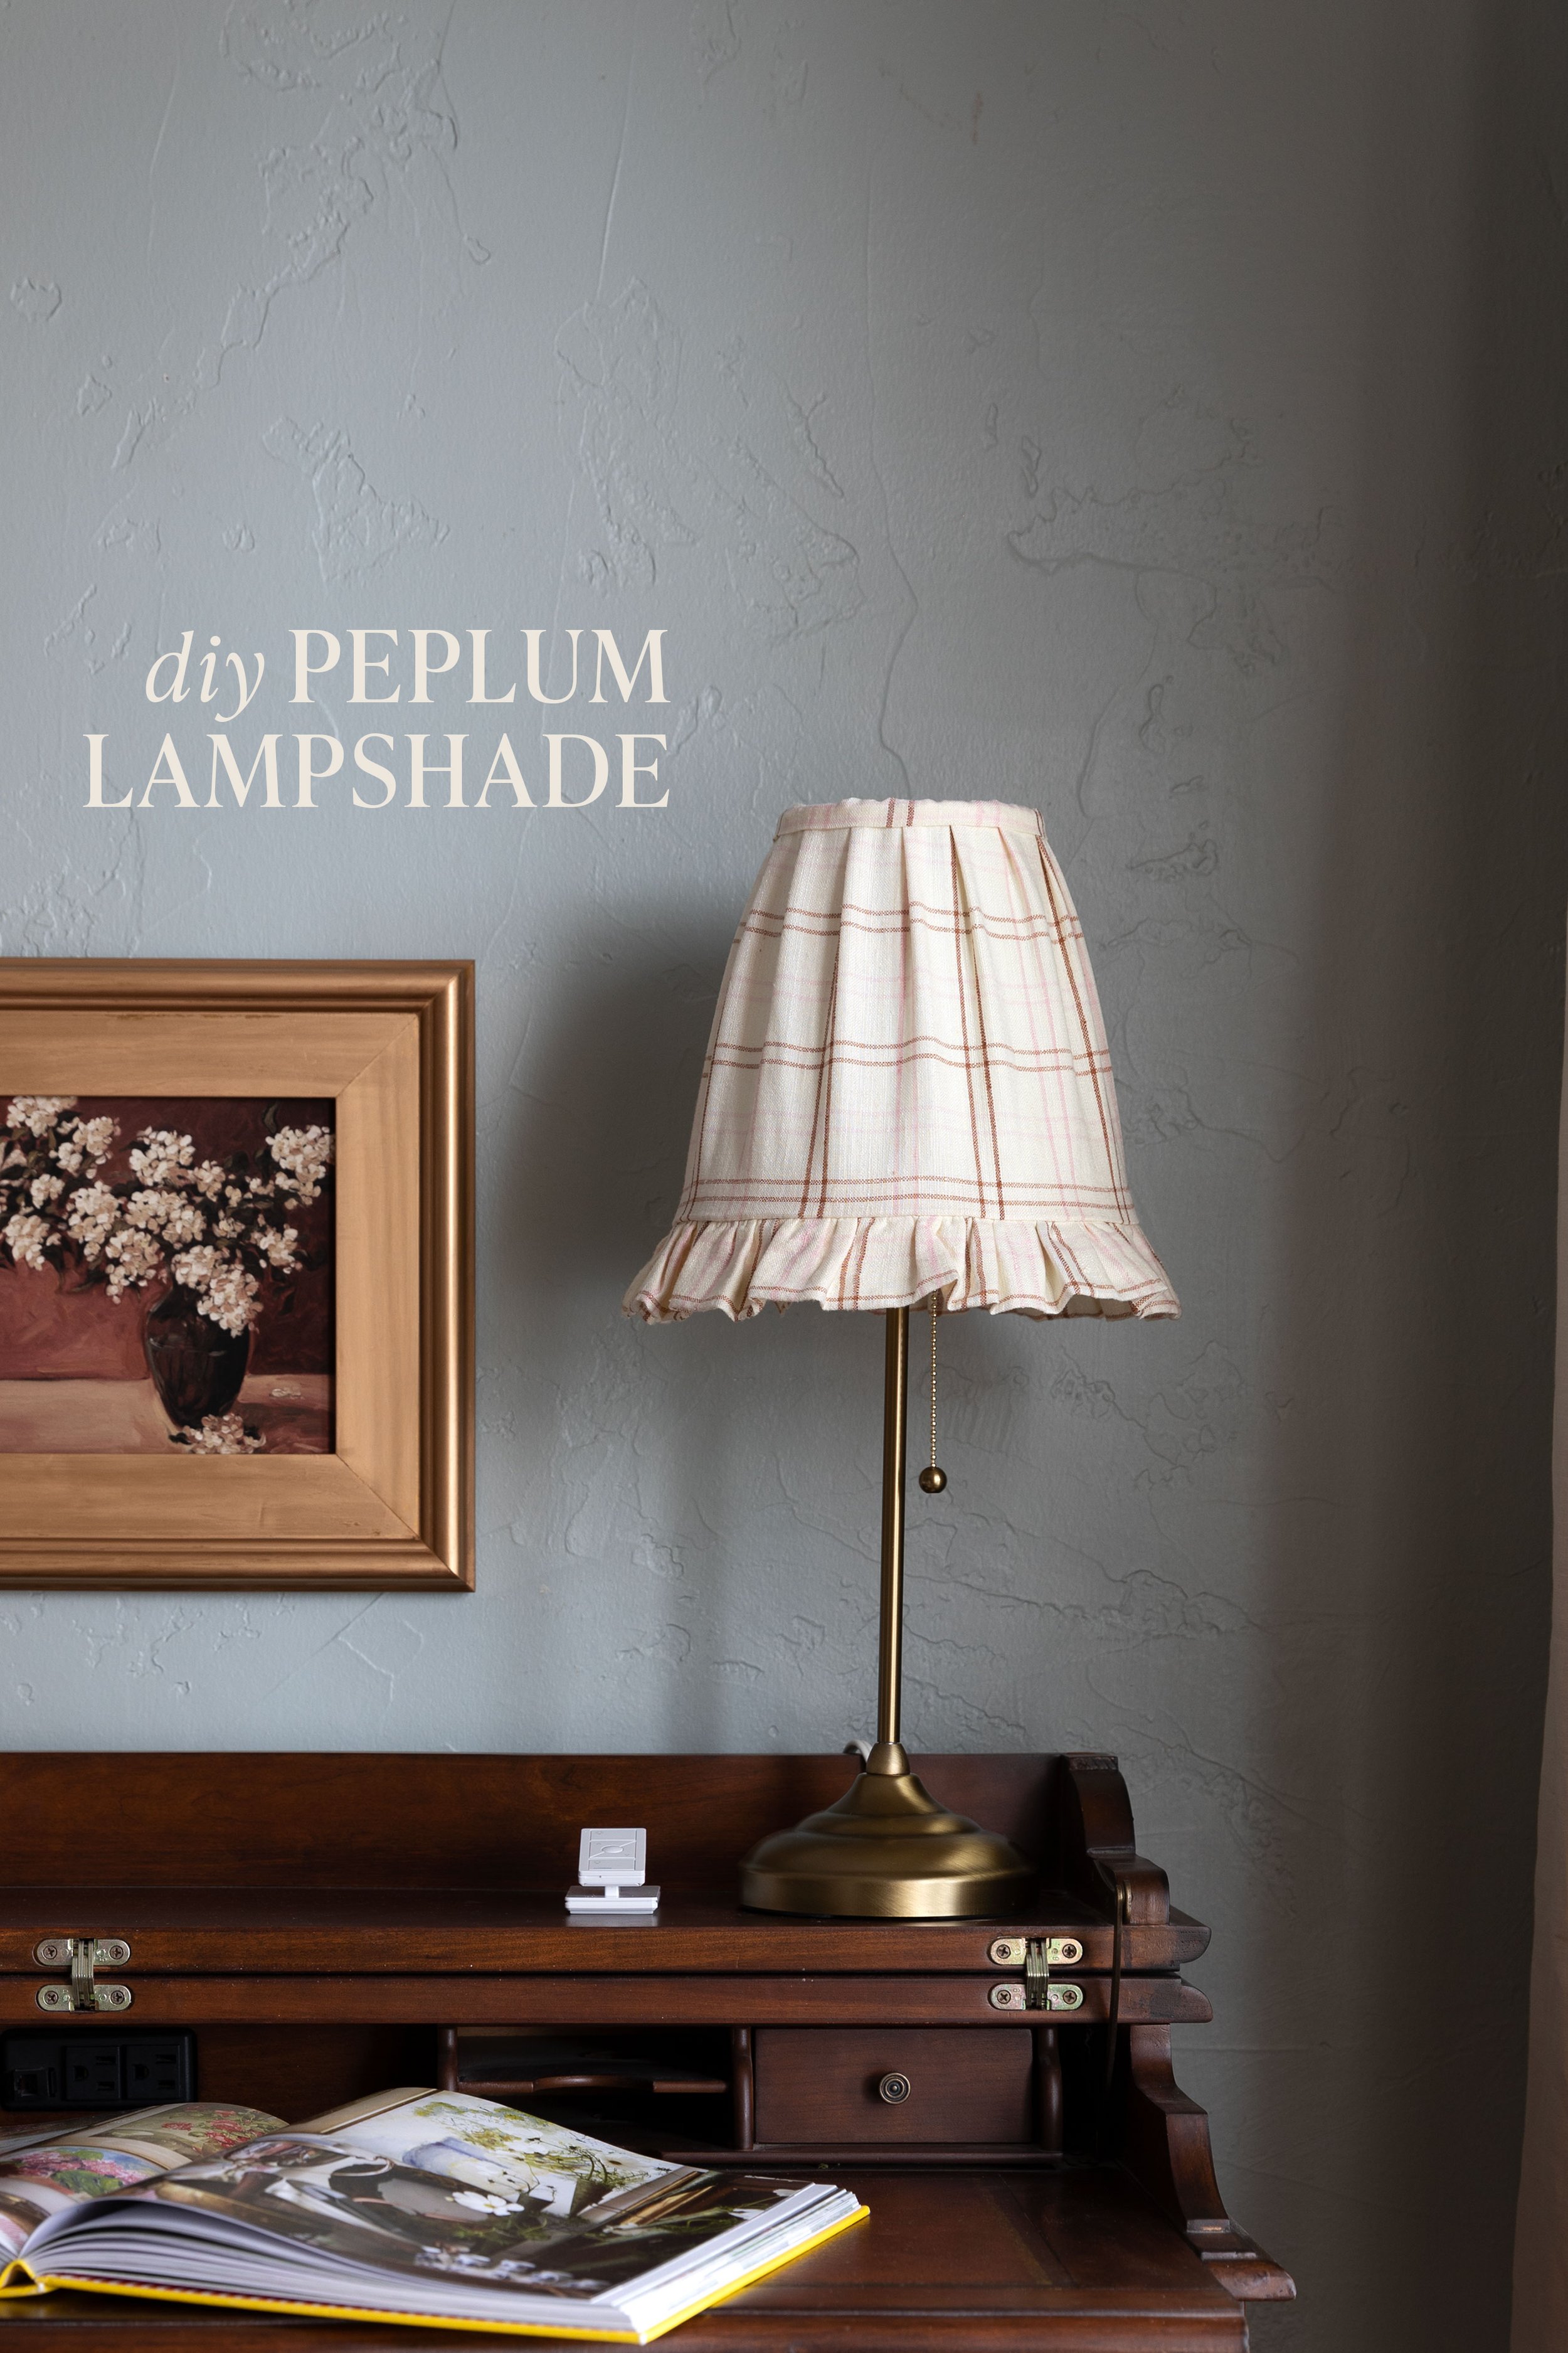
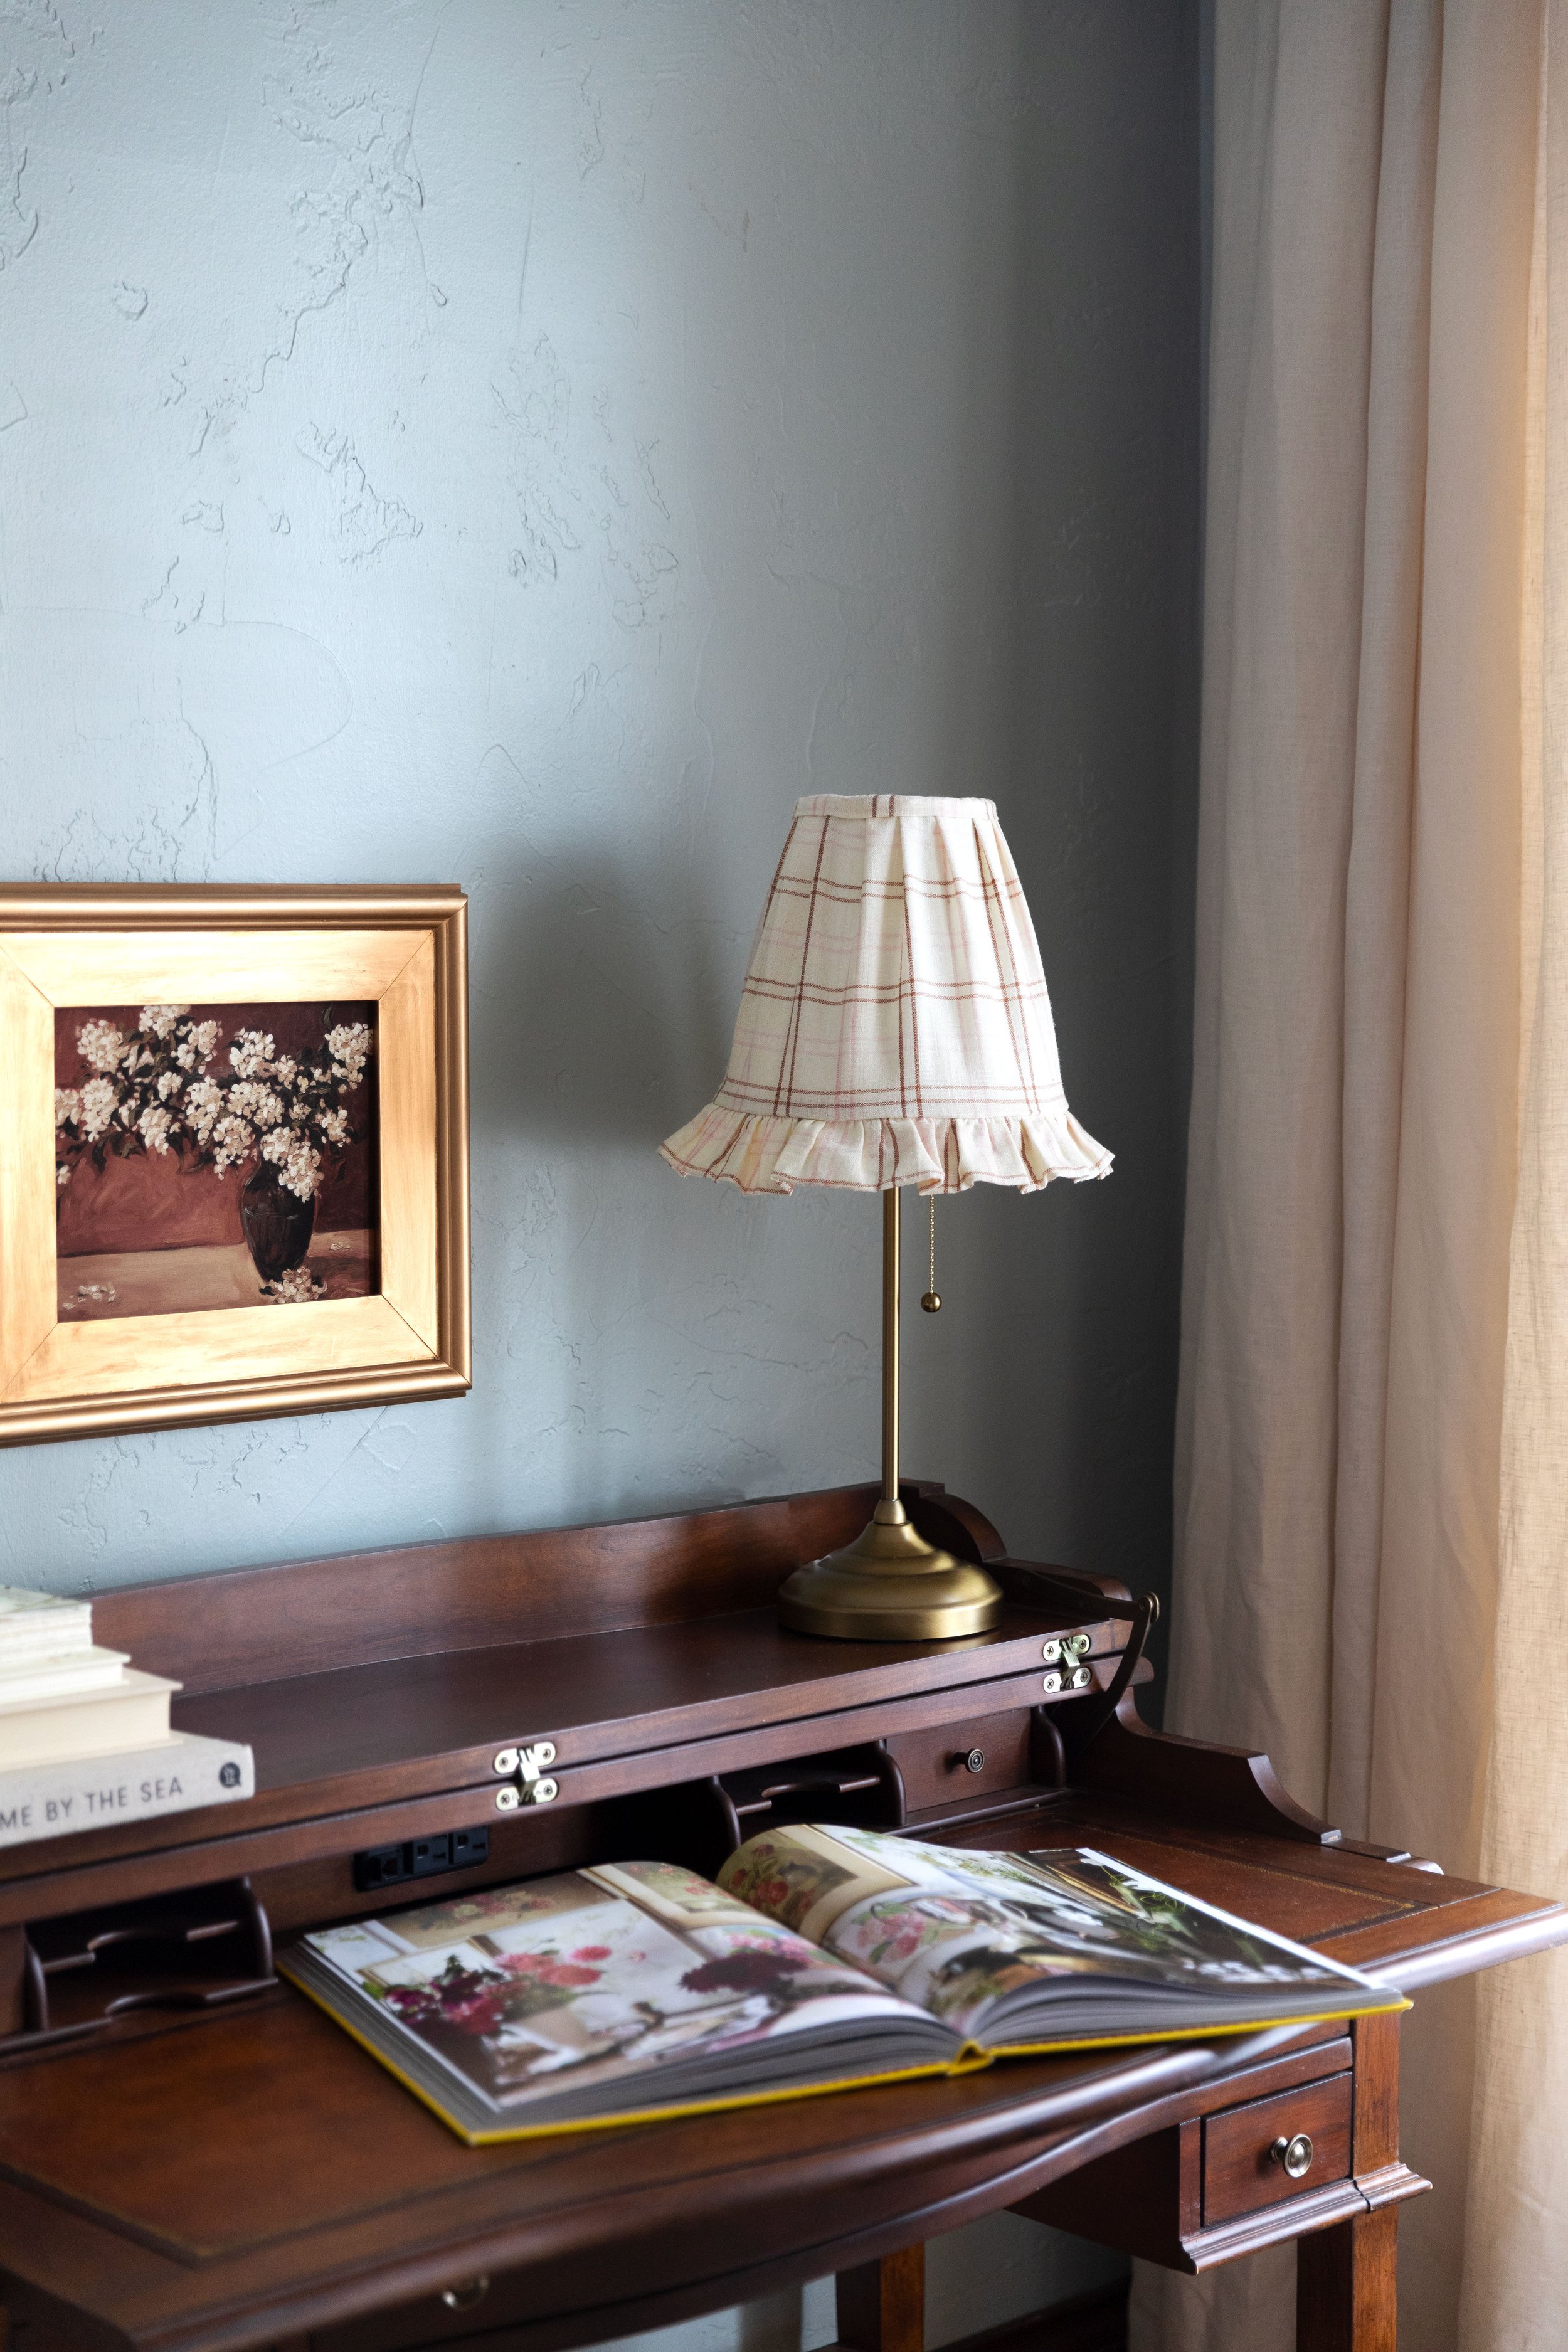
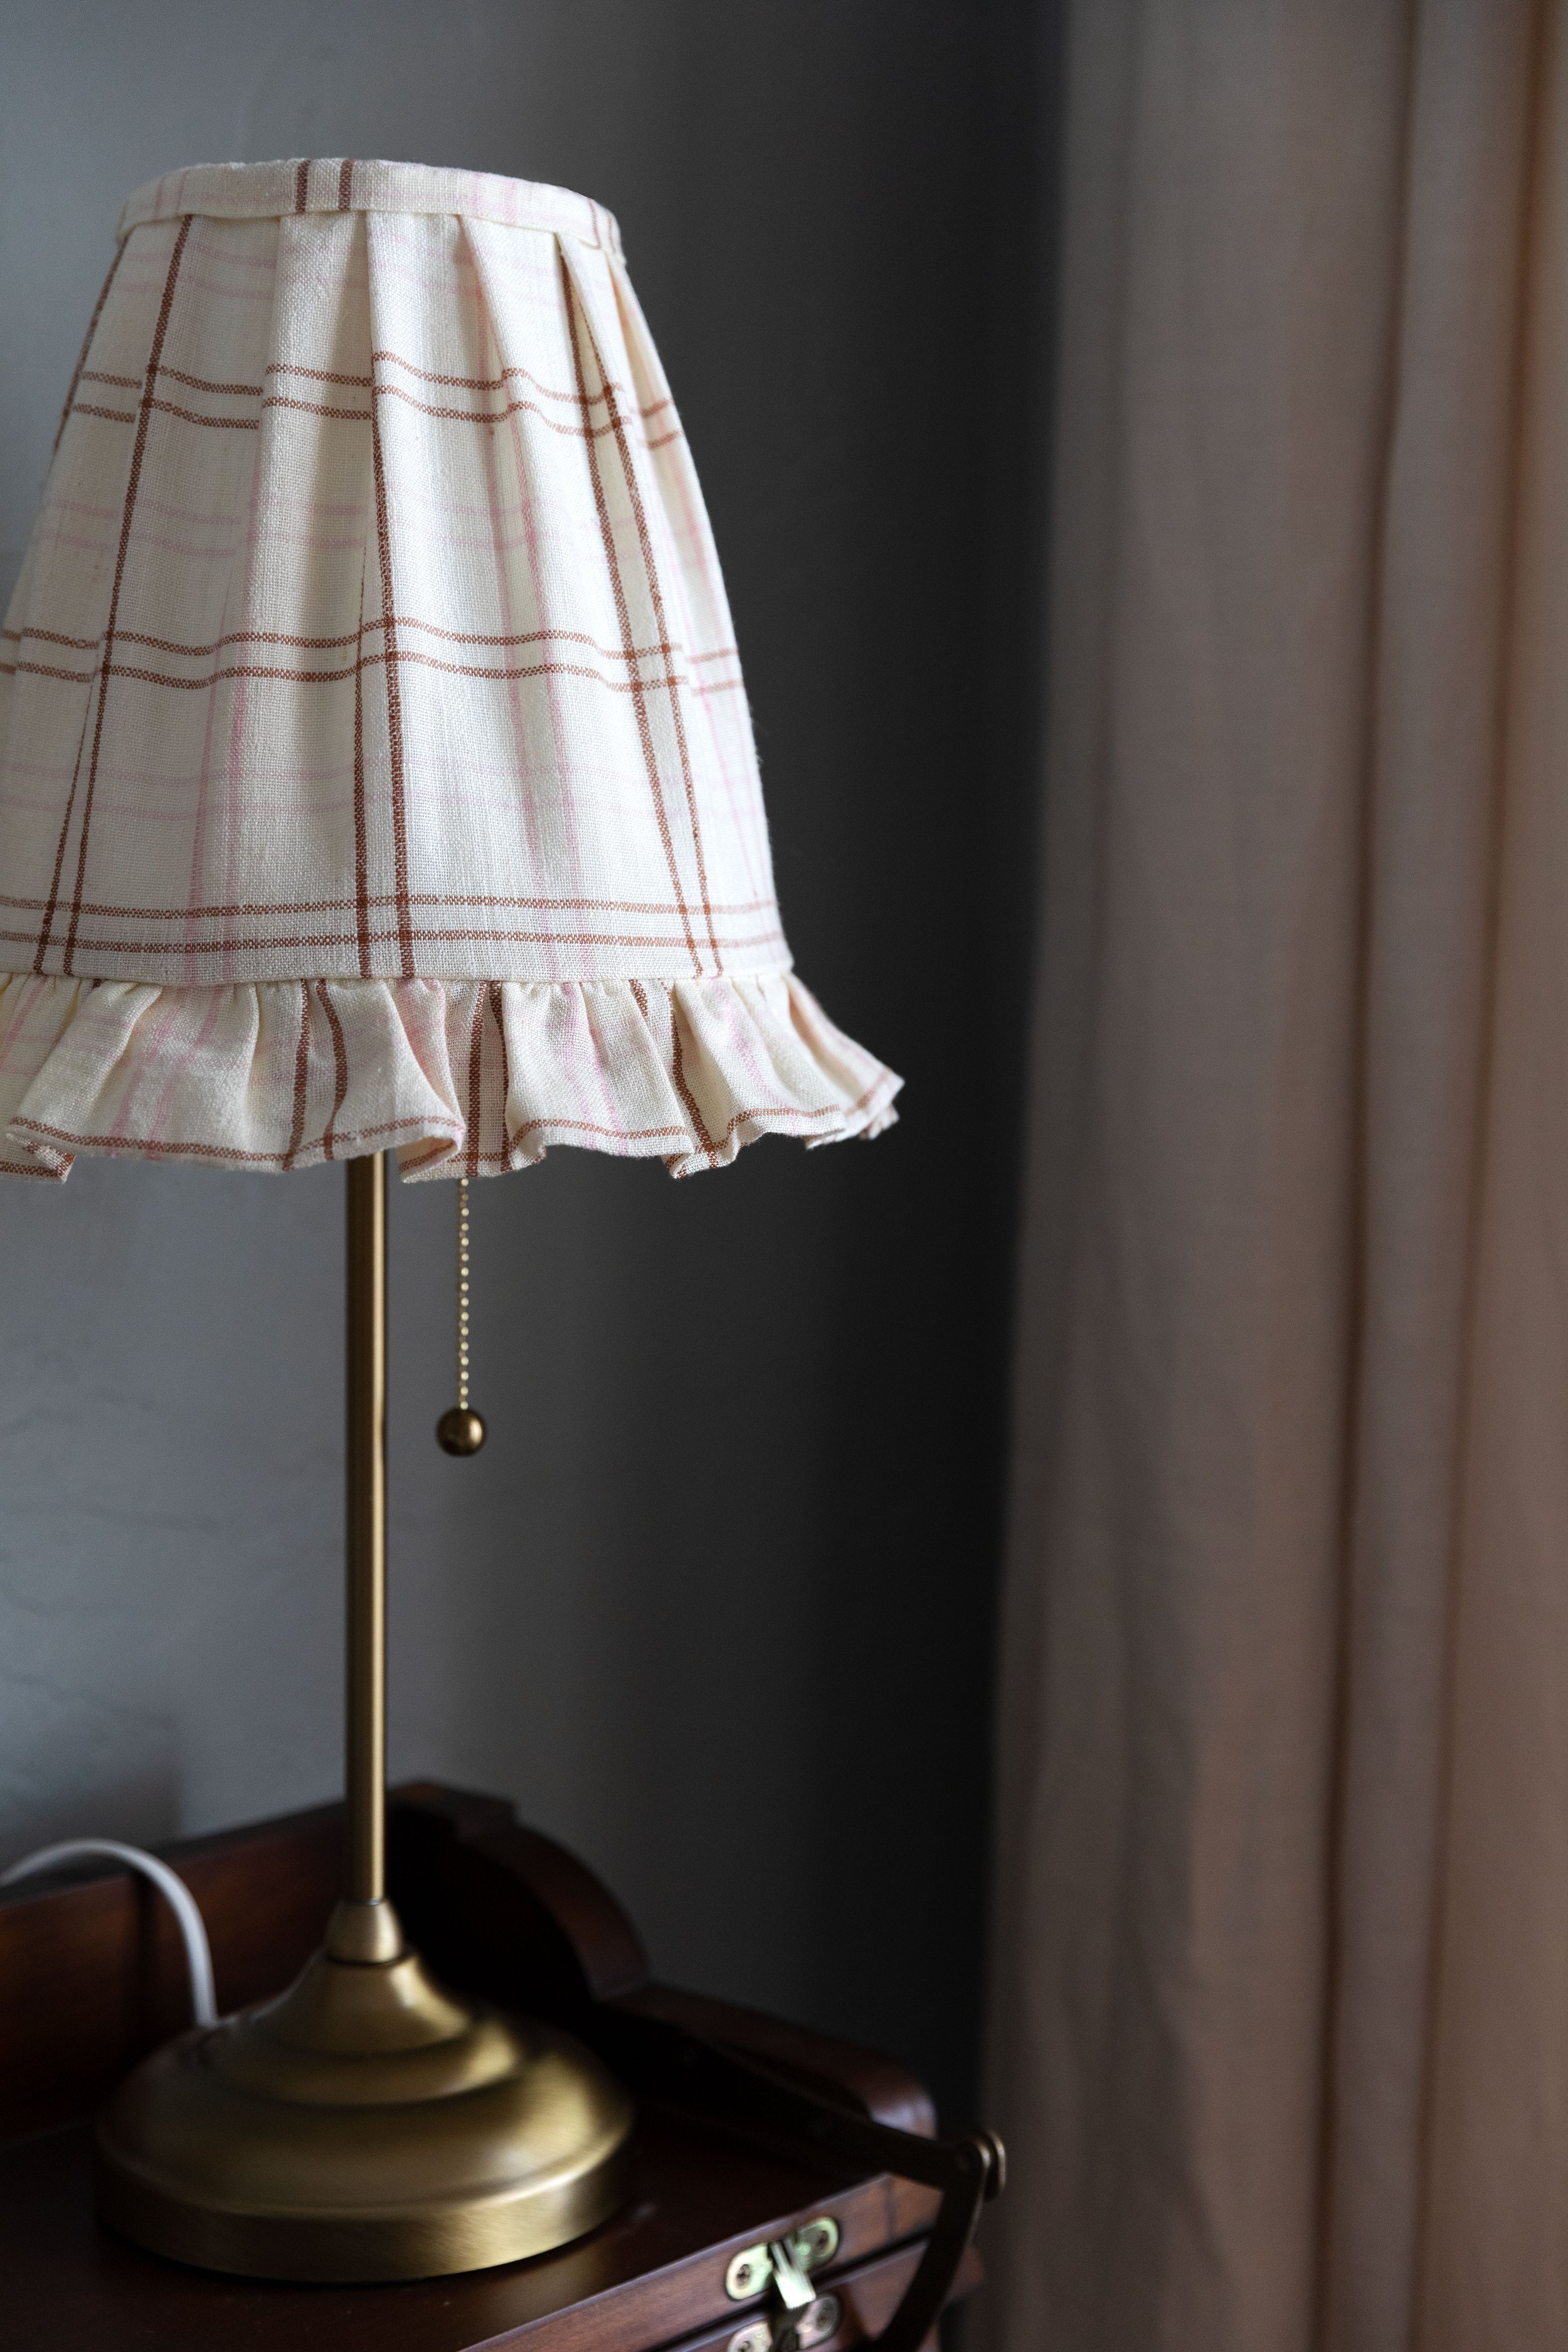
diy Peplum Lampshade
THE FARMHOUSE
Fabric lampshades have been a thing for a few years now and I have to say, I’m a big fan. They add a soft, layered element to a space and are oh so charming. Thankfully they’re pretty easy to make, too! I recently DIYed a peplum-shaped pleated fabric lampshade and I wanted to share a tutorial for you. Let’s get to it…


The fabric for this lampshade was actually a pillow cover I bought on clearance from the Heather Taylor Home collection with West Elm. The 14”x35” pillow cover cost $20 and has enough fabric to cover two of these lampshades, so a good deal! But a half yard of fabric should be enough for a single, small lampshade like this.

rug, sconce, block print shams, linen quilt, linen duvet, sheets
I’ve tried some sew-only pleated lampshades, which felt like the right way to make these. But in the end, hot glue is a whole lot easier to work with. So this DIY makes use of both a sewing machine and a hot glue gun.
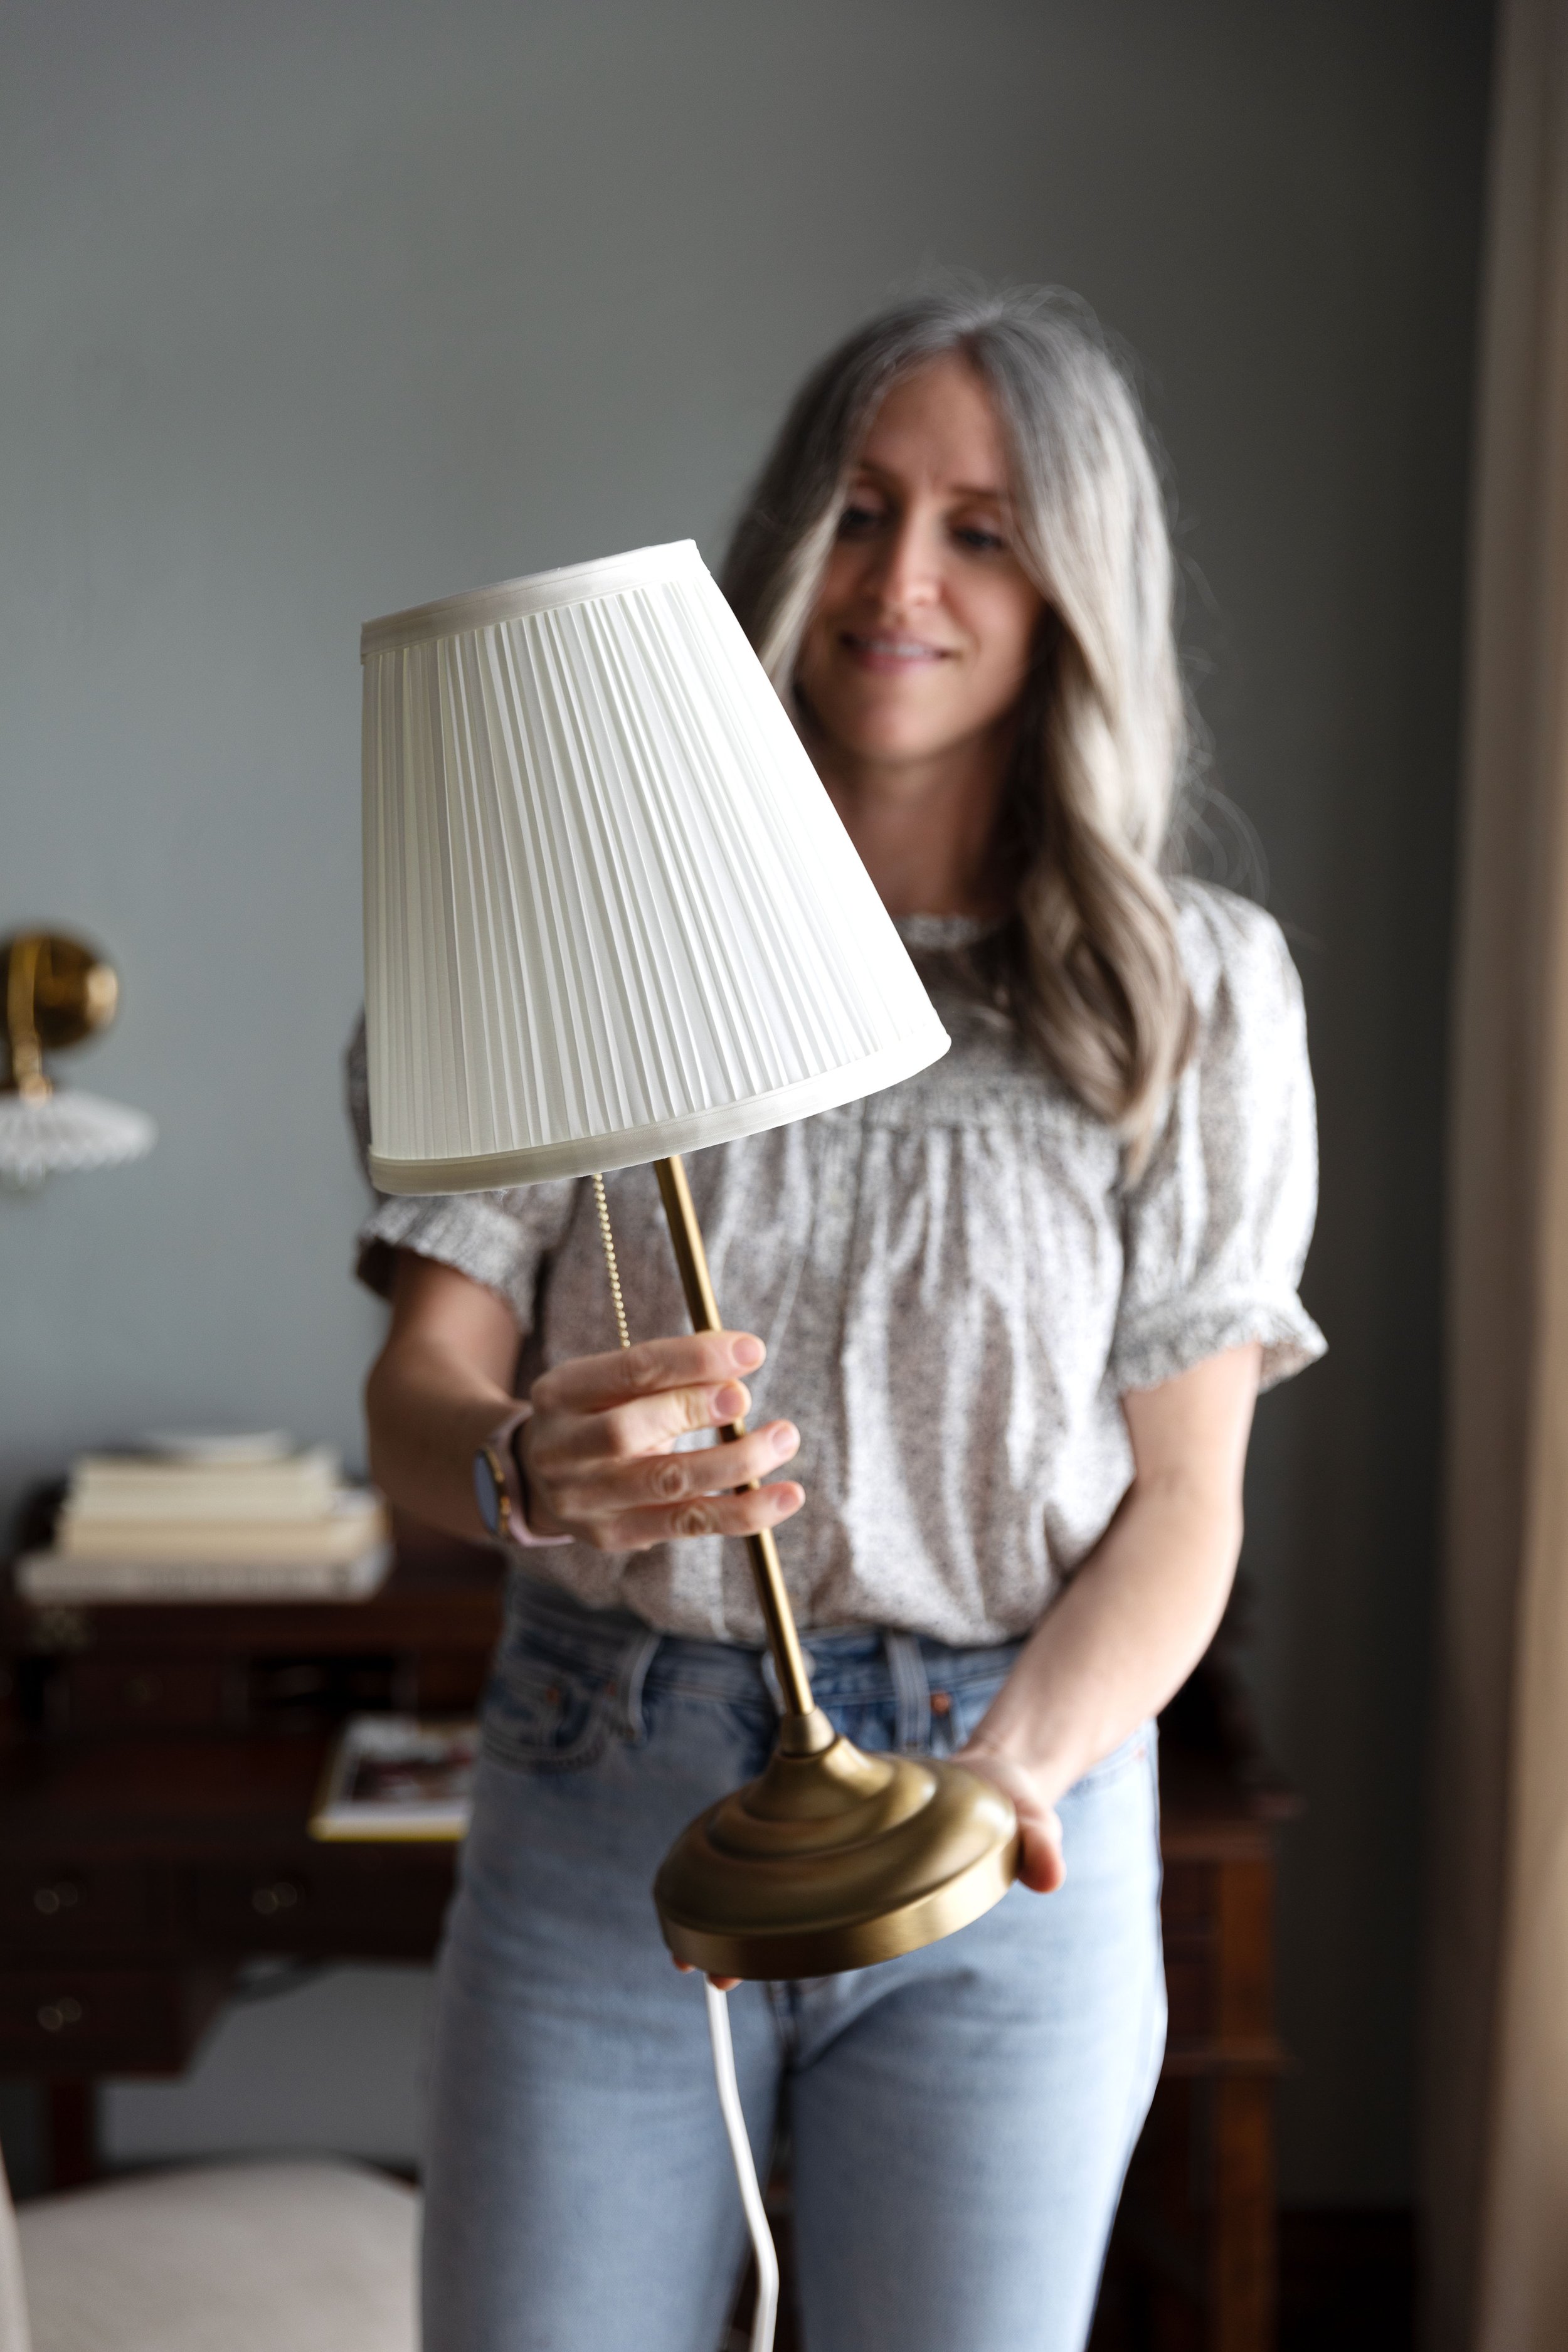
Before we get to the DIY, here’s how the lampshade started. The lamp was an inexpensive pickup from IKEA called the ASTRID. It comes with a lampshade that has a plastic base and pleated fabric over top. I carefully removed the fabric from the shade and was left with a basic white lampshade base.

DIY Peplum Pleated Lampshade
lamp shade
fabric (a thin fabric will make light-transmittance easier)
sewing machine, pins, sharp scissors, hot glue gun (we have this cordless one)

Cut fabric
For the main lampshade, cut a rectangle like so…
Height = height of lampshade + 1”
Length = largest circumference of lampshade + 2”
For the top of lampshade, cut a rectangle like so…
Height 2”
Length = top circumference of lampshade + 2”
The ruffle should be the length of the bottom circumference of the lampshade + 2”. I cheated a bit with this DIY because I deconstructed a pillowcase to make this lampshade and it already had a ruffle that I could reuse. But making your own gathered ruffle is easy enough and here’s a tutorial.

To attach the ruffle to the lampshade, flip it over the bottom of your large rectangle, so that the good side touches the good side of the rectangle, and pin the seam together. Then sew the seam.
Flip the ruffle down and iron it.

Now we’re going to sew the lampshade into a circle. Measure the seam you just sewed against the bottom fo the lampshade and pin the two sides together where they meet. Note, it’s easiest to do this by flipping your lampshade over so that the good side touches the outside of the lampshade. Once you have the widest part of the lampshade pinned, pin the rest of the seam, creating a cylinder. And then sew the seam.


Flip your lampshade right-side-out again and test fit it onto your lampshade. You want the fabric at the largest part of the lampshade to be snug.


Now it’s time to get out the glue gun. Glue the bottom seam to the bottom of the lampshade, making sure that the glue stays on the side and not the bottom of the lampshade so it doesn’t shown. You’ll want to glue down the fabric shade so that the ruffle seam is just above the bottom of the lampshade frame and won’t show.


Add pleats to the top of the lampshade by gathering fabric every inch or so and gluing the pleats together. The glue should seep through the back of the fabric and secure it to the lampshade frame as well. I found it easiest to eyeball the pleats, but you could measure to make sure they’re spaced evenly. The goal is to evenly take up the extra fabric at the top of the lampshade between the pleats. You’ll also want to gently pull the fabric upwards before attaching it to the lampshade base so that there’s no sagging or fabric rolls in the body of the lampshade.

I found the glue seeped through the thin fabric and burned my thumb a couple of times, so I definitely recommend wearing gloves if that’s a concern.


Cut off excess fabric at top of the lampshade. Once you can see the top of your pleats, you might find some of them aren’t securely glued to the lampshade frame. So go back in and secure them to the frame with hot glue.
To finish the top of the lampshade, take your final piece of fabric and fold it in half and then fold each end in towards the middle, like a book jacket. Iron your folds in place.

Glue the fabric over the top of the lampshade so that half of it rests inside the lampshade and half of it rests outside. Glue at the top of the and top-front of the lampshade, making sure to keep the fabric taut as you work around the circle. Be careful that your glue is always hidden behind the fabric at the top-front of the shade.


Once you’ve worked all the way around the top of the shade and are back to the raw edge, fold excess fabric over (if it’s more than a 1/2”, I’d cut it down to that) and glue it over the raw edge.
That’s it! I really love how this peplum pleated lampshade turned out.


What do you think? Would you ever sew/make your own fabric lampshade?