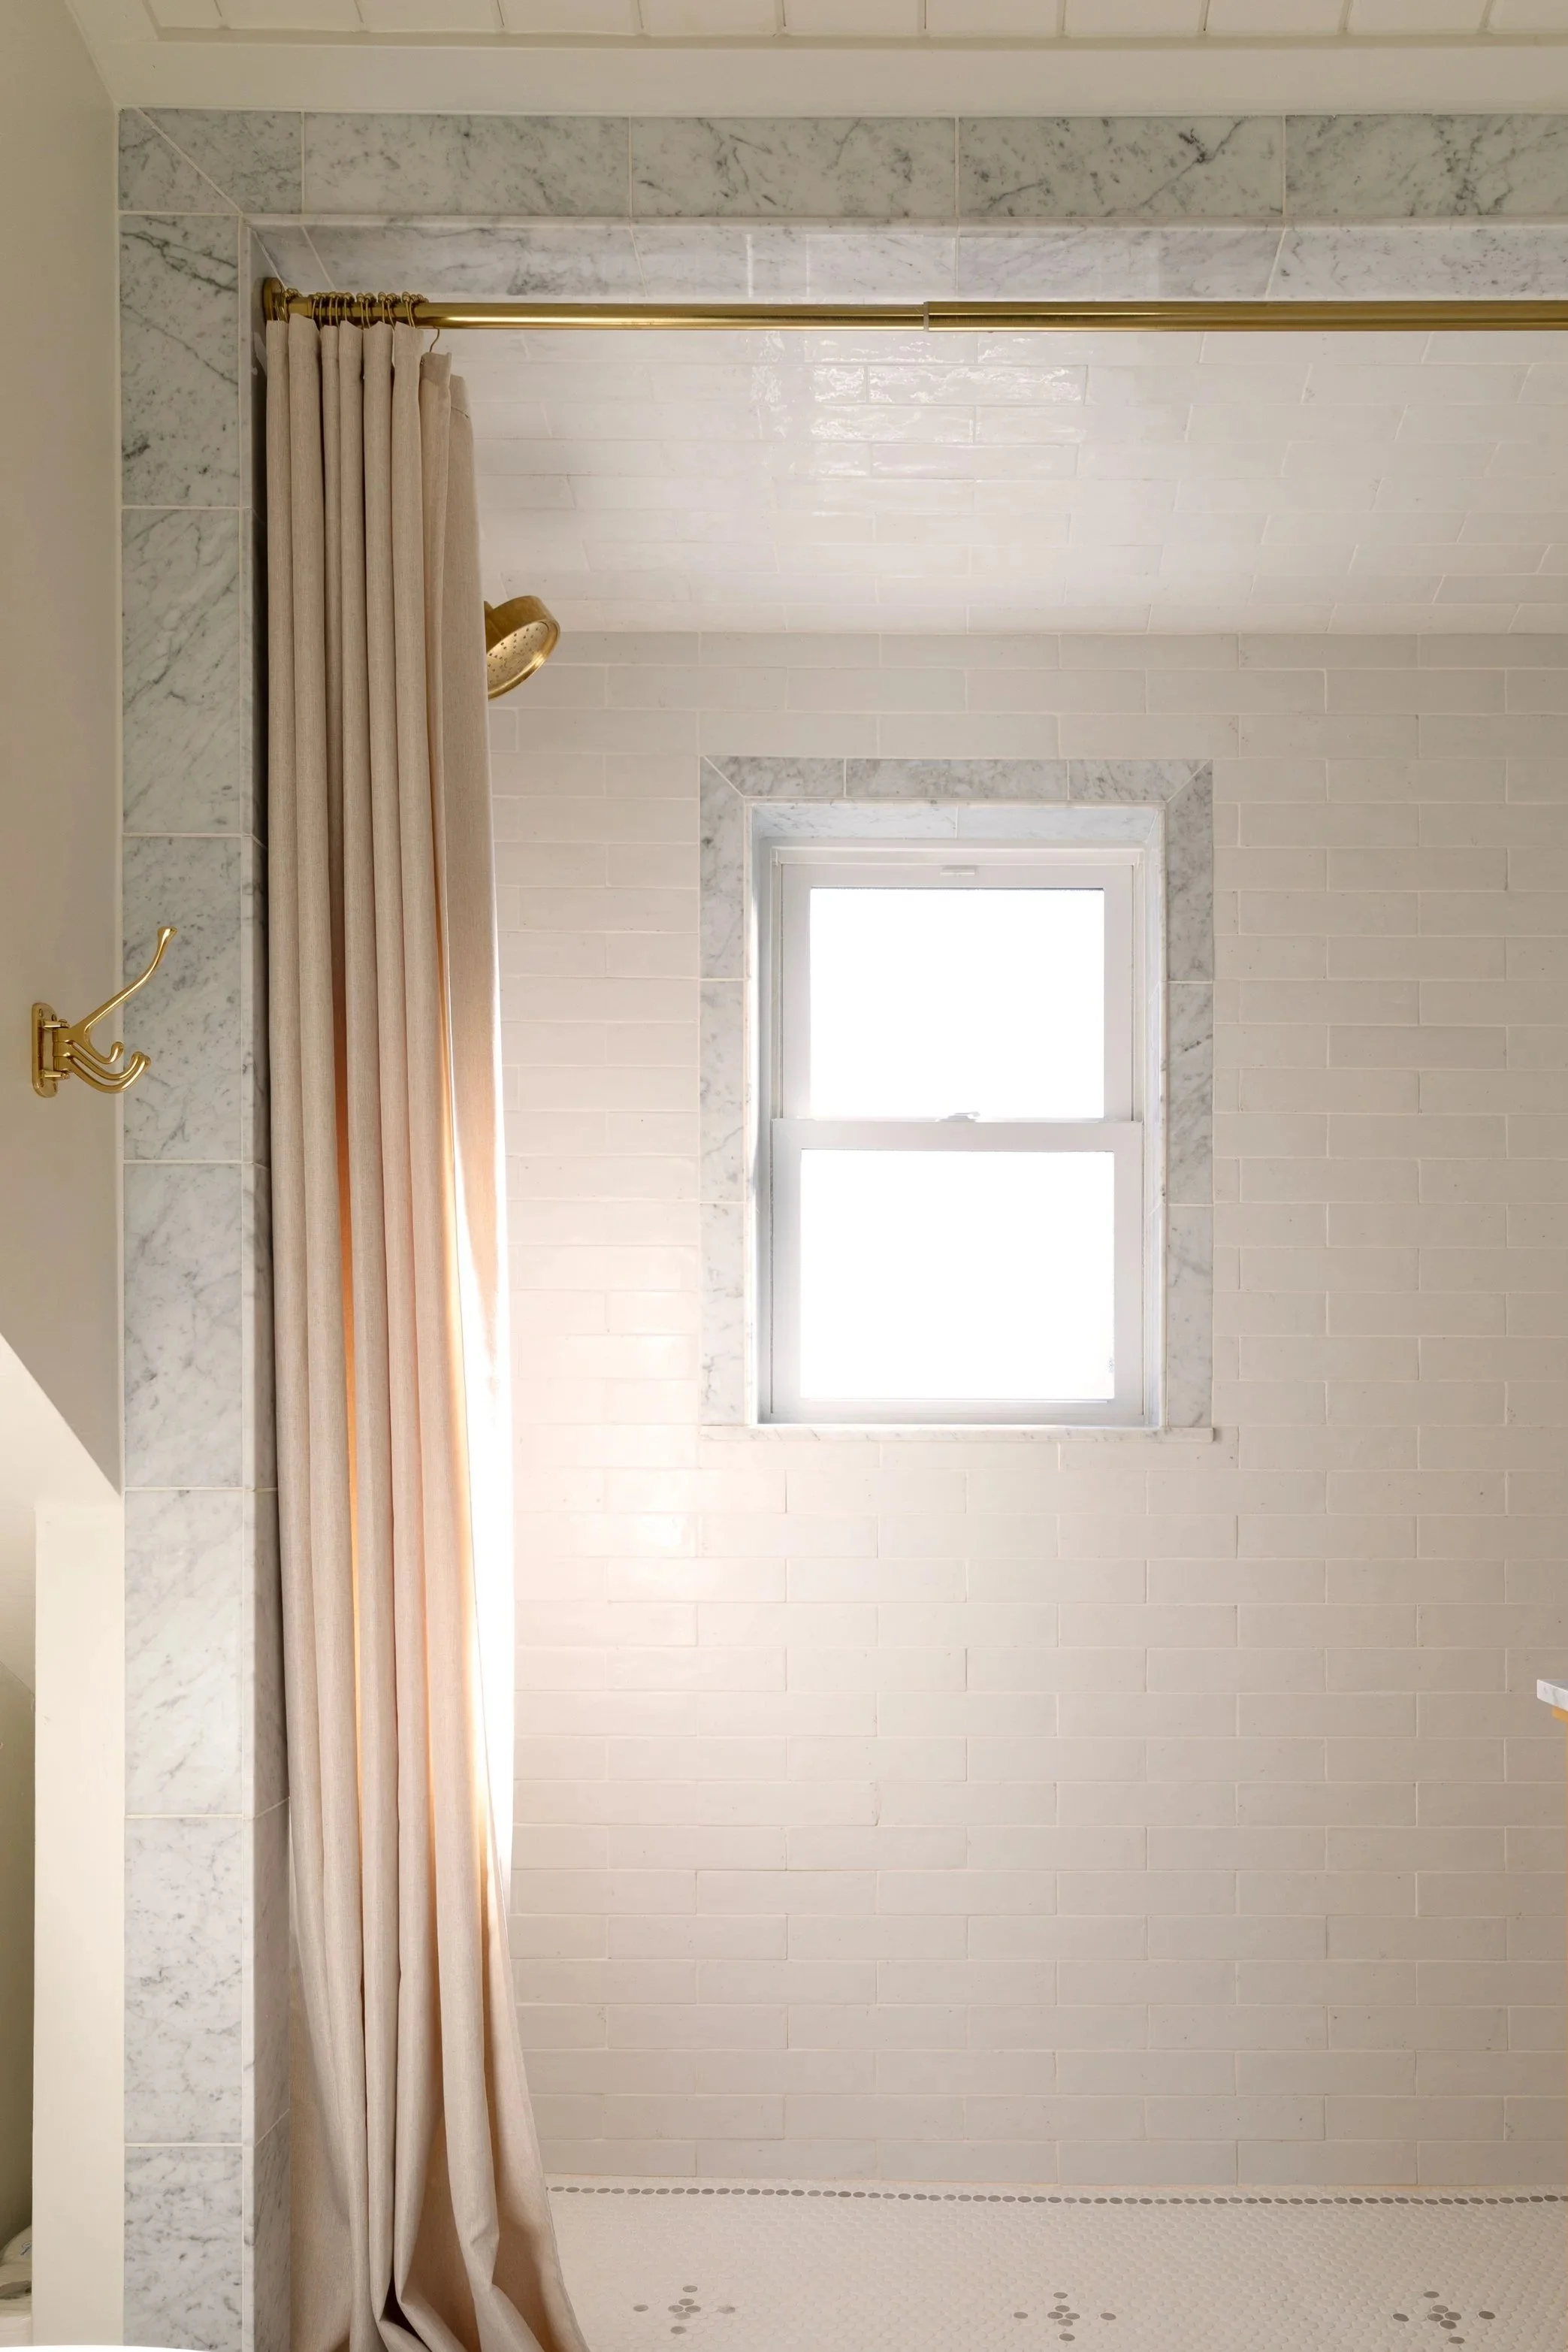
Handcrafted Tile in the Poplar Cottage main floor bathroom
THE POPLAR COTTAGE
Zellige, Zellige, Zellige where have you been all my life?! Seriously though, these hand-made tiles are really something. I have actually wanted to use Zellige tiles for years now but just didn’t think they fit the character of our Farmhouse. So I was thrilled at the opportunity to partner with The Tile Shop on a Zellige tile wainscot around the Poplar Cottage bathroom! These tiles are the perfect complement to the hand-crafted character of this cute little cottage. Each tile is unique so the finished look has texture, movement and a subtly-organic look. I love them so! Take a look…


*this post is sponsored by The Tile Shop
What exactly are Zellige tiles?
Zellige tiles are traditionally handmade in Morocco, they’re ceramic, and usually have a high-gloss glaze. As the Tile Shop puts it, “Each piece of this carefully crafted tile is individually shaped and glazed by hand before being unevenly heated in the kiln. Through this meticulous process, incredible variation in color and surface texture from tile to tile is achieved, giving each piece its own unique look and feel.“

Install
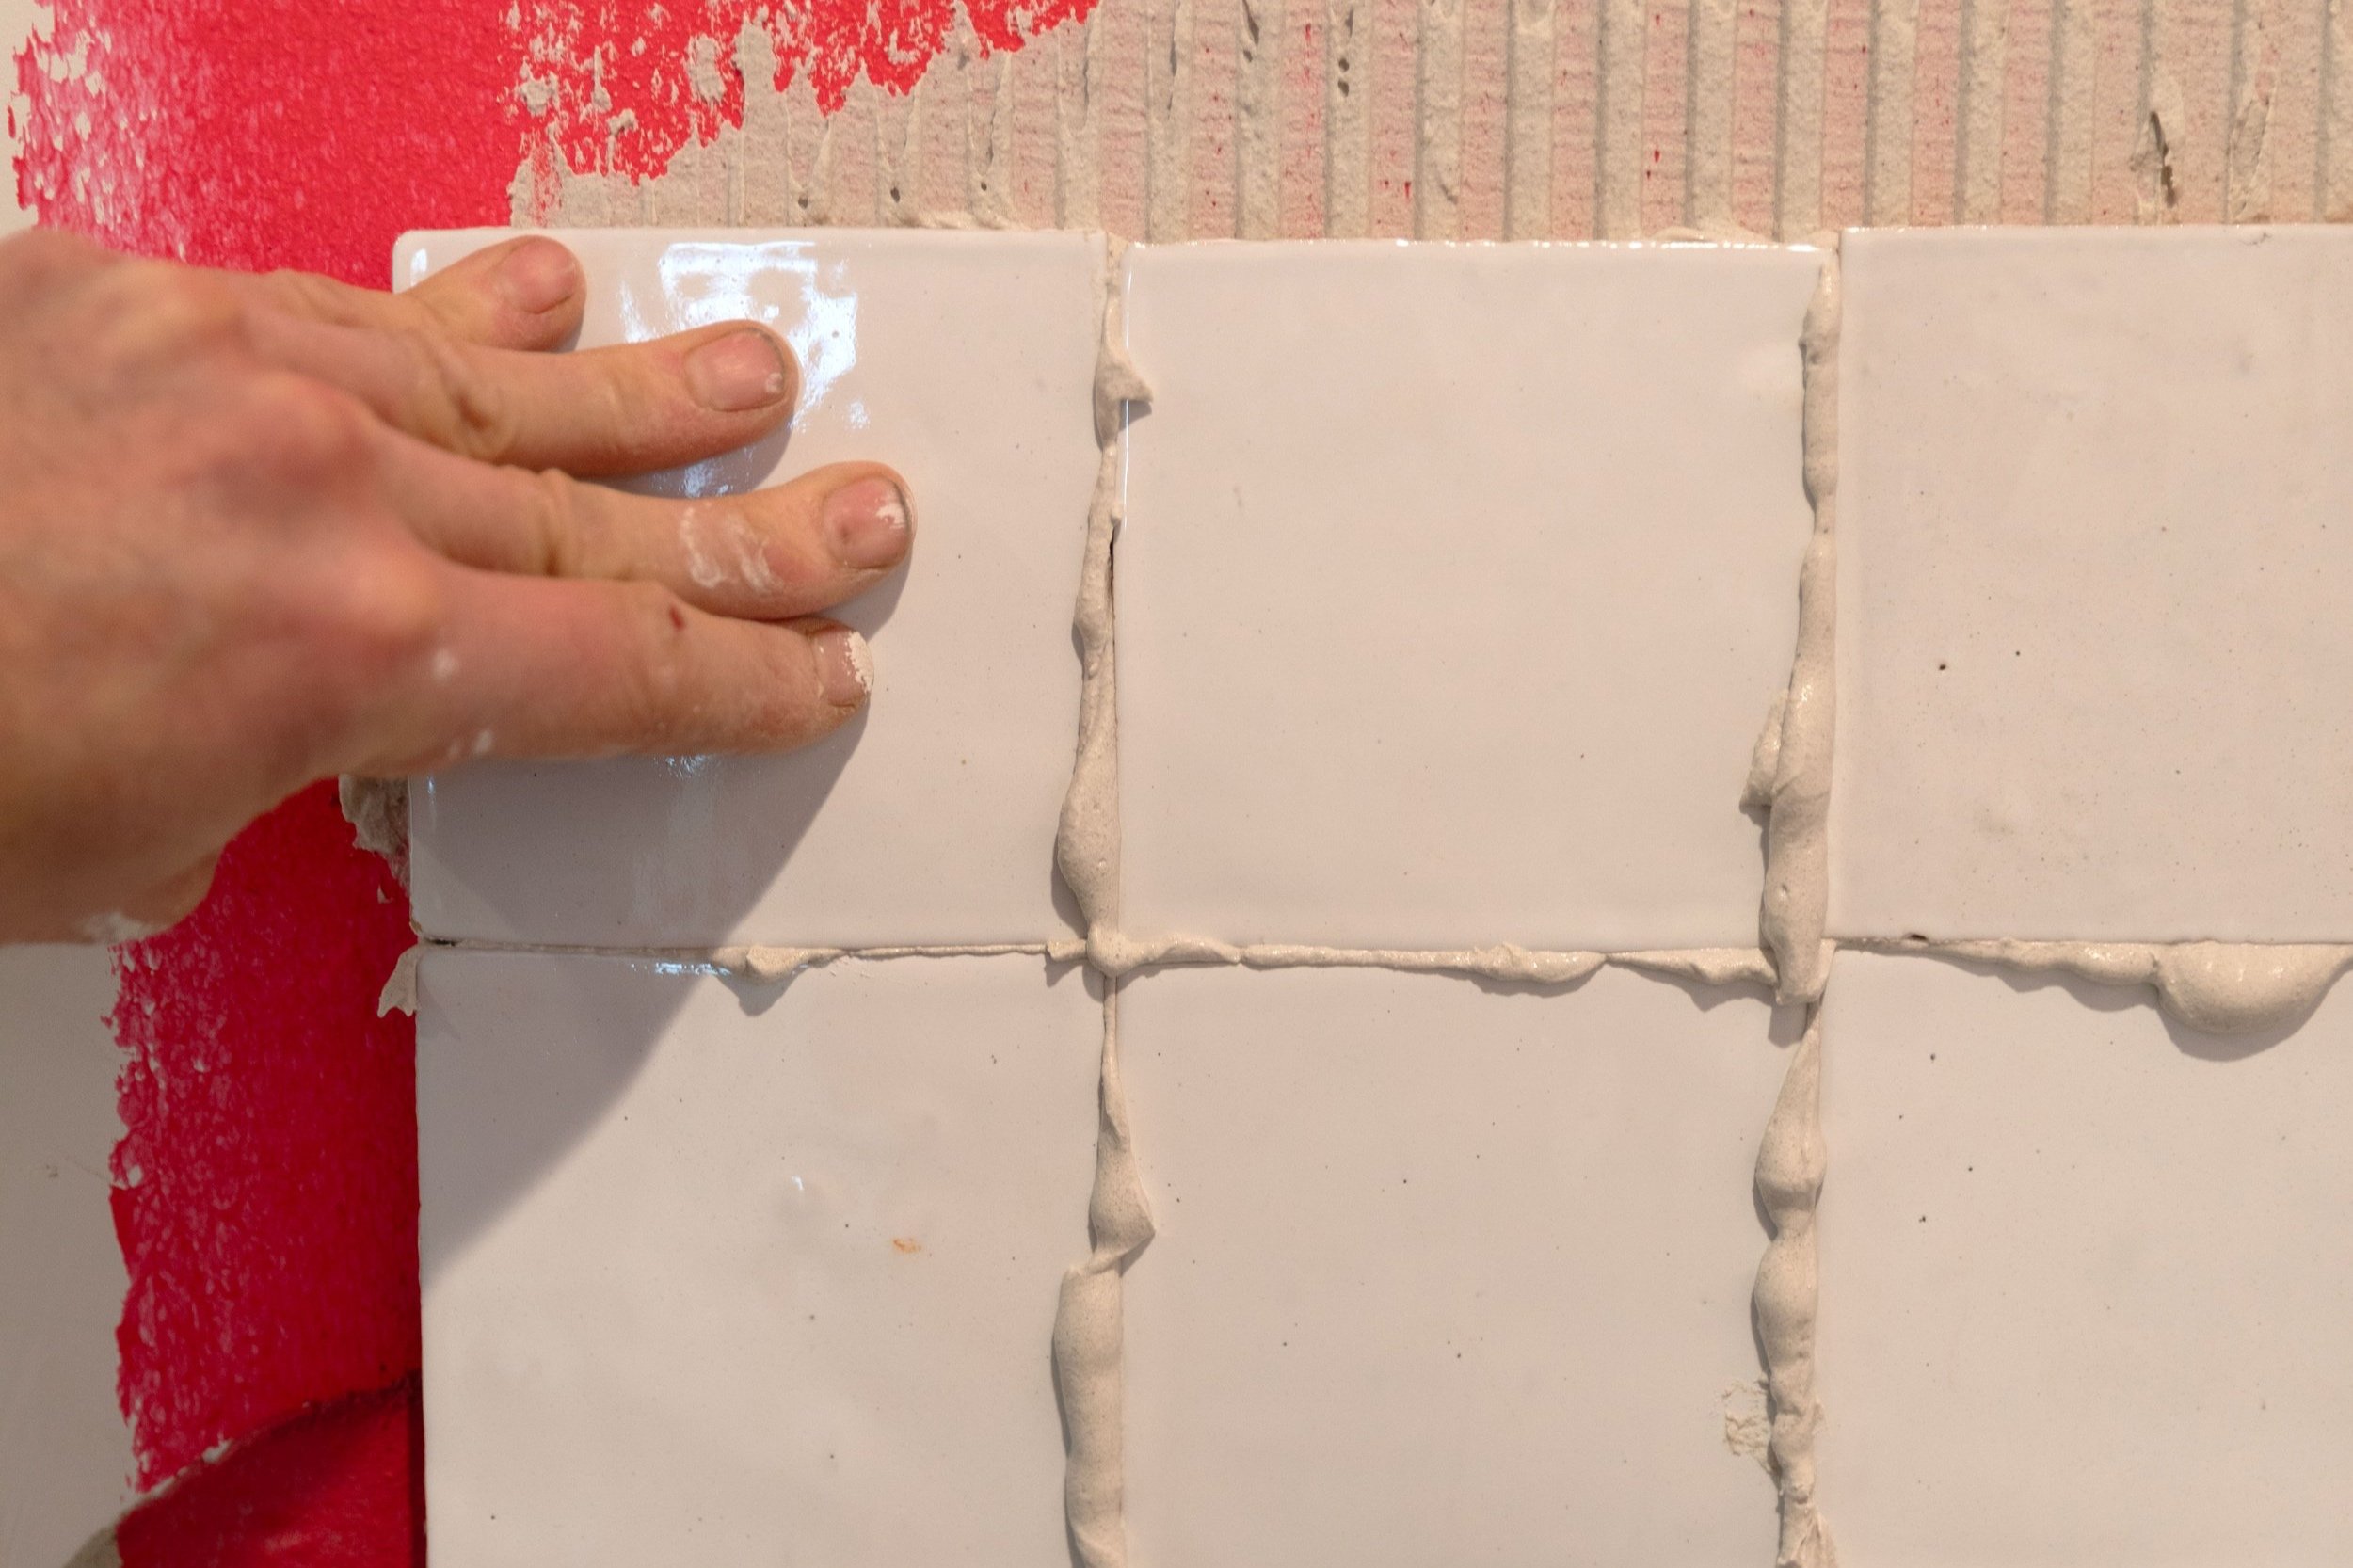
Because of the handmade nature of these tiles, you kinda have to go with the flow on the install. Each tile is minutely different and even the small changes to dimensions or the ‘square’ of a tile makes traditional grout spacing difficult. So we opted to lay the tiles in a stacking bond, straight on top of and next to each other without a space. I love the look of Zellige tiles laid like this.


We did level the rows of tile every one or two rows and used 1/16” spacers to make up any space as needed. But for the most part, we just stacked the tiles next to each other and appreciated the movement and variation in each one. BTW The Tile Shop’s product sheet recommends installing tiles as close together as possible, without joints. They also recommend soaking tiles for 1-2 minutes before install and then applying thinset to the installation area and to the back of the tile.
We opted to lay a thick bed of thinset on the wall and on each tile, so that there was enough excess thinset to spill out between each tile when we pushed it onto the wall. We then wiped and washed the excess away, creating a look similar to grout between each tile. We did this in the shower only, to make sure water couldn’t get back behind the tiles. We opted not to use grout.

For the wainscot around the room, where we’re not particularly worried about water, we opted to leave the tiles un-grouted. I’ve seen this done in a lot with Zellige tile installations and it’s a pretty look.

Our Finished Tiles
We’re thrilled with how these tiles turned out! They’re just so beautiful and make an-all-white shower surround anything but boring.


One thing I love about the high-gloss glaze is how it bounces light around. In a room without much natural light like this bathroom, it really helps to make the space feel brighter.


Last minute, we decided to tile the front of the tub as well. I know, I know, I’ve never seen anyone do that before either. But I just didn’t love the detail on the front of this tub and it felt like a fun experiment.
What’s next
There’s still lots to do in the bathroom - like sand the hardwood floors, install plumbing fixtures, millwork, paint, and add some sort of top rail to the Zellige tiles - but goodness I’m already so pleased with how this bathroom is shaping up.

Thanks to The Tile Shop for sponsoring this post. All thoughts and opinions are our own.