THE HILL HOUSE
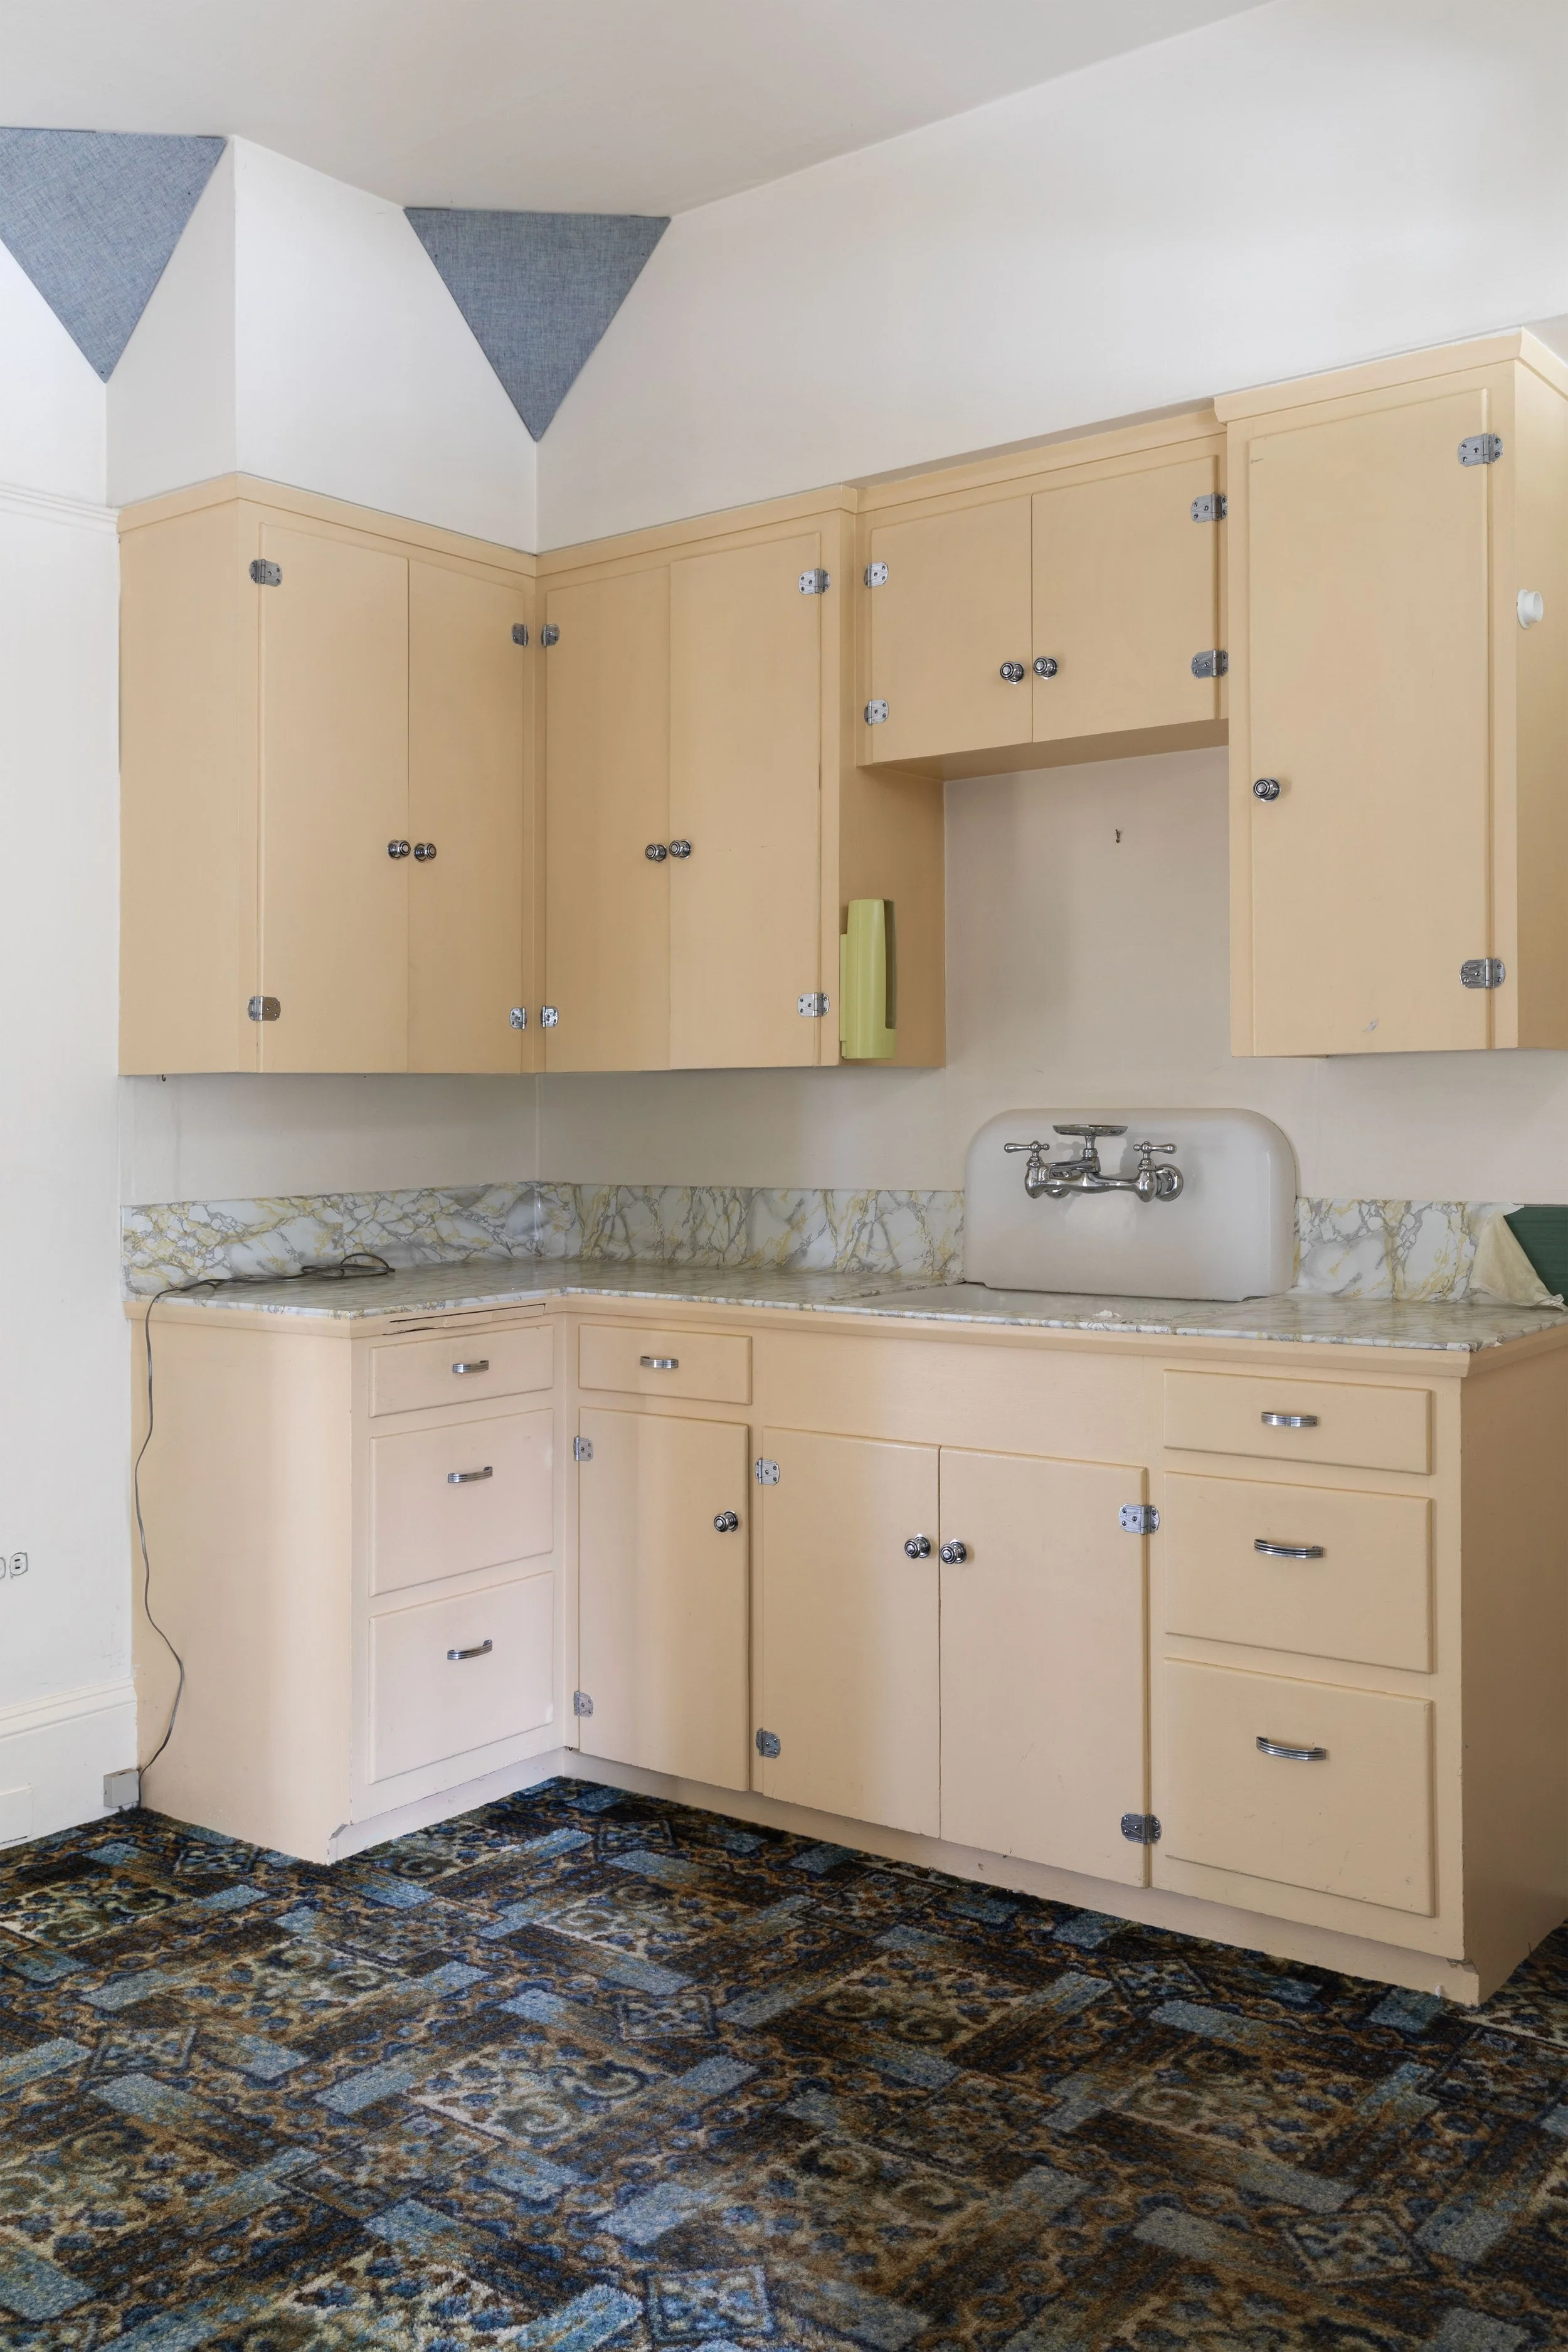
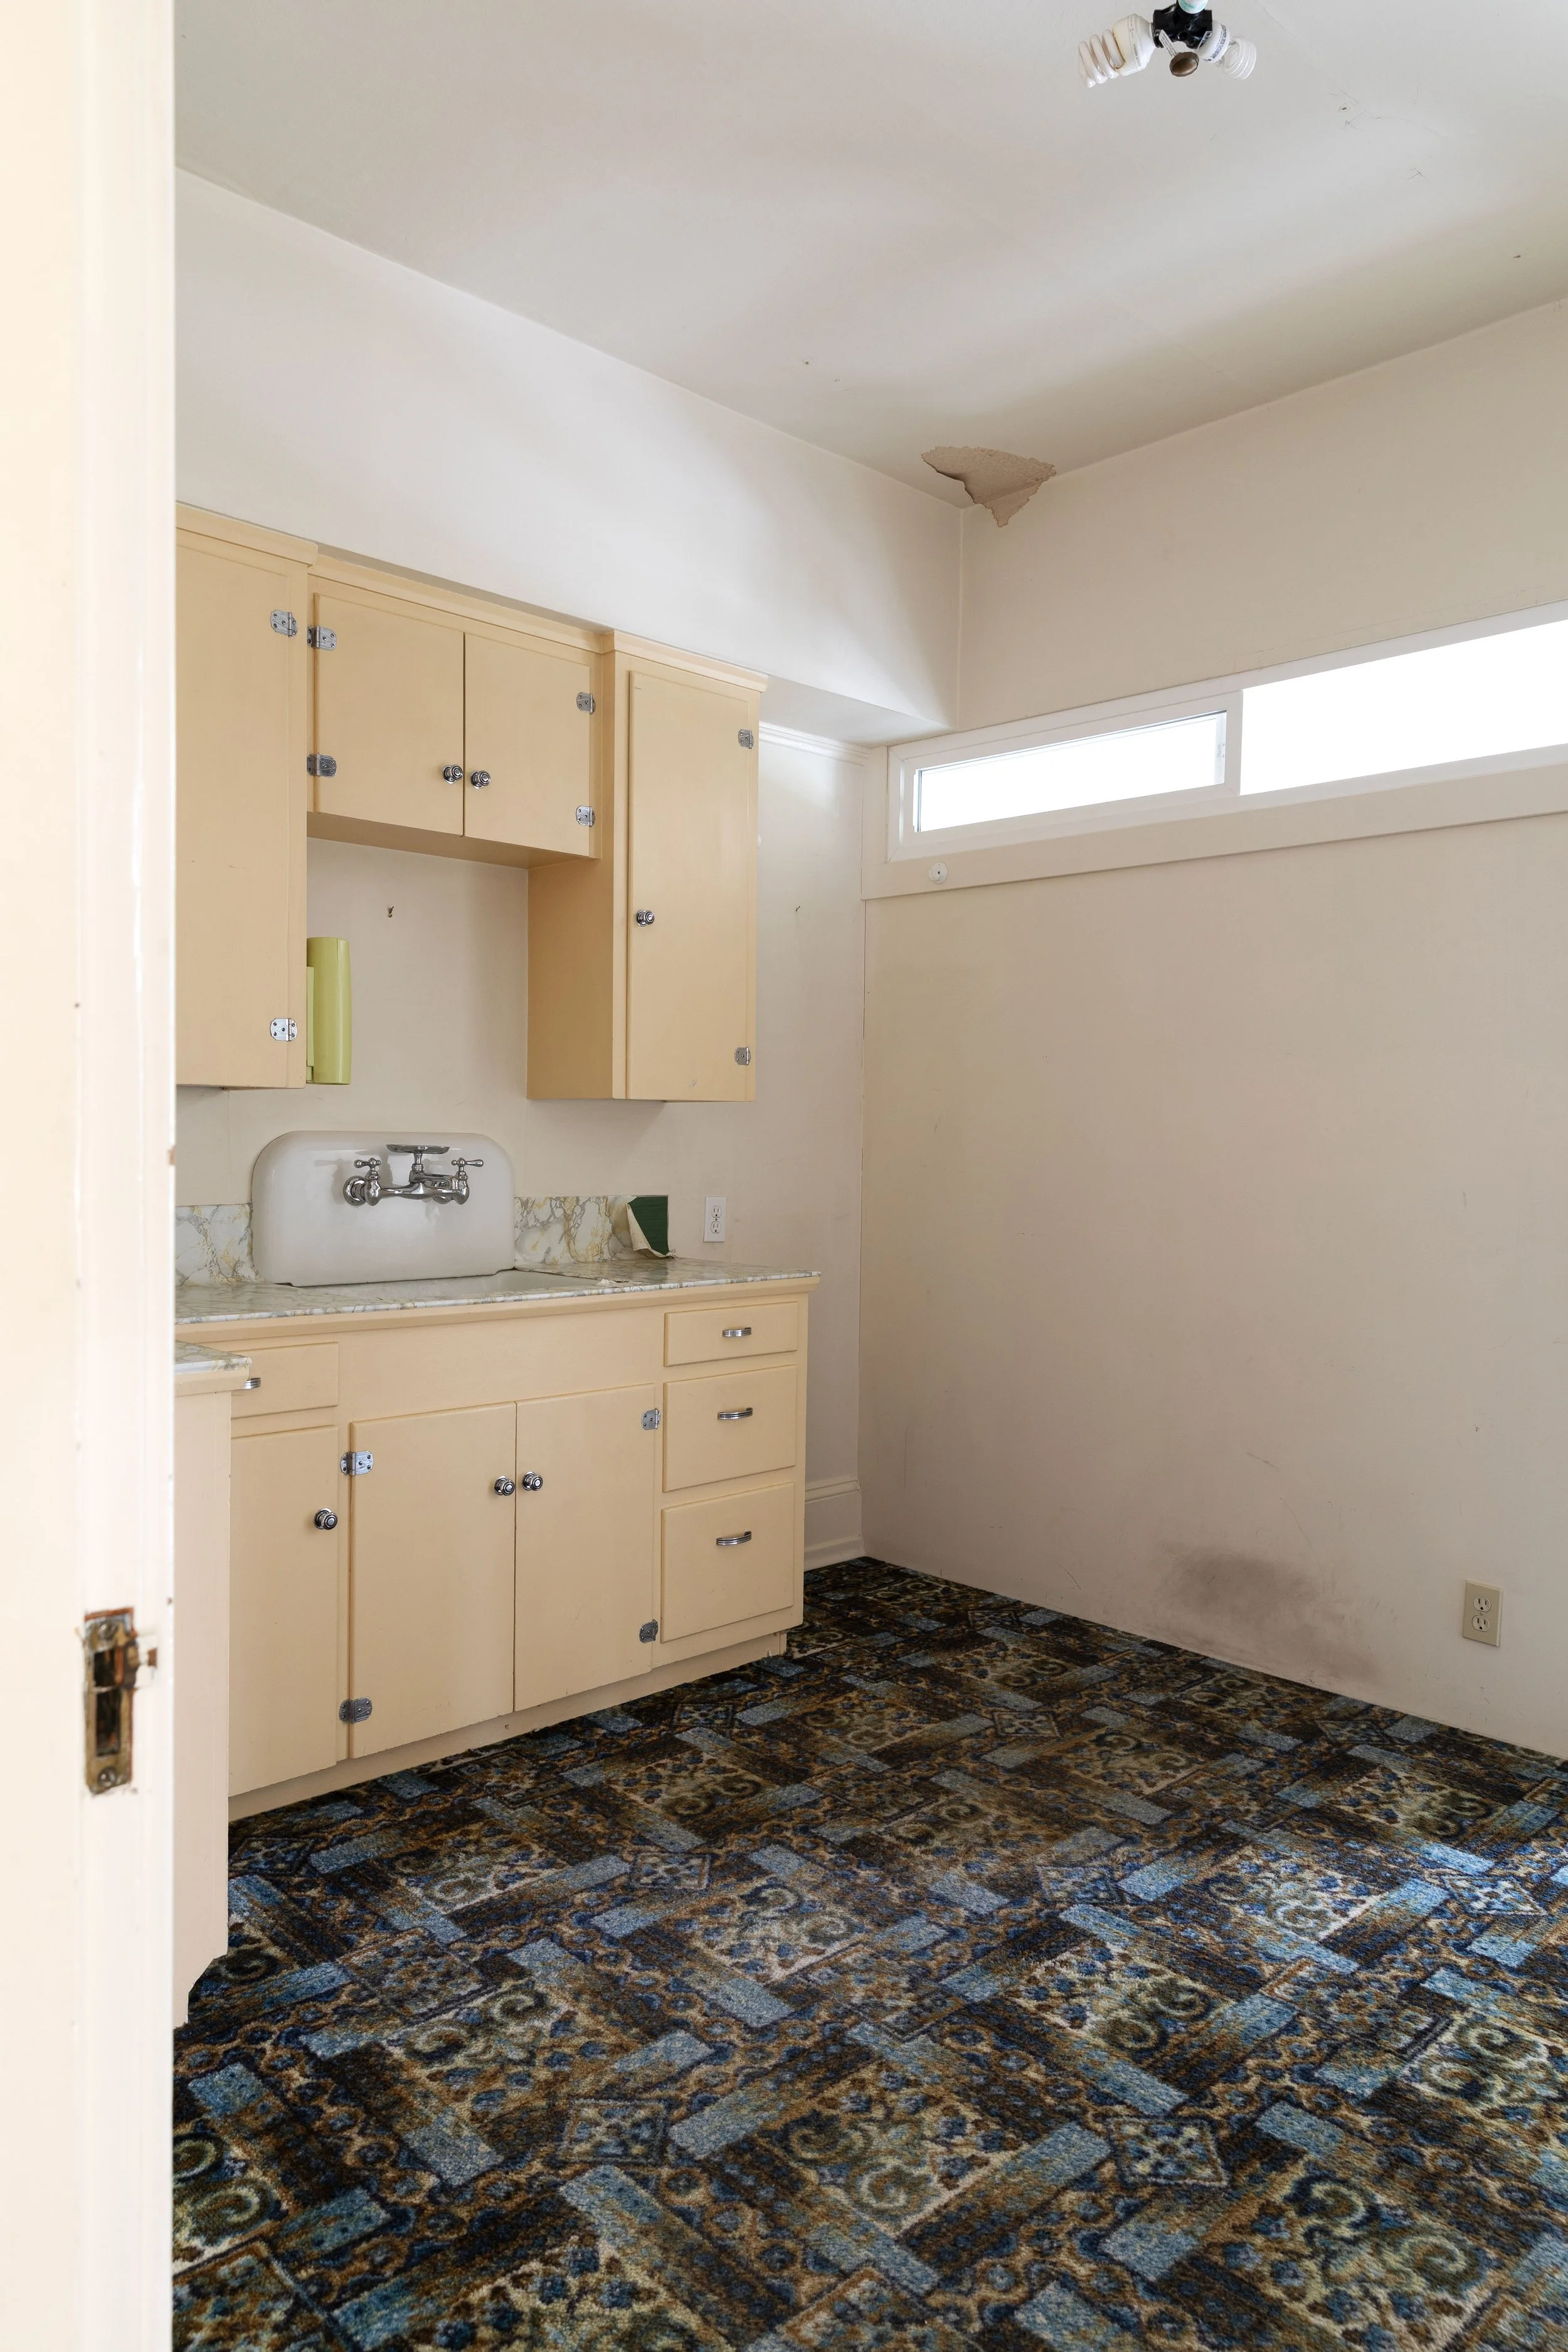
When we first toured the Hill House, I was pretty enamored with the little second kitchen tucked in a back room (the one that’s now our temporary kitchen). It was really just a bank of cabinets on the wall but it had some charm, and even better, I knew how handy it would be during the future renovation! Renovating a whole house and living through it is messy. Dust, yes. But also a 'shifting rooms kind of messy. Right now we’re eating in the living room (until we demo that space), lounging in our future bedroom, and cooking in the temporary ‘second kitchen’ while the first kitchen is demo’d. Messy! Today we’re sharing our temporary kitchen makeover: a quirky, cheery, far-from-fancy, make-do kitchen we pulled together on a serious budget. Let’s get into it...

floors, tea kettle, color: India Yellow
I wasn’t planning to show you all of the temp spaces during this project, but what would a real old house renovation story be without the messy bits, too? Plus the thoughtful comments on Instagram swayed me. People called this space a “real life moment” and told us the facelift is perfect for anyone without the budget for a full remodel. Not all of us have $50k and six months to renovate a kitchen, after all. So here’s the quick, inexpensive refresh we gave the Hill House’s ‘second kitchen’ so it works for our family of five while the main kitchen waits its turn. I’ll walk you through everything, from the peel-and-stick tile to the mustard paint color to the second-hand range, plus exactly what it all cost.
Why We Have a Temporary Kitchen (and How Long We’ll Use It)
If you’re new here, the Hill House is our 1910 in-town fixer upper, and we’re doing it in phases (here’s our renovation phasing plan for the whole house). The main kitchen is a bigger project that we’re hoping to start in the spring, but we demo’d it before moving back in since I was trying to avoid a ton of demo going on while we lived in the house. So for now, we’re cooking in the quirky second kitchen downstairs.
Why did this house come with two kitchens? No idea! It really wasn’t much of a second kitchen, just a bank of cabinets on the wall, but it had charm. Now that it has to feed our family of five plus the glorious rotating door of neighbors, friends, and family we have here (Garrett’s ENTIRE family now lives within walking distance!), we wanted to put in enough effort that we can ACTUALLY cook.
People keep asking how long temporary is. I’m writing it here for the record: we’re planning under 18 months, and hopefully even less. (Future self, please don’t laugh at me if I’m totally off!)
The other question I keep getting: what happens to this space afterward? Down the road, this space will be our future primary bathroom! So everything you see in this kitchen is temporary, which feels funny to write down but really it is the nature of old houses and renovating them for a modern family and a second century of life. Don’t worry though, when the day comes to demo this second kitchen, everything will be carefully removed. The cabinetry will be moved to our basement, or a future space I haven’t even dreamed up yet, or off to the salvage store for someone else’s retro kitchen.
Where the Second Kitchen Is (the Floor Plan)
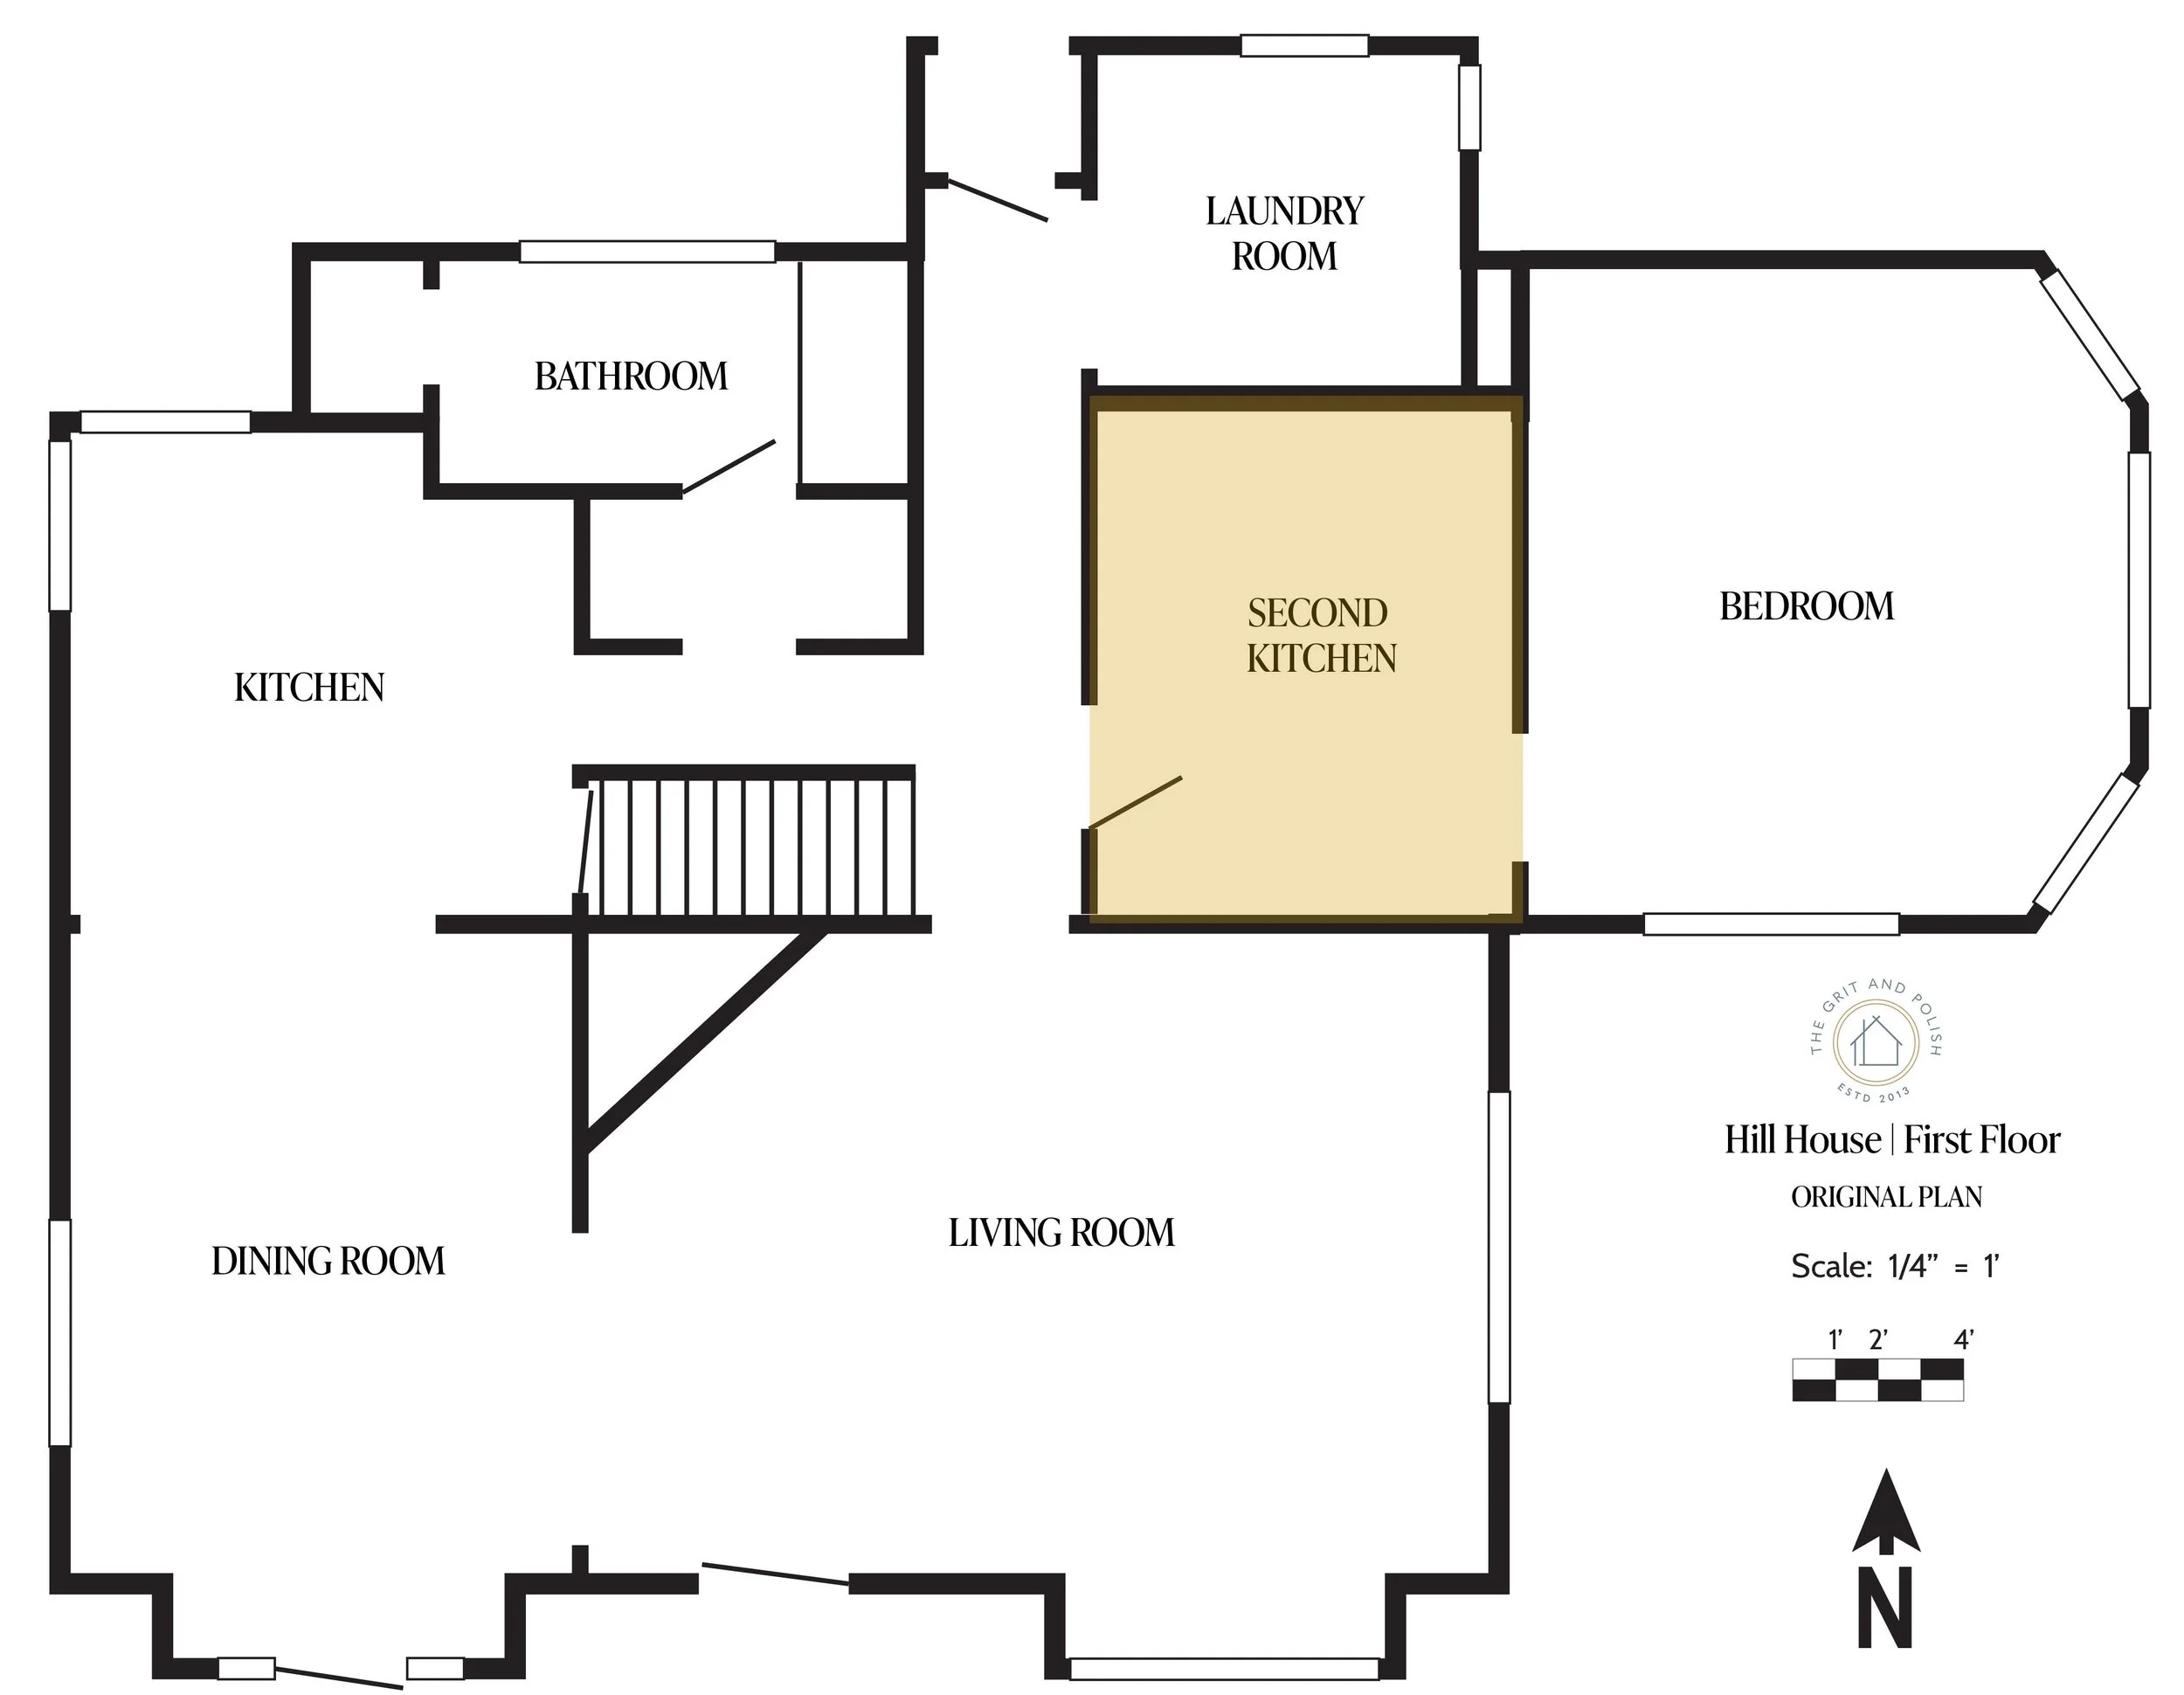
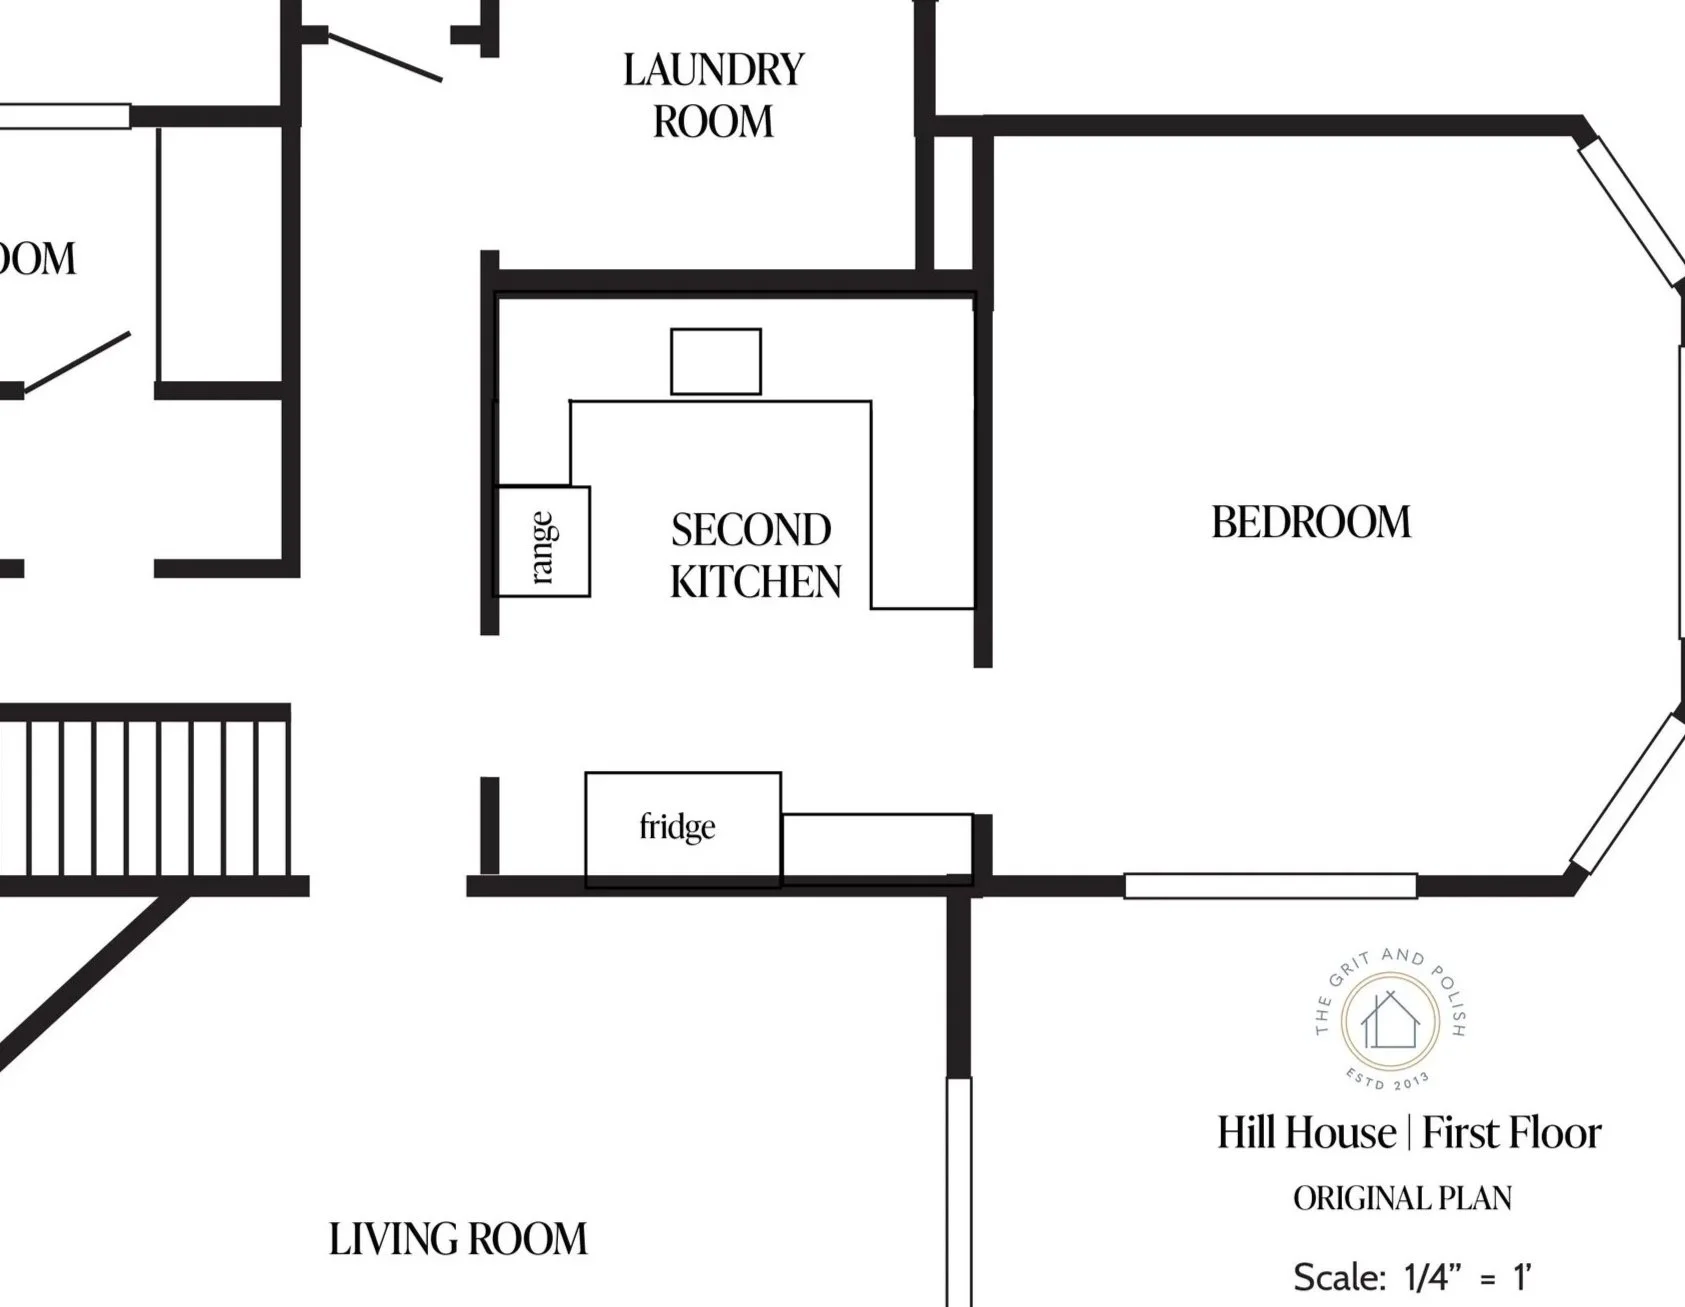
Before I show you more of this kitchen, let me show you where it is in the house. The second kitchen is on the main floor, next to the laundry room, and adjacent to the bedroom addition, which we’re using as our living room and office for the moment but will eventually become our primary bedroom.
Here’s the original floor plan:
The Plan: Make Do With What’s Already Here
We started with a very cute bank of cabinets in a windowless room and had a simple rule: use what we already have first. We also wanted to spend as little money as possible while making it pretty and functional for a year of use (or more). Here’s what that looked like...
Cabinets: We reused the cabinets that were already in the second kitchen.
More cabinets: We found another bank of lower cabinets in the basement (you just never know what’s waiting for you in the basement of an old home!). We brought it up, set it in place, and connected it to the other bank with simple shelves in the corner.
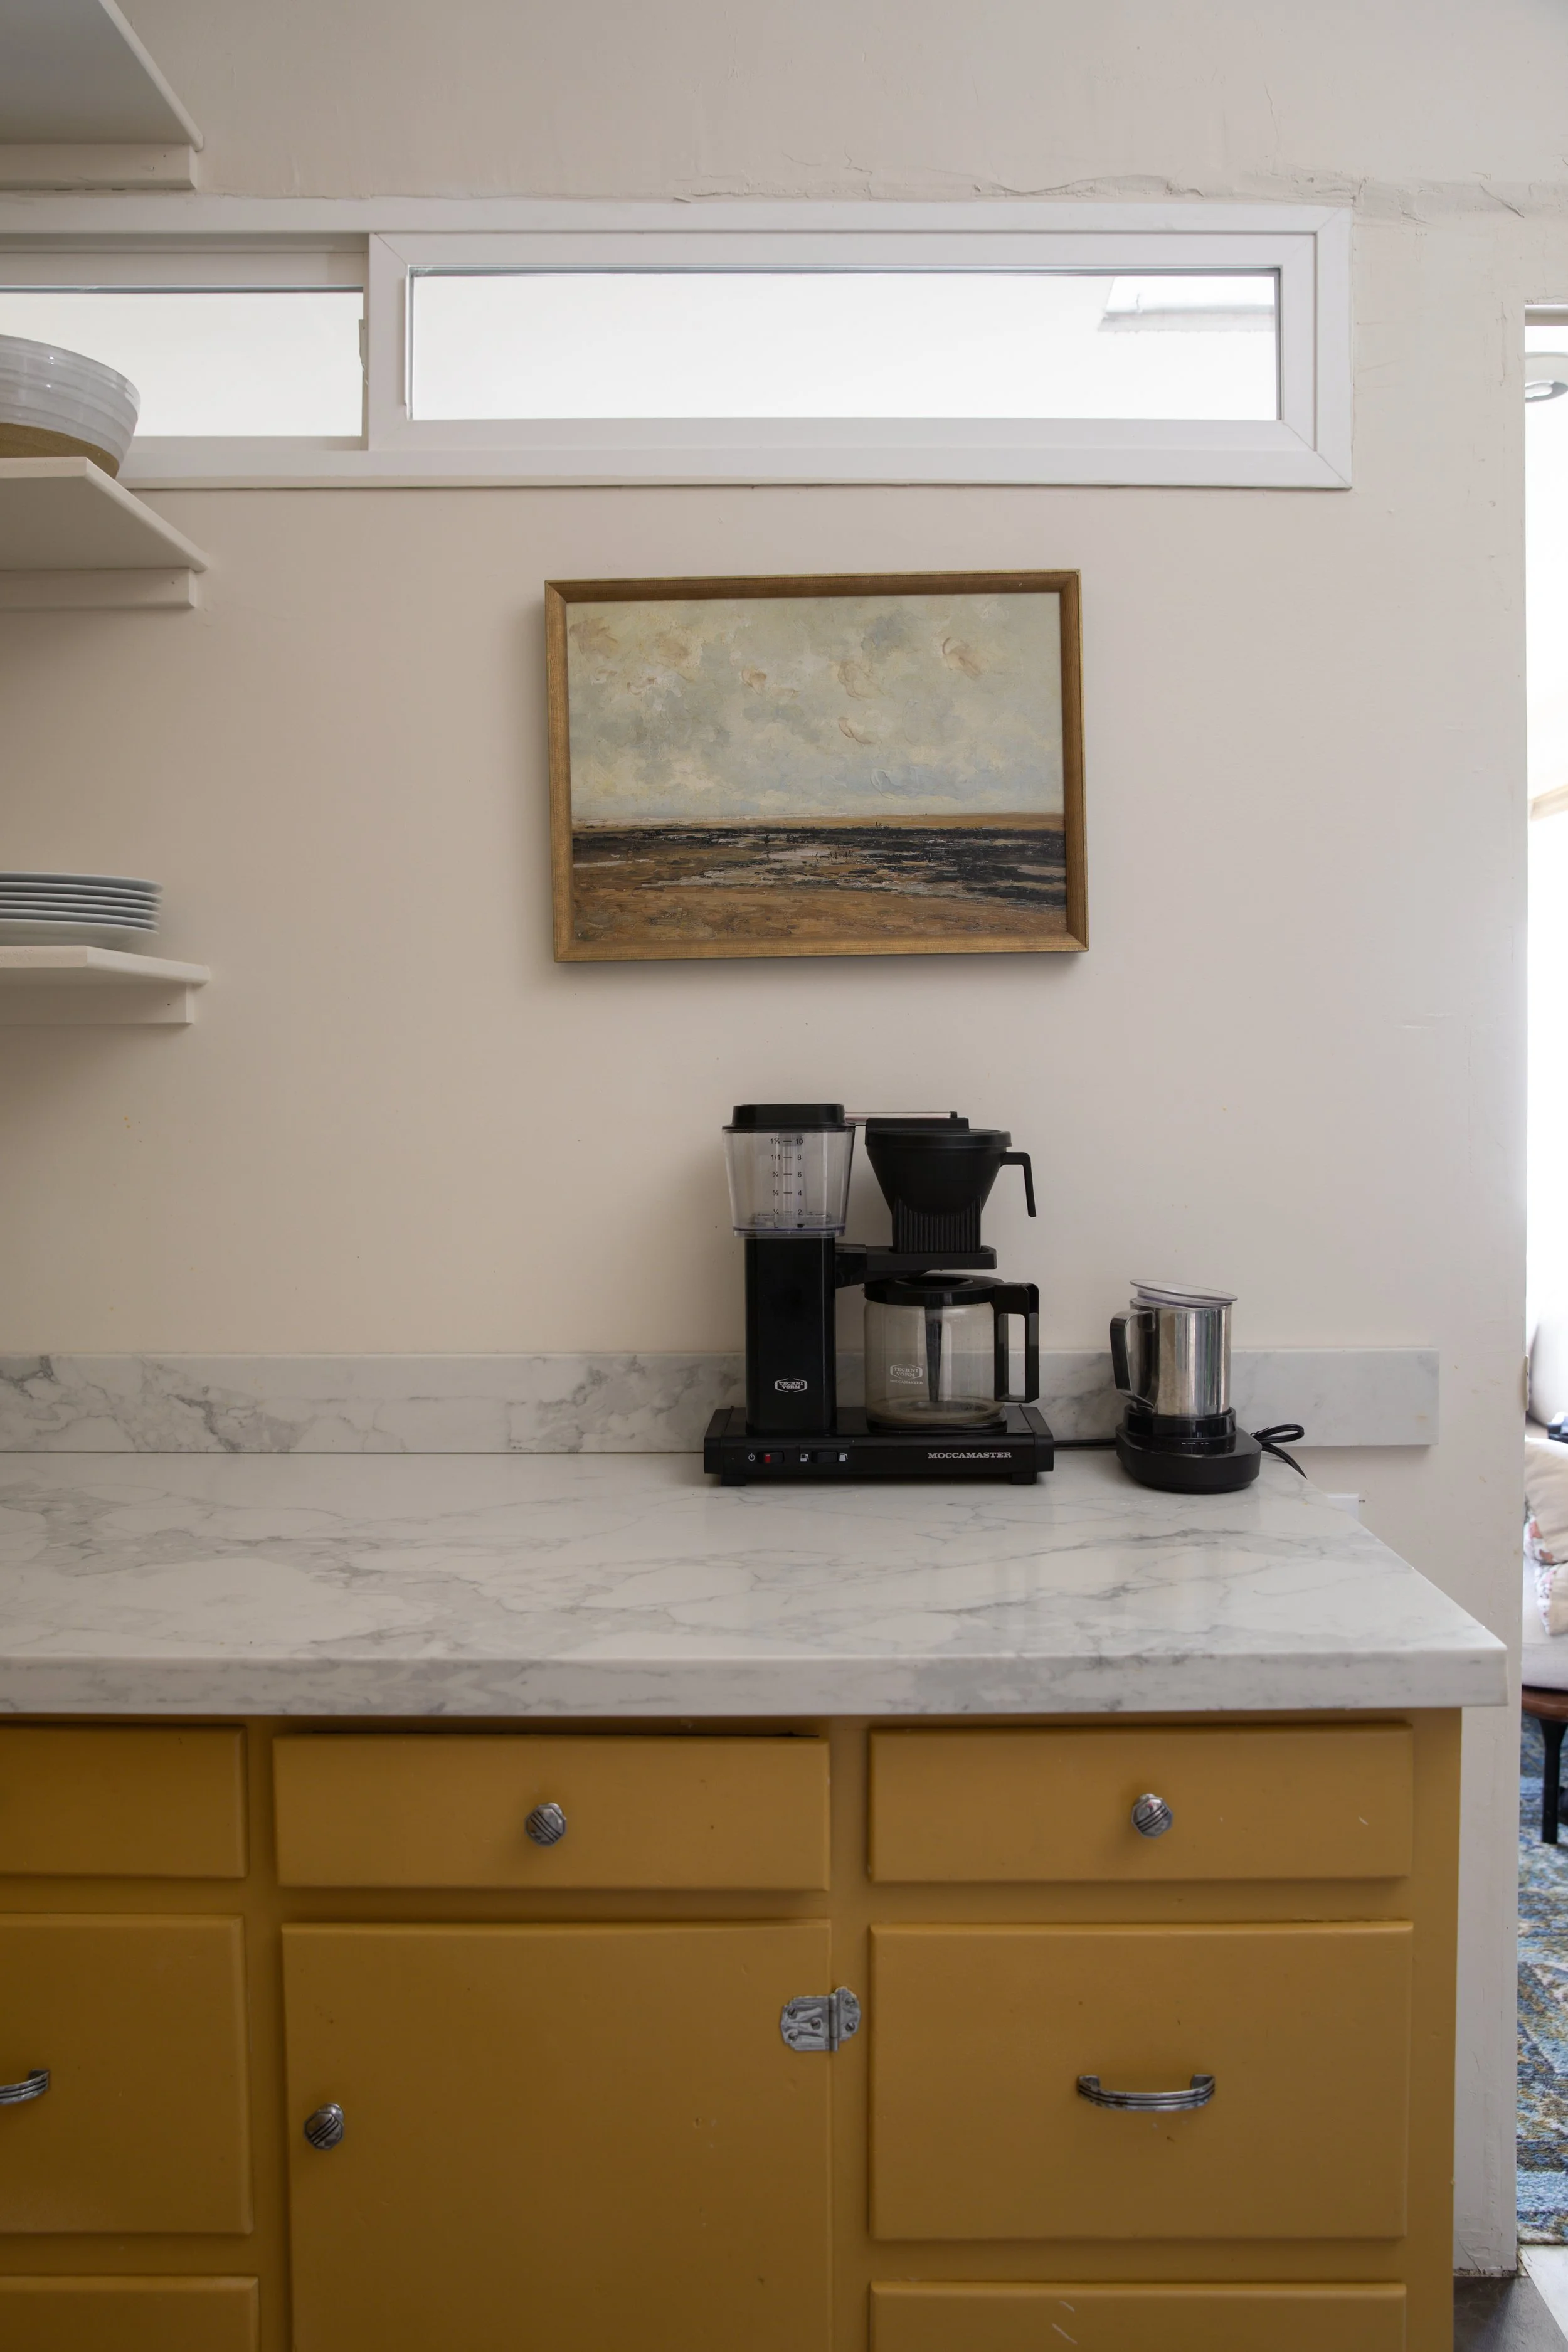
Countertop: We left the existing linoleum countertop (we did remove the faux marble contact paper on top). My parents also had a leftover piece of quartz from their kitchen renovation and gave it to us. We placed the new lower cabinets so the quartz would fit perfectly without cutting, because Garrett insisted he wasn’t fabricating countertops for a temporary kitchen.
Backsplash: My parents had a leftover length of backsplash, too, so we put that on.
Pantry: A simple wire metal rack with leftover bins (more on that below).
Range: A nice, almost-new electric range from Facebook Marketplace (more on that below, too).

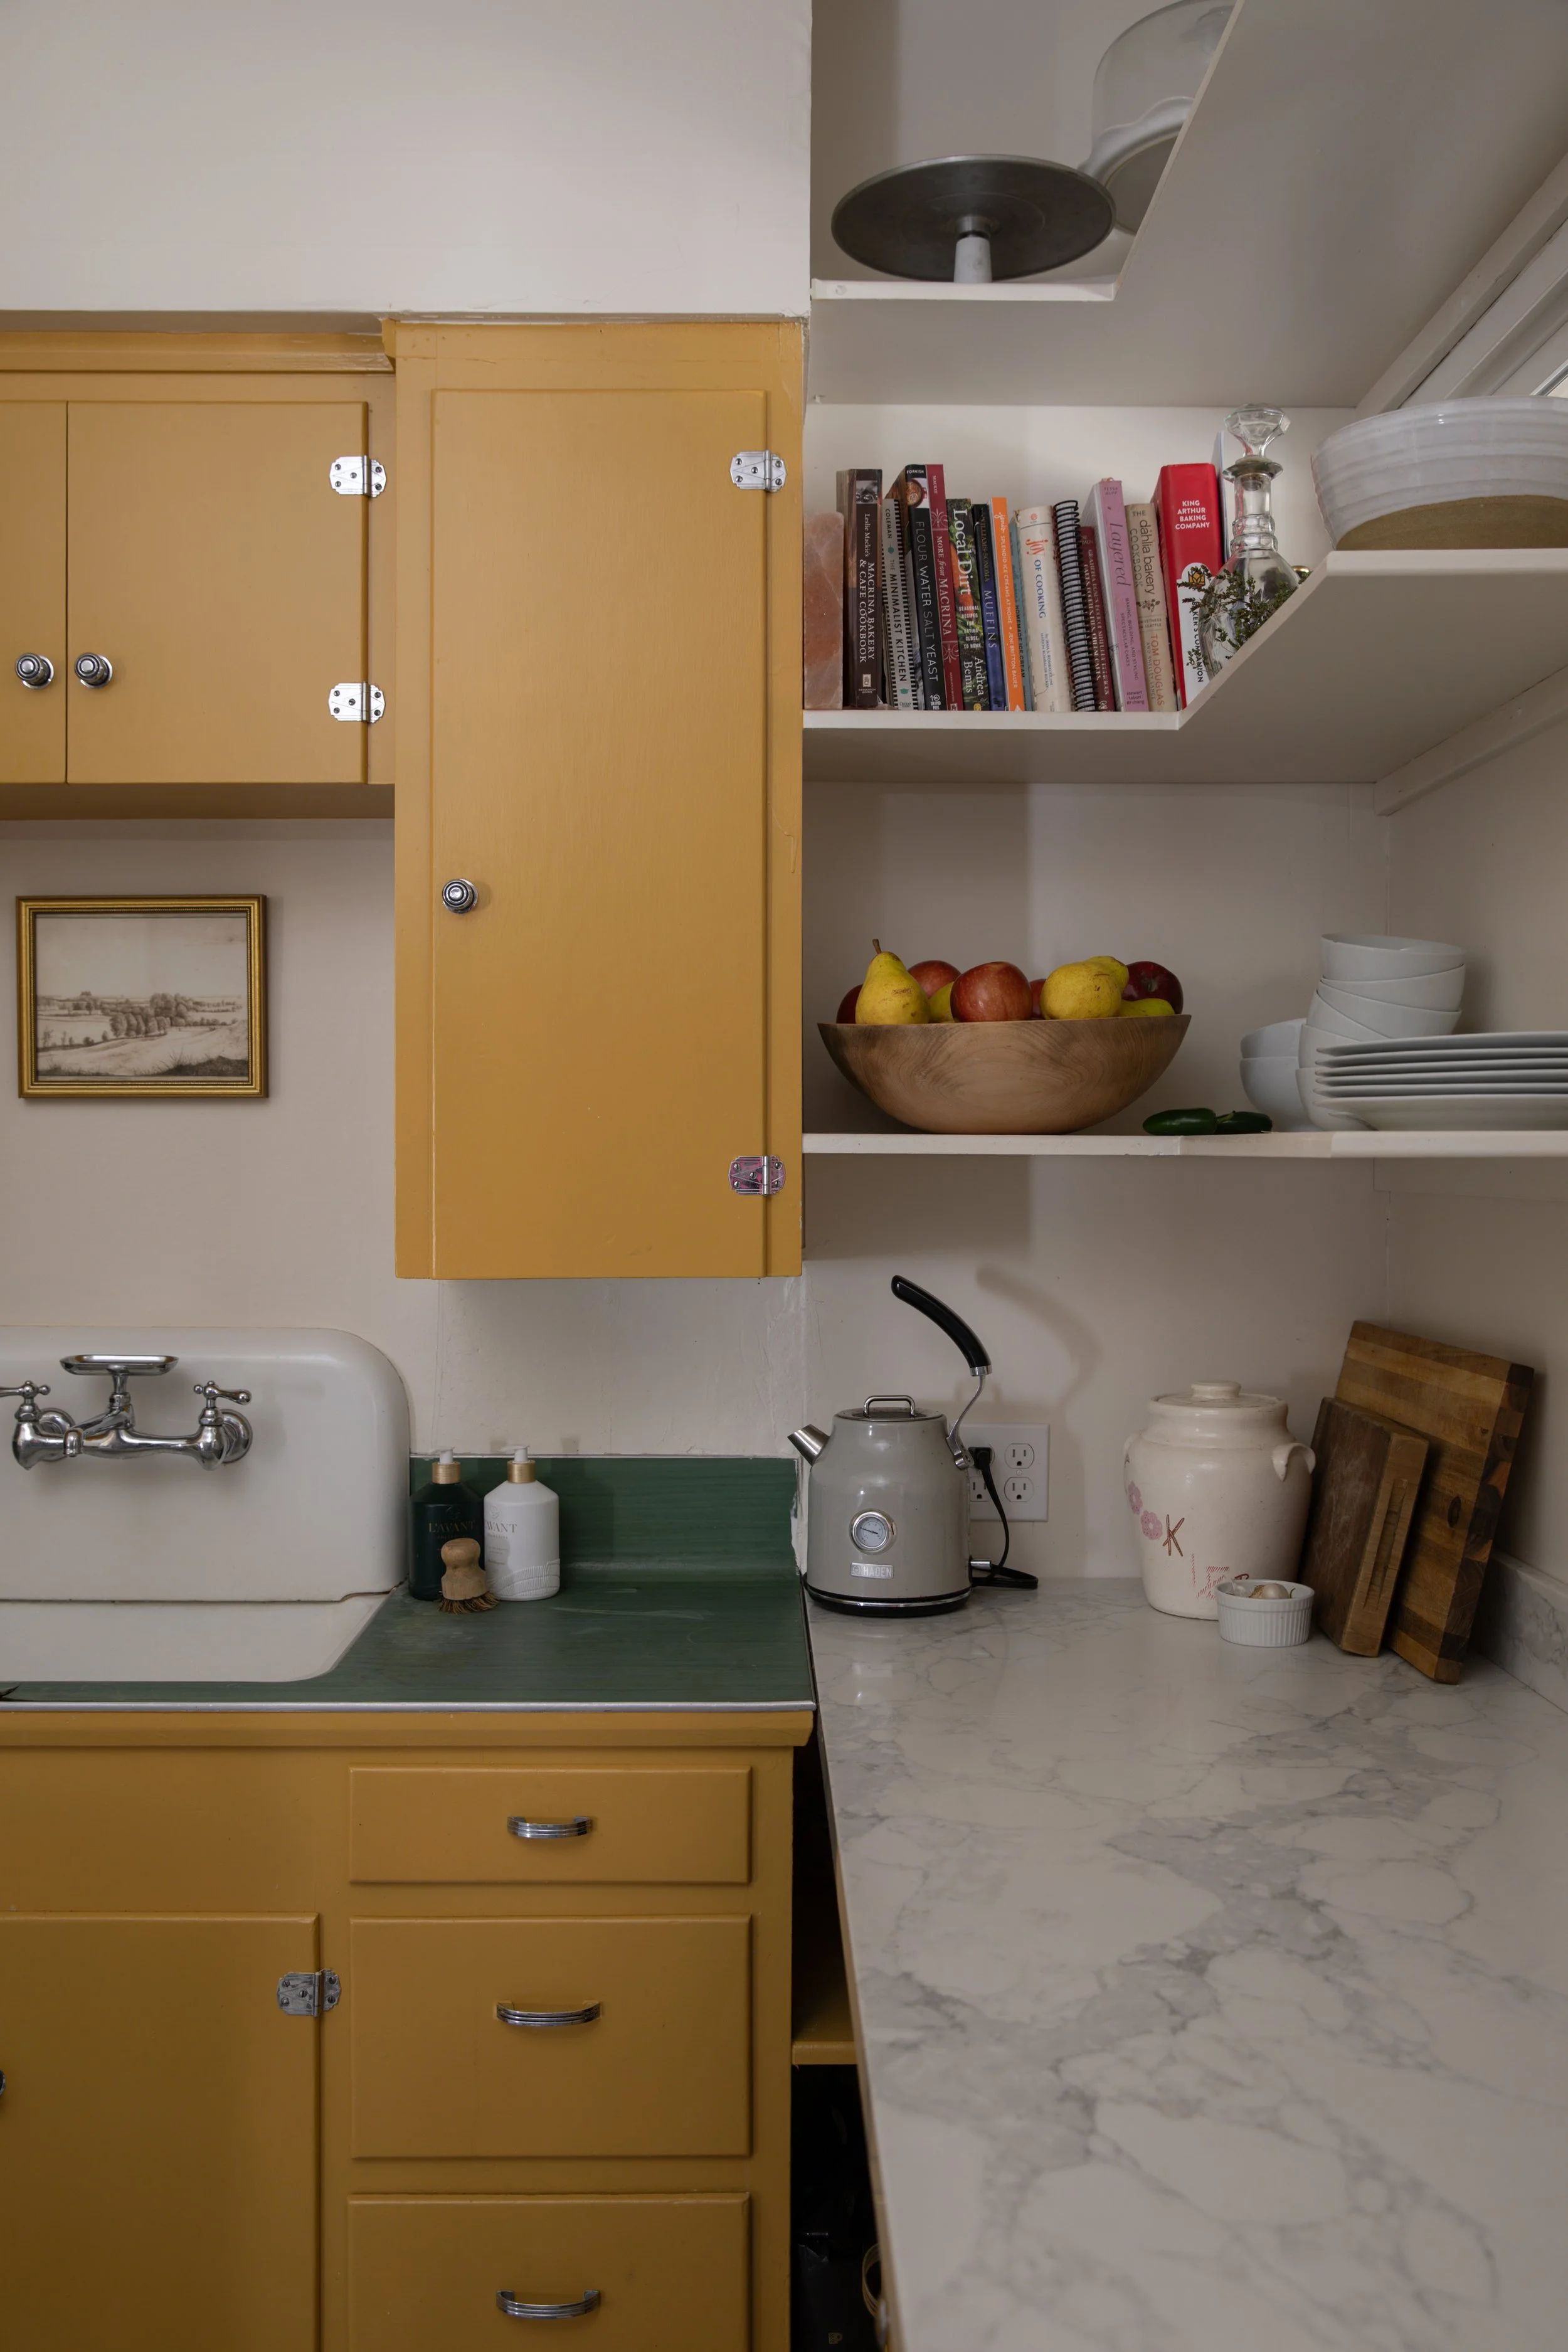


And here’s the layout we landed on with those changes:
The Floors: Peel-and-Stick Tile Over Old Tile Glue
When Garrett and I first started talking about using the second kitchen as our primary kitchen during the main floor renovation, he tried to convince me that we should keep the carpeted floors. Ha! That wasn’t going to happen.
So we pulled up the carpet, thinking we’d find the original hardwoods underneath (like we did upstairs). And there they were! But there was SO MUCH gunky glue on top. Getting it off would’ve been a major effort and it just wasn’t worth it for a space that’s eventually becoming a bathroom (we’re planning tile and heated floors in here down the road). So we ordered the same vinyl peel-and-stick tile we use in the Poplar Cottage mudroom and stuck it right over the top. Ideally you should have a nice level and smooth subfloor for these tiles, but in a pinch it’s good to know that they stick to old, gunky glue ;)
I have to say that we’re huge fans of these vinyl tiles. They’ve been in the mudroom for 2 years now with zero issues. Plus they’re very pretty. And they’re just an easy solution when you need something pretty, low effort, and low profile. (Here’s our peel-and-stick tile install tutorial if you want the how-to.)
Of course a mudroom gets less of a beating than a kitchen, and vinyl won’t last as long as real tile, so I’ll update this post as the kitchen floor ages. But so far we highly recommend these tiles for the right space.
psst: Older floor tile and the glue under it can contain asbestos, and the EPA says material in good condition is usually best left alone and shouldn’t be sanded or leveled. Covering it was the easy call for us. If you want to remove yours, test it first and call a pro.

The Paint: Farrow & Ball India Yellow (and Slipper Satin Walls)
Since this is a temporary space, I went a little bolder on the design than I usually would. We painted the cabinets in Farrow & Ball India Yellow No. 66, which is a moody mustard. And here’s my confession... I didn’t even sample the color first. Eek! I always spend the time to sample paint before committing, but since this room is temporary, I just went for it. I’m so glad it worked out.
We had Sherwin-Williams match the color (they have the formula on file) and used these products:
Primer: Sherwin-Williams Multi-Purpose Latex Primer
Paint: Sherwin-Williams Emerald Urethane Trim Enamel in Satin
(Curious how that works? Here’s how we get Farrow & Ball colors matched by other paint companies.)
I don’t know if I could live with this color in a windowless room forever. But I’d love it on a furniture piece like a hutch, and I could absolutely do cabinets in it in a bright laundry room, maybe with a skirt on the lowers. It’s just a REALLY cheery color, and it’s hard to have a bad day when your kitchen is this bright!
The walls are painted Slipper Satin No. 2004, which we used throughout the upstairs and on the stairs. I had toyed with doing a pink or something bolder, but we already had this paint, and I’m glad we kept the walls simple in the end.


The Appliances: A $400 Marketplace Range and a Repaired Rental Fridge
Facebook Marketplace came through! I set a $400 budget for an electric range, and Garrett found this GE range nearby and picked it up one evening. It was exactly $400, which felt really reasonable for an appliance that had barely been used, and we’ve been so happy with it.
The fridge came out of one of our rentals after it was damaged. We brought it home and had it repaired, even though we didn’t have anywhere to use it, because it seemed silly not to. Fast forward a couple of years and it’s working hard in this temporary kitchen.
The Pantry and the (Not-So-Great) Lighting
Our “pantry” is a big wire shelf with some IKEA bins on it, and we just throw our food in there. Not fancy, but it works surprisingly well.
The lighting, however, is the weak spot in the room. It’s just a work light on top of the fridge, and it’s pretty bad, but it does its job well enough. We may add some of those rechargeable sconces (the kind you operate with a remote), but we’ll see if we get that far. This space is working great right now even with just a work light for light ;)

What It Cost
A LOT of this room was free or leftover, which was one of our goals. Of course leftover and free are a lot easier when you have a bank of cabinets in your basement and a stone boneyard you can grab an extra countertop from. Renovating 9 houses does come with its perks ;)
Already had or leftover:
Existing cabinets
Lower cabinet bank (found in the basement)
Quartz countertop (leftover from my parents’ remodel)
Backsplash (also leftover from my parents)
Lumber for the shelves (scrap wood from the boneyard)
Wall paint (leftover)
Pantry bins (leftover from the Farmhouse pantry)
Work light
Fridge (came out of one of our rentals)
What we spent:
Peel-and-stick floor tile (7 boxes): $234
Primer and paint (India Yellow): $140
Range (Facebook Marketplace, almost new): $400
Microwave: $60
Total: $834
One thing I didn’t include here is our outdoor cooking setup. The kids and I got Garrett a Blackstone grill for Father’s Day last year, and it’s gotten a ton of use. Having some sort of outdoor kitchen option (like a BBQ or a Blackstone) during a kitchen renovation can really take the pressure off your indoor setup! We didn’t actually get it for the renovation (Garrett is a big cook and has wanted one for years), but it has come in handy :)
Bonus: Our Temporary Dining Room
Since we’re sharing the temporary kitchen, let’s take a look at the temporary dining room, too! This is our future living room, which will be under construction soon, but for now, we have our table and 6 vintage chairs around it. I shared last week where the chairs came from (some of you liked them, some not so much ;) and the beautiful reclaimed table was my 20th wedding anniversary present from Garrett. I can’t wait until these are actually in the dining room, but we’ve been a little slow to start that project. Soon enough!


Is It Worth Making a Temporary Kitchen Pretty?
For us, YES. A kitchen you use every single day for as long as we’ll use this one is worth a little zhuzh, even when it’s temporary. Of course any money you put into a space you’ll eventually take apart is money you may not get back, which is why we stuck to leftovers used/budget buys, and an inexpensive floor to hide the gunky glue. But the $400 range can be resold along with the fridge and the cabinets can be reused elsewhere, donated, or sold. So we could still come out of this kitchen closer to $0.
If you find yourself in a similar situation, here’s my advice: reuse everything you can, go for pretty, fast, and inexpensive, and let yourself have a little fun with color.
Temporary Kitchen FAQs
How long will you use the temporary kitchen? I wish it was just going to be 6 months, but we’re looking at under 18 months, and hopefully even less.
What will the space become? Our future primary bathroom! Here’s the phasing plan with the bigger picture.
Can you put peel-and-stick tile anywhere? Not anywhere but lots of places. We put them over old flooring glue here and at Poplar, over plywood. If this was a longer-term space, we would have spent more time getting the subfloor in better condition before adding the tile since they call for a level, smooth surface. And make sure you consider safety- older glue can contain asbestos and shouldn’t be sanded or scraped until you know what you’ve got.
What colors are in the temporary kitchen? Farrow & Ball India Yellow No. 66 (color-matched at Sherwin-Williams) on the cabinets and Slipper Satin No. 2004 on the walls.
How much did the temporary kitchen cost? $834 with a lot of it being free or leftover. We’ll plan to resell the appliances when we’re done, so we might bring this down closer to $0 :)
How long did it take to create this space? All in all, we spent about a week on it. Honestly, if it was up to Garrett, we’d probably still be cooking on those ugly carpets, but I think a week of work was well worth the effort for a kitchen we can actually cook in and host family and friends.
A Temporary Kitchen Can Still Feel Like Home
A temporary kitchen doesn’t have to be a sad one! Ours is quirky, cheery, and working great. And a little ways down the road, we get to look forward to this space becoming our primary bathroom. I
Have you ever set up a temporary space like this during a renovation? We’d love to hear about it!
xx
ps we may receive a small affiliate commission if you purchase something through our links, at no cost to you. Thank you for supporting The Grit and Polish!