A Cute Cedar Fence for Our Cute Cottage
THE POPLAR COTTAGE
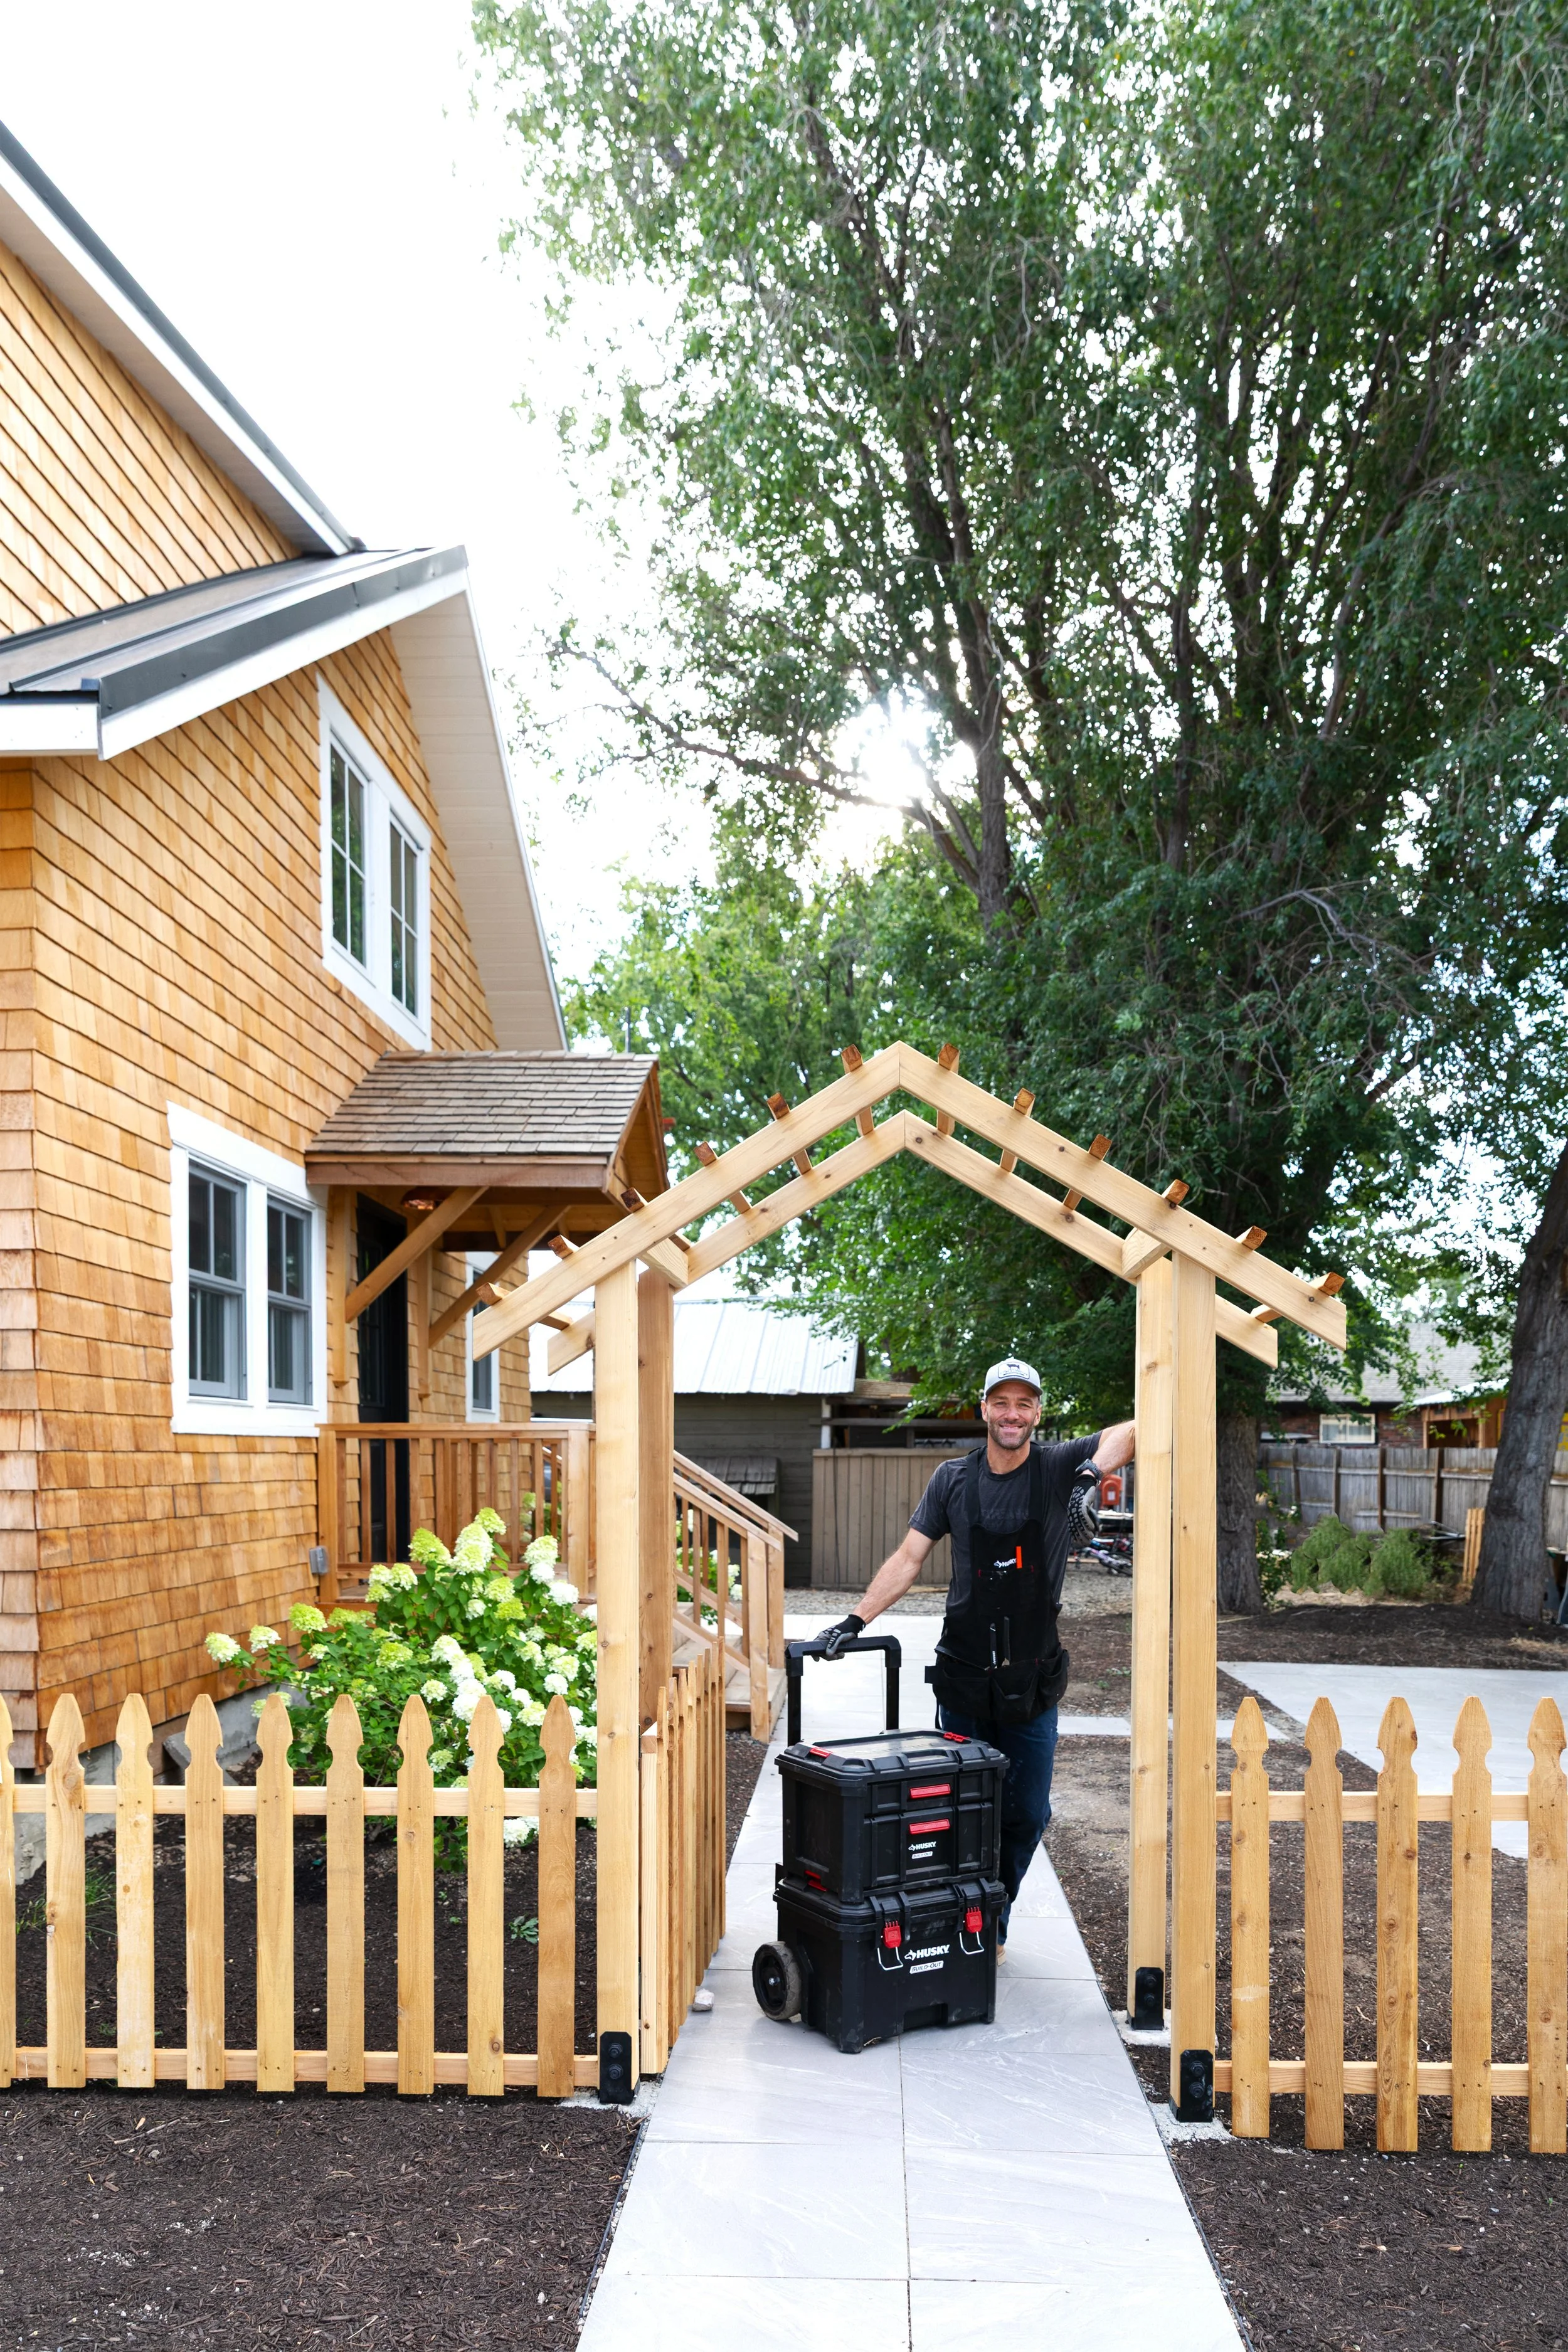
Replacing the old wobbly fence at the Poplar Cottage has been on our to-do list since forever! We had big goals for this new fence: something cute to boost the curb appeal, some small scale to feel approachable, and something solid to define the front yard in a way that feels cozy, nostalgic, and welcoming. This summer, we finally made it happen, and we couldn’t be more thrilled with the result! And today we’re sharing all the details - how we built our cedar picket fence, the inspiration behind the design, all the tools and materials we used, and lots of photos of the finished project. Let’s get into it…
pavers, windows, fence links below
psst: you can see all of our plans for the front yard here.
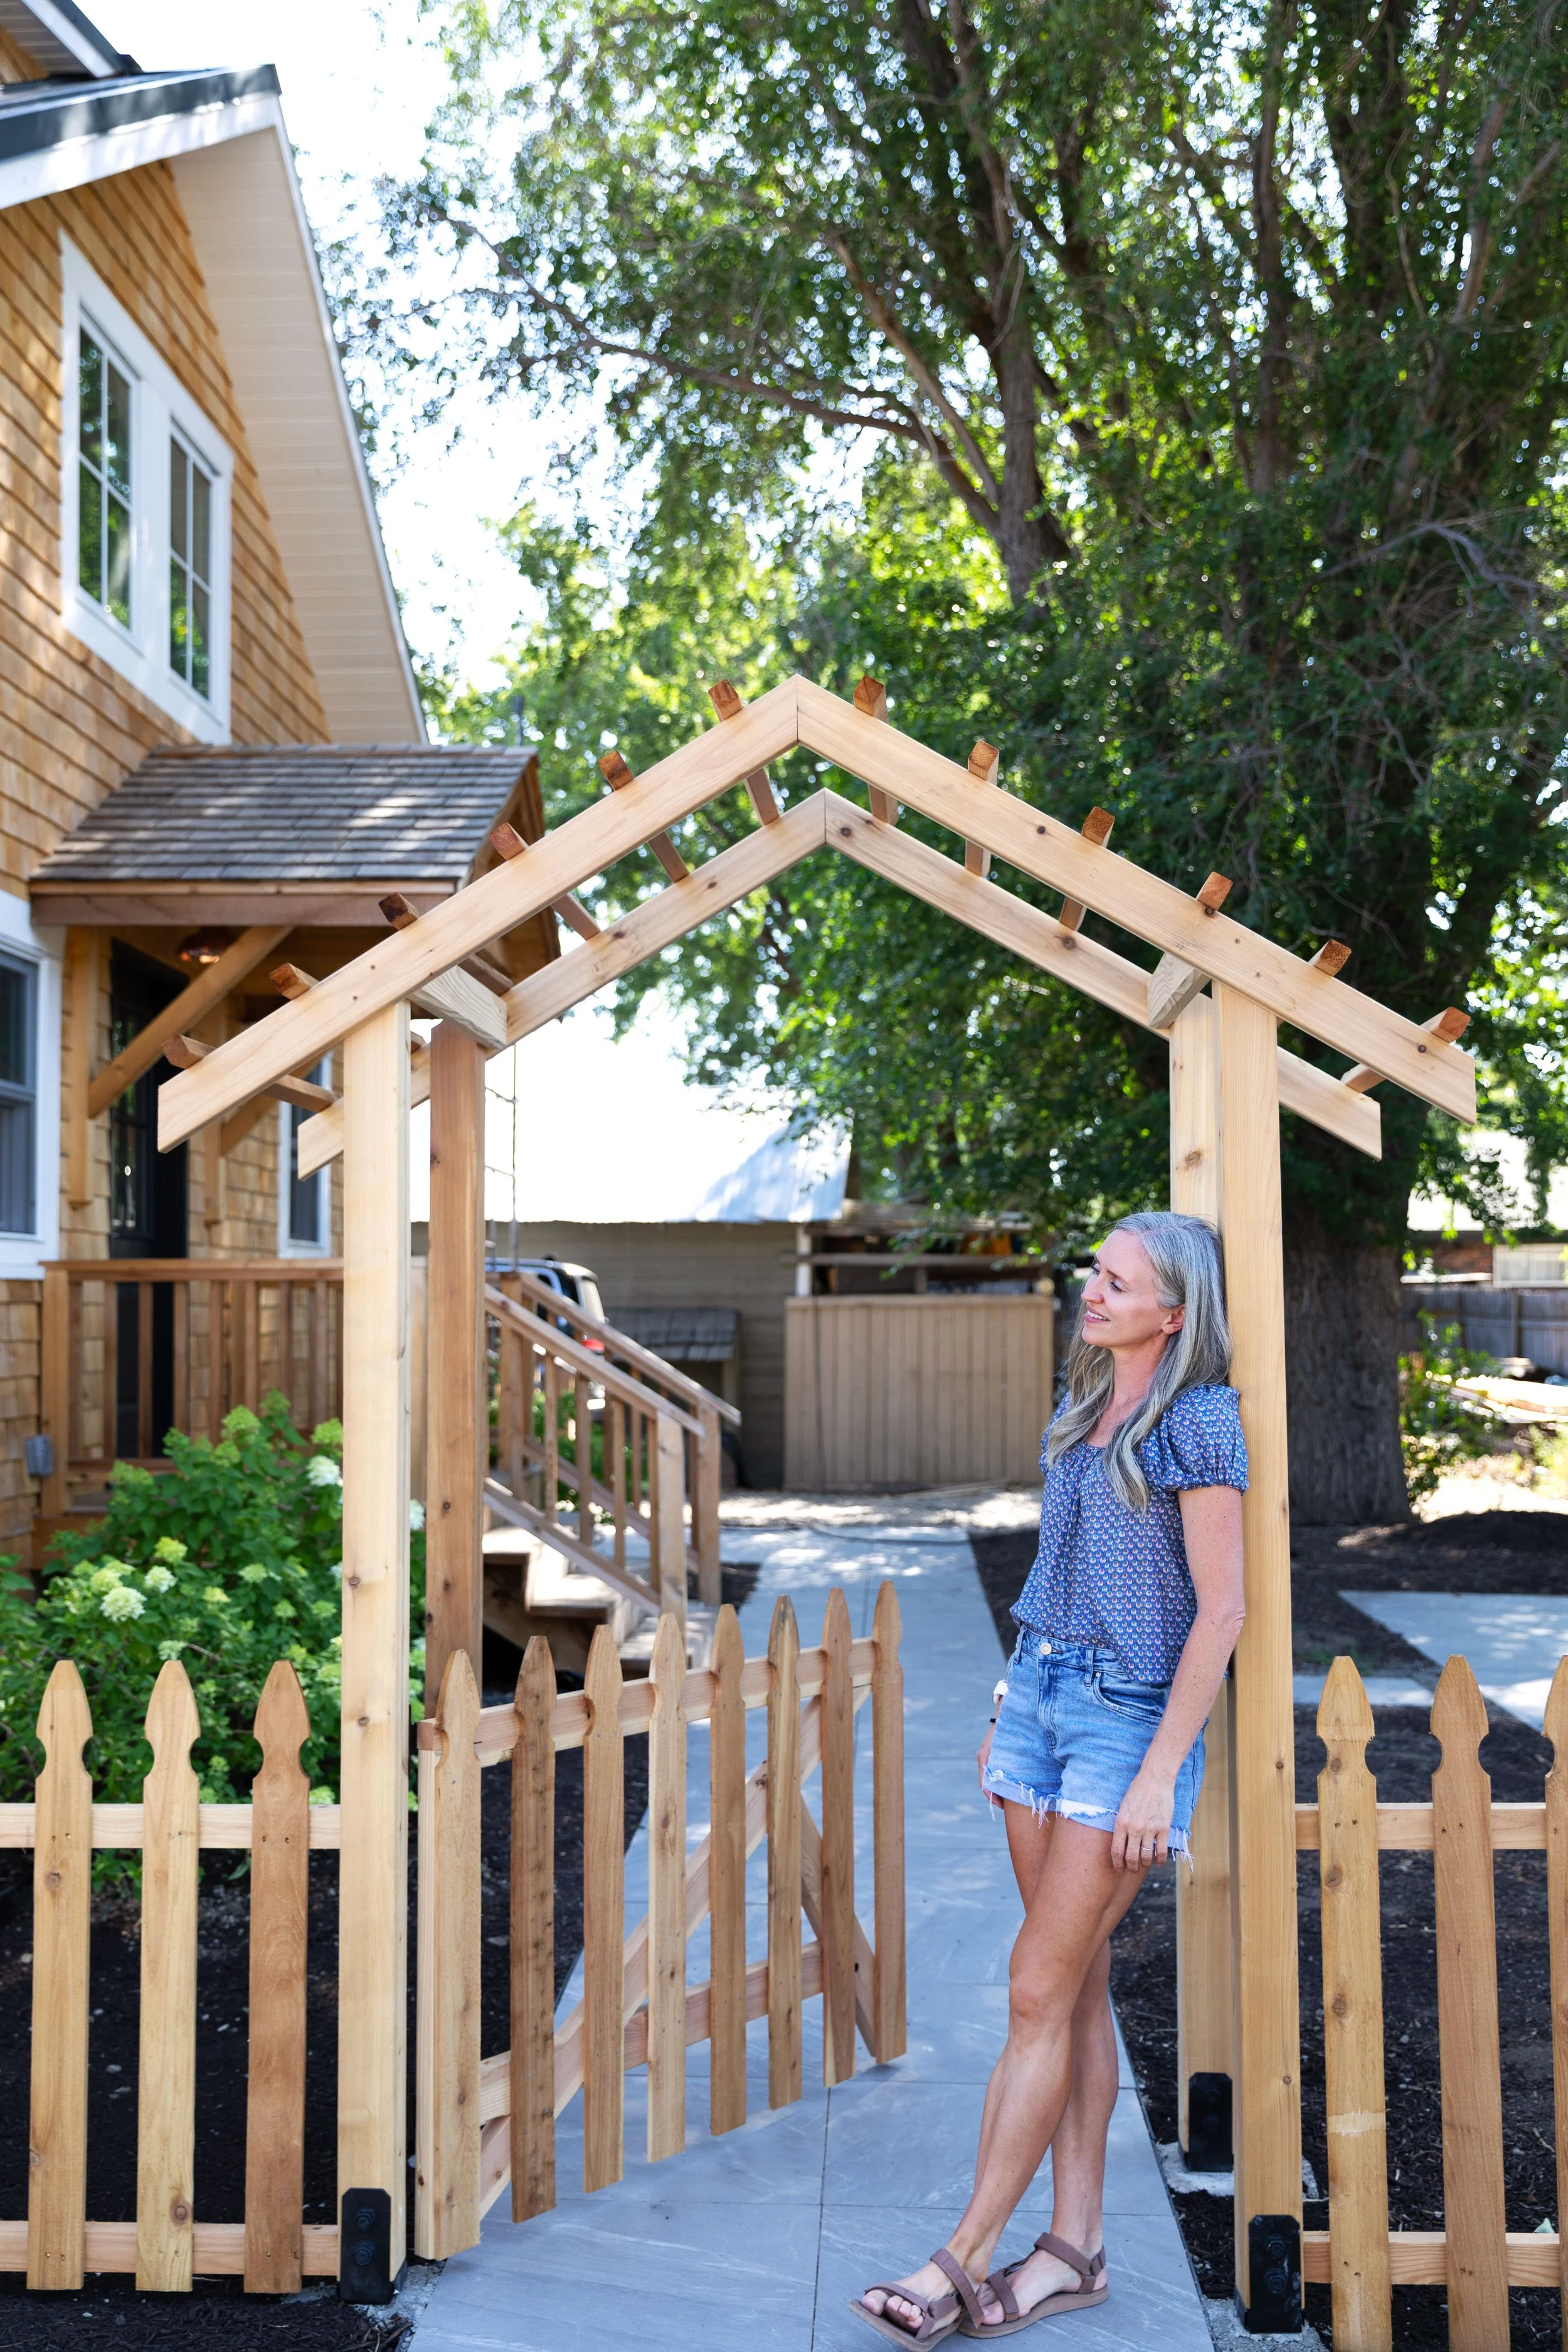
The new fence and arbor feel like they’ve always been here, don’t you think? It’s a classic look that’s oh so cute and functional too. Here are a few more photos of the finished fence before we get into the nitty gritty of building it.


Let’s back up and look at where we started…
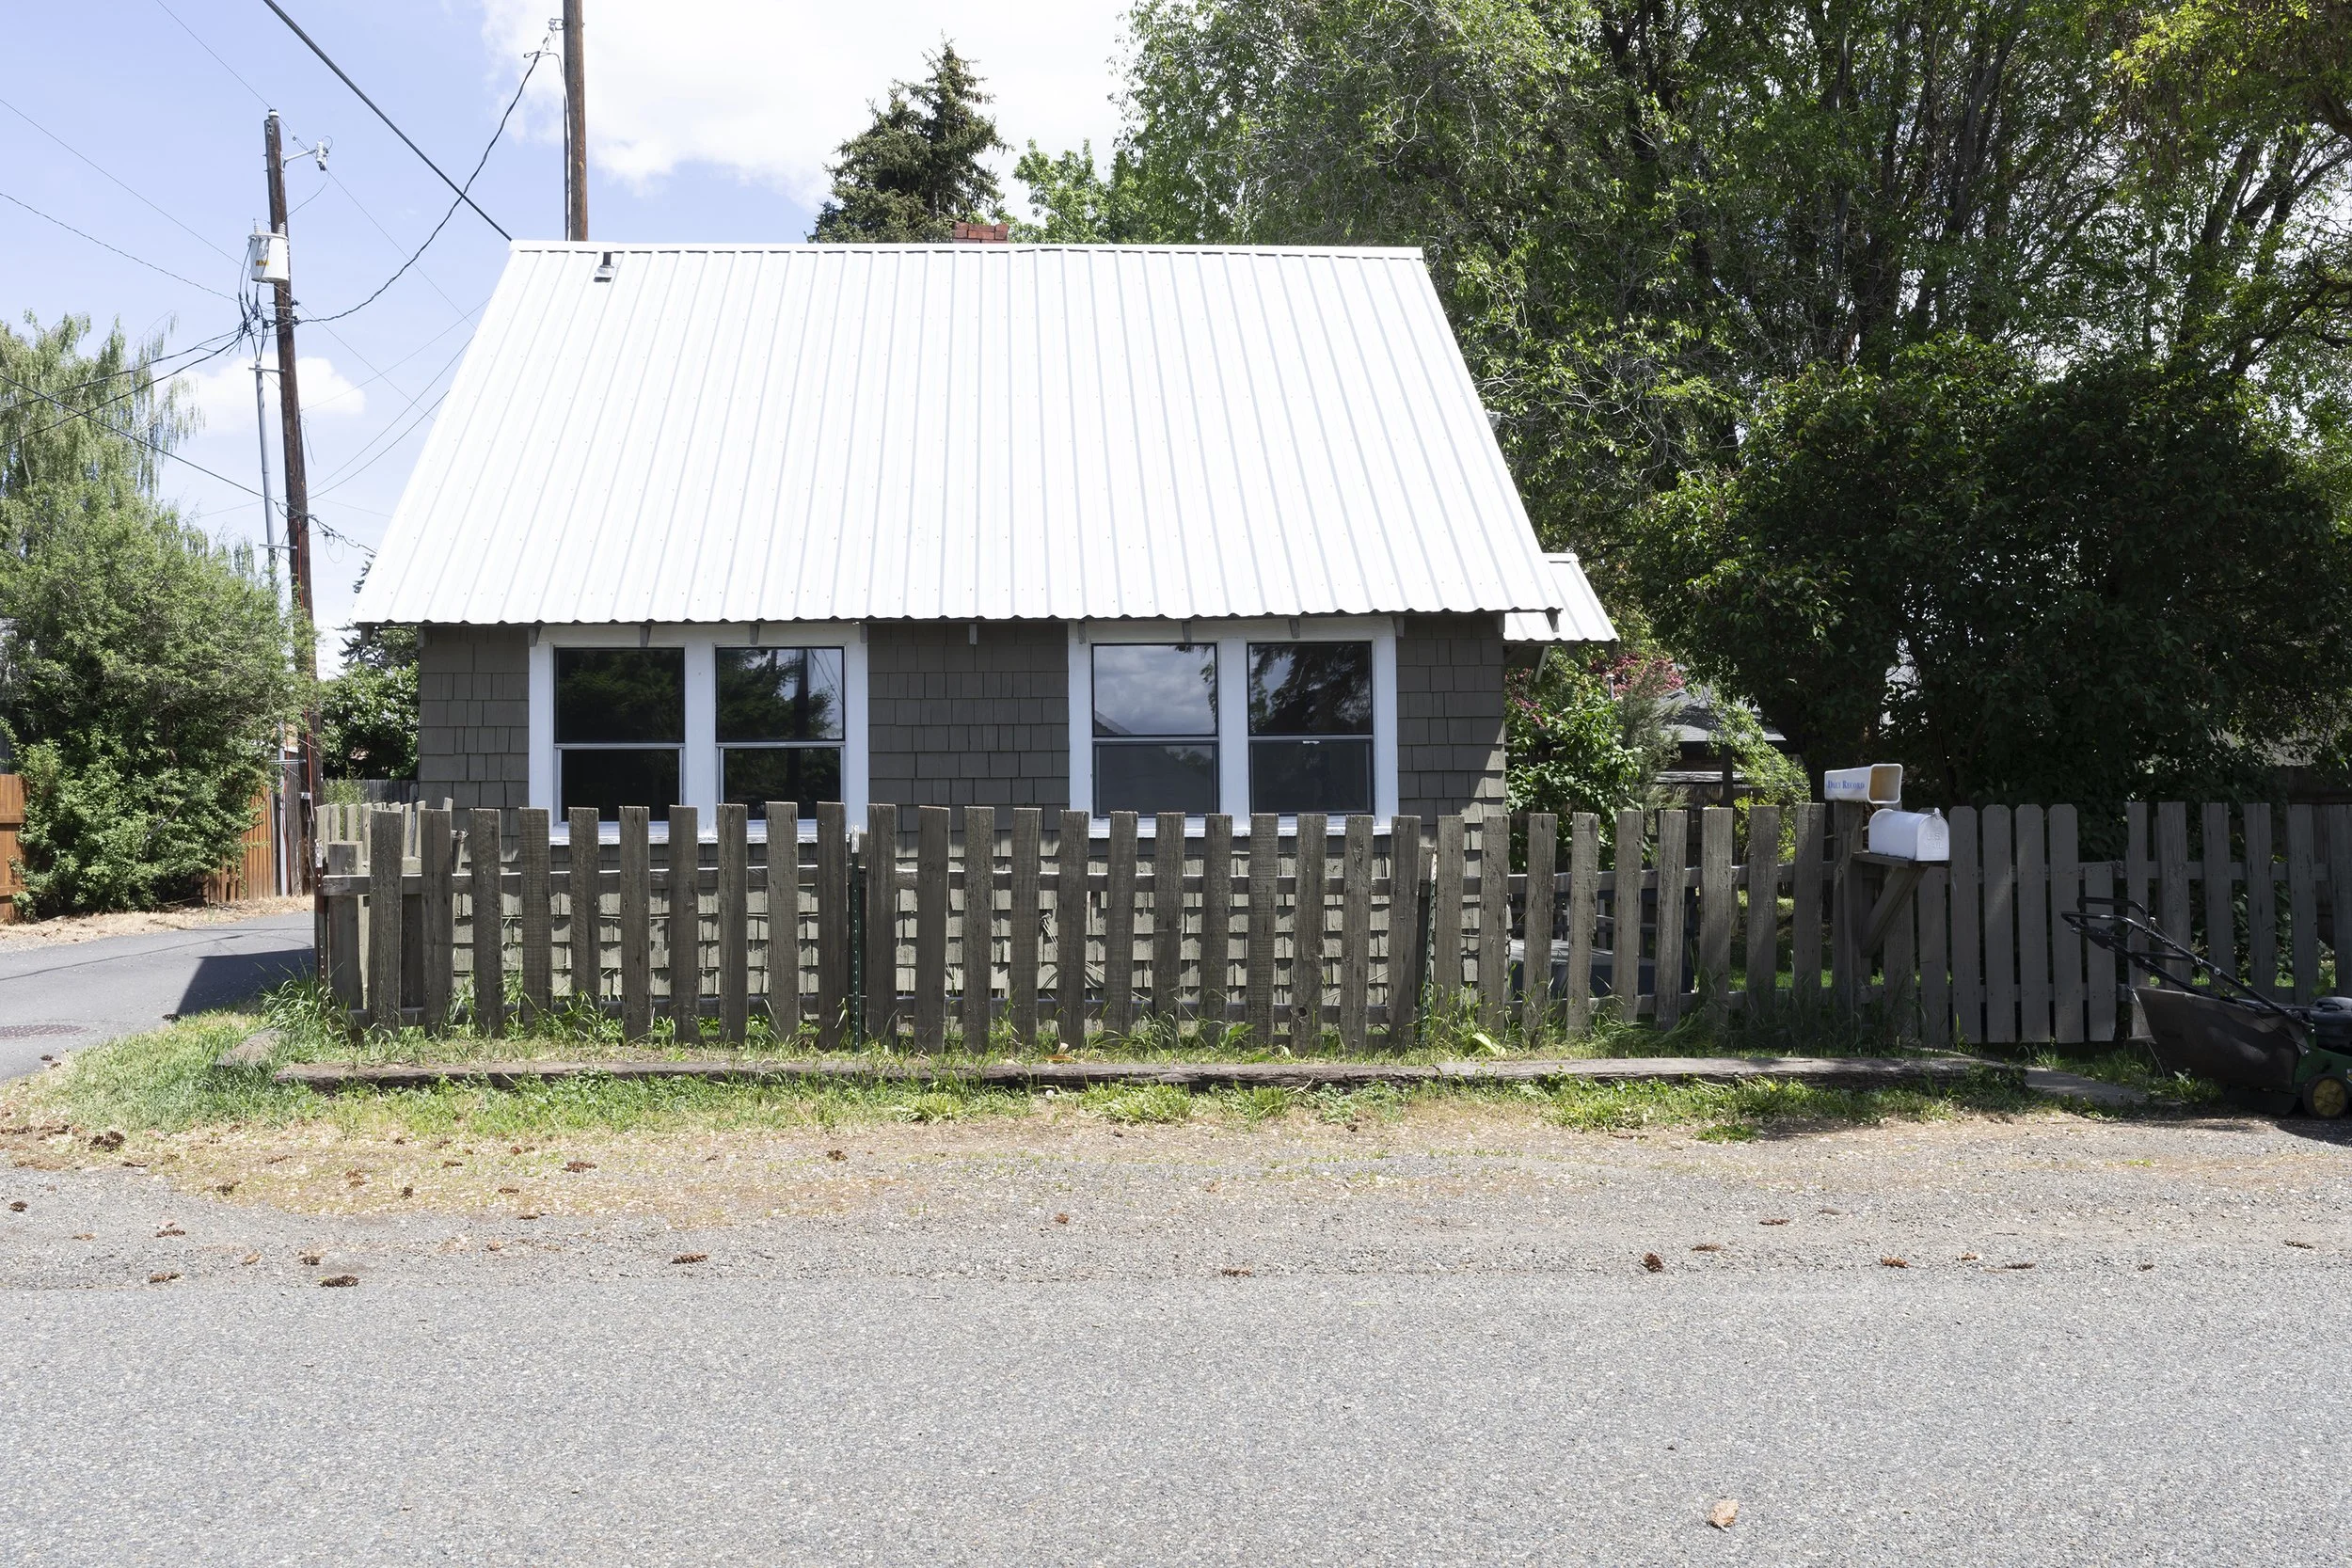
The house has changed a ton, right?! But let’s focus on the fence. Back in 2016 it was wobbly and decidedly less cute. We had big plans to make it better…
Picket Fence Goals
This was our first time building a picket fence, but it felt like the right choice with this house. We really wanted to give this cute house a cute fence. Here were our basic goals…
zhush up the curb appeal
keep the scale small
give the front yard a little structure
provide an arbor for plantings - I’m thinking climbing roses on the arbor
Design
The inspiration for the fence and arbor came from a House Beautiful image I’ve loved for years. We were drawn to the scale, openness, and storybook charm of that design (unfortunately I can’t find the original designer or owner, but kudos to them!). I shared the image last month, but here it is again...
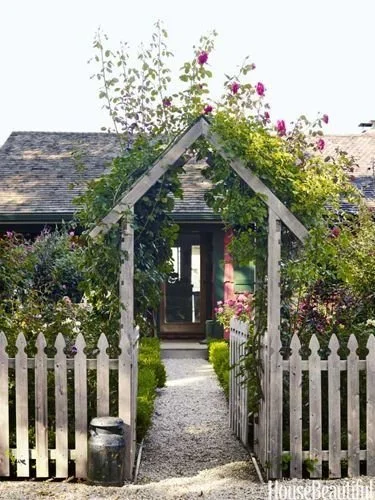
Just like in the photo, we wanted to keep the height of the pickets modest and chose a style that feels open and welcoming, rather than enclosed. The idea was to create a gentle visual boundary without blocking views or cutting us off from the street. The Poplar Cottage sits along a popular walking route and we love chatting with neighbors, dog walkers, and other friendly faces passing by. It would have been so easy to throw up a 6’ fence and get lots of privacy in this front yard, but a smaller fence really helps to invite conversation and community connection and create a more welcoming feel in the neighborhood as a whole. Plus it shows off the house we’ve worked so hard on ;)
the supplies: tools + Materials
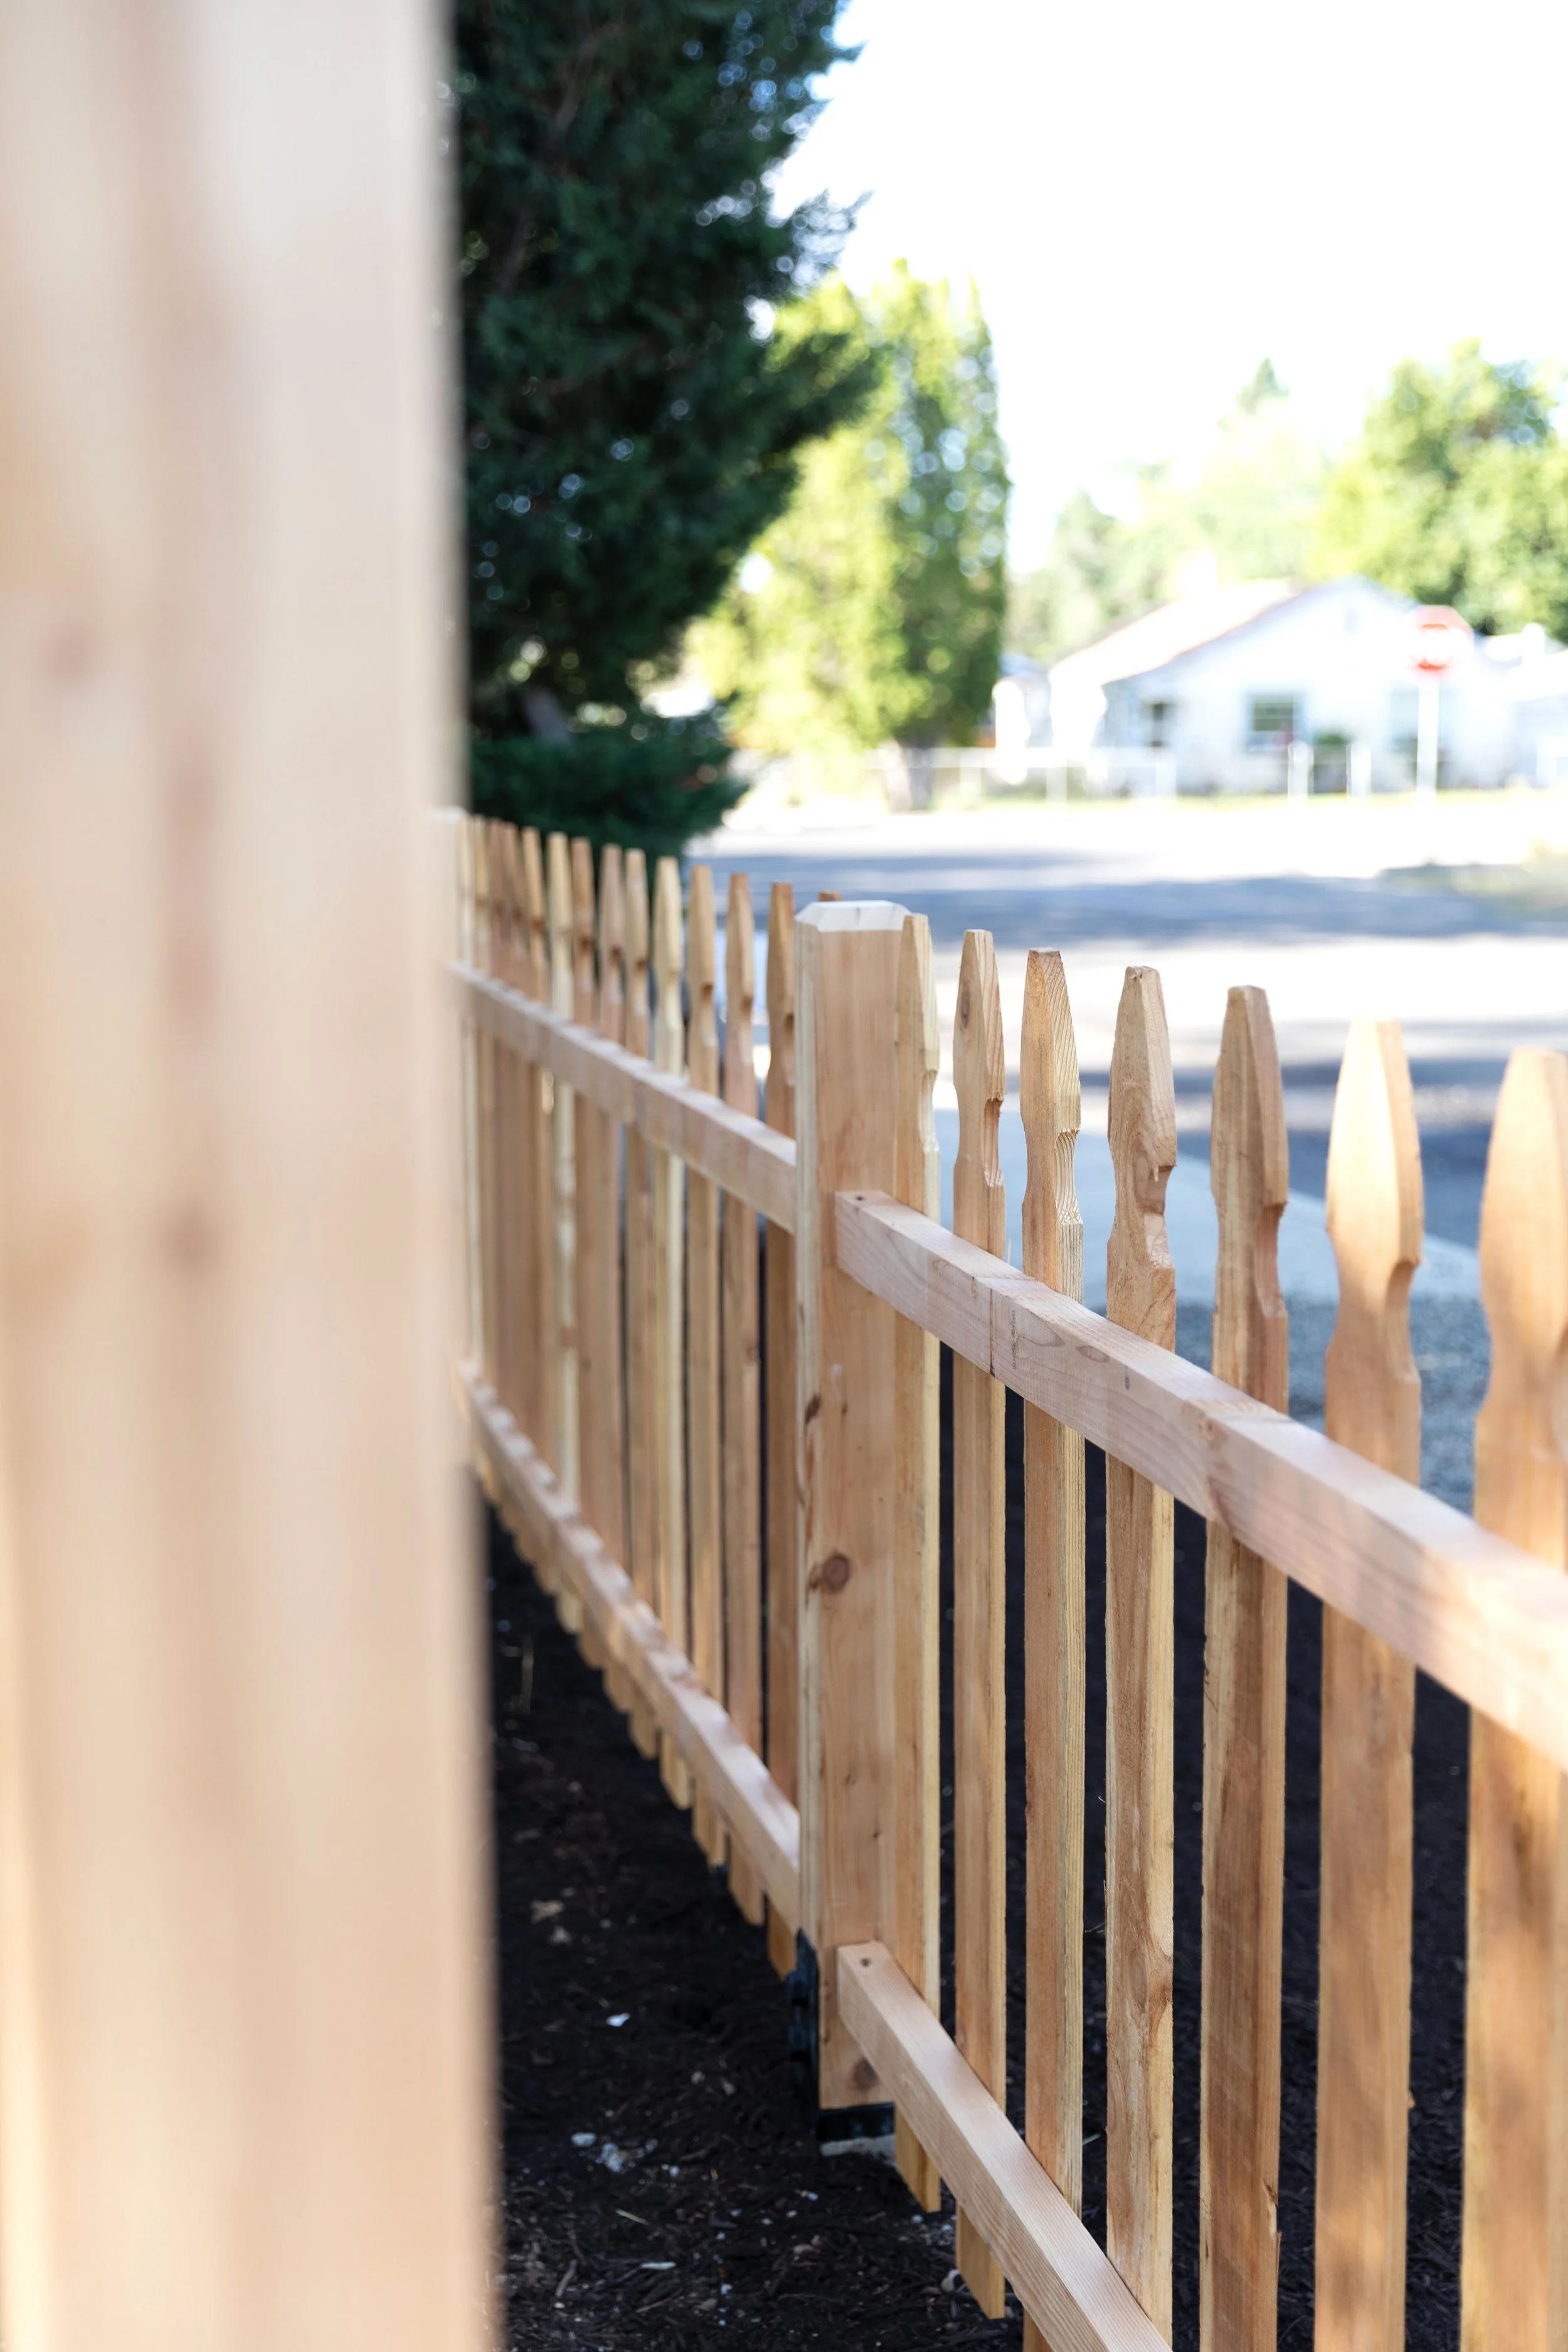
We kept this project simple and affordable by using prefab cedar picket fence panels from the Home Depot. Each panel was 8 feet long and ready to install. This was our first time using prefab fence panels and let me just say, they really do make the process much faster than building the fence from scratch (though we love doing that too!).
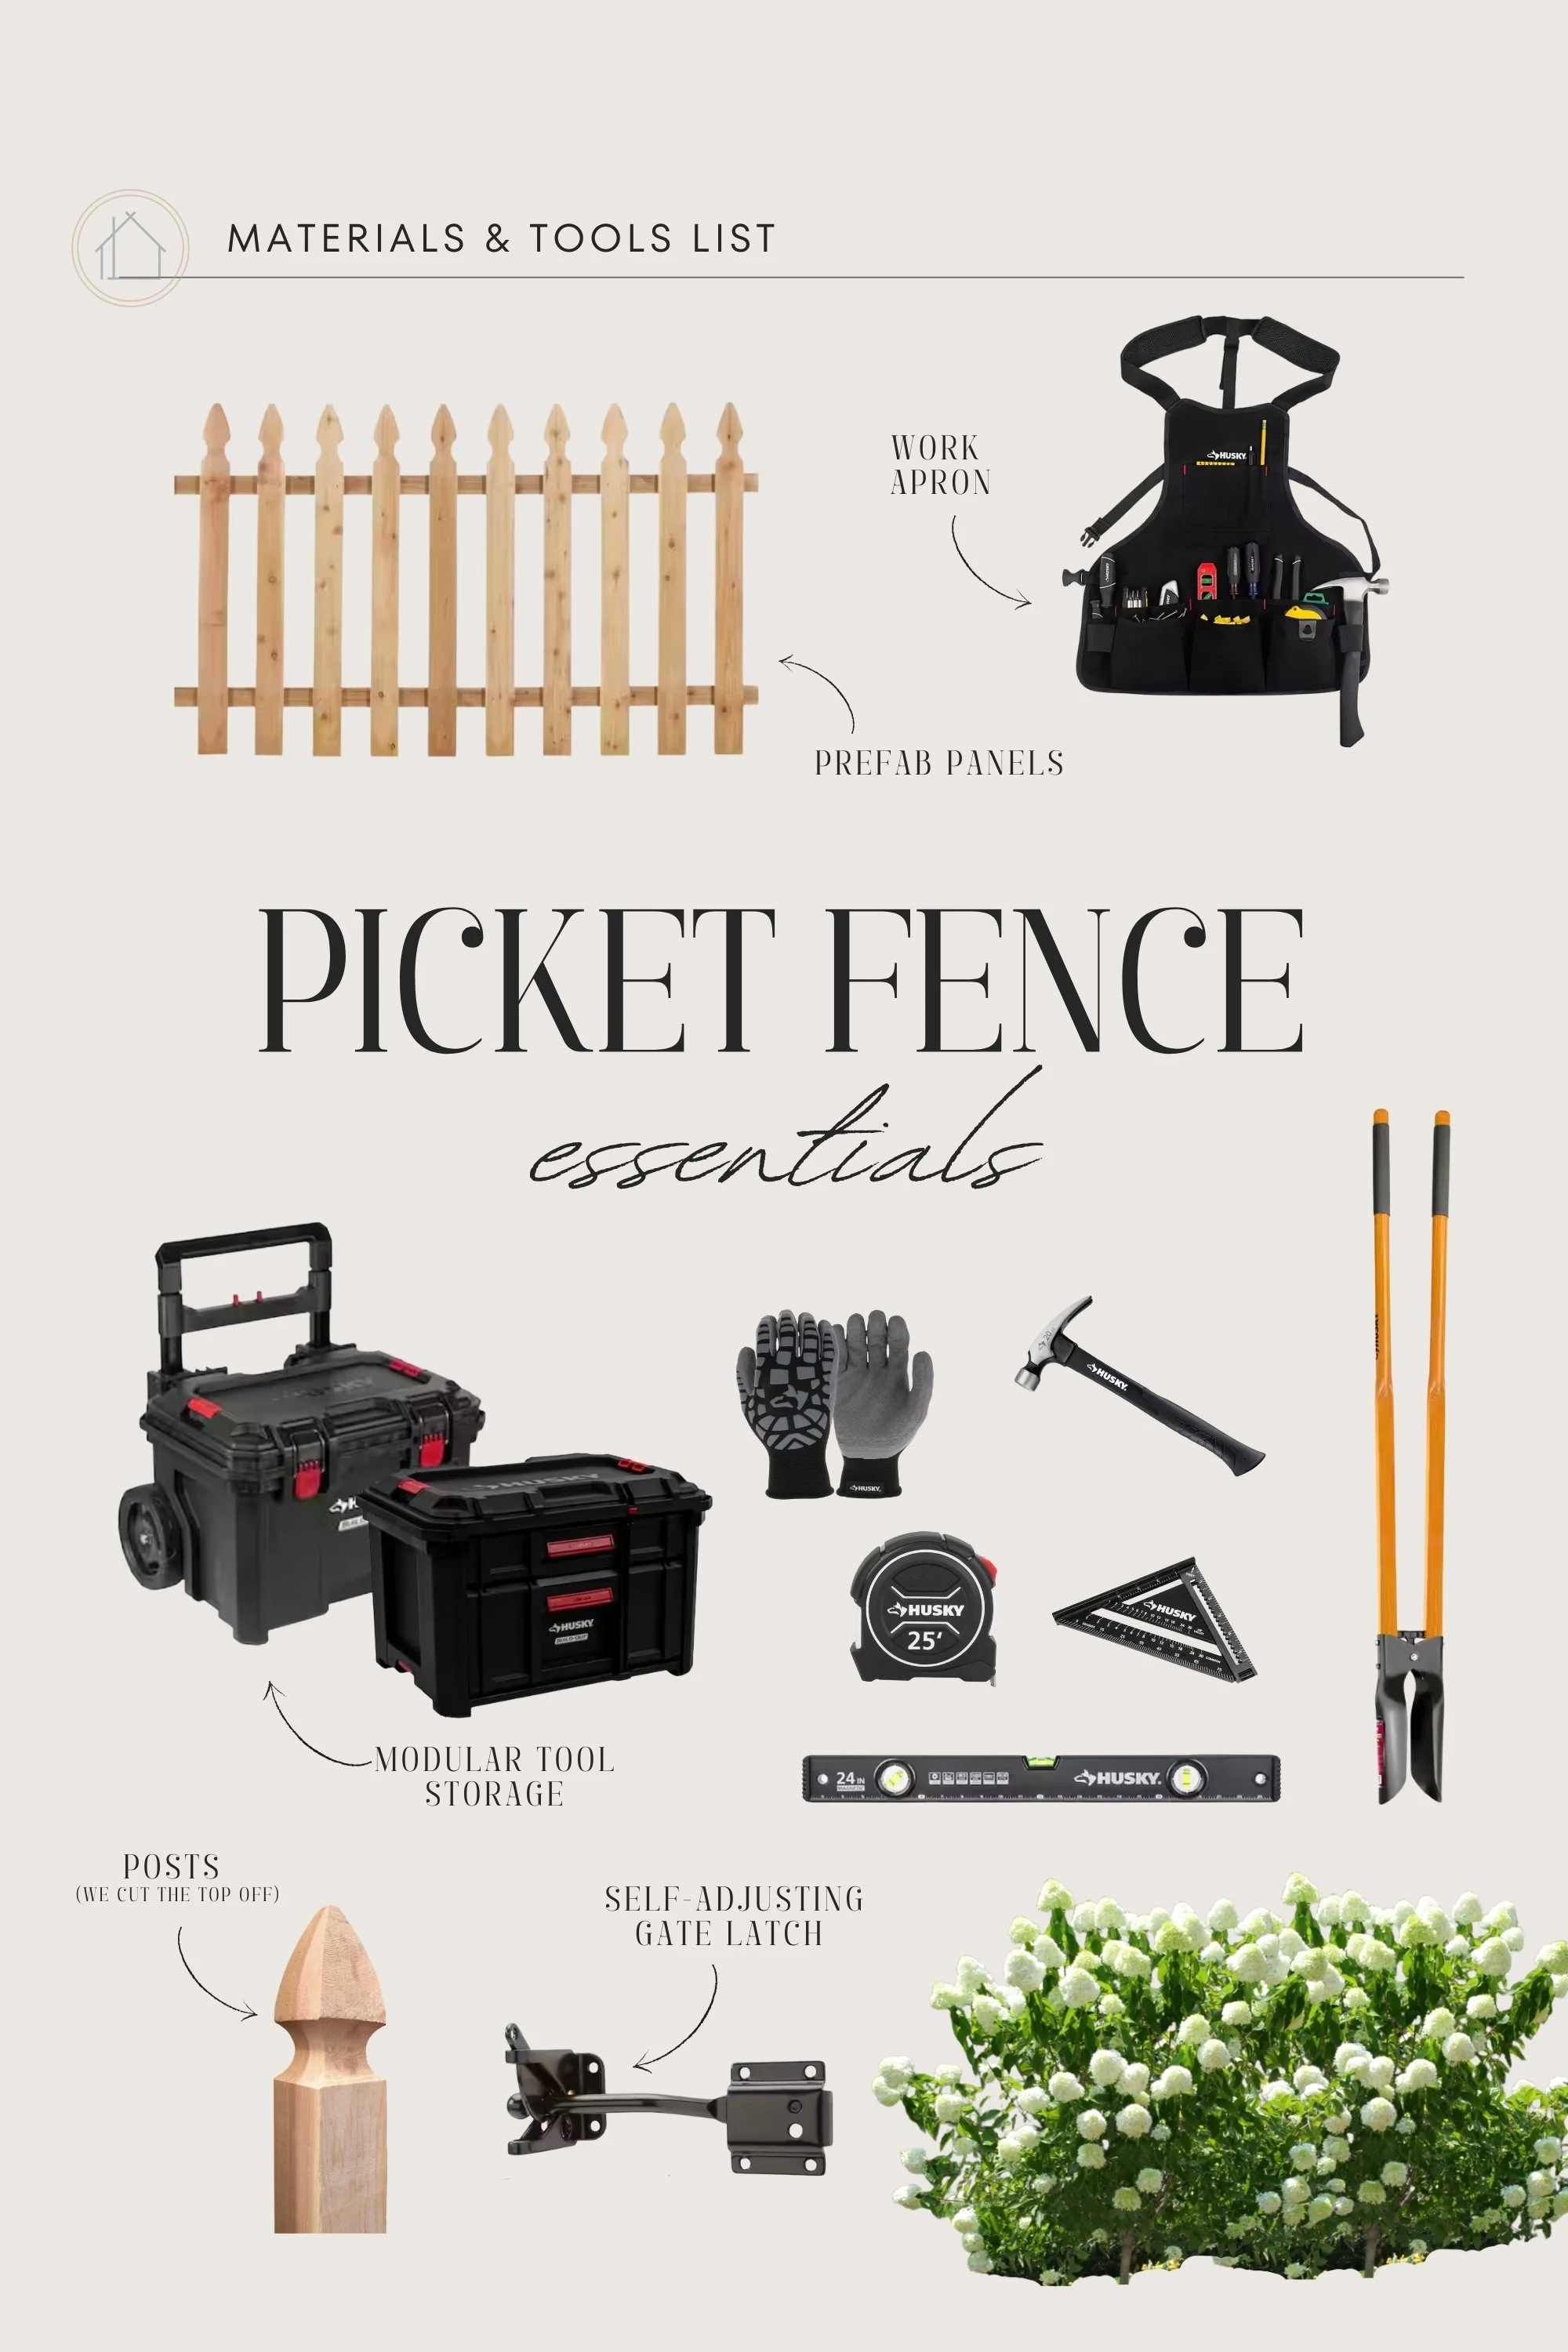
Here’s a breakdown of what we used to build this fence:
Pickets - 8’ prefab picket panels plus extra single pickets for the custom gate
Apron - a good work apron is a must for Garrett on any big project
Modular tool storage - we have this one and this one and they saved us about a million trips to the garage
Hand tools - a level, hammer, tape measure, square, and gloves at a minimum
Post Hole digger - a must for any fence project
Posts - we cut the top off these. They’re great cedar and much cheaper than anything else we could find
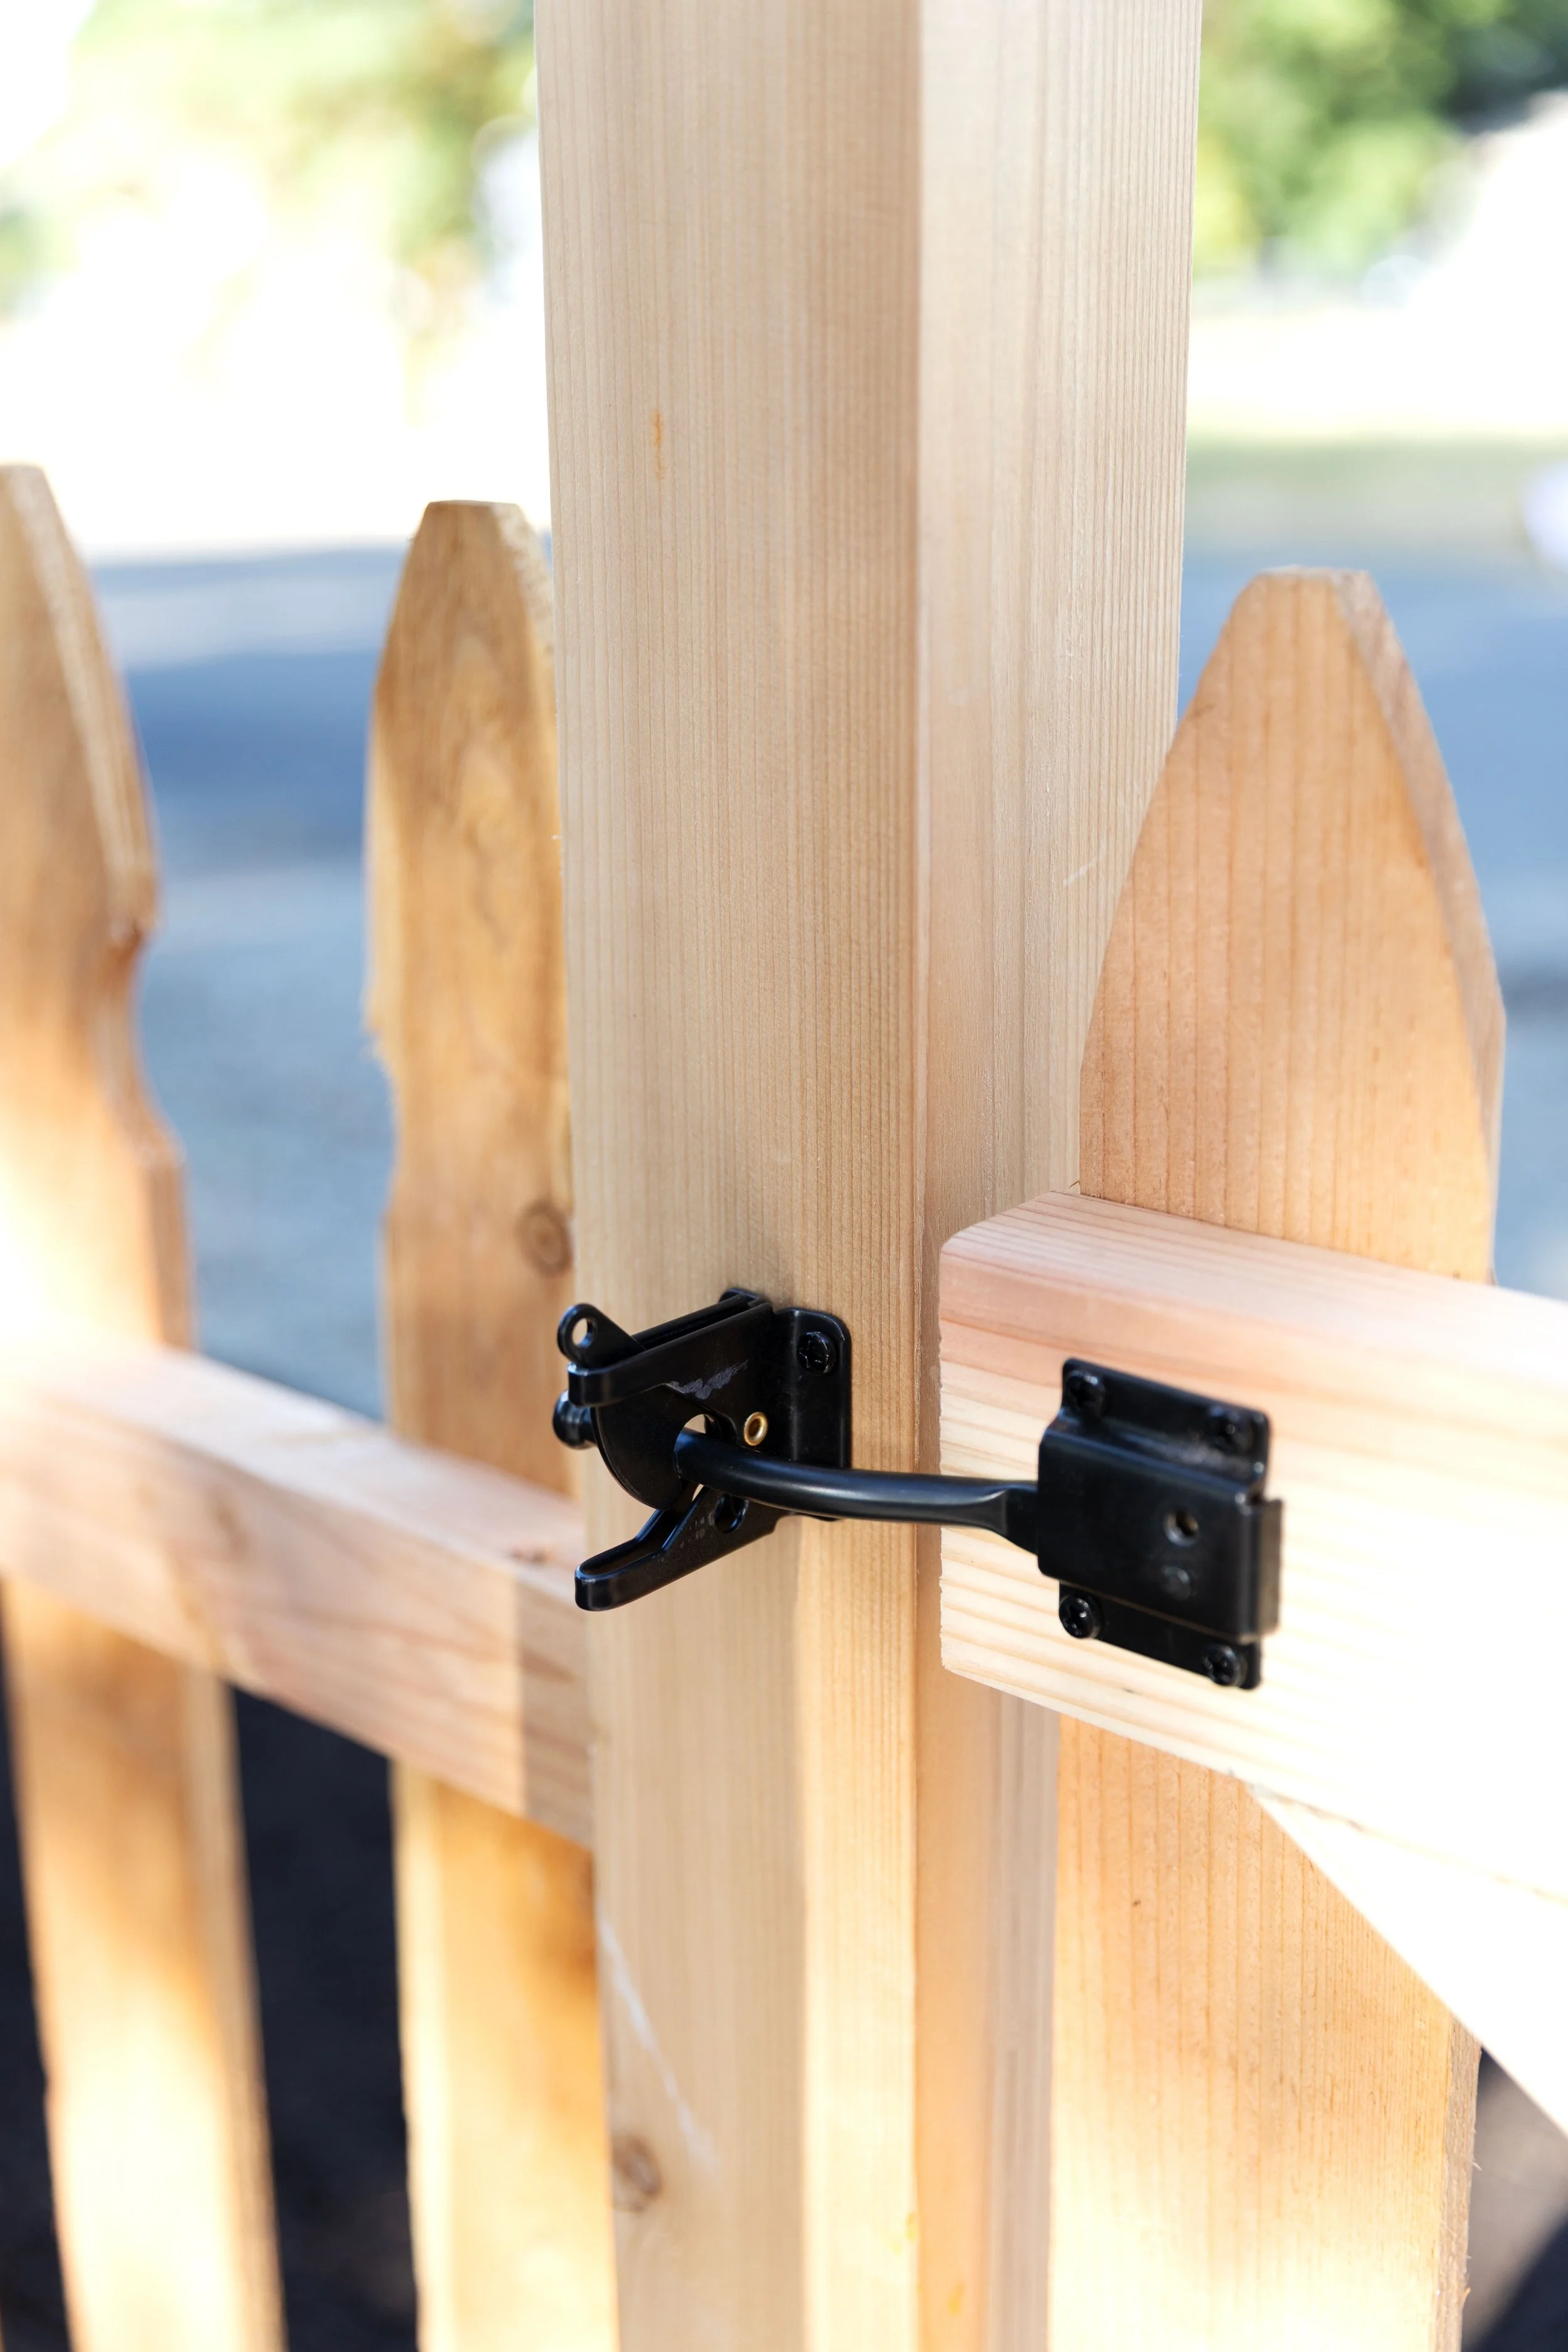
gate latch - we like the self-adjusting kind
Hydrangeas :) - our’s are limelight
How we built it
Here’s what it took to build this cute fence:
Layout: We drove rebar into the ground at either end of where we wanted to put the fence and ran a string line across to get our line. With the string line still in place, we determined where we wanted each post, accounting for the exact dimension on the prefab fence panels.
Posts: We installed cedar posts with steel brackets set in concrete
Pickets: pre-assembled 8' cedar fence panels speed up installation. We briefly considered using painted pickets but it felt better to keep the design consistent. Single pickets were used on the gate
Arbor + Gate: Garrett custom-built the arbor and matching gate using cedar to coordinate with the fence. The arbor is designed to support climbing roses, which we plan to add this fall for more classic cottage charm.
Tools - the Home Depot and Husky sponsored this project over on Instagram (but this post isn’t sponsored) and we used their durable tools, including Husky’s modular storage system which was a lifesaver and limited our trips back and forth to the garage
Here are a few pics from the building process…


This little fence project took us about three days to complete with lots of good planning and procurement done ahead of time. It was a really fun project and the whole family pitched in despite the heat.

You’ll have to use your imagination for the landscaping that will go into this yard (hopefully in a couple more weeks when it cools off enough to plant!), but it’s already looking so much better!
Since installing the fence, we’ve chatted with so many neighbors and passerbys, many of whom have been watching this renovation for almost 5 years now. The whole neighborhood feels like part of this project ;) It really is amazing how a small-scale fence and gate can give you the sense of privacy while still allowing for connection and conversation. We’re so pleased with how this one turned out!
Okay, that’s it for today. Any favorite climbing roses we should consider for the arbor?!
xx