Installing our Own Black Aluminum Gutters at the Poplar Cottage
THE POPLAR COTTAGE
We’ve put a lot of love into the Poplar Cottage exterior over the past few months - from cedar shake siding to a garden and picket fence - but one key feature was still missing: gutters! With fall rains rolling in, the back door was getting drenched and the deck was collecting puddles. Garrett had the idea (as he often does!) to DIY a simple set of black aluminum K-style gutters, and they turned out beautifully!
Before this, I’d never heard of anyone DIYing gutters, but the process was surprisingly simple - and the finished look ties the whole exterior together. Below, we’re sharing the step-by-step installation, tools and materials, and why this budget-friendly project was one of our most practical upgrades yet. Let’s get into it…
When we wrapped up the cedar shake siding earlier this year, we knew gutters would be next. Without them, rainwater pooled on the back deck, making the door nearly unusable during heavy storm. Not ideal for a freshly renovated cottage!
We considered hiring this out, but since we only needed gutters along the mudroom gable and lower roofline, we decided to DIY the installation instead. (Spoiler: it was a great decision!)
Why We Chose Black Aluminum Gutters
Durability: Aluminum is rust-resistant, lightweight, and low-maintenance - we only plan to install these once and never think about them again!
Style: The black finish adds a crisp, tailored edge that complements the black metal roof and frames the cedar shakes perfectly.
Budget: We briefly considered copper gutters but they would have cost thousands for this small section and honestly, the black metal looks pretty slick (I’ve said it before, but getting from 90% to 100% design usually costs 10x more - it’s rarely worth it).
Project Cost and Timeline
This project was a very satisfying weekend endeavor and came in at a very reasonable price…
Total Cost: The materials came in just under $500
Time: Two afternoons
Materials: Black aluminum K-style gutters
Our install was really straight forward and we only installed enough gutters to cover the mudroom gable and lower section of the main house plus two downspouts. If your house has multiple roof angles or longer runs, you might consider hiring out - but for straightforward lines, DIY gutters are totally doable!
Materials and Tools We Used
All materials came from Home Depot (linked below). The black aluminum finish looks sleek and timeless — a subtle modern-meets-classic combo that works beautifully with white trim and cedar shingles.
Materials List:
Tools:
Extension ladder (a must for safe access)
Cordless drill and driver bits
Tin snips or metal-cutting shears (or an angle grinder to make cutting even easier!)
Level or laser level
Tape measure and pencil
Caulk gun
Work gloves and safety glasses
Pro tip: Gutters are sold in 10-foot or 16-foot sections that can be joined together with slip connectors. Measure twice before cutting - clean, accurate cuts make assembly much smoother!
Step-by-Step: How to Install Gutters Yourself
Garrett knocked this out one Saturday afternoon with minimal help from me. Here’s the process we followed, and what we learned along the way.
ONE // Plan the layout and slope
Gutters need a slight slope toward each downspout for proper drainage.
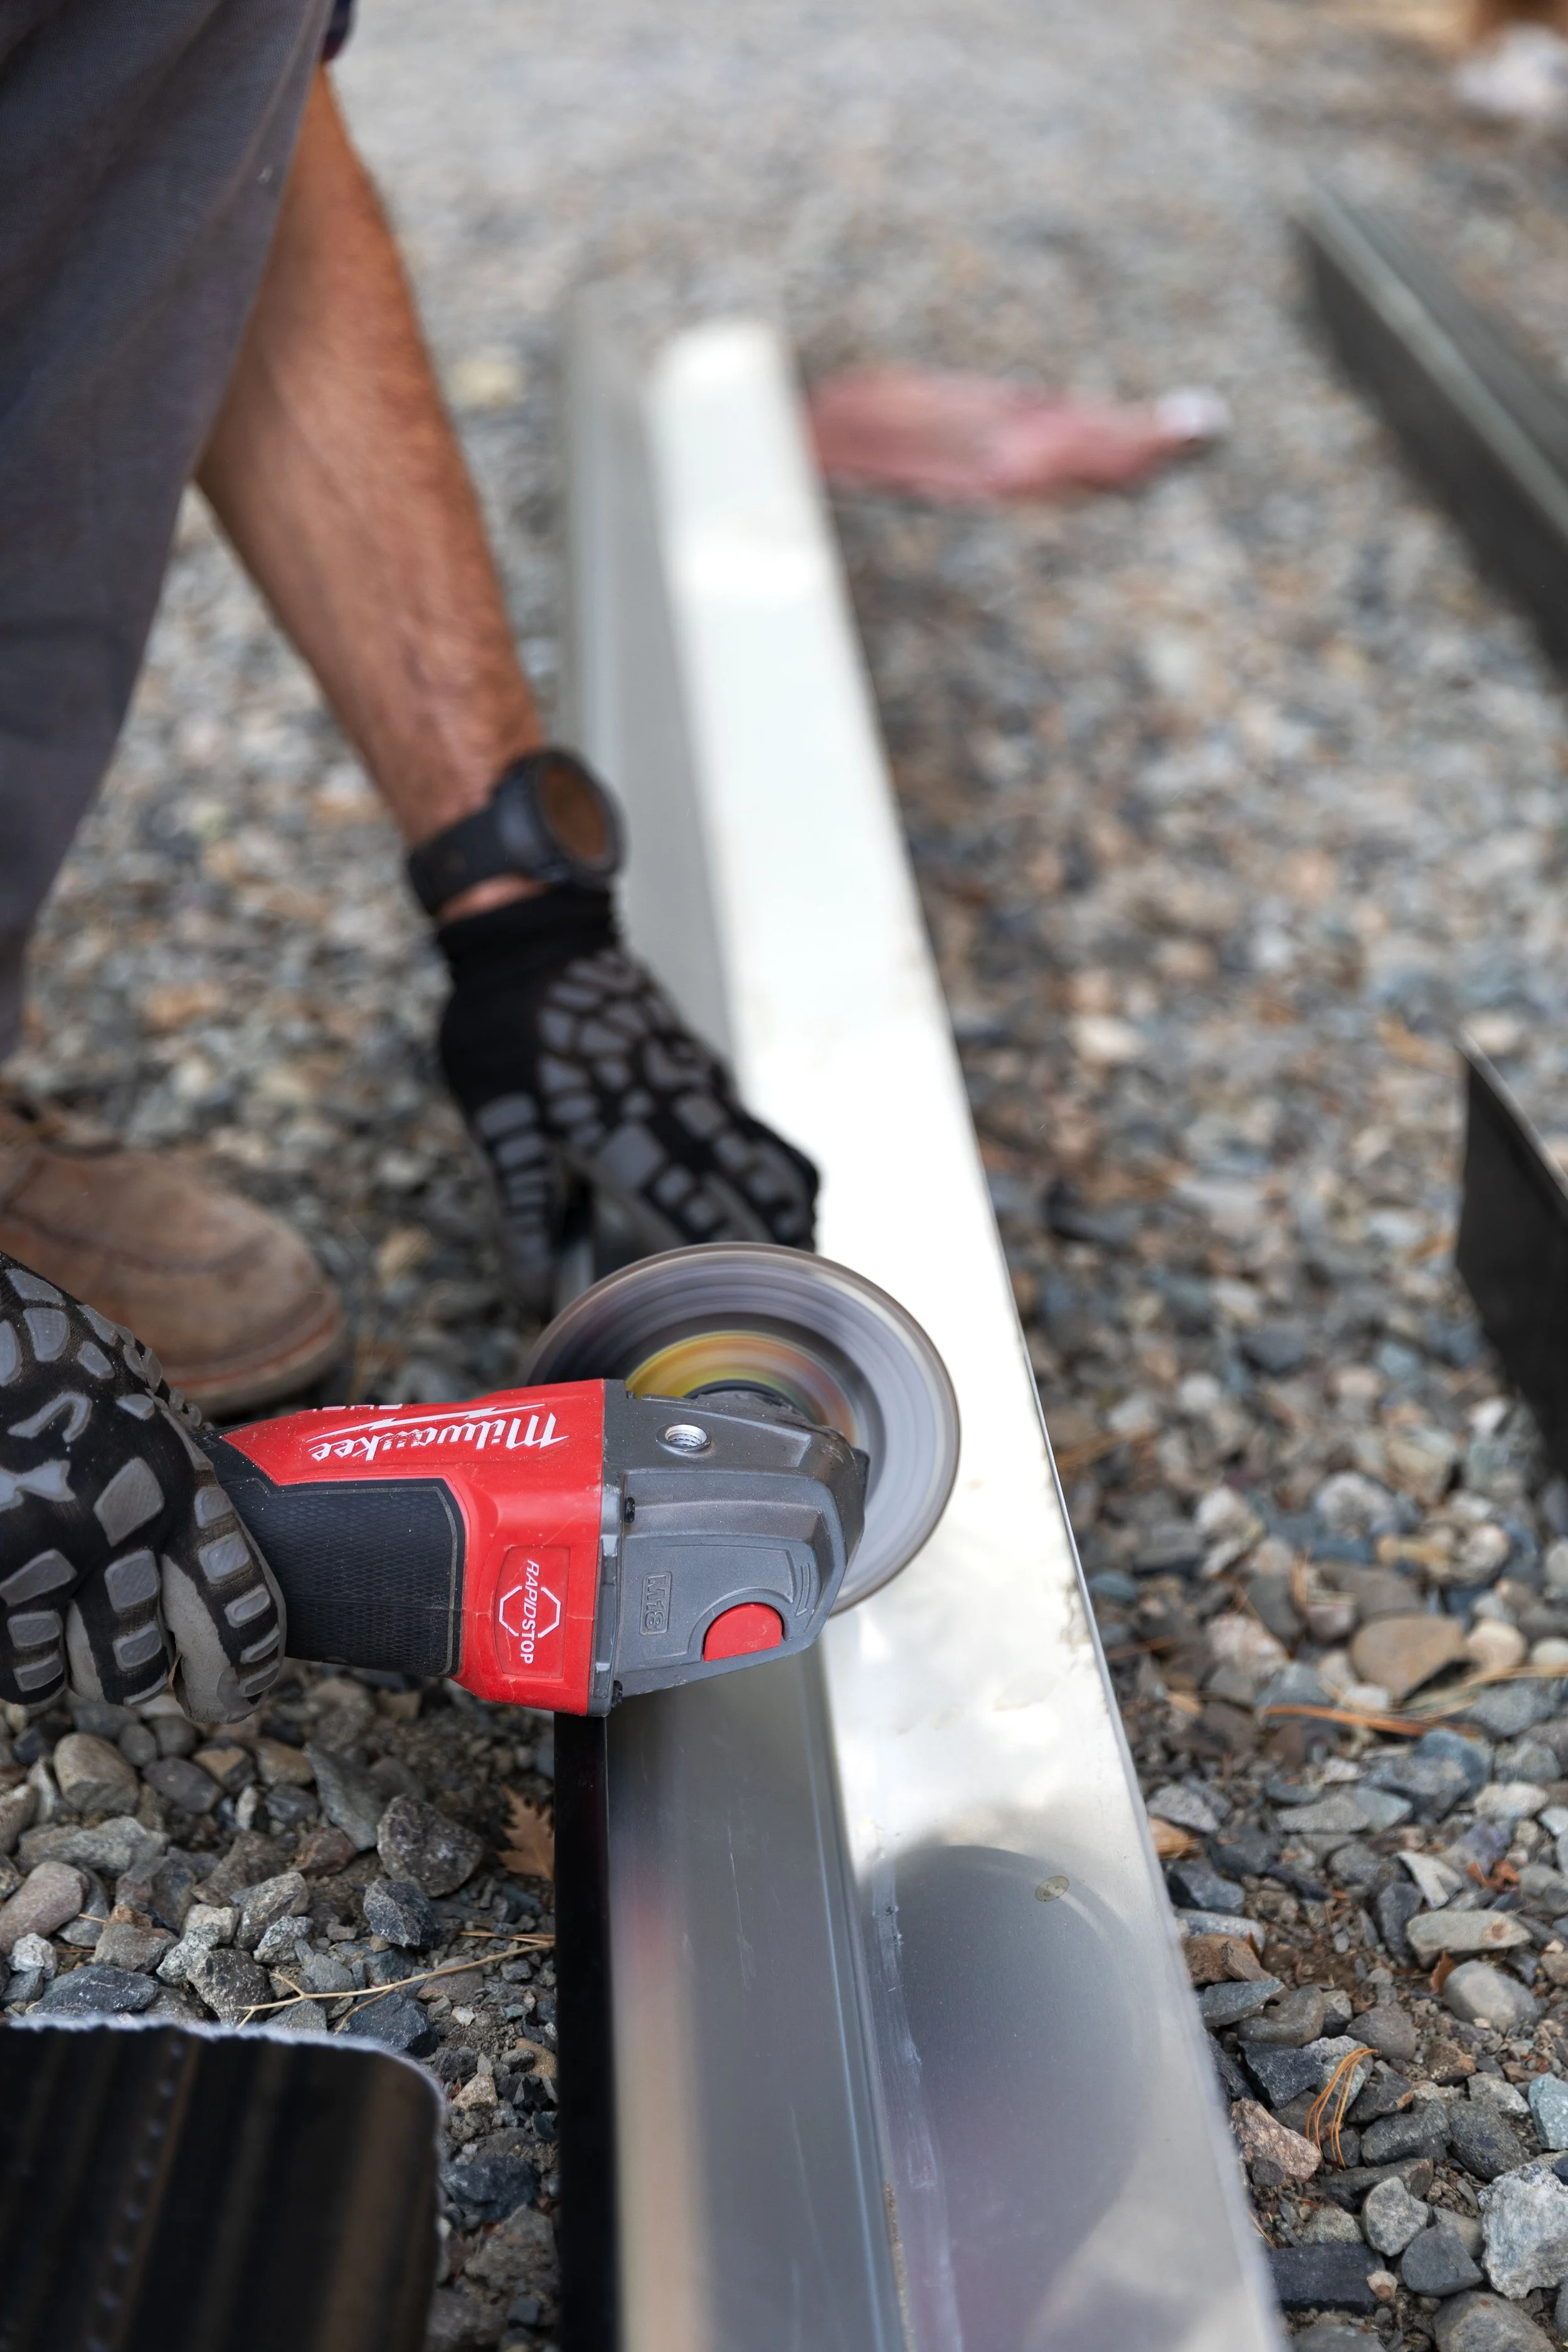
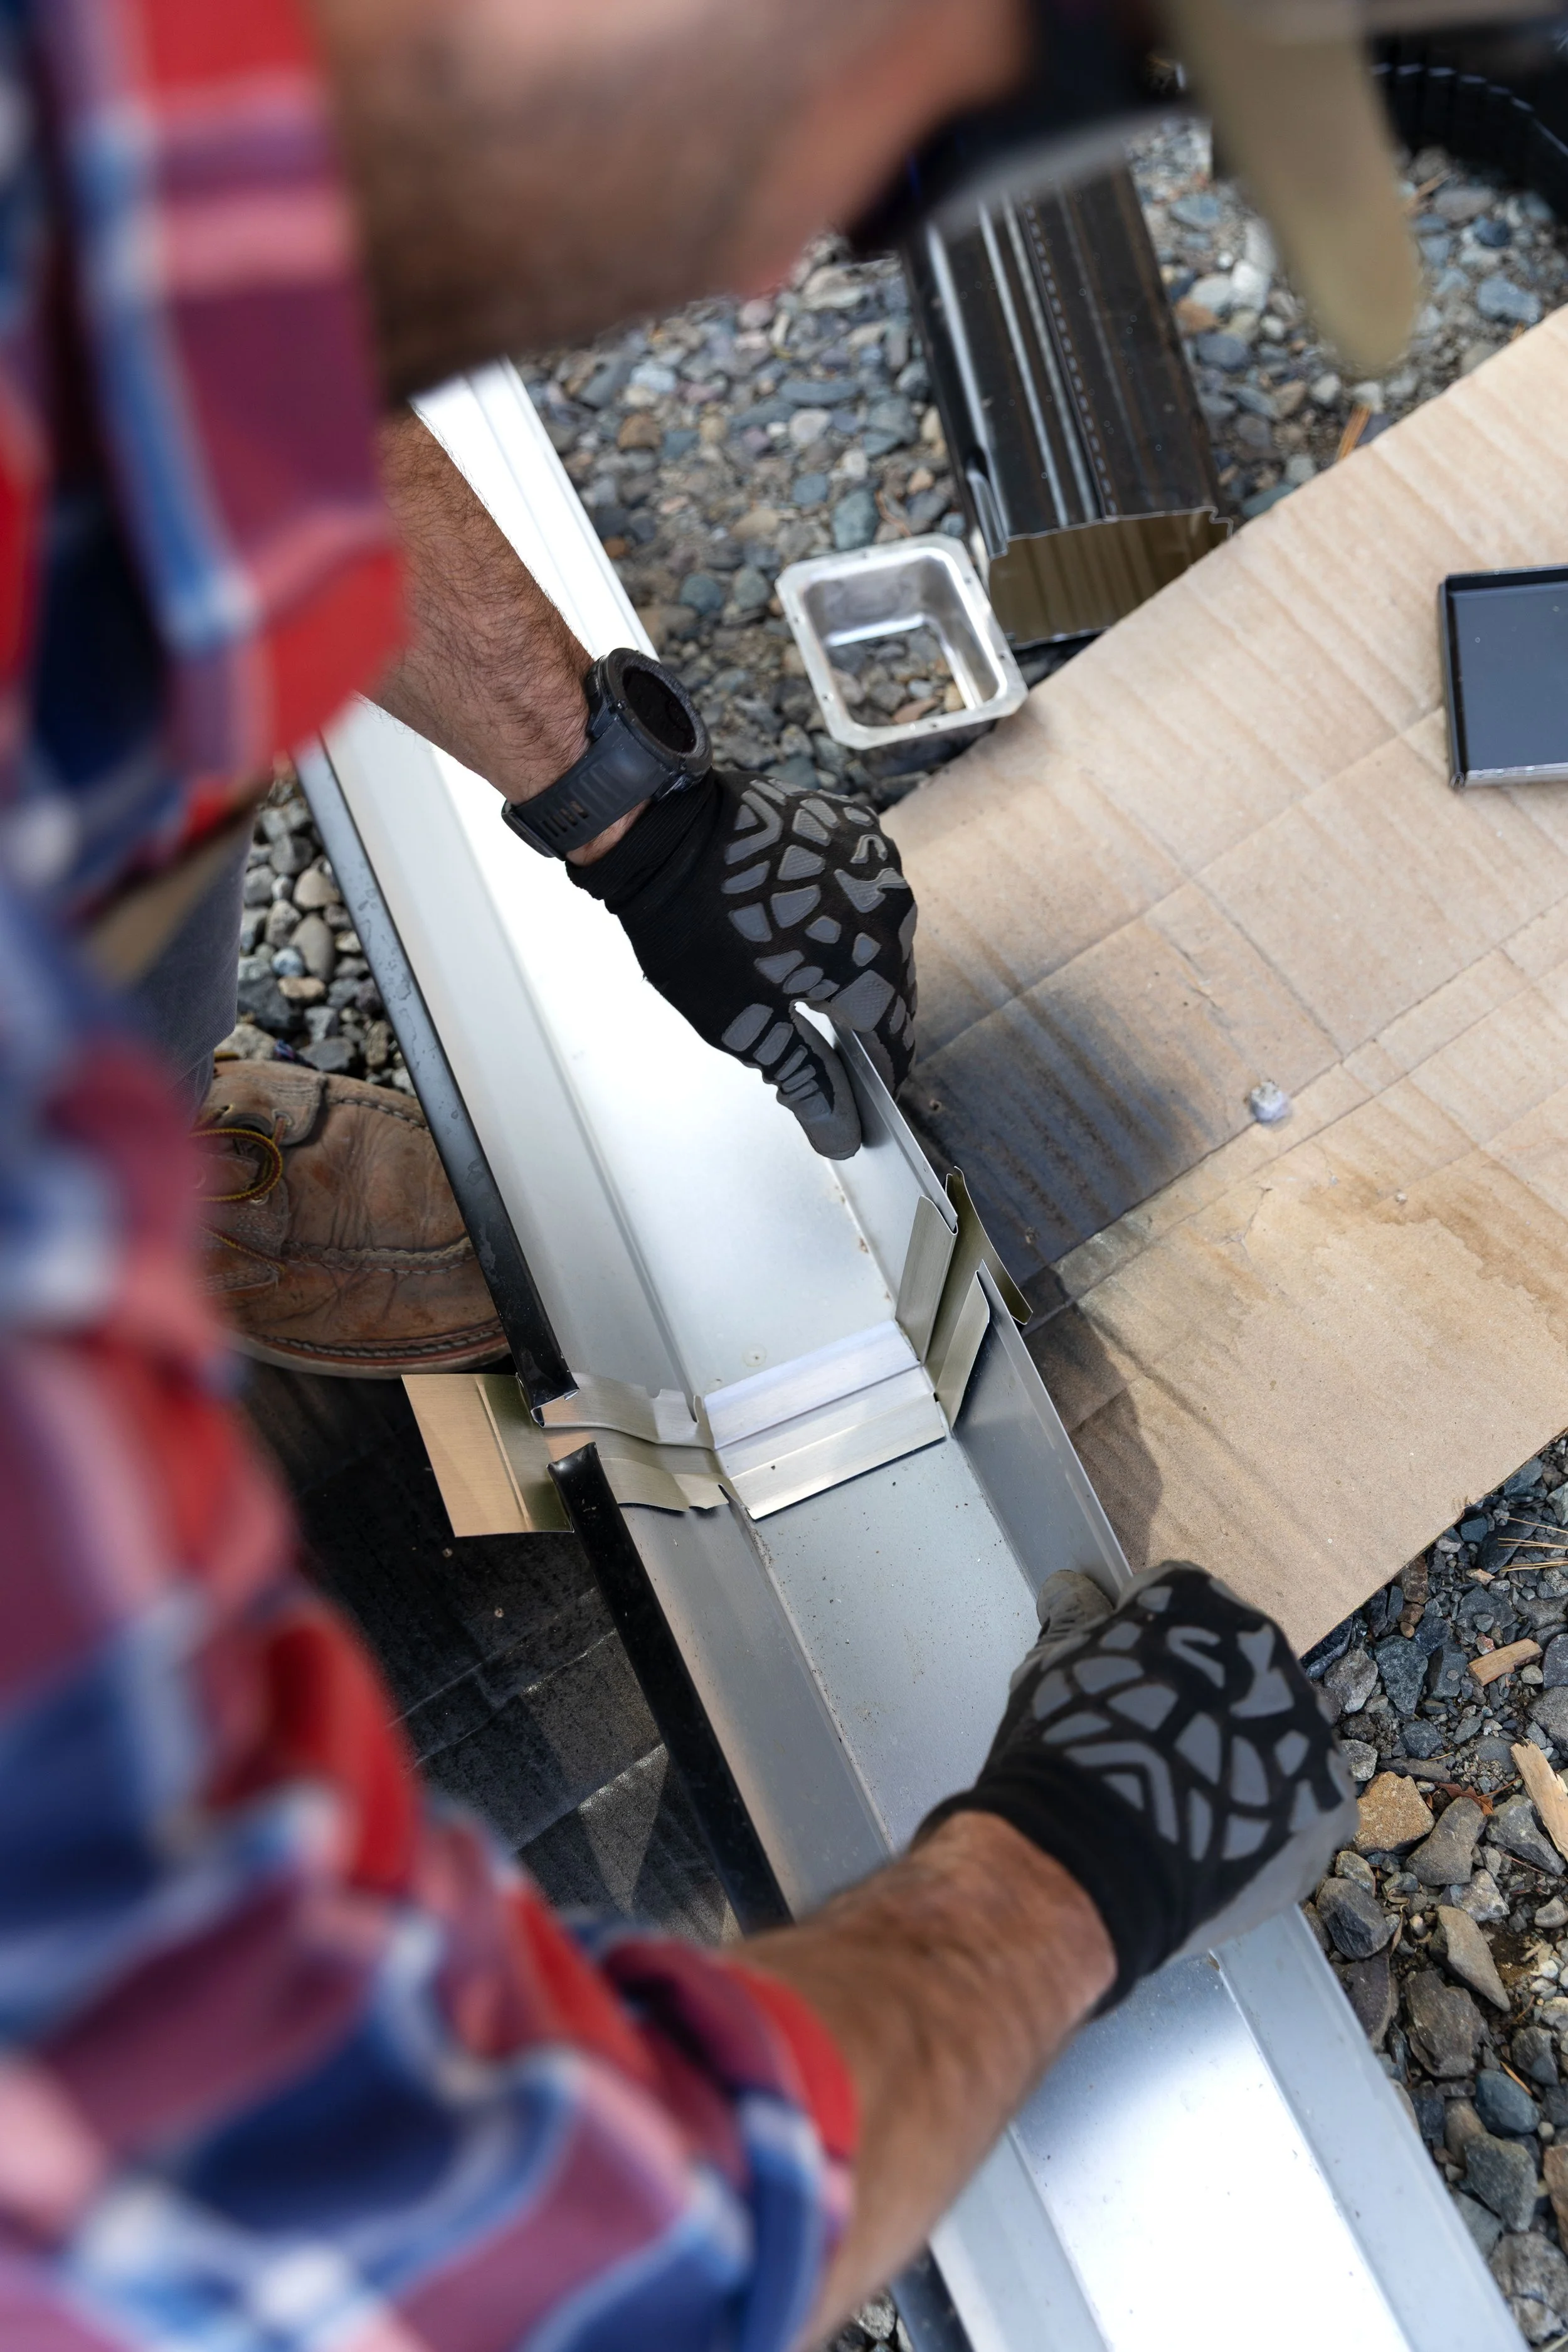
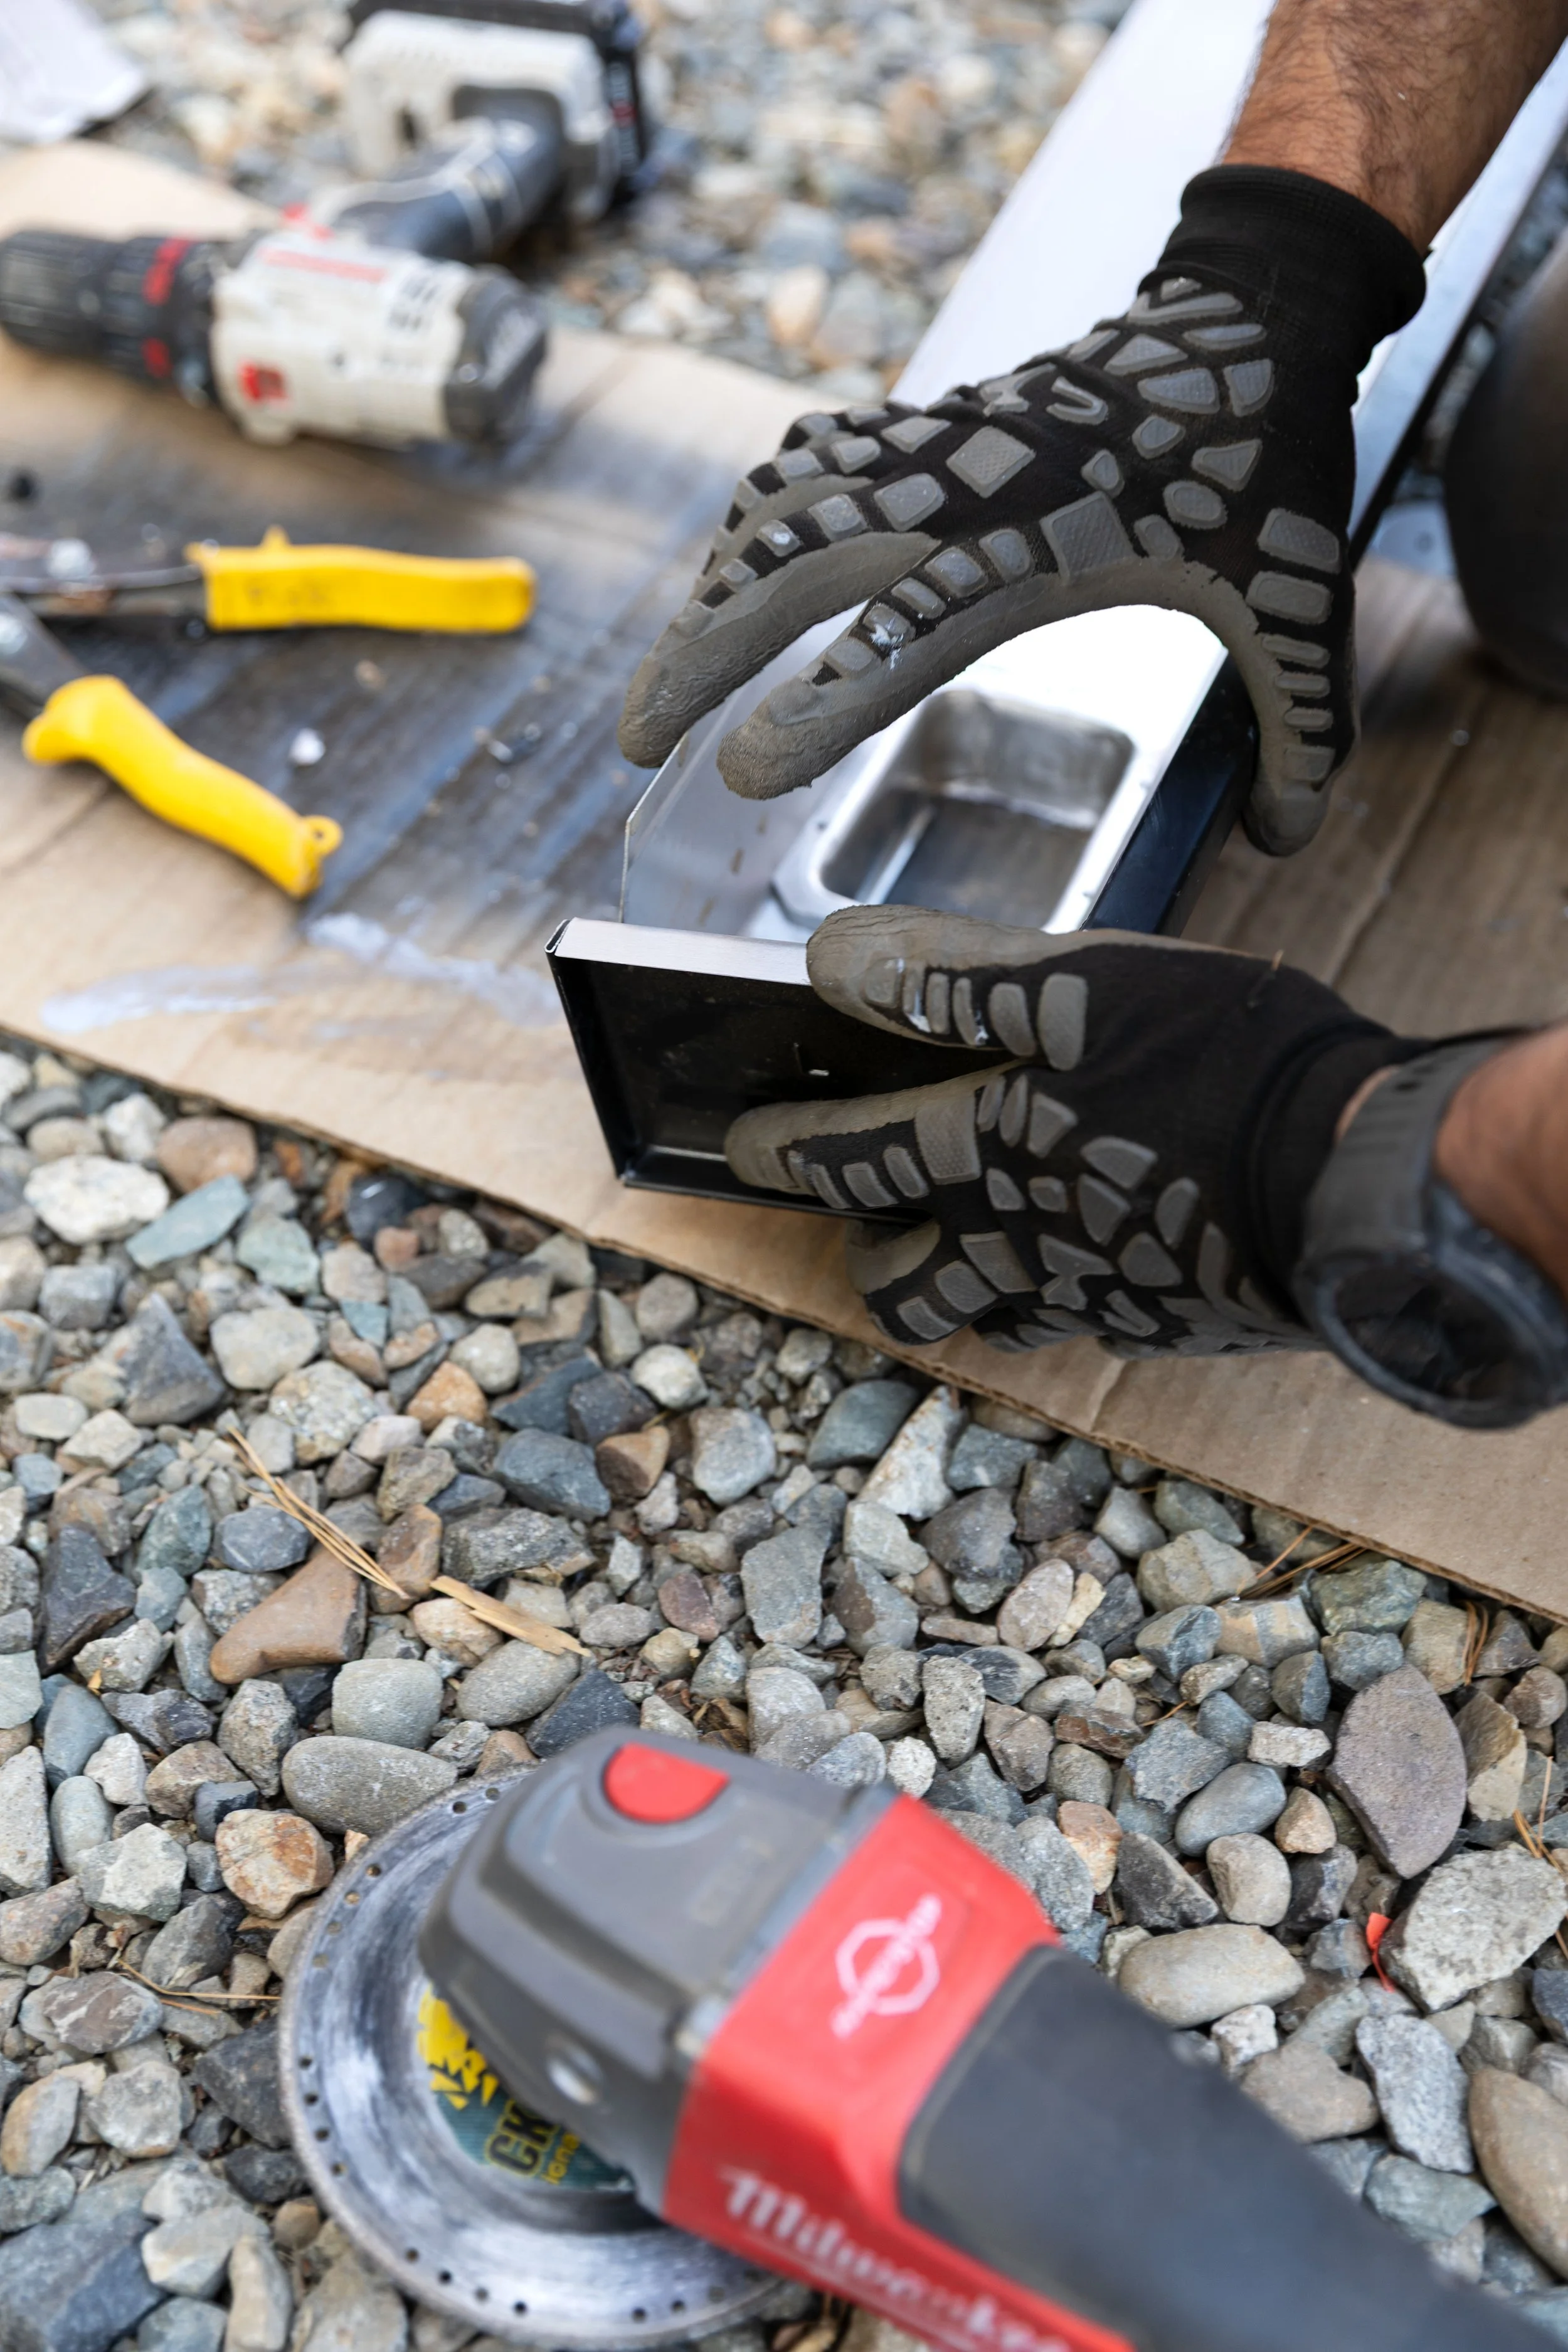
TWO // Cut and connect sections
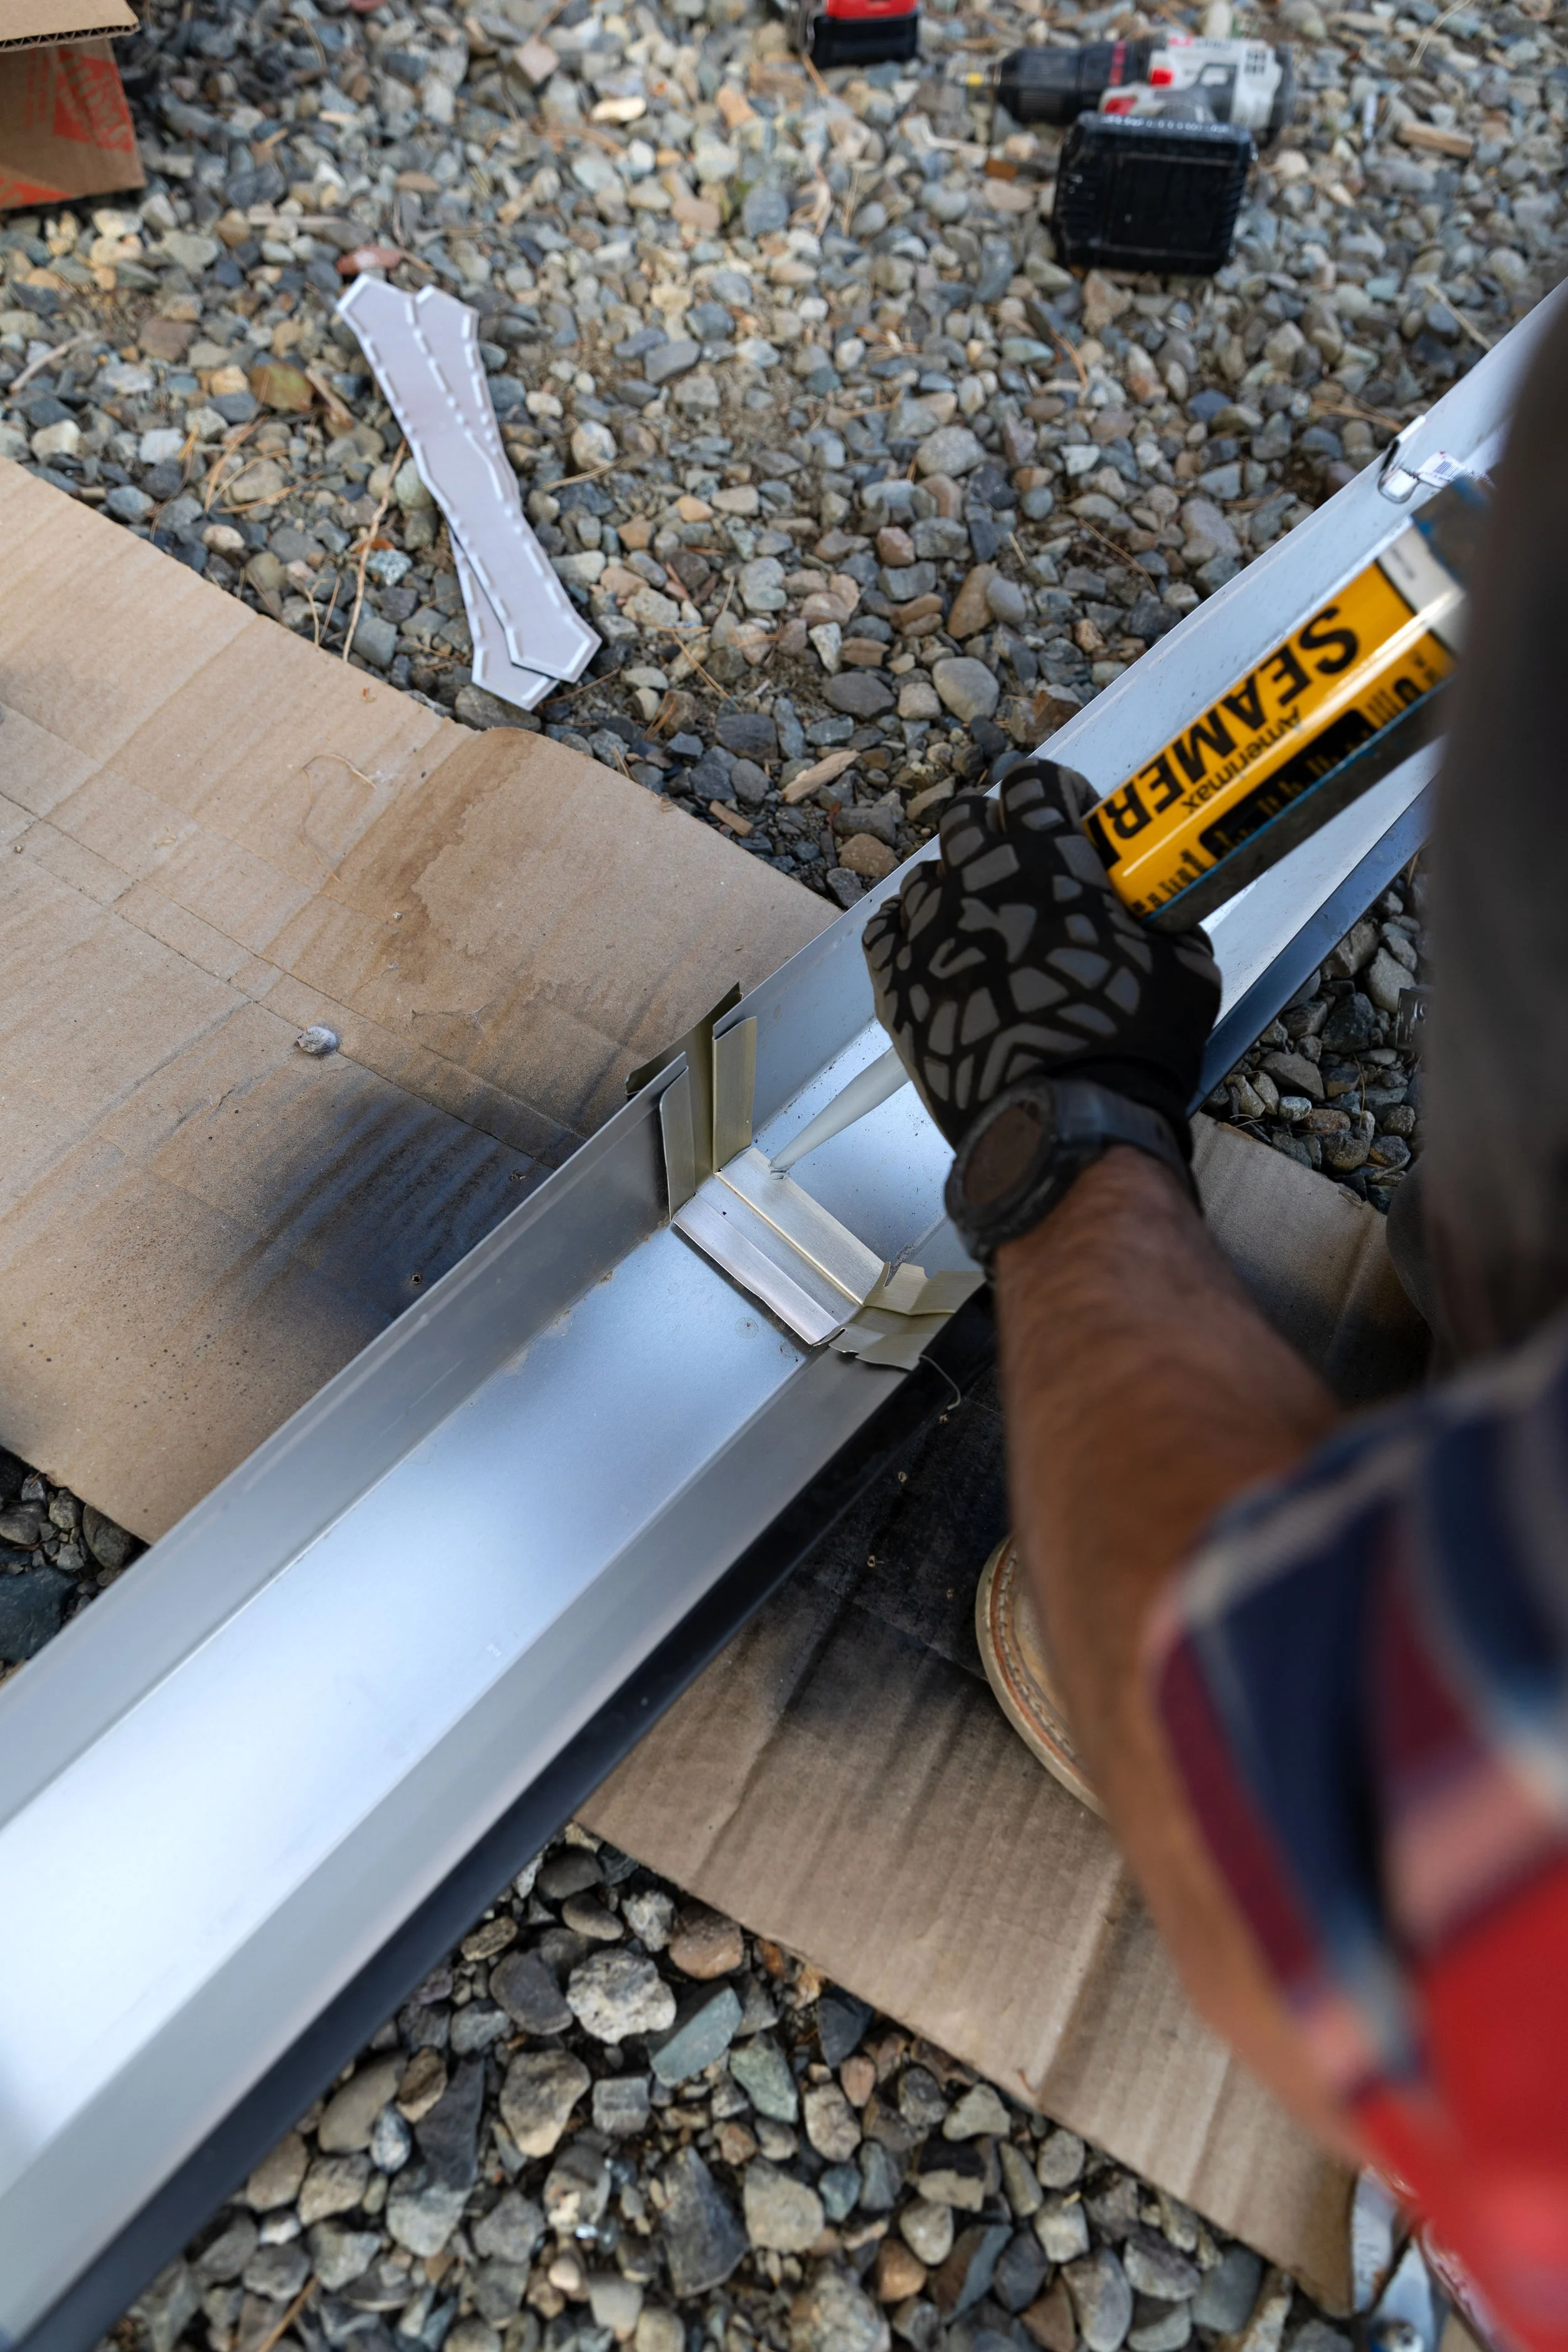
Use tin snips (or an angle grinder) to cut each piece to size. Then attach end caps and downspout outlets, and seal all seams. Assemble as much as possible on the ground - it’s much easier than on a ladder!
Here’s what that assembly looked like for us…
Cutting:
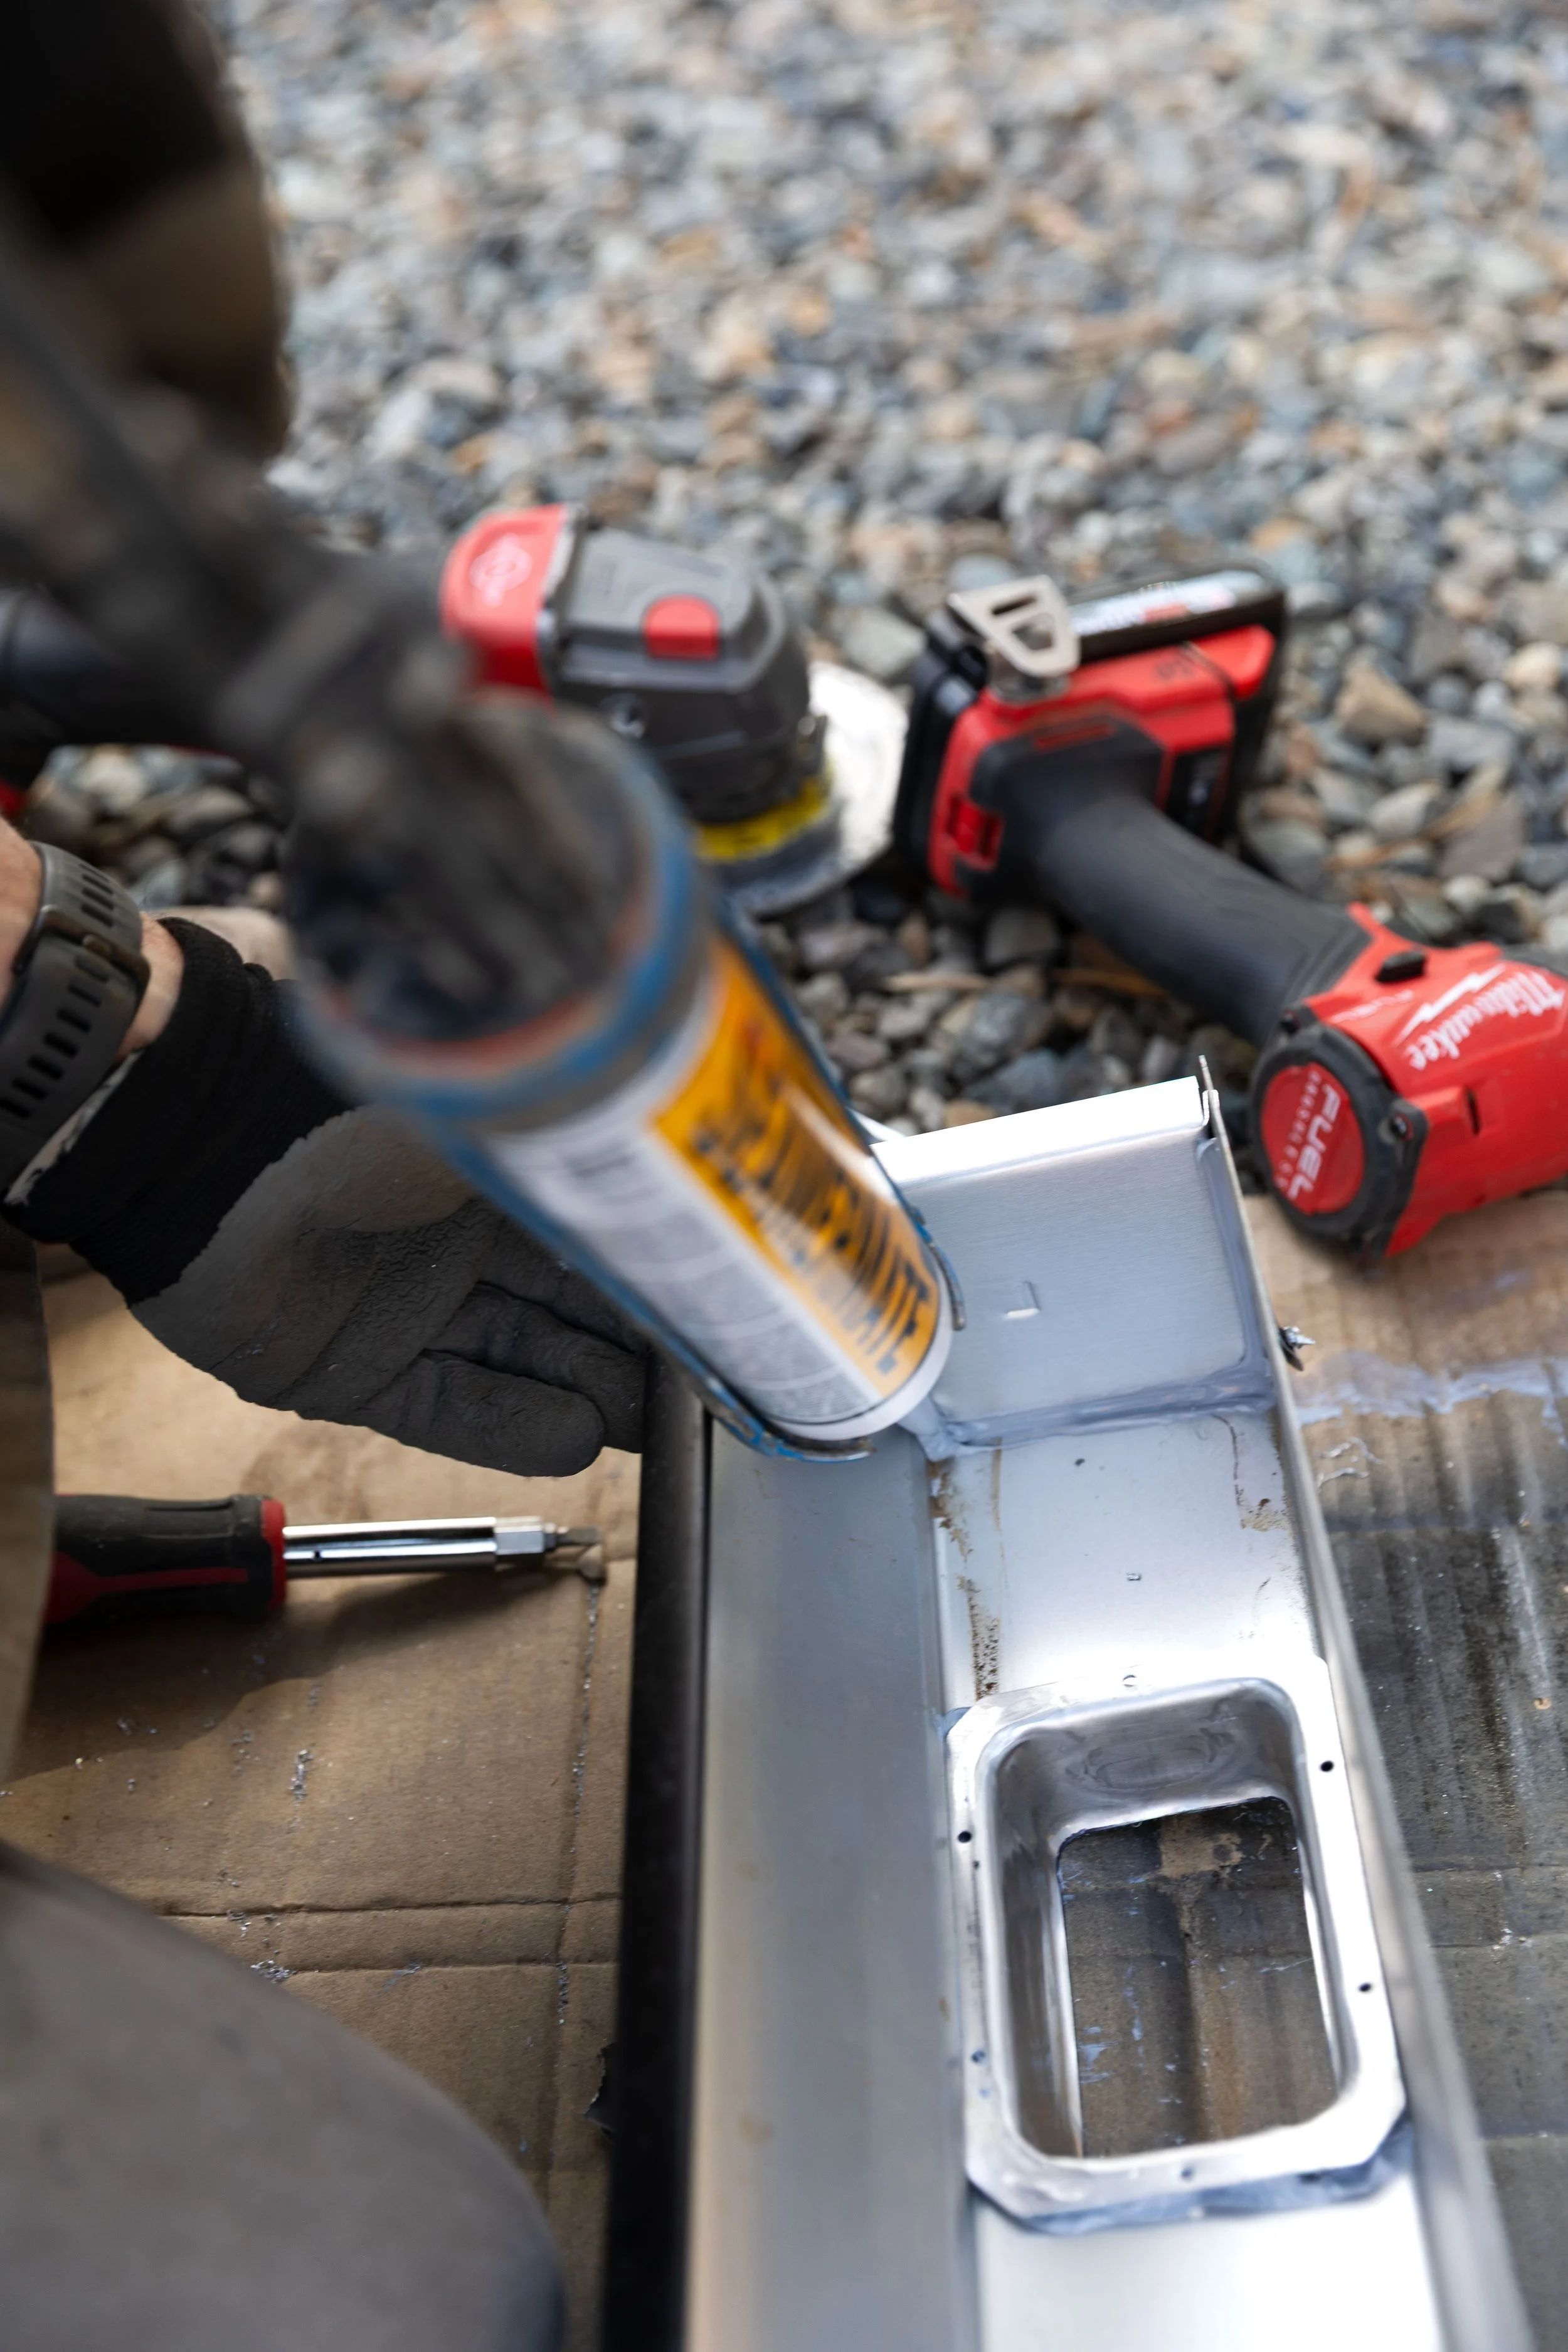
Splicing sections together:
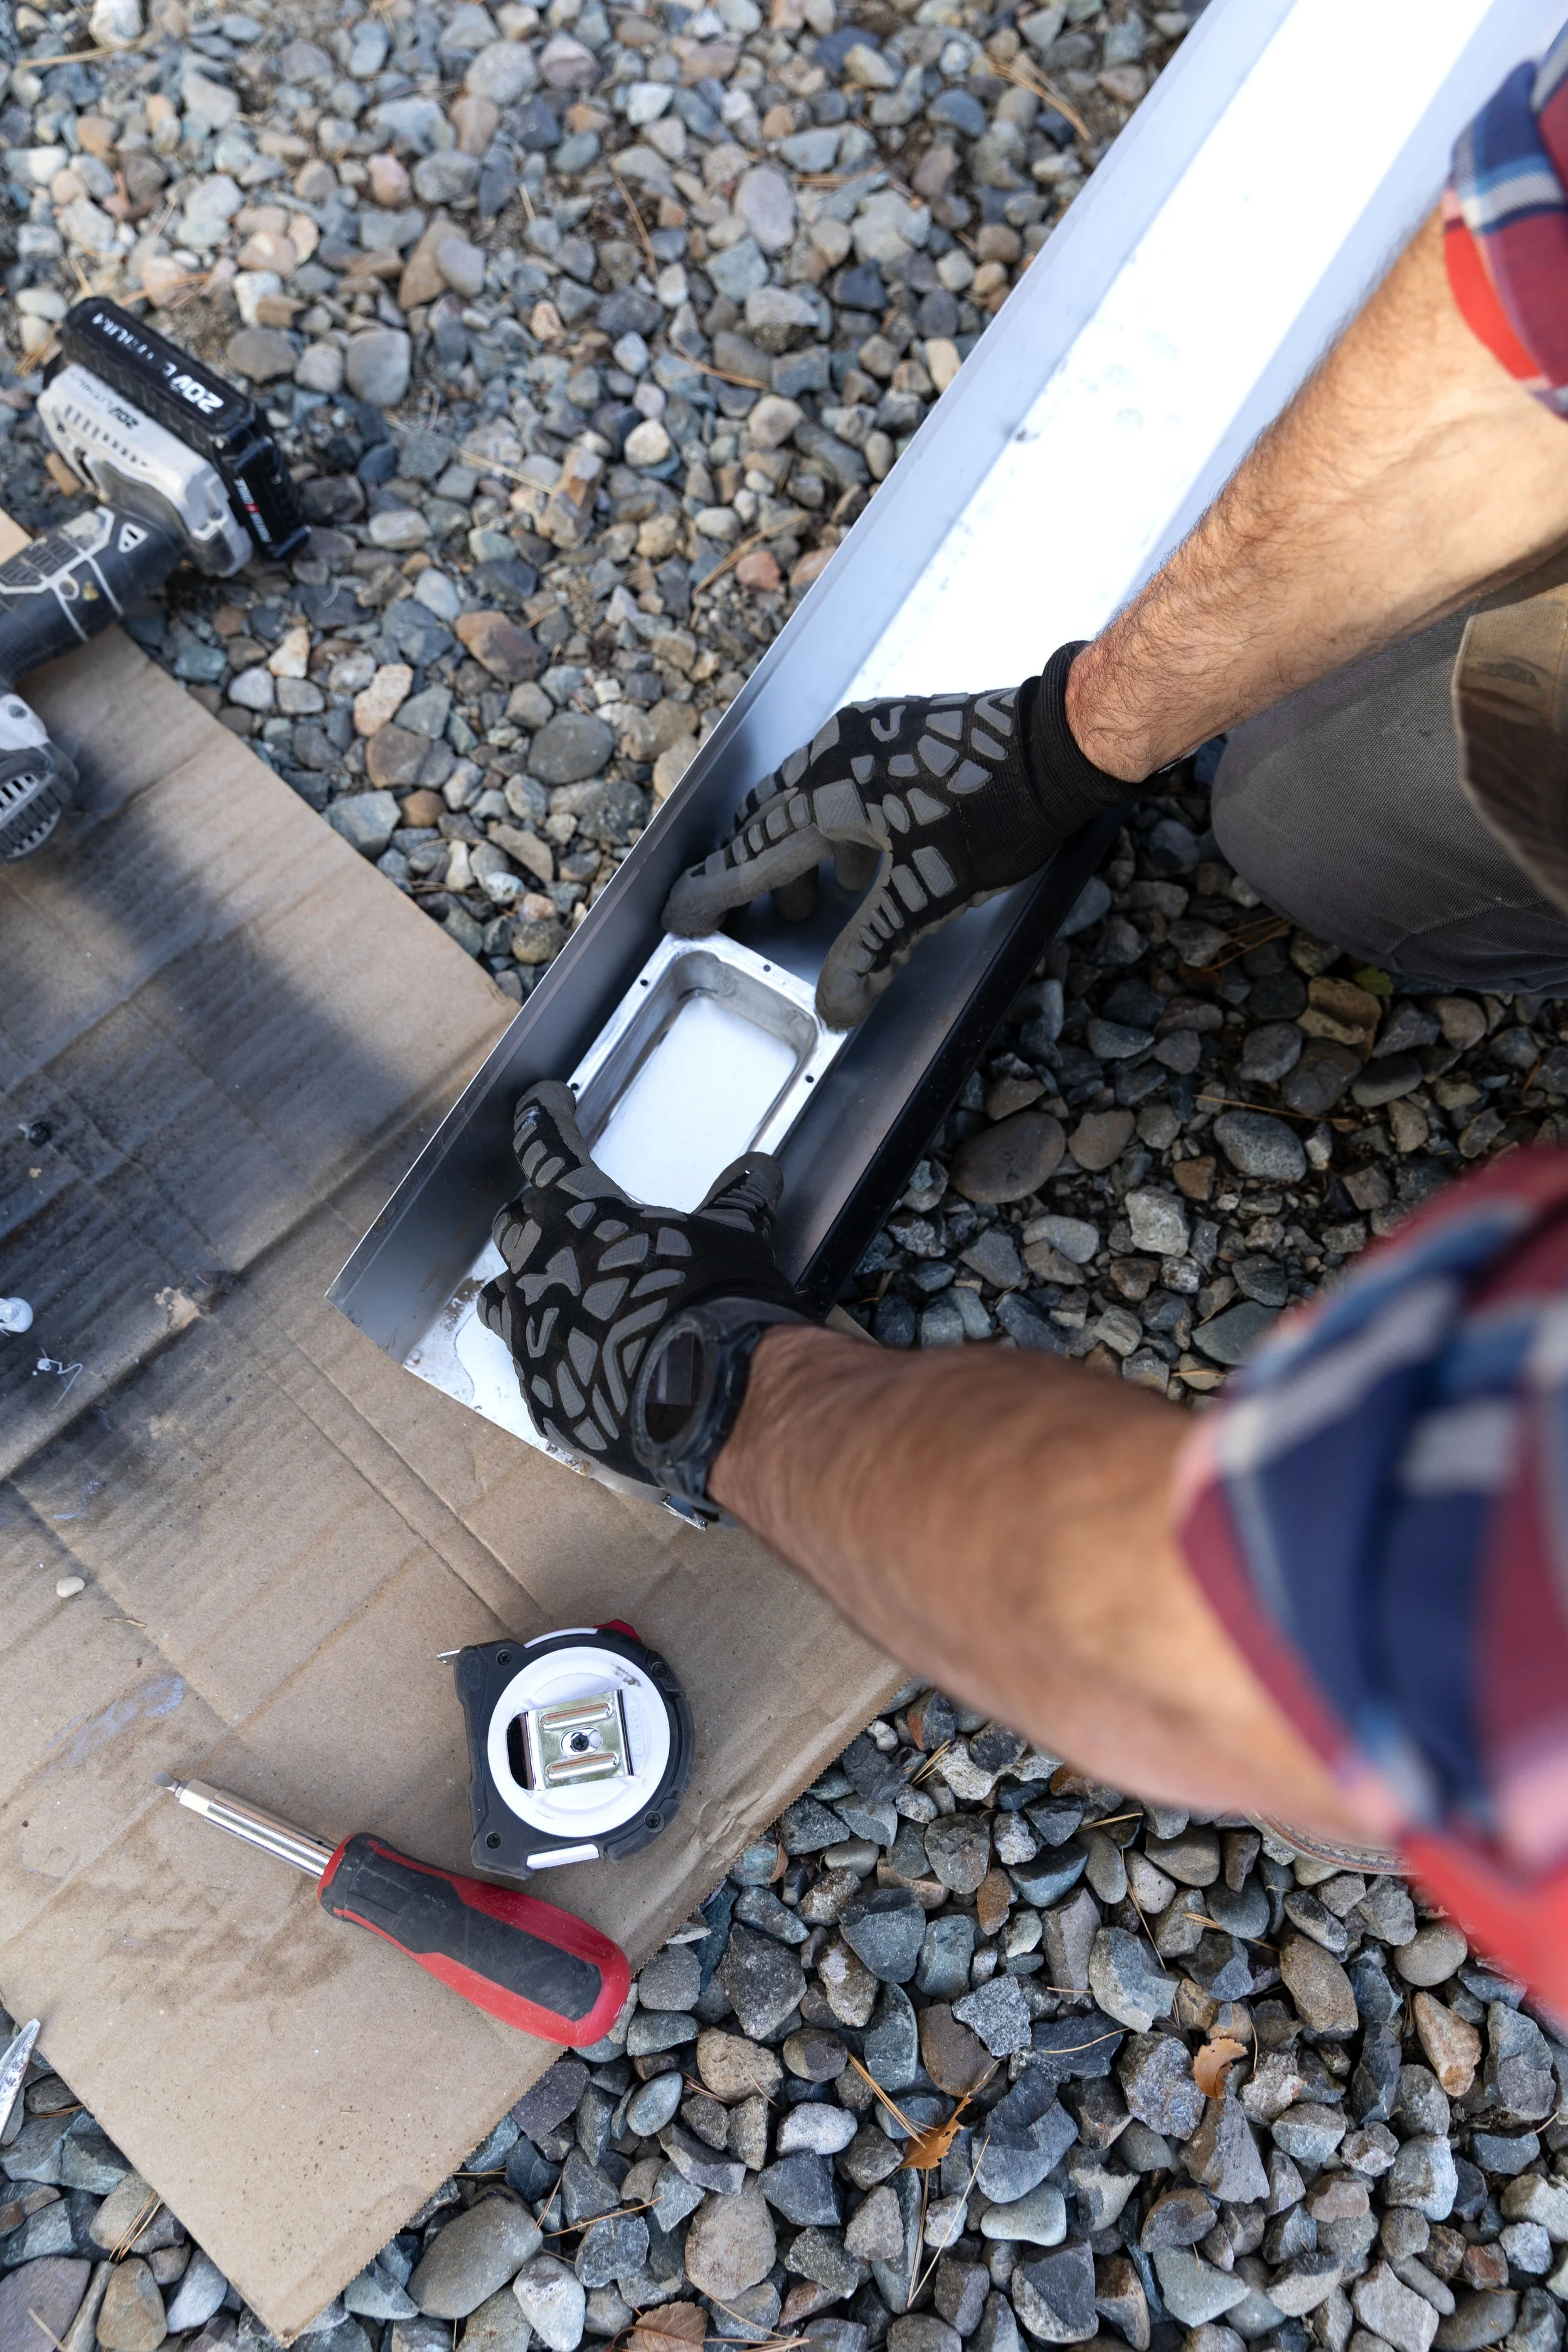
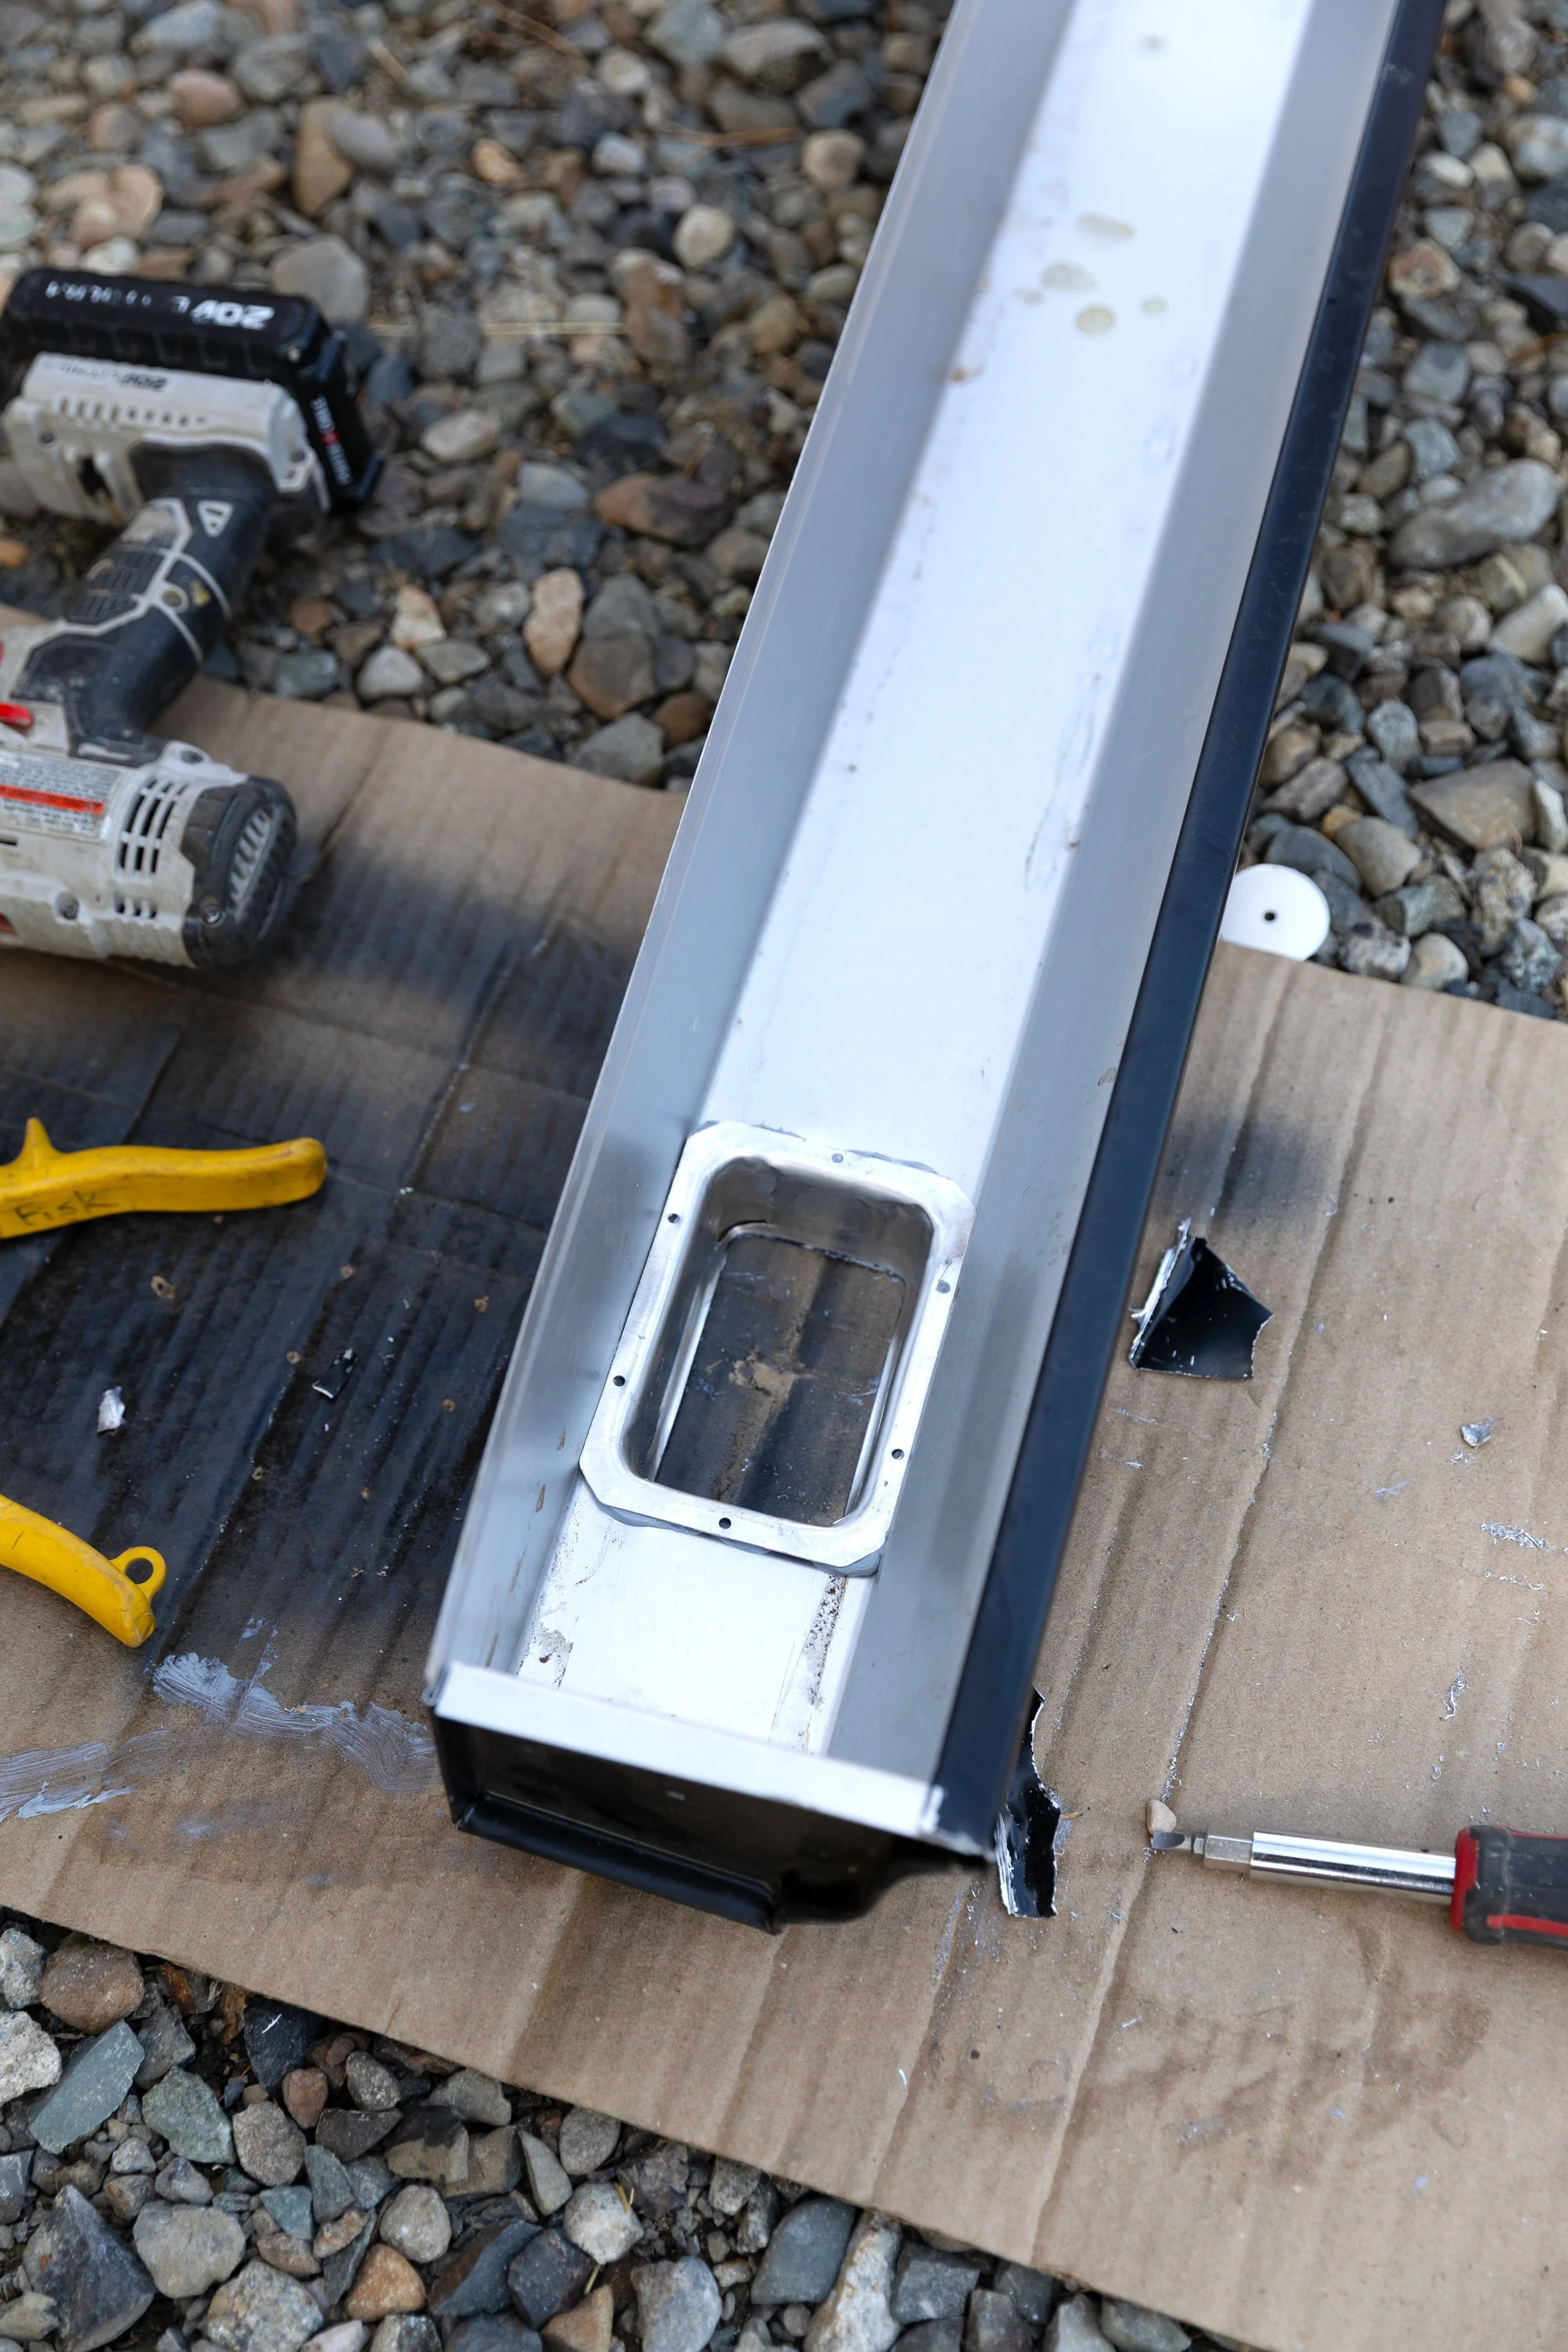
Adding downspout outlet:

Adding end cap:
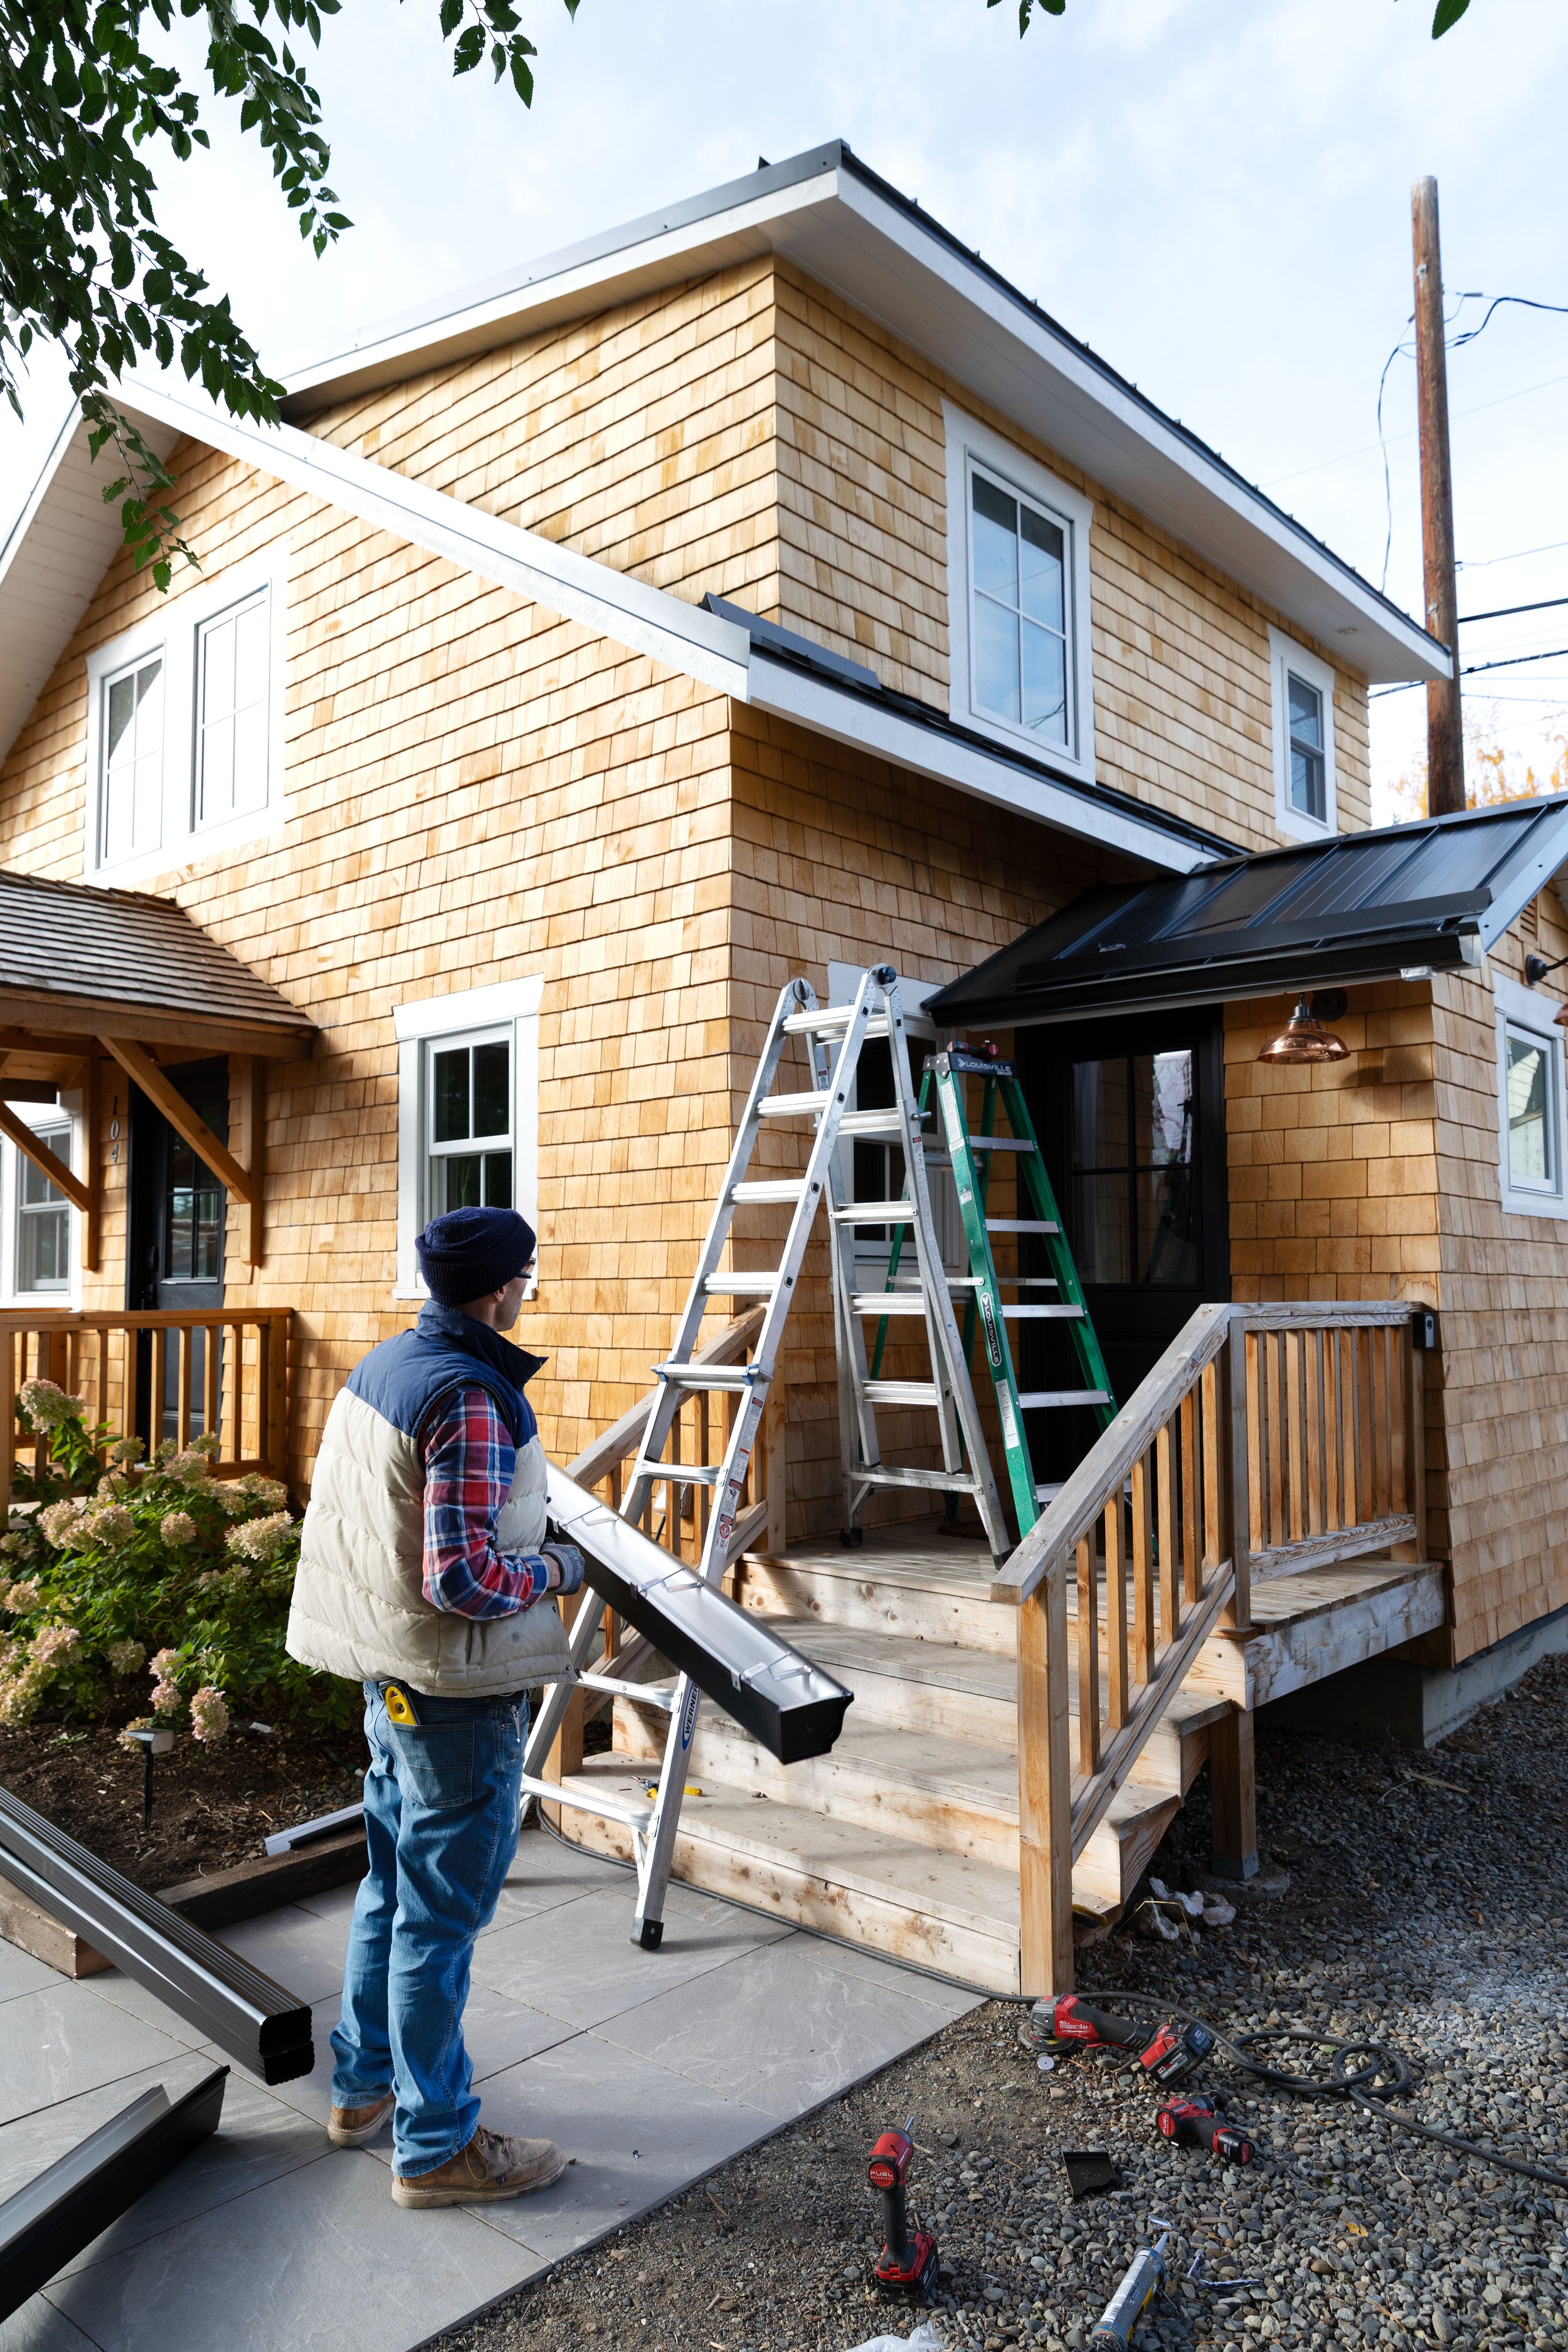
Three // Attach hangers
Clip hangers onto the gutter every 18” or so.

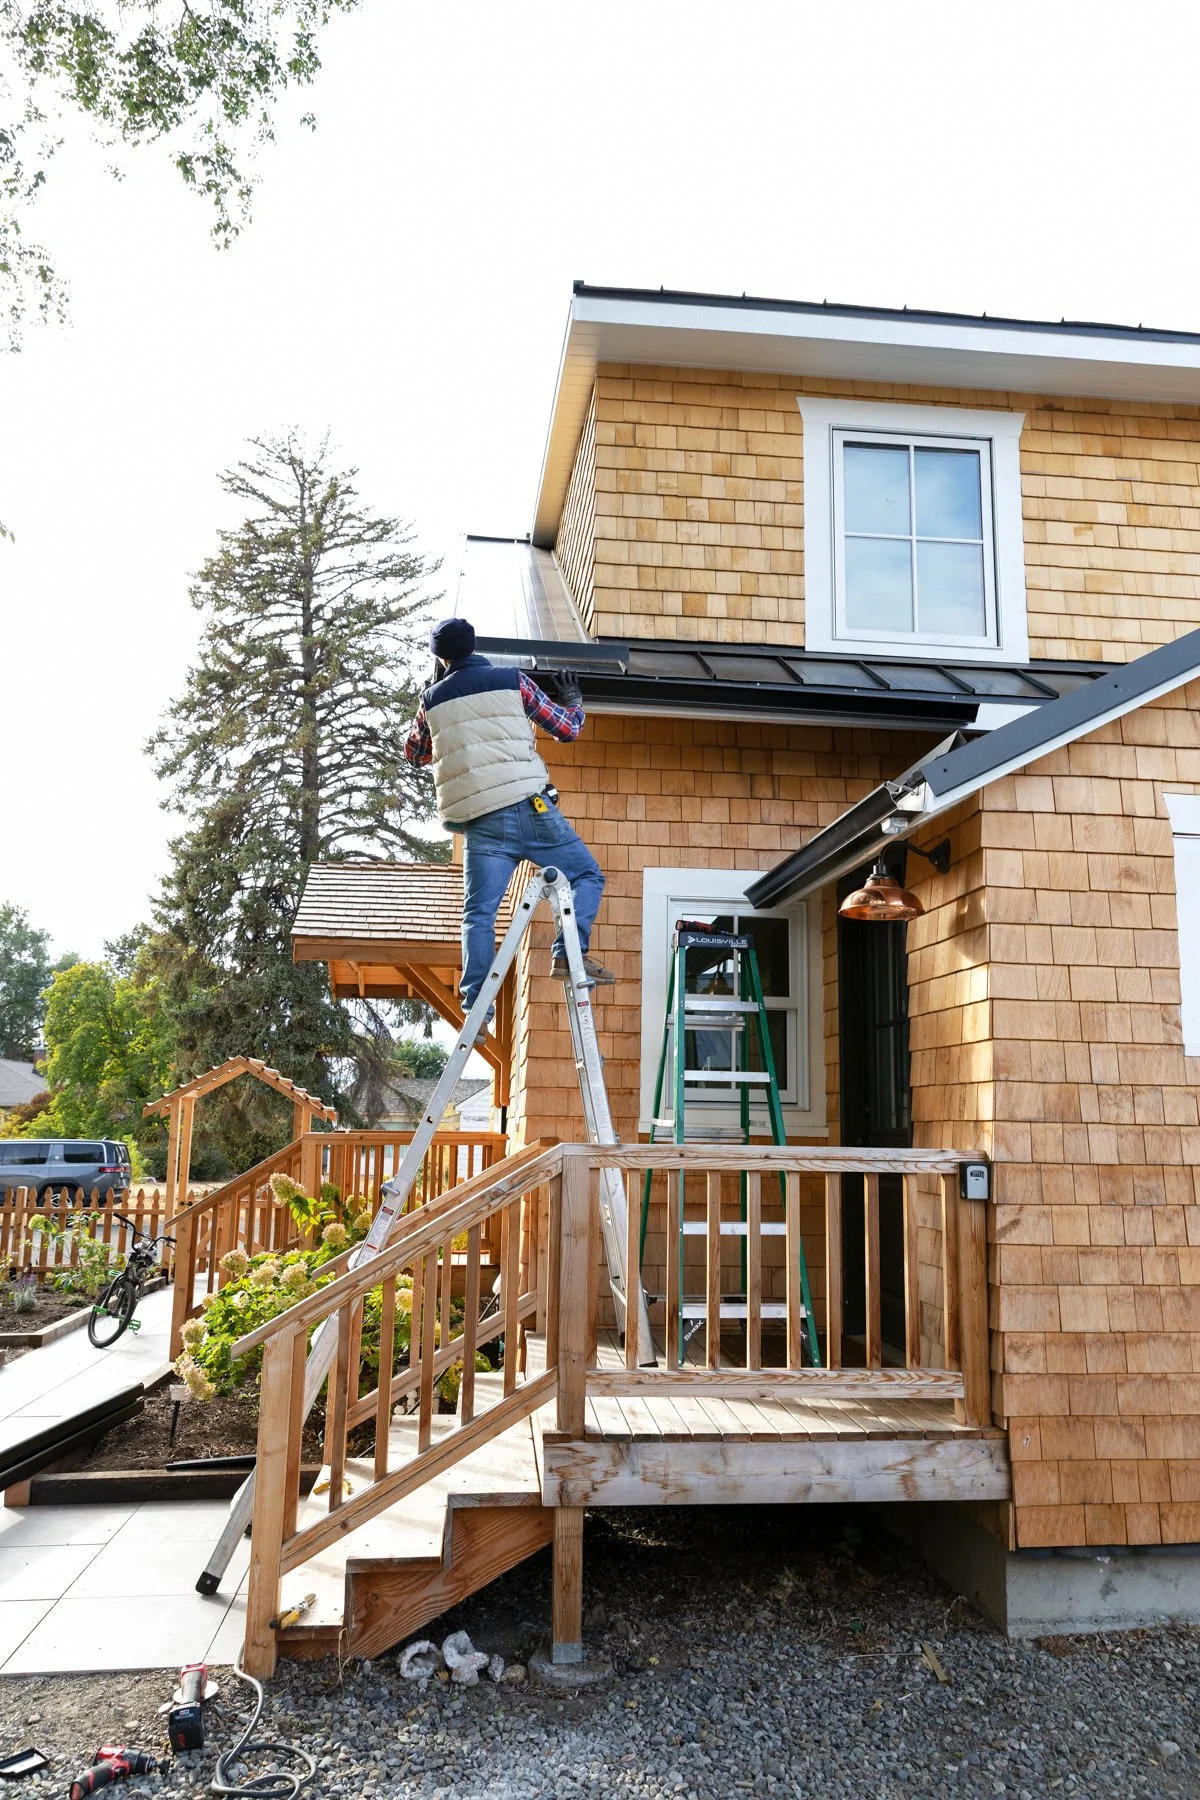
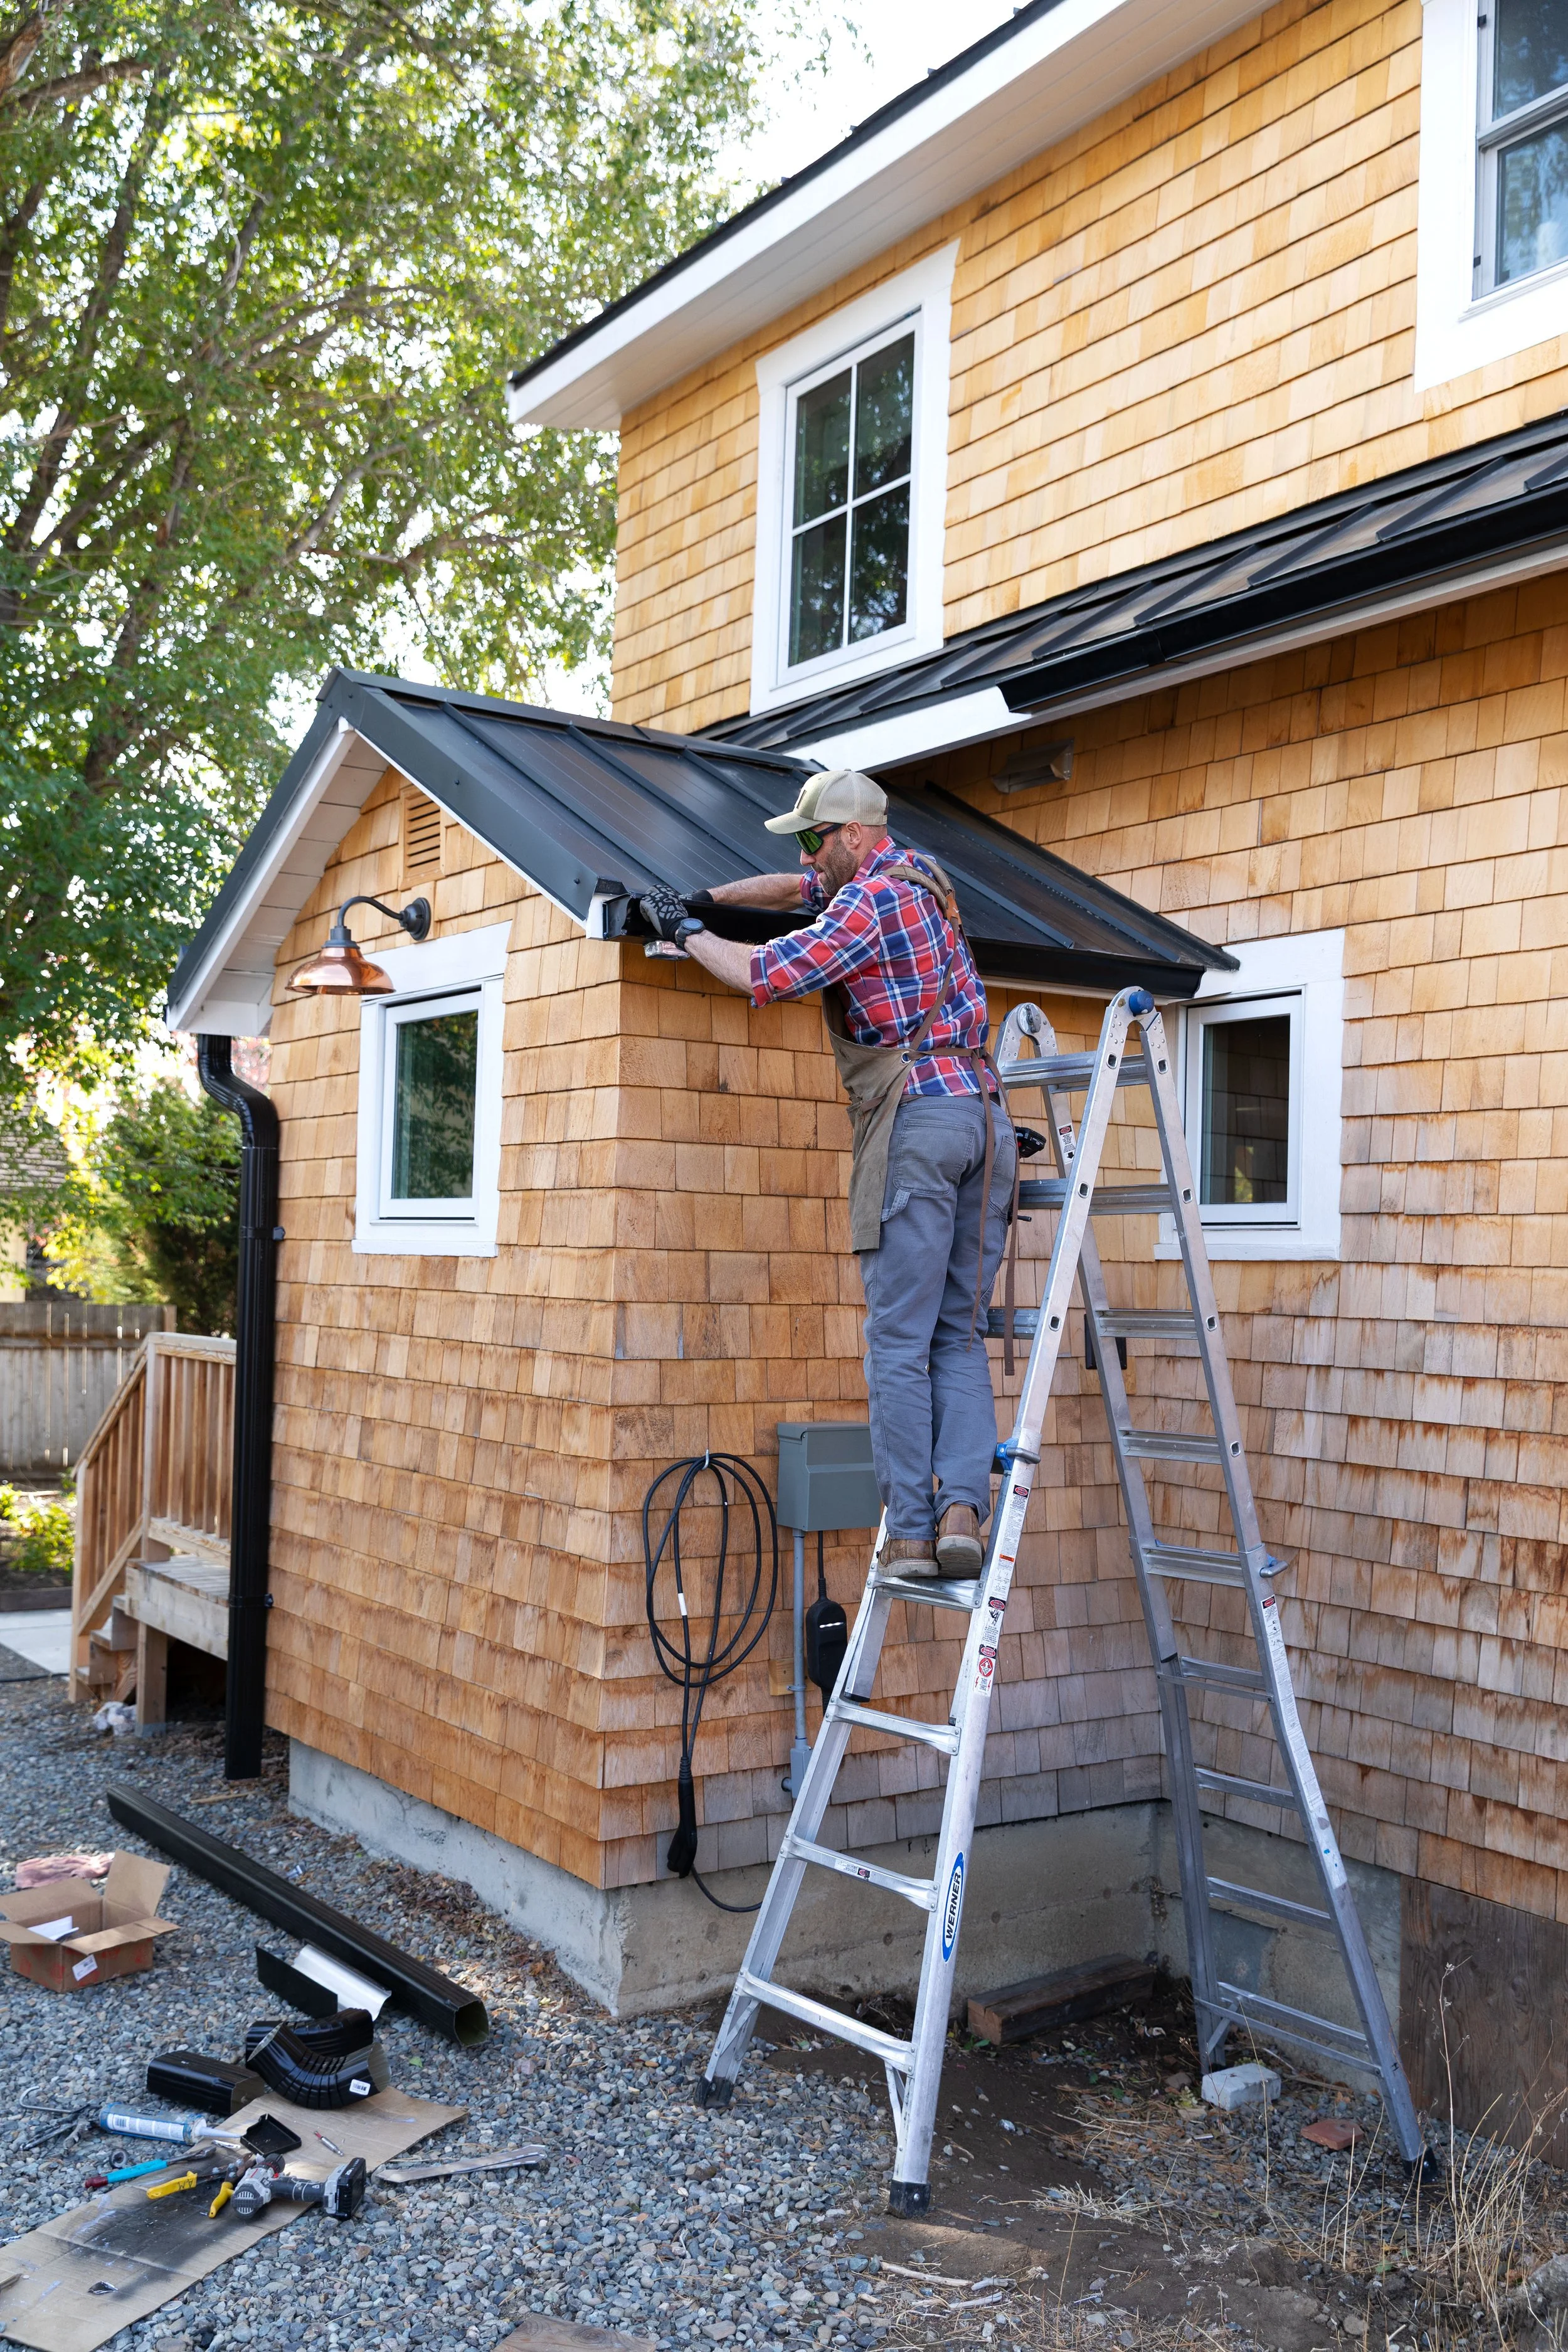
Four // Mount Gutters to fascia
Secure hangers directly to the fascia board, maintaining your slope. A second set of hand sure helps here so one person can hold the gutter in place while the other installs the screws!
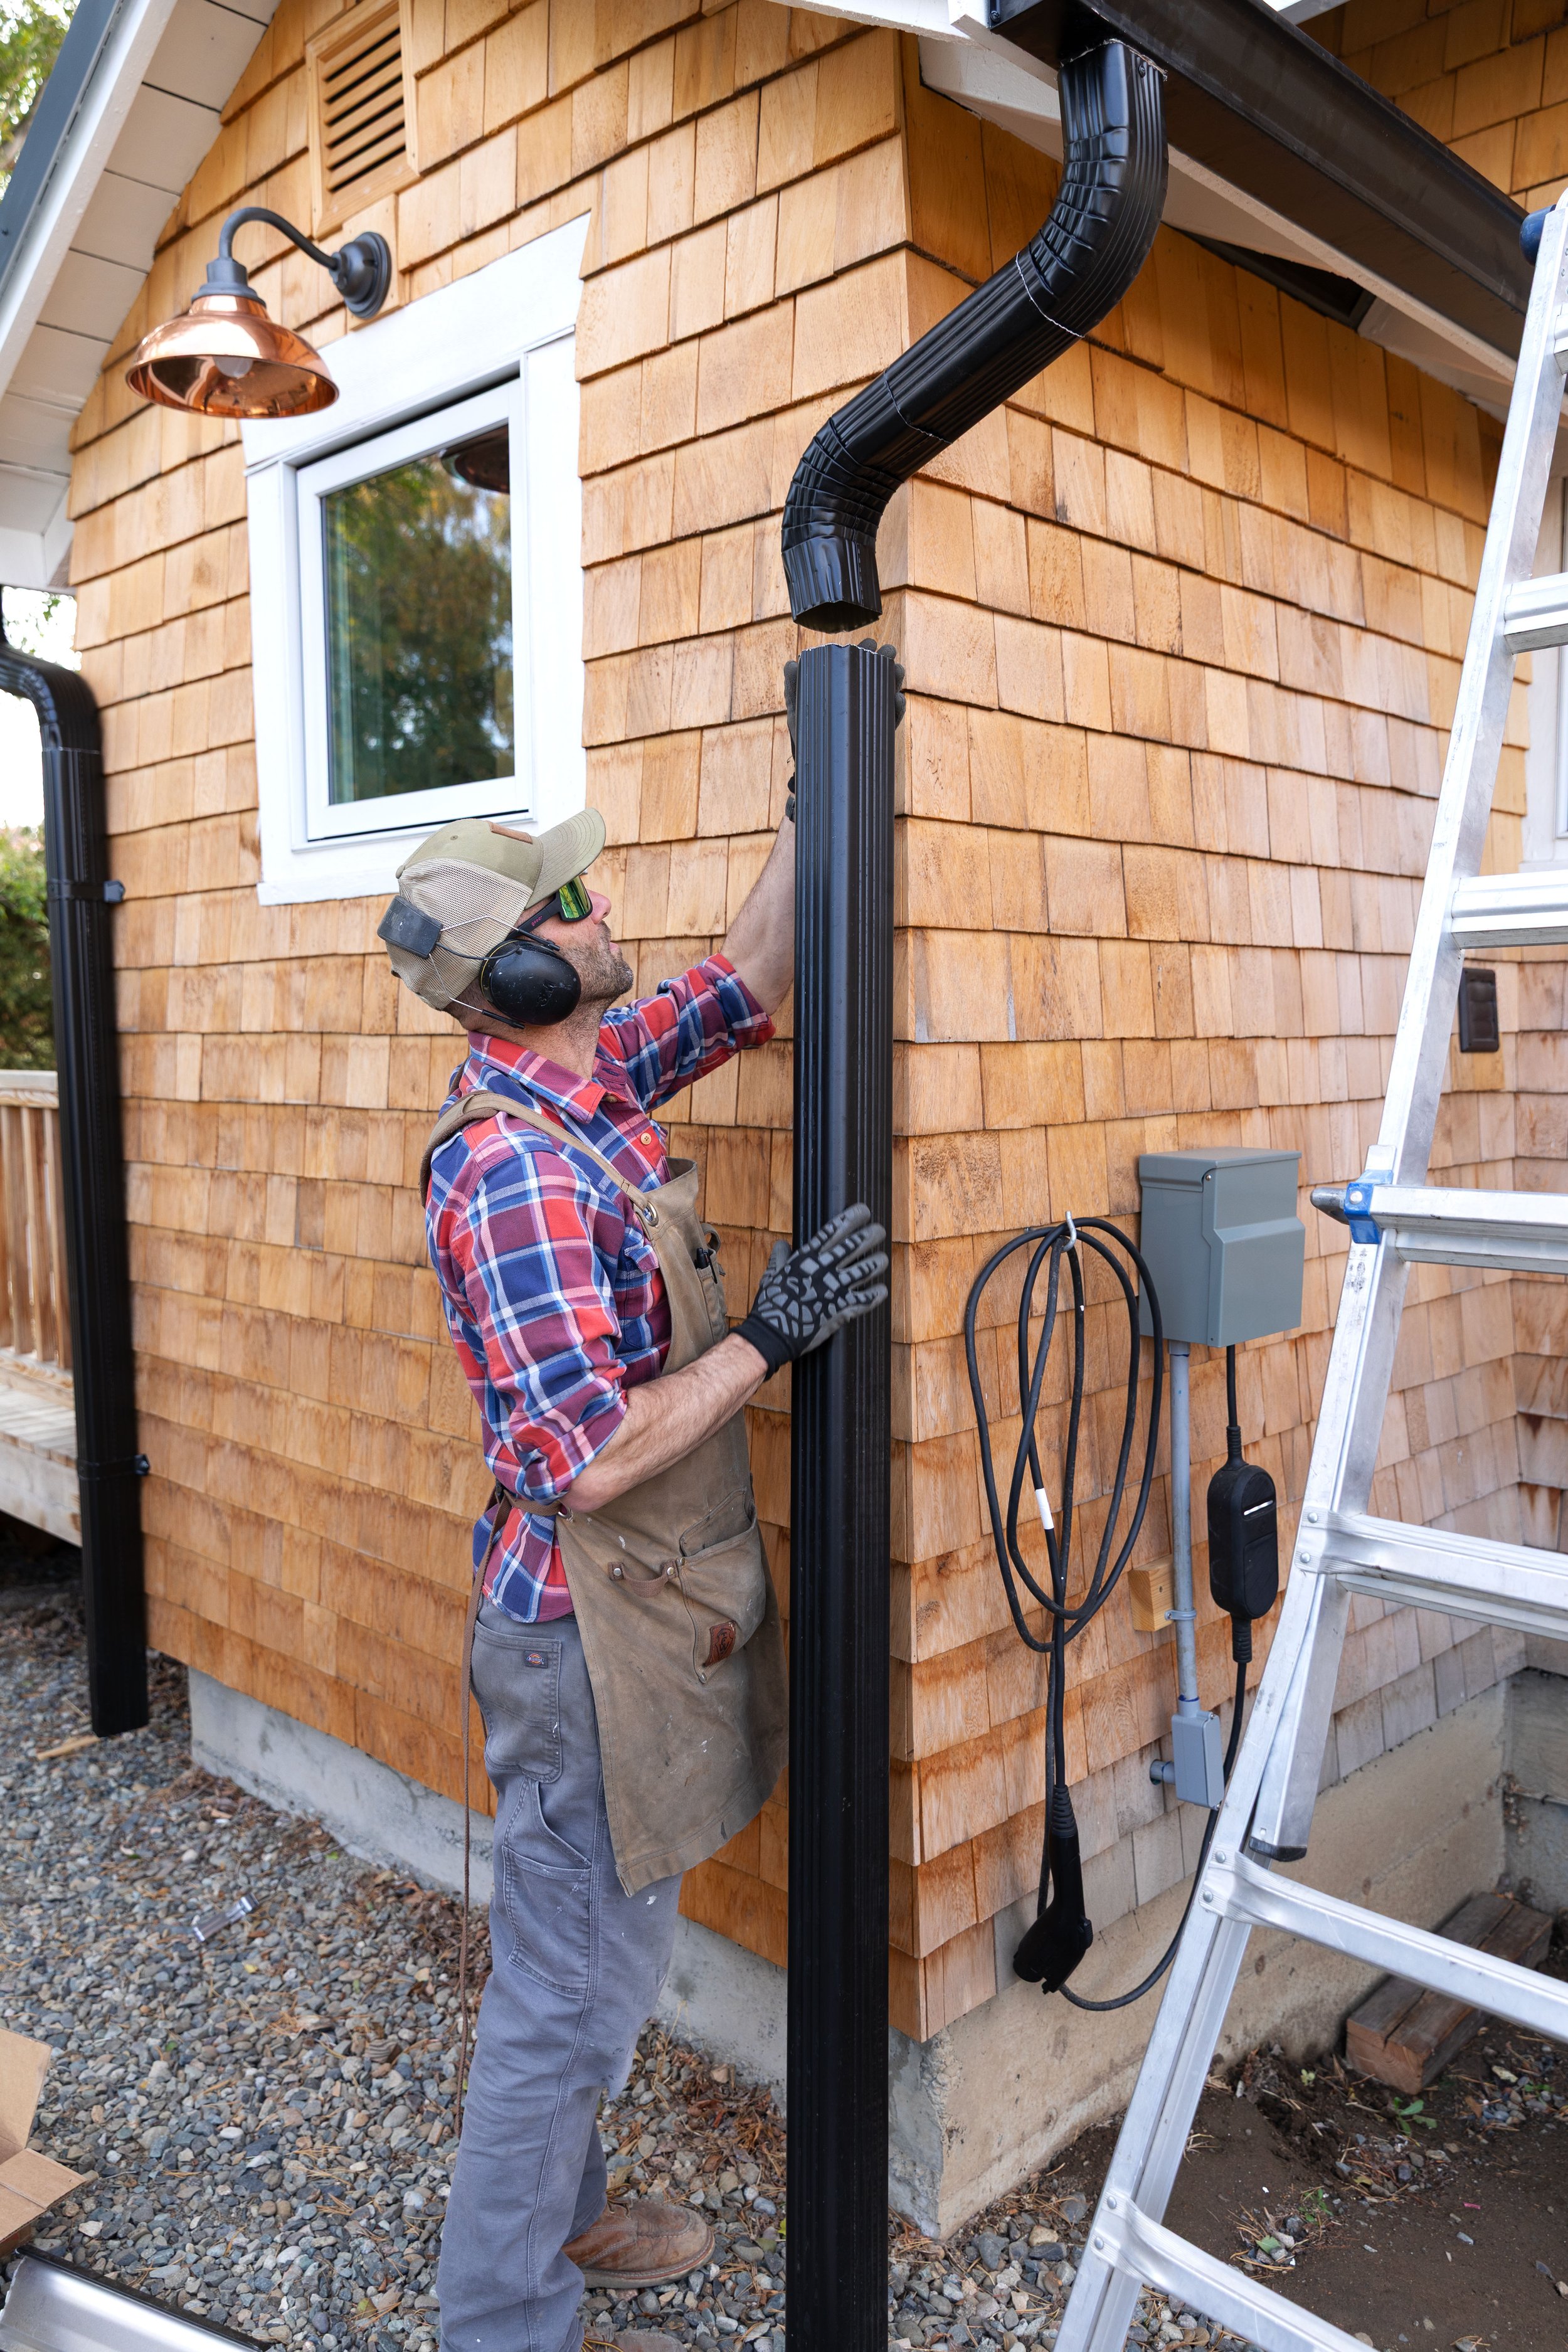
Five // Install downspouts
Attach downspouts to direct water away from the foundation. We added an elbow at each downspout and attached the downpipes directly to the house with a strap.
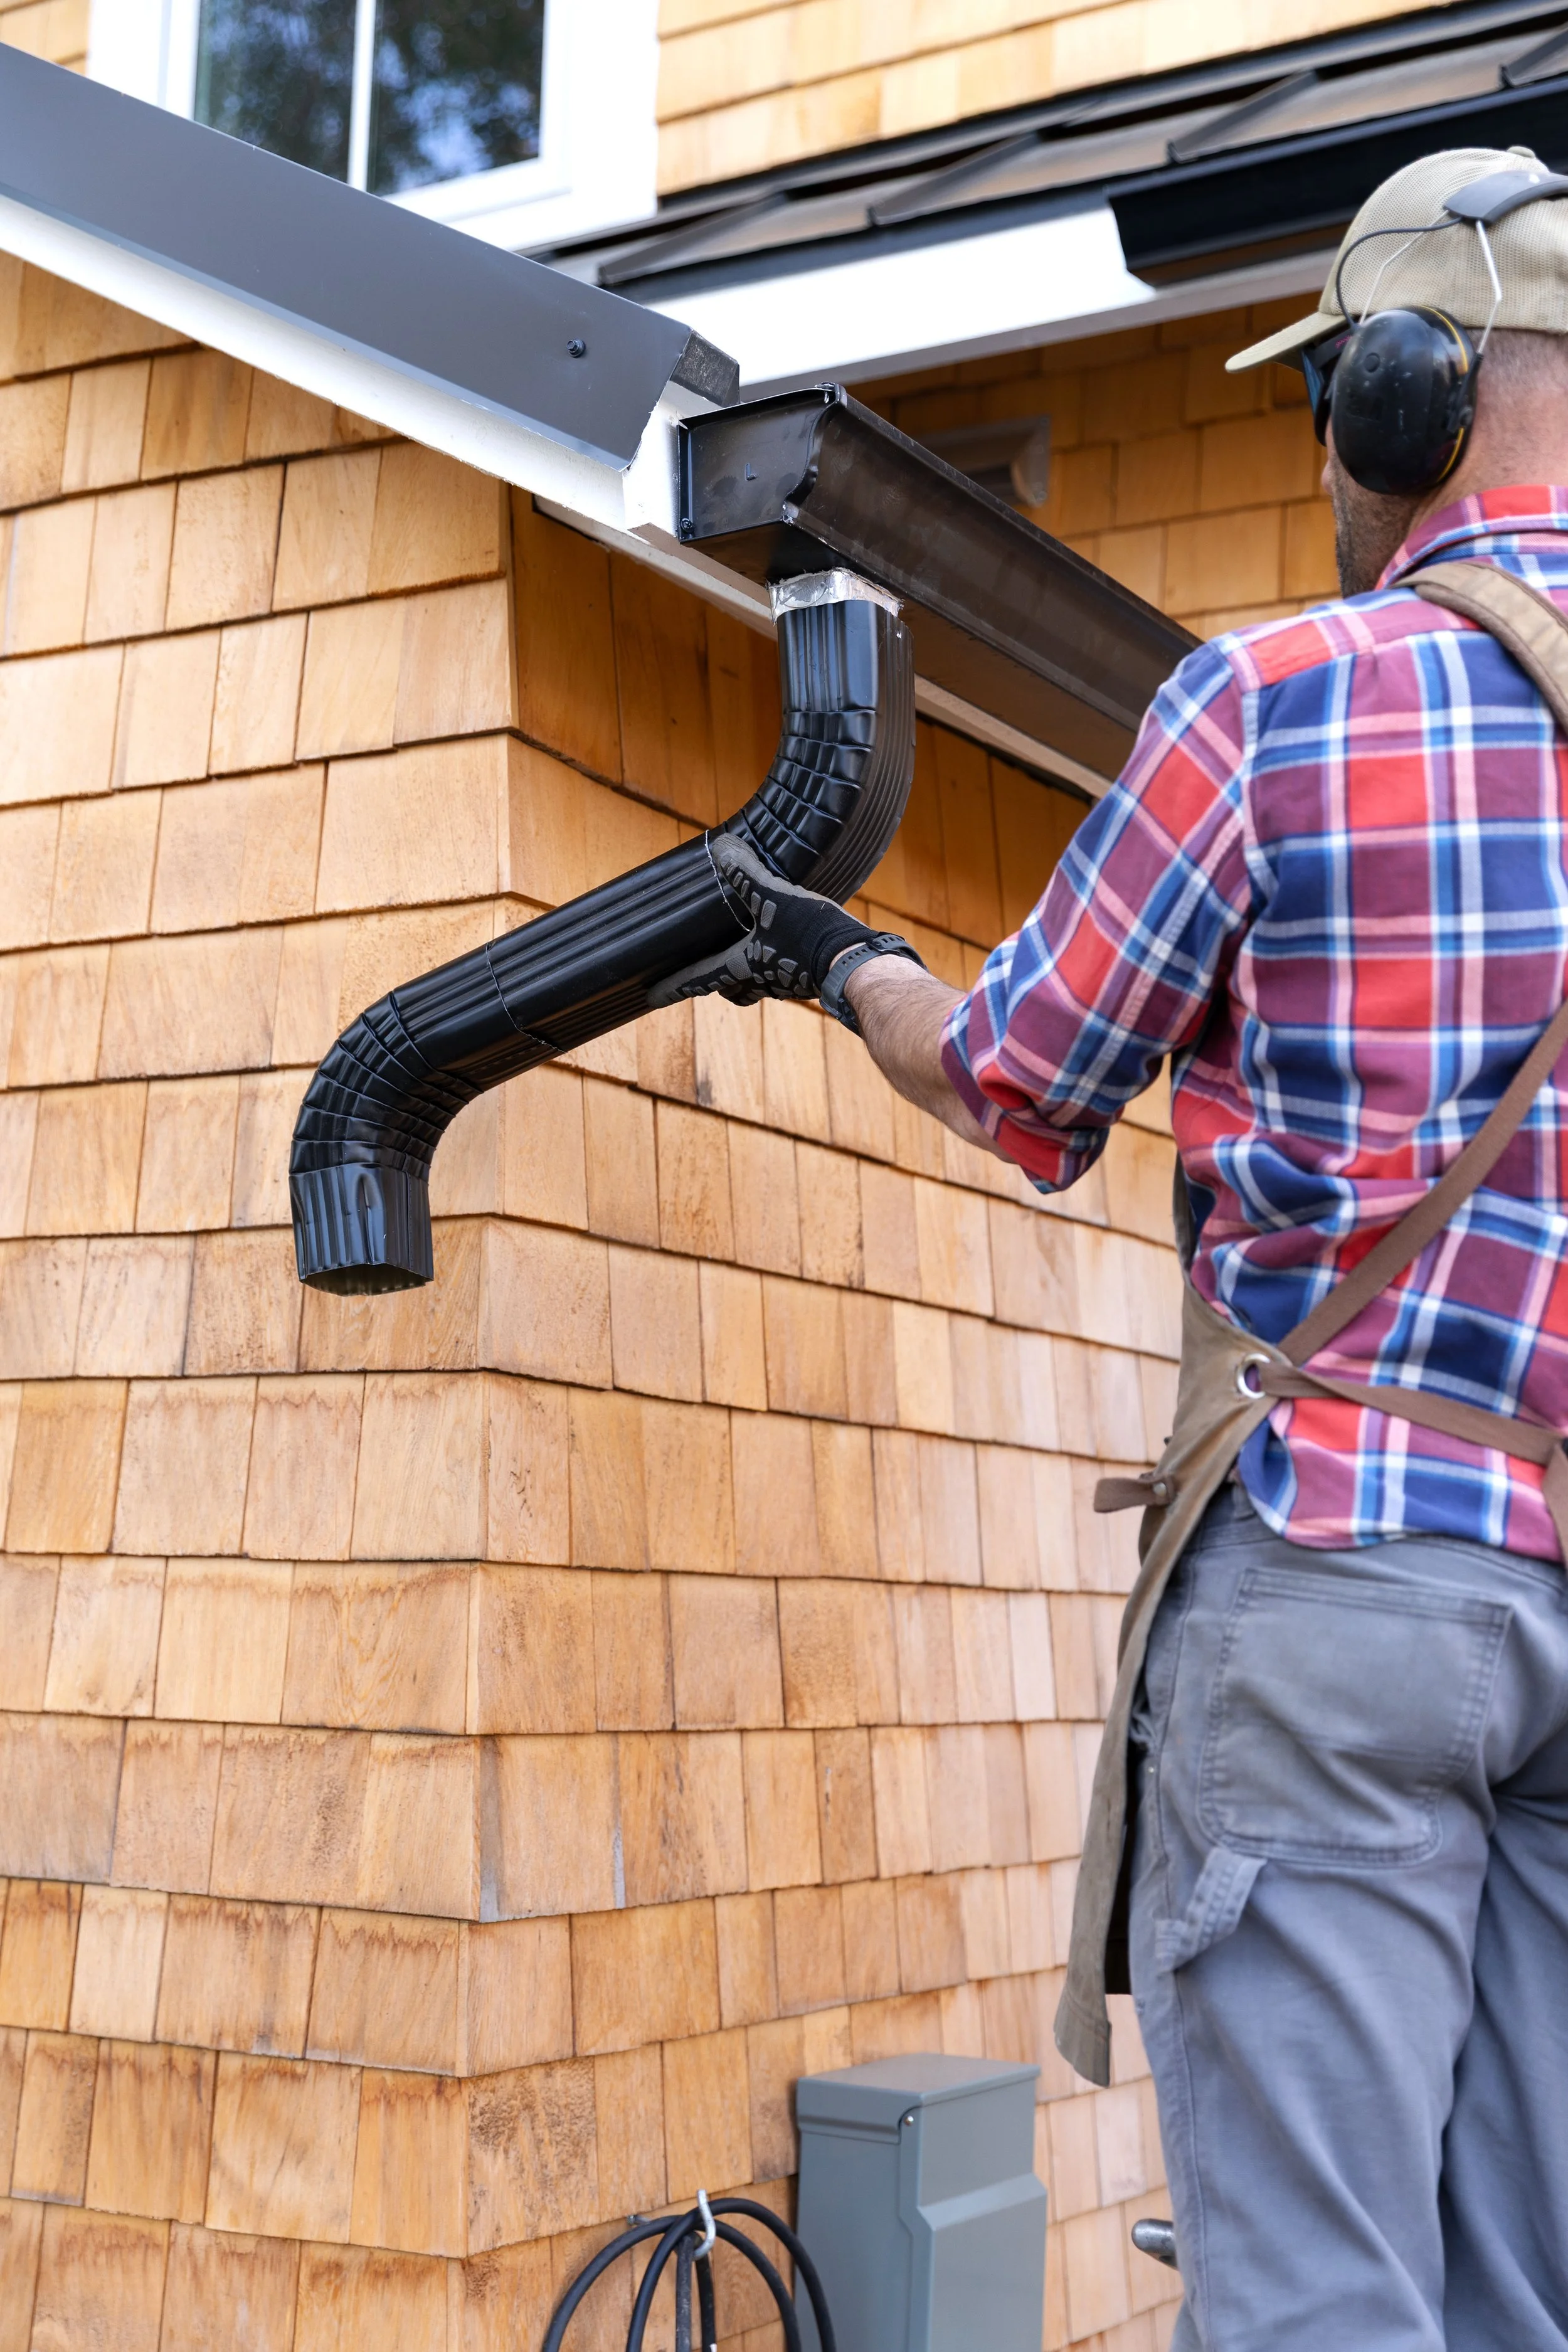
Note that our downspouts drain directly into rocks with a general slope away from the house. Depending on your drainage situation and sub straight, you may need to direct water further away from your foundation and house
Seal and test
Apply any extra sealant and test with a hose to confirm proper flow.
And that’s it! This is definitely a moderate-level DIY project, but doable, especially if you’re comfortable on a ladder.
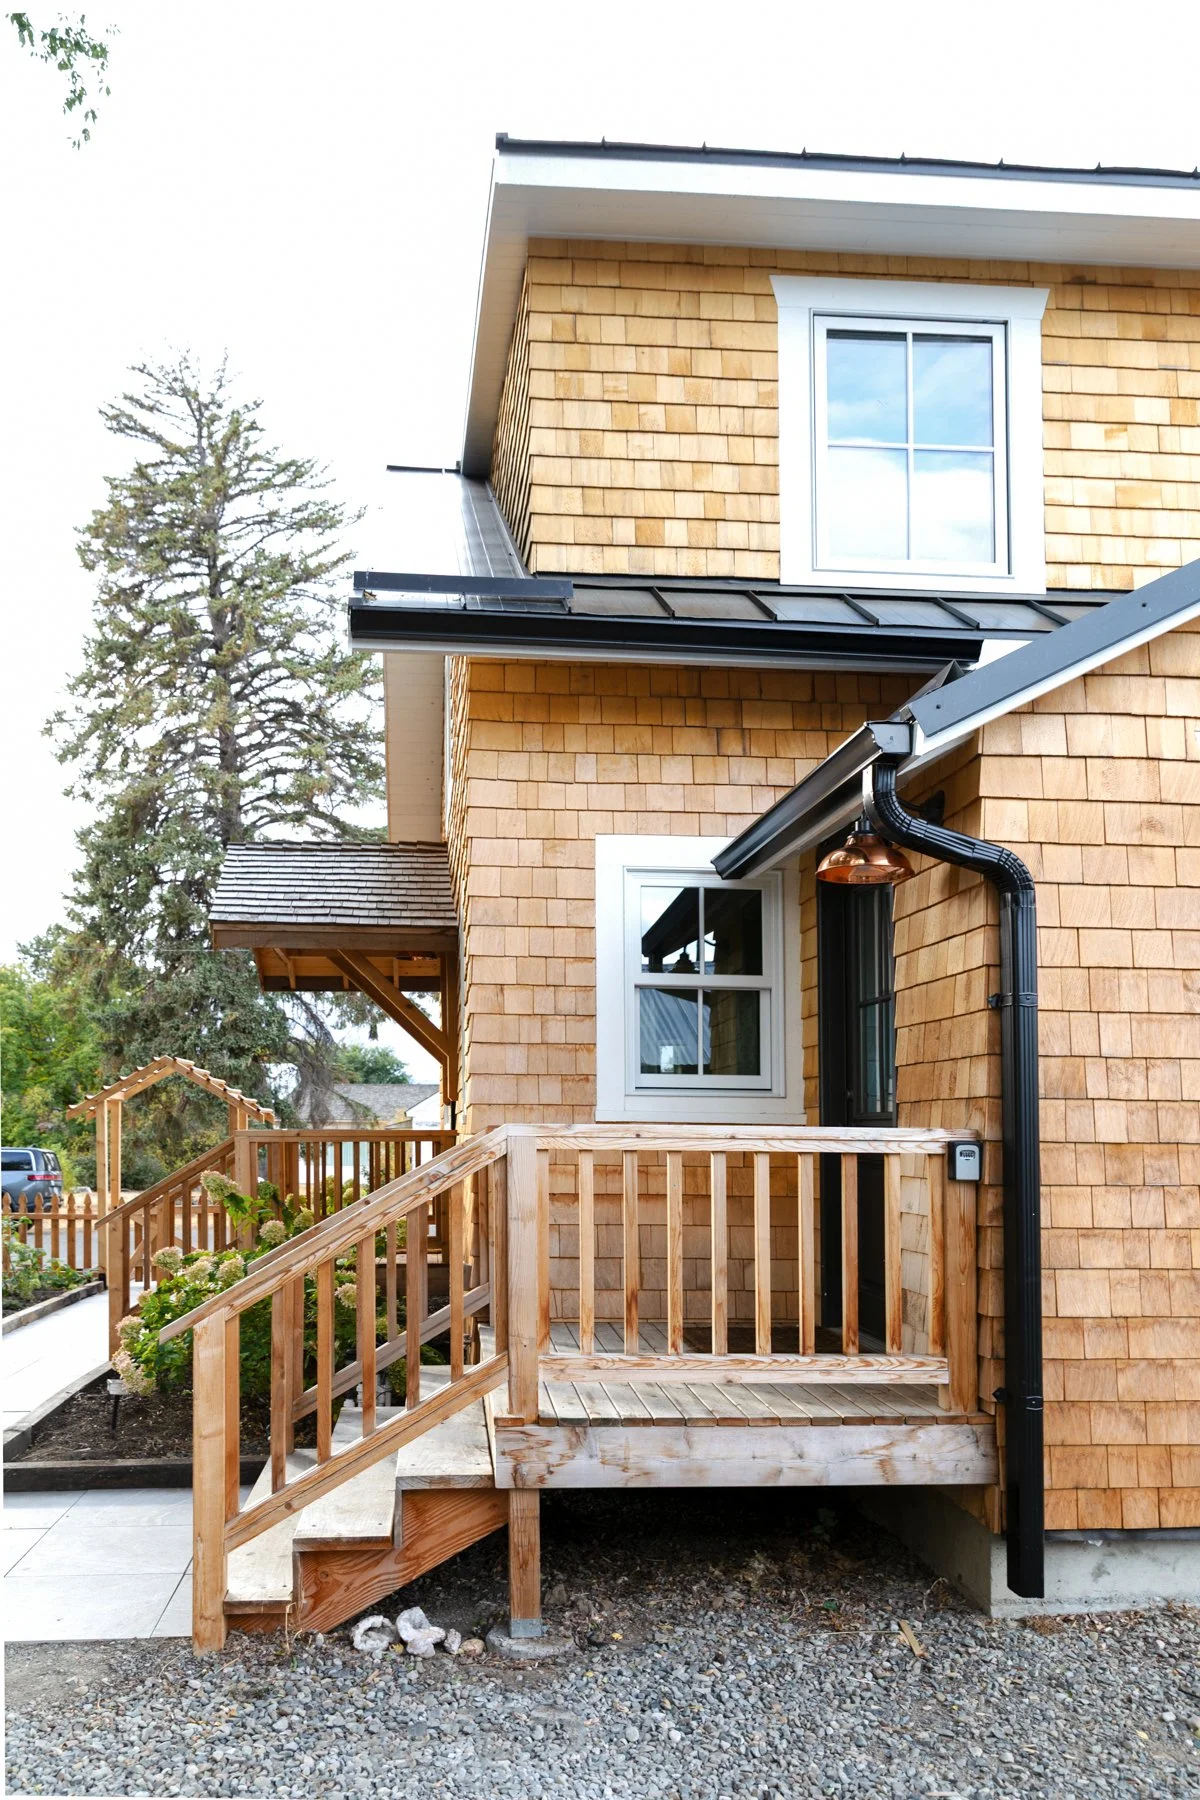
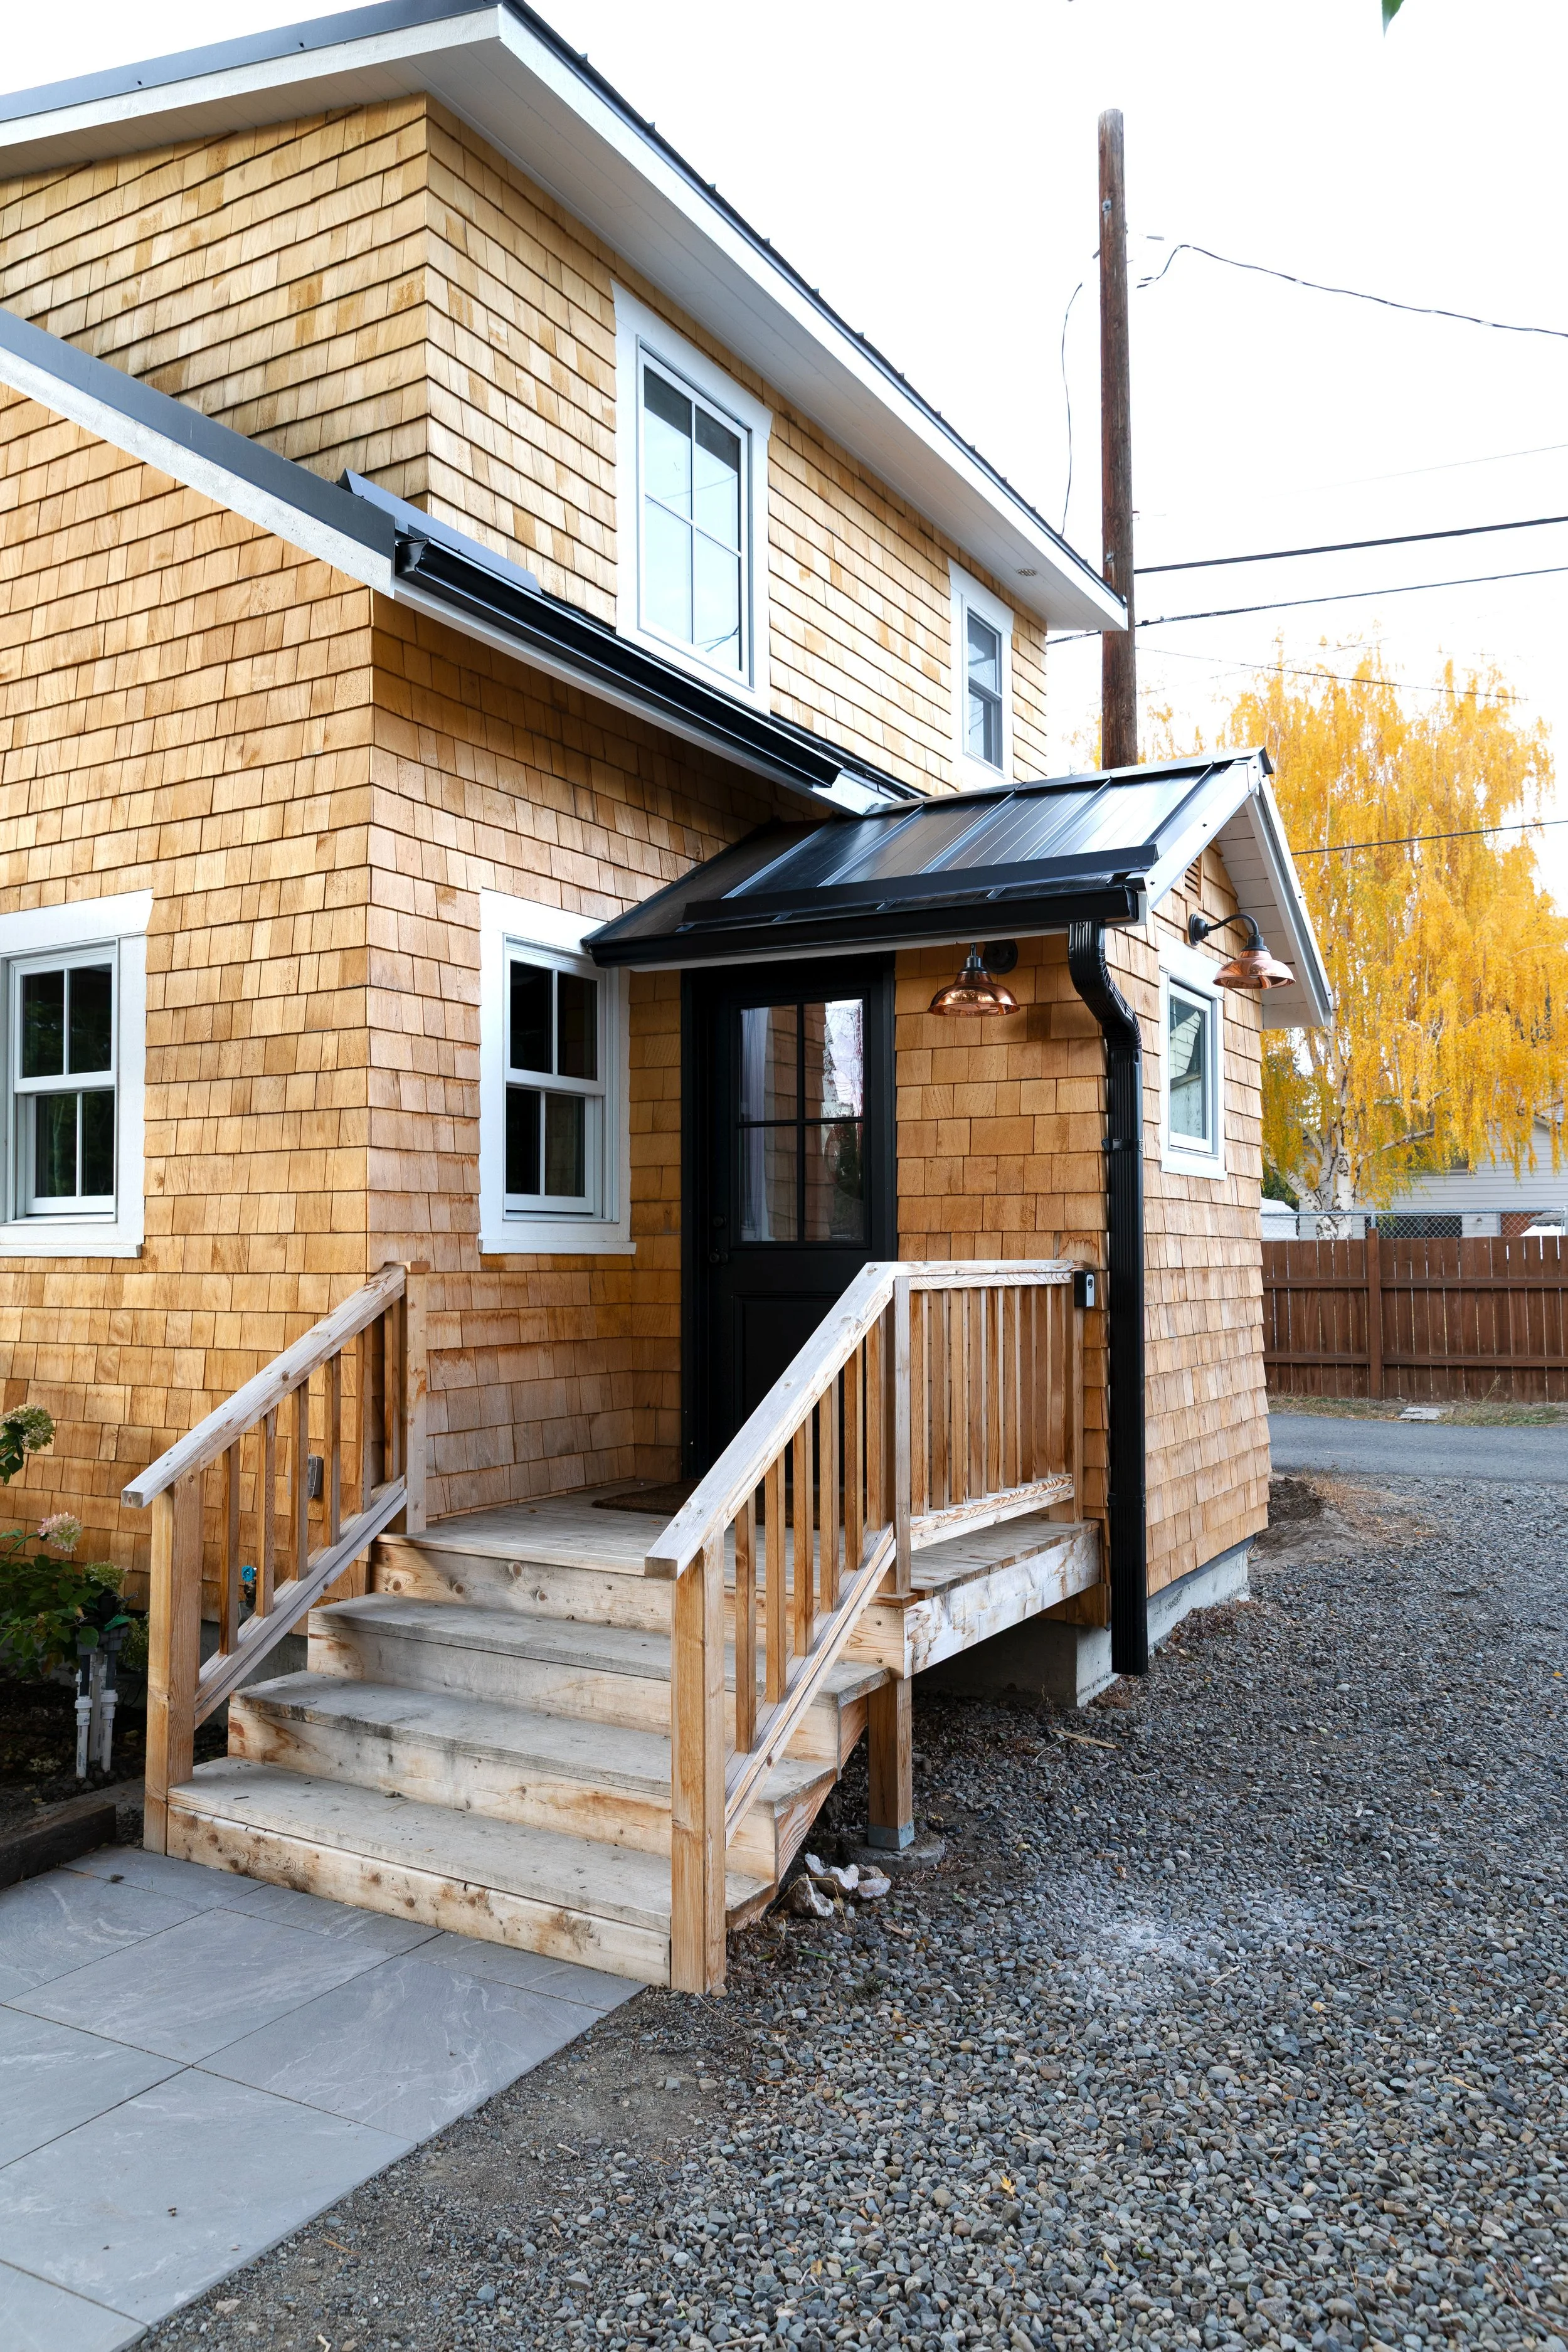
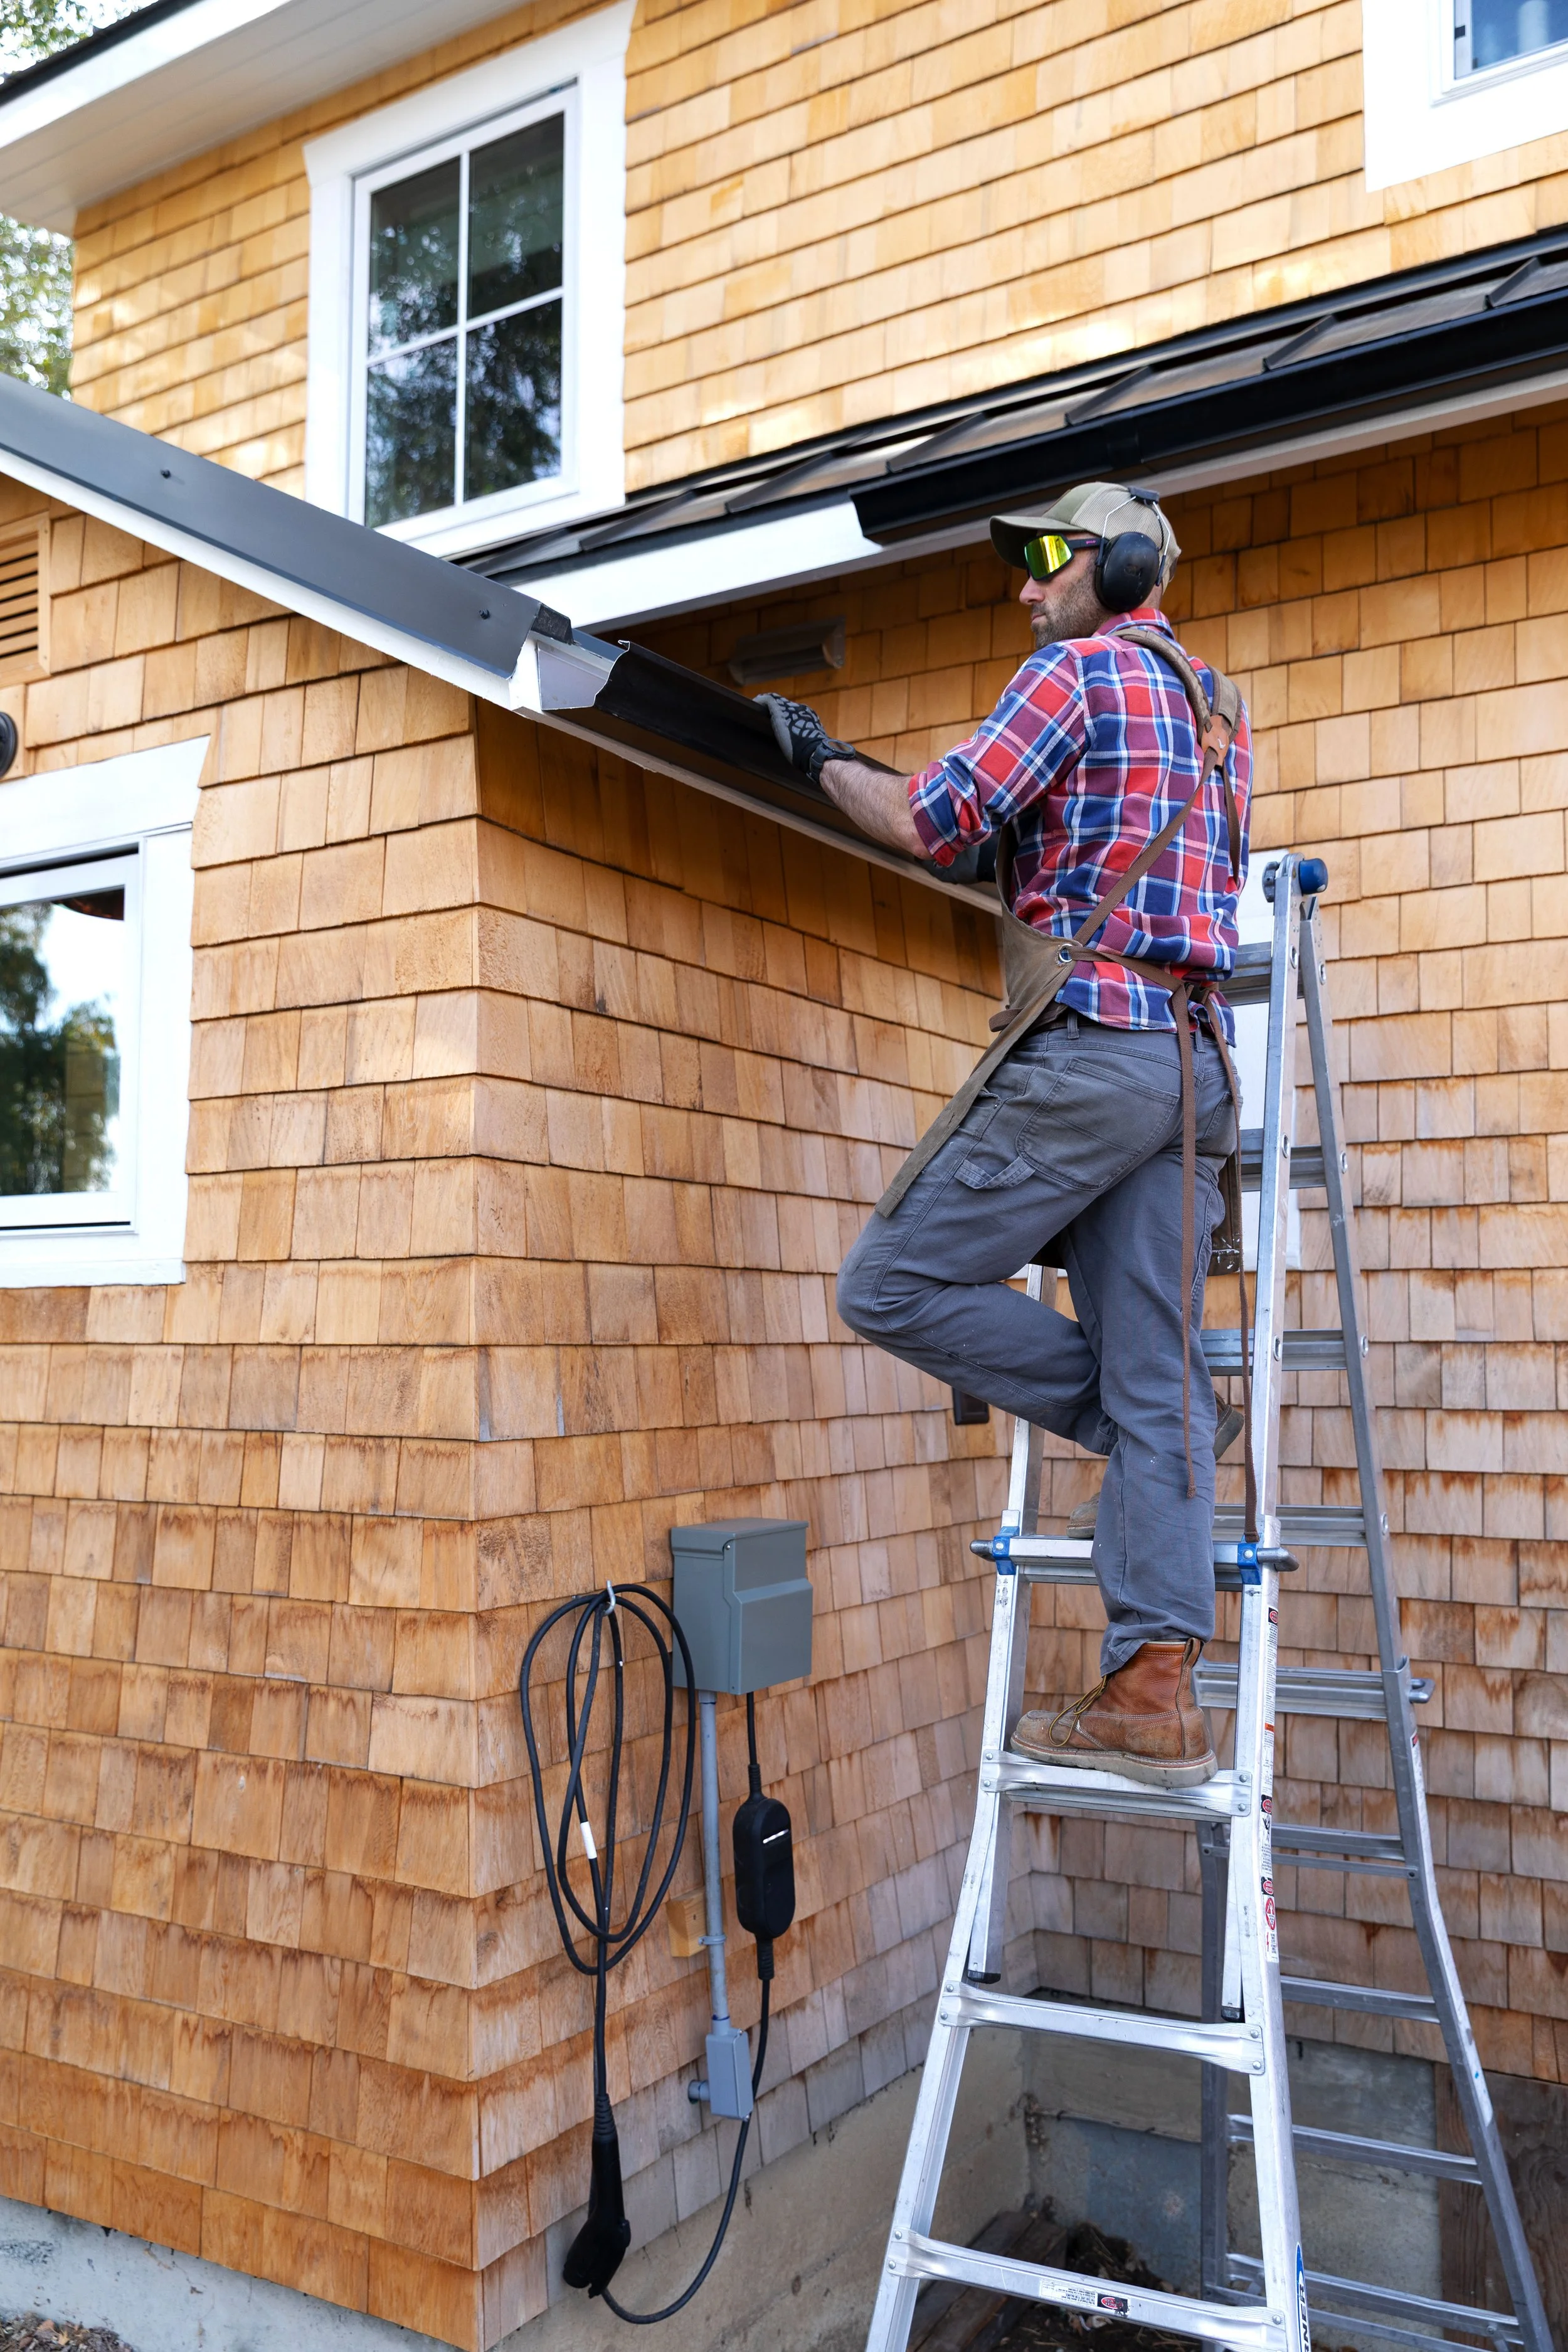
The Finished Look
They may “just be gutters,” but these might be the prettiest ones around. The black aluminum lines frame the roof beautifully, highlight the cedar shakes, and give the Poplar Cottage exterior a crisp architectural edge. Most importantly, water now flows exactly where it should - away from the siding, deck, and foundation.
This was one of those simple weekend projects that makes a huge difference in how a house both looks and lives. For $500, it’s a total win.
🛠️ Project Recap
Cost: $500
Time: 1 afternoon
Difficulty: Moderate DIY
Materials: Black aluminum K-style gutter system
Result: Foundation protected, siding preserved, and a cleaner roofline
This post contains affiliate links, which means we may earn a small commission if you purchase through our links, at no additional cost to you. Thank you for supporting The Grit and Polish and helping us keep sharing our renovation adventures!