How to Make Ready-Made Curtains Look Their Best
THE HILL HOUSE
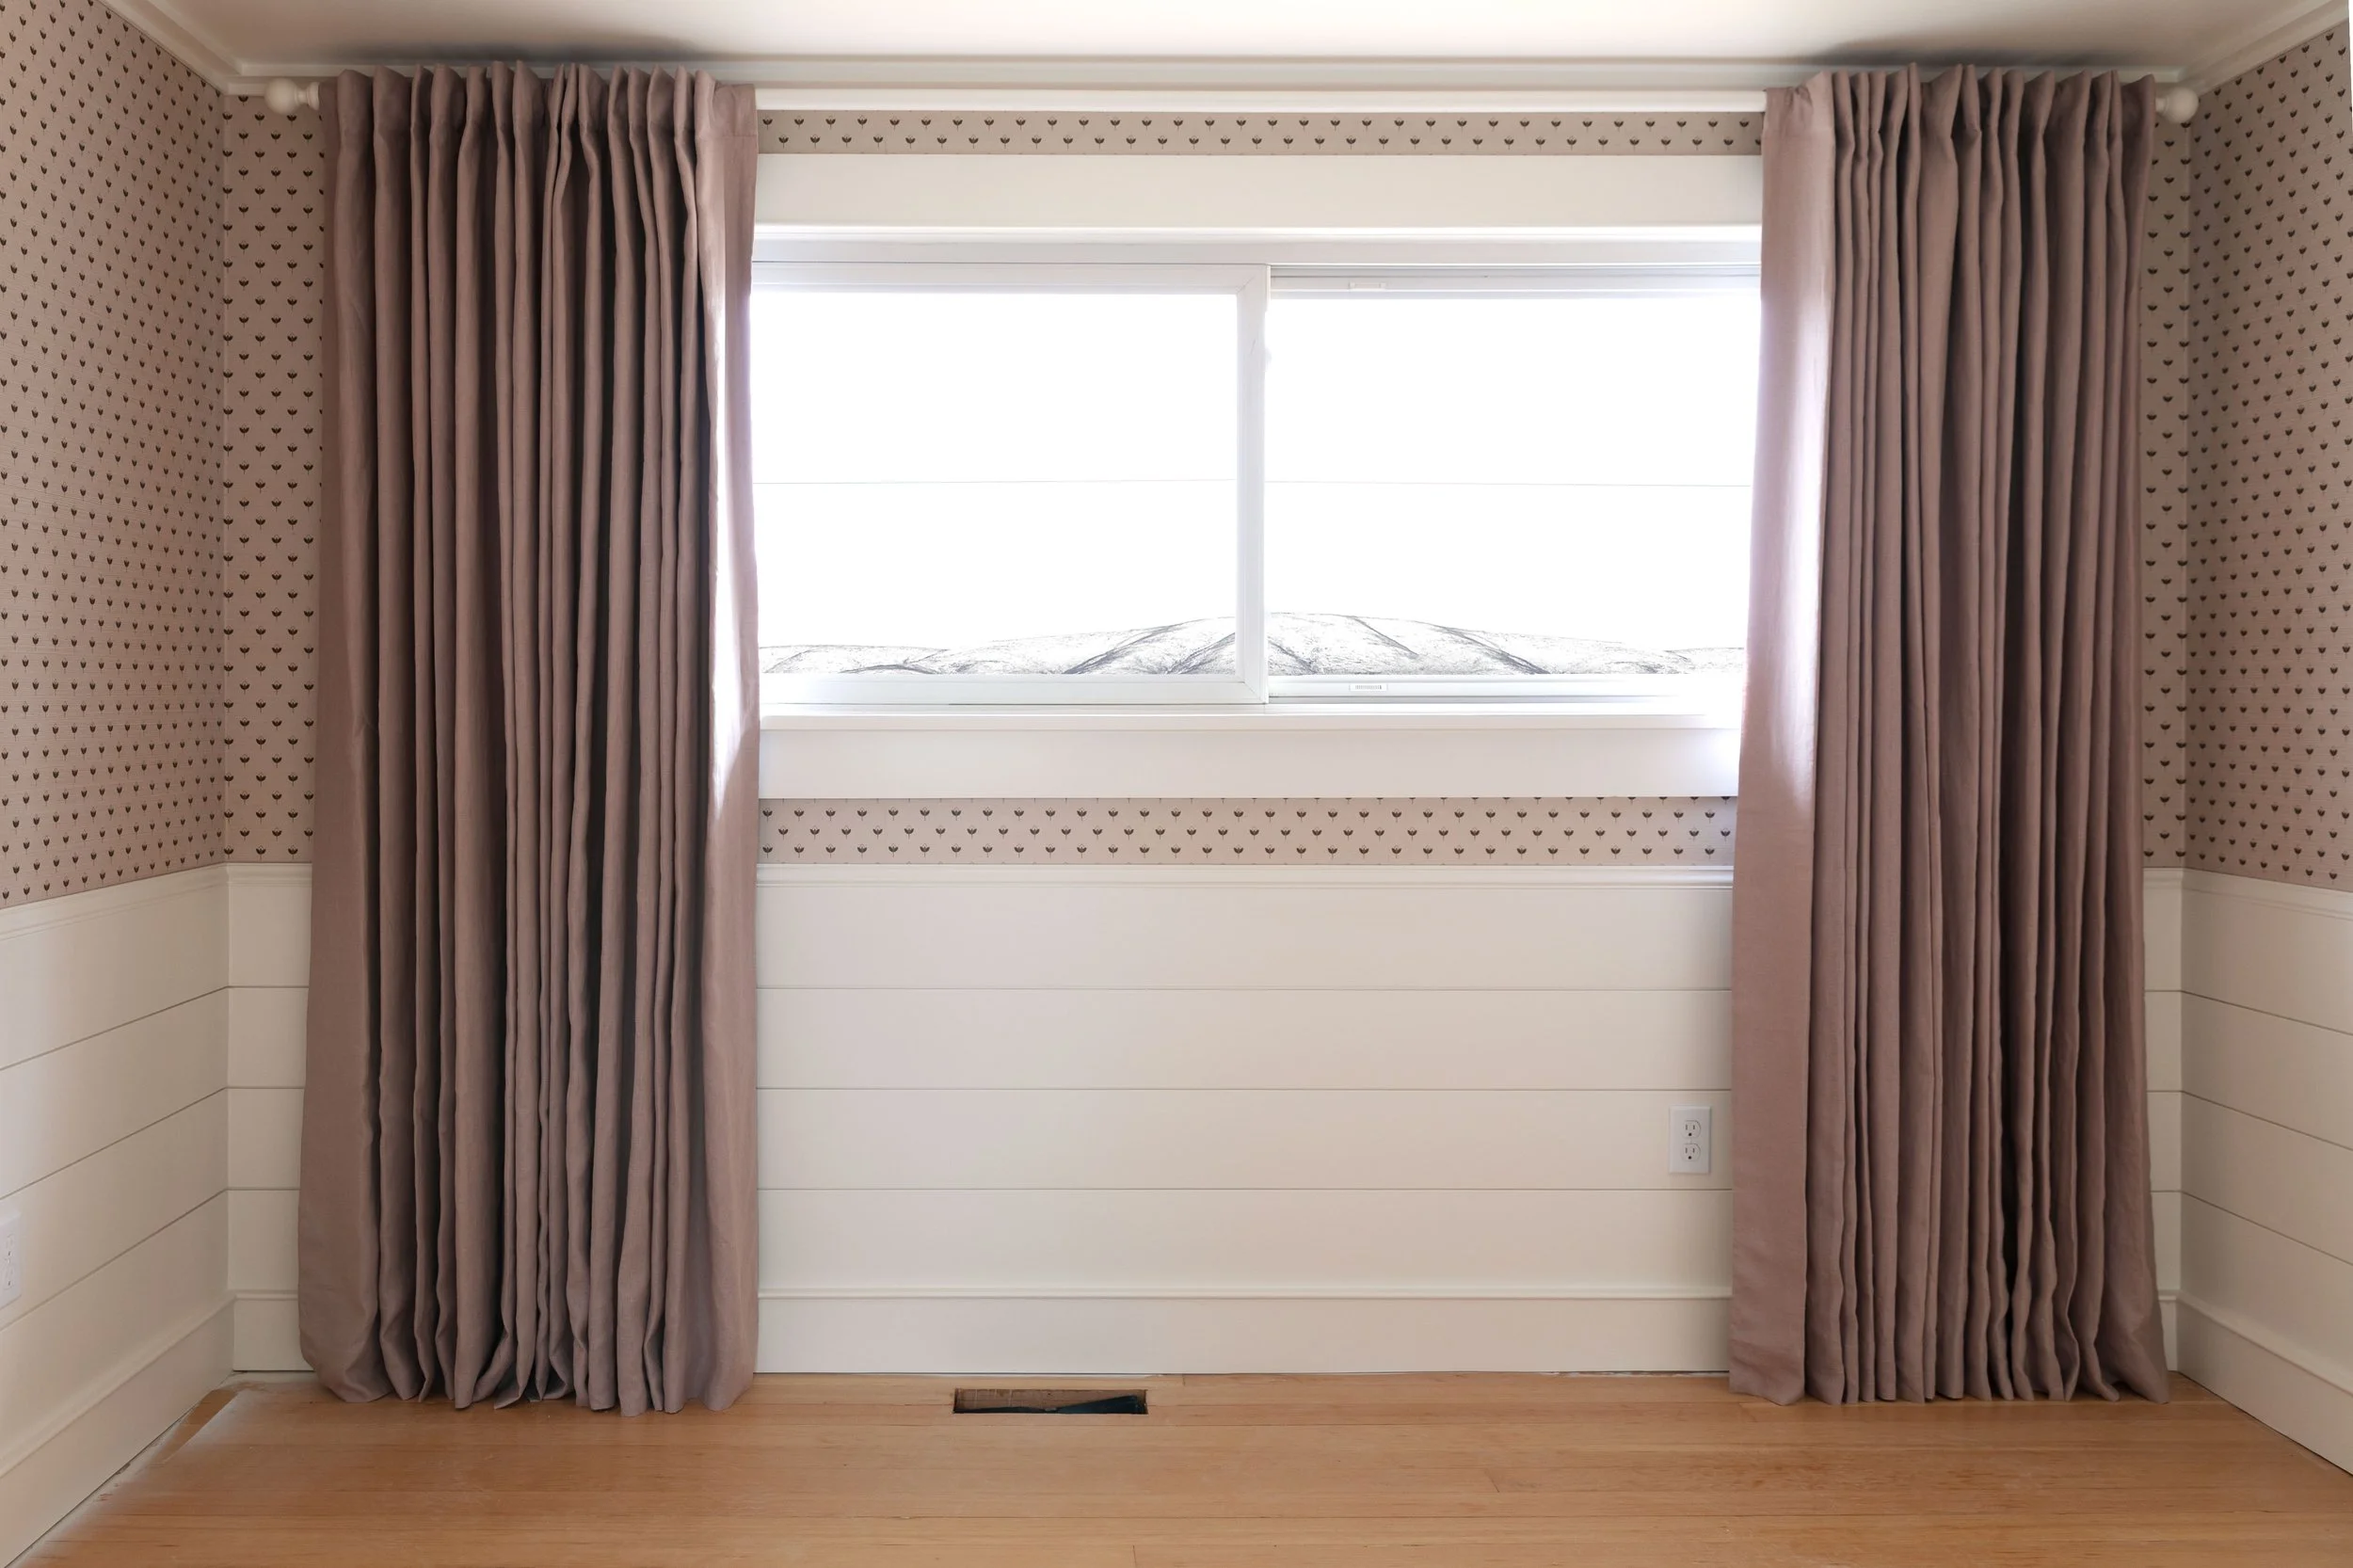
We just hung curtains in Daphne’s freshly wallpapered bedroom at the Hill House and they are so good (and ready-made!). Here’s the thing: if you’ve ever wondered why your curtains don’t look like the ones in magazines, it’s not because they’re off-the-shelf. It’s how we hang them. How many panels we use. Whether we steam them and train the pleats. In Daphne’s bedroom, we used affordable linen blackout curtains - the same ones we’ve loved at the Poplar Cottage - and with a few simple adjustments, they went from basic to beautifully tailored. Here’s exactly what made the difference…
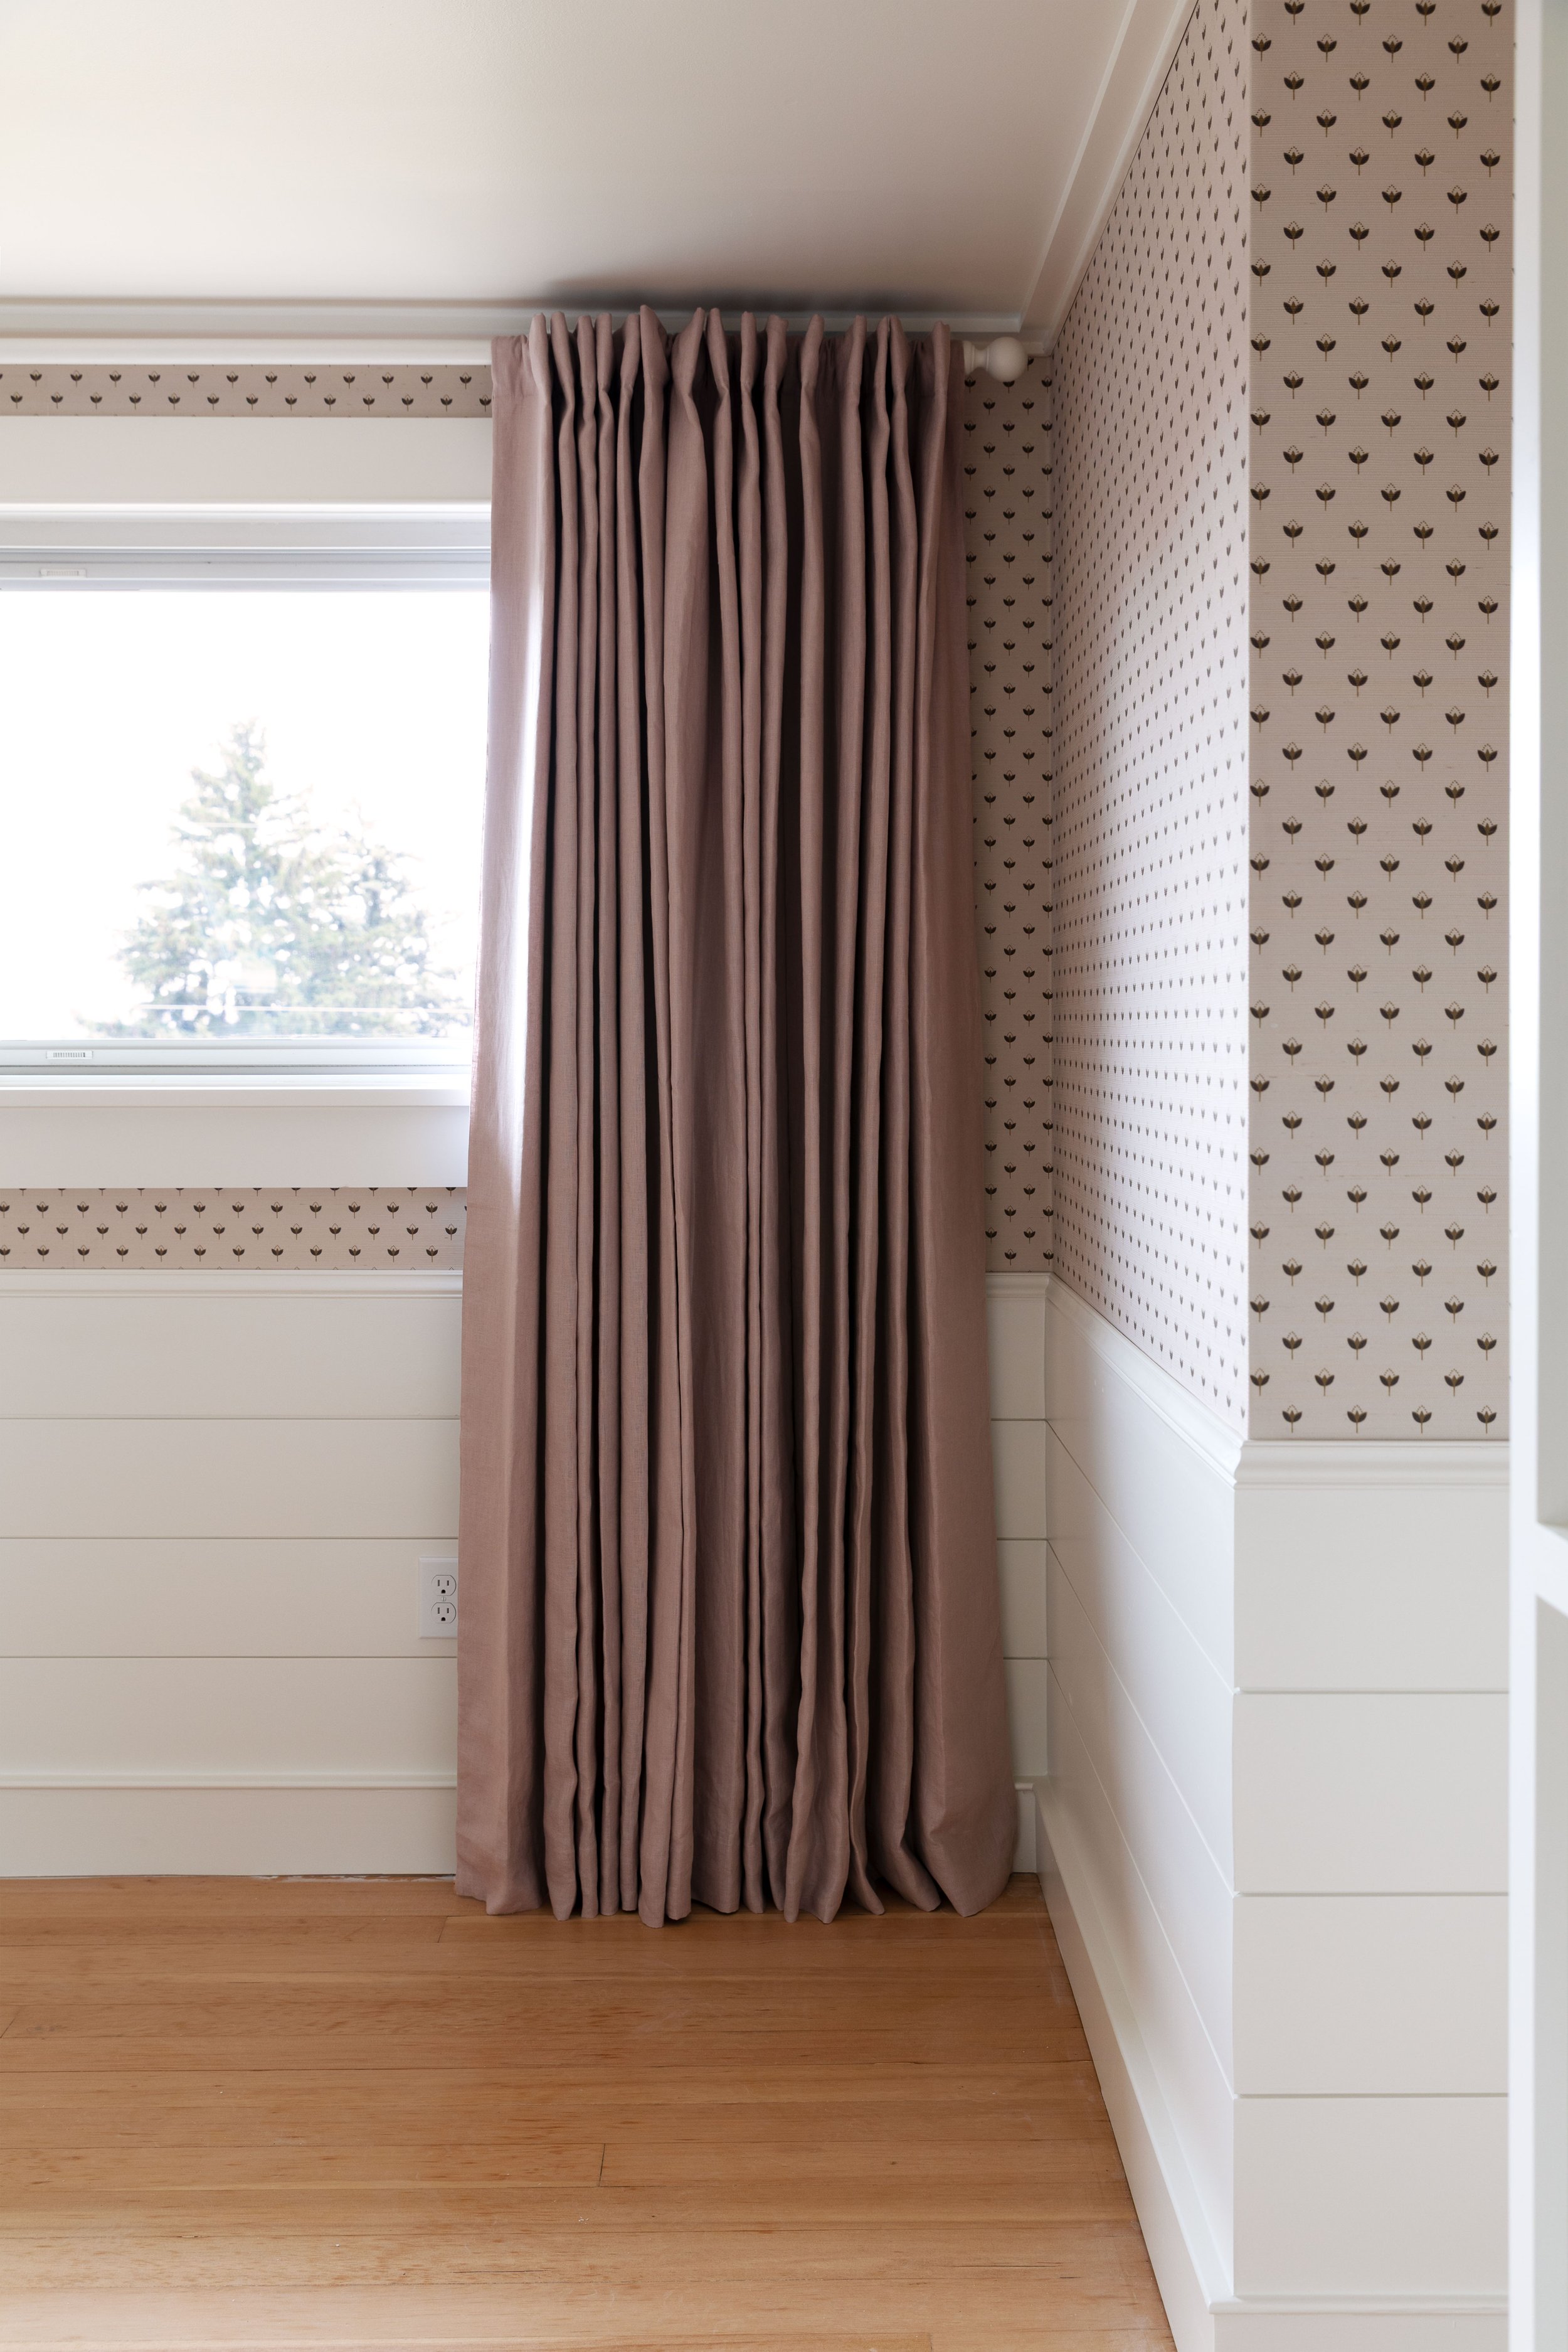
curtains (blackout, rose quartz), wood rod + bracket + ball post, wallpaper, paint: BM Swiss Coffee, paneling, floors
1. Choose the Right Fabric
Like so many things in interiors, it comes down to the quality of the material. Most custom drapes are made from natural materials like linen or cotton. These fabrics drape beautifully, soften over time, and have depth and texture that synthetic fabrics often lack.
So if you’re shopping for ready-made curtains like your’’s truly, look for:
Linen
Linen blends
Cotton
Cotton canvas
Textured weaves
Choosing a natural fiber instantly elevates the look. Shiny polyester tends to reflect light harshly and can read flat or inexpensive and rarely last long. Natural fibers absorb light and create softness, which is what makes custom drapery feel so layered and timeless.
Our curtains are from Quince and SO good, but we have also found natural-fiber ready-made curtains at Pottery Barn, and West Elm.
2. Use More Fabric Than You Think You Need
This is the big one. For a roughly 6.25’-wide window, I ordered six curtain panels. I know, that’s a lot! As a general rule, I like curtains to be 2 to 3 times the width of the window, more if we’re pinch pleating. Here in Daphne’s room, we have 24’ linear feet of curtain for a 6.25’ window, which is a bit excessive with a ratio of 3.8x, but because of where the window falls on the wall, it just works.
The extra fabric visually widens the window and allows the curtains to drape in soft folds instead of stretching flat across the wall. Flat curtains look skimpy, full curtains look luxurious :) And a second (or third) ready-made curtain panel is far less expensive than custom drapery, so this isn’t the place to skimp. hot tip: you can often find extra wide widths of curtains (Quince offers a ‘double panel’ of 96”) or you can stitch together your panels if you want them to move as one.
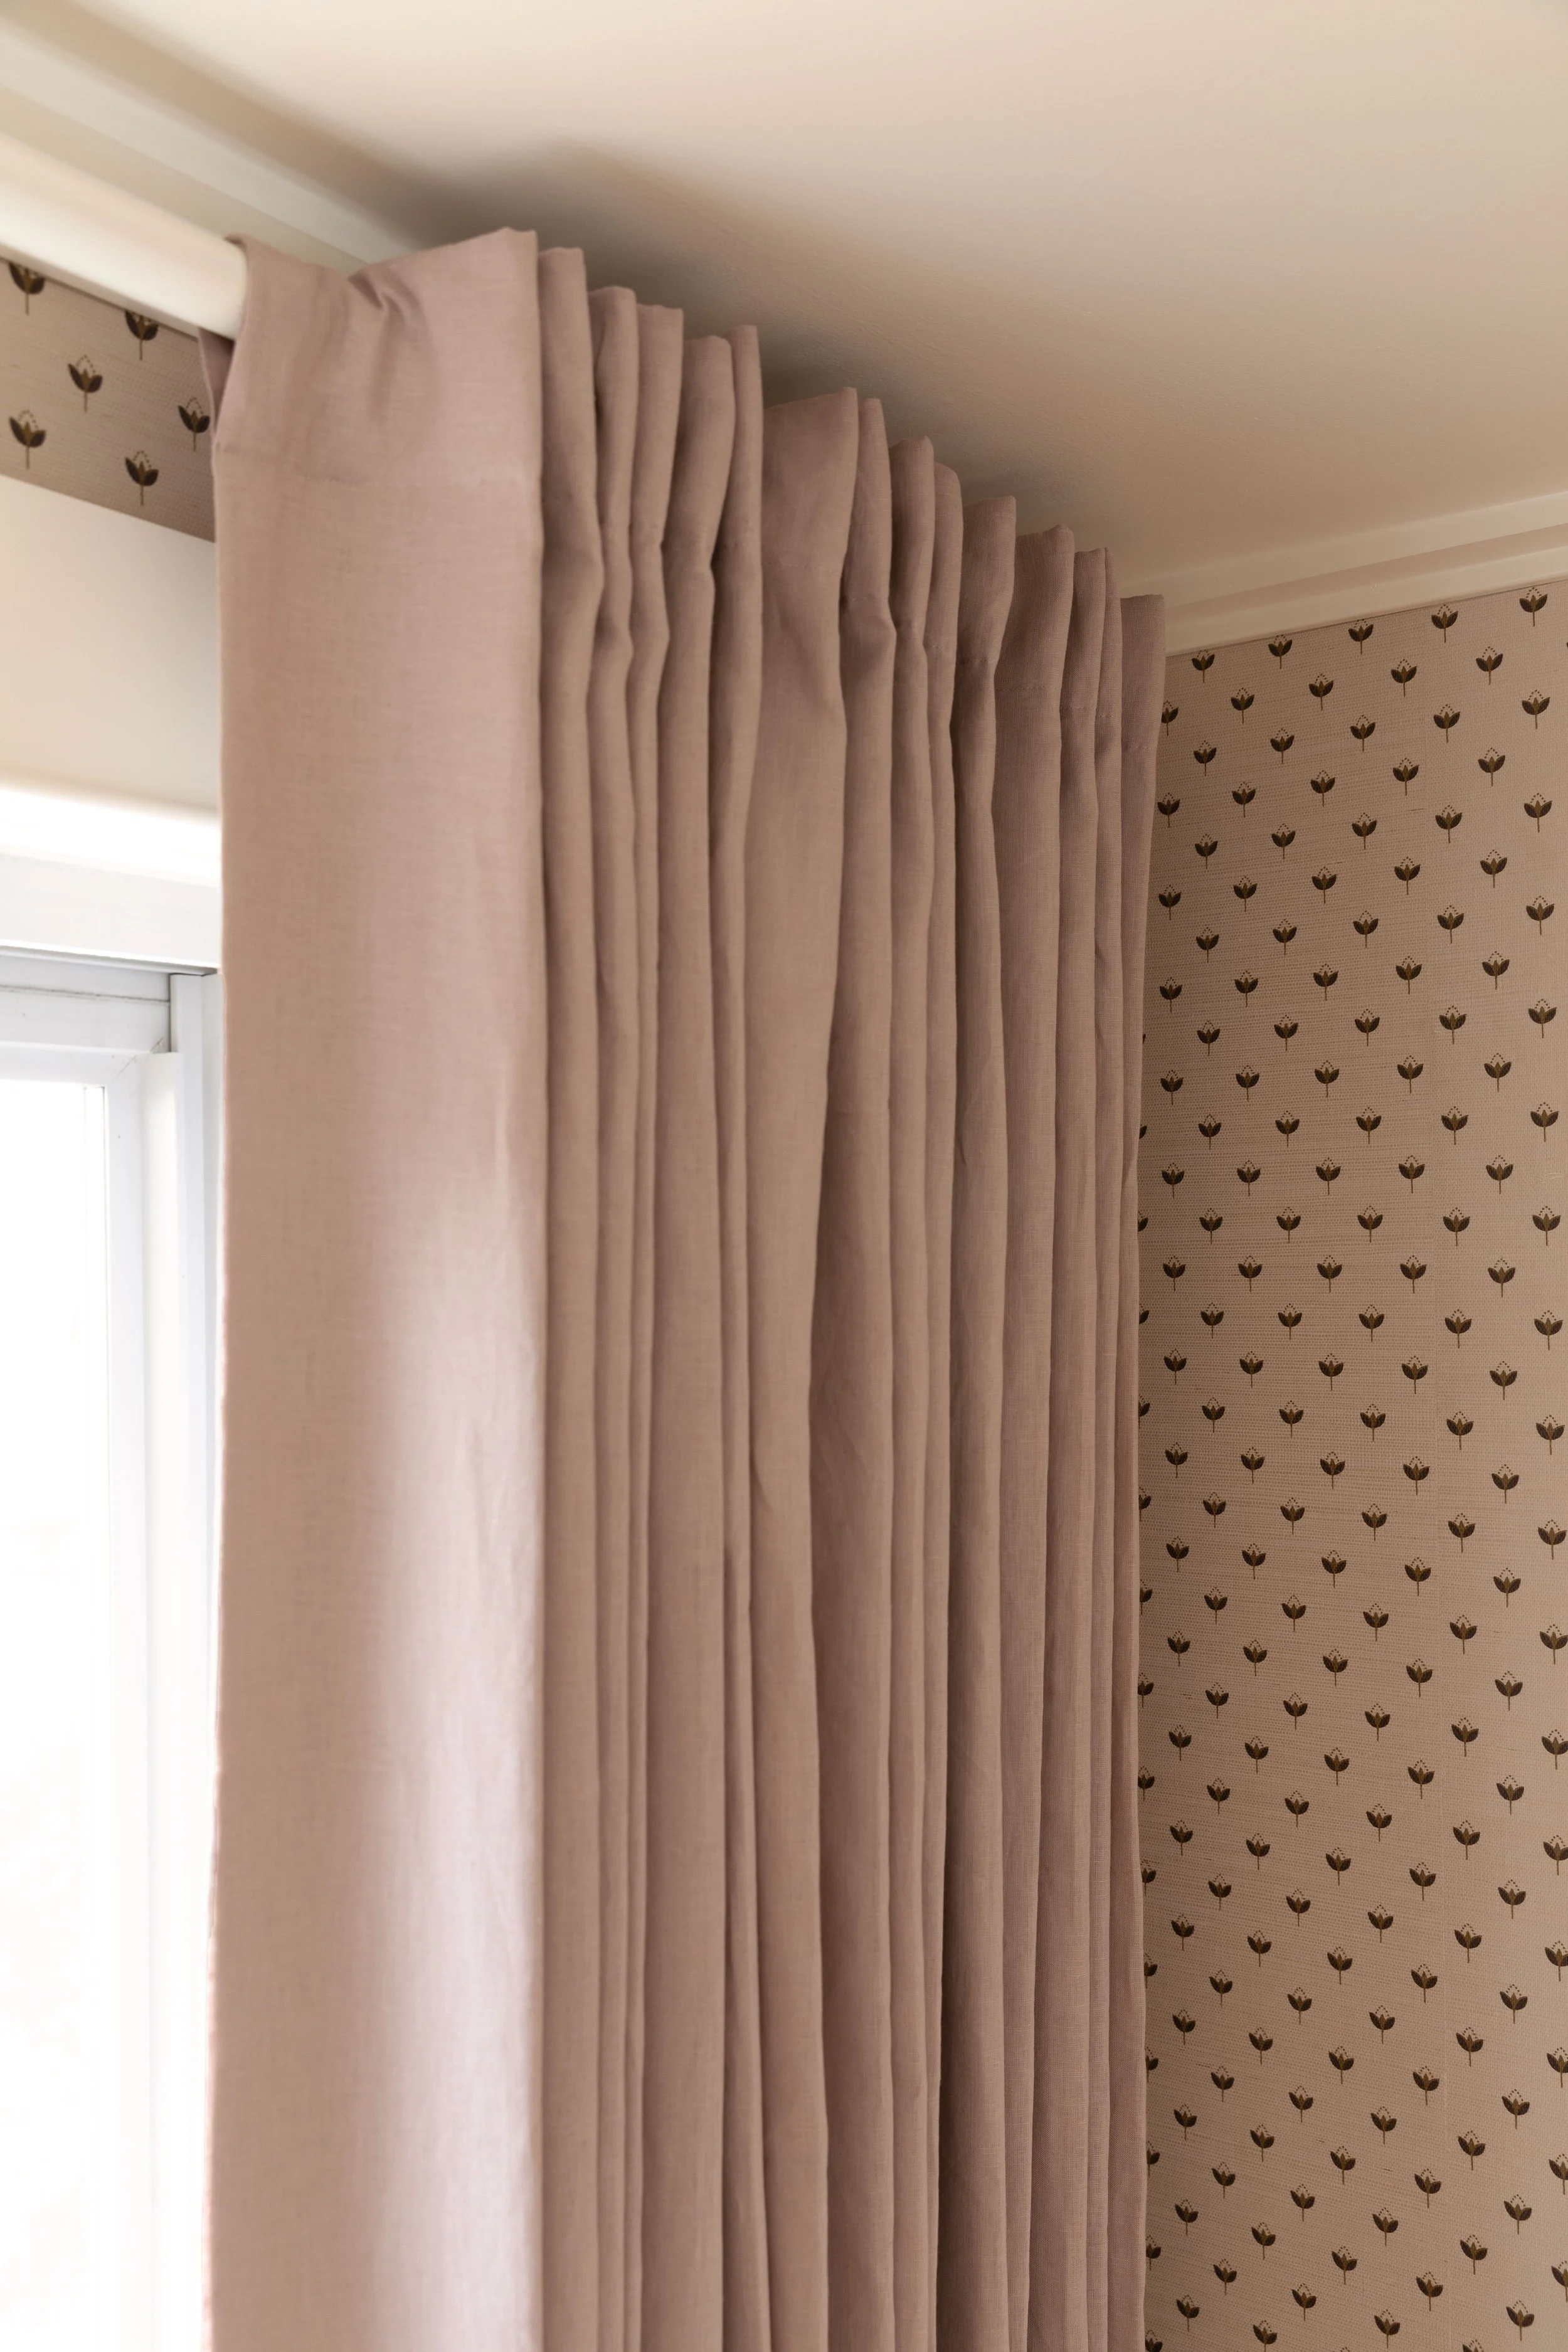
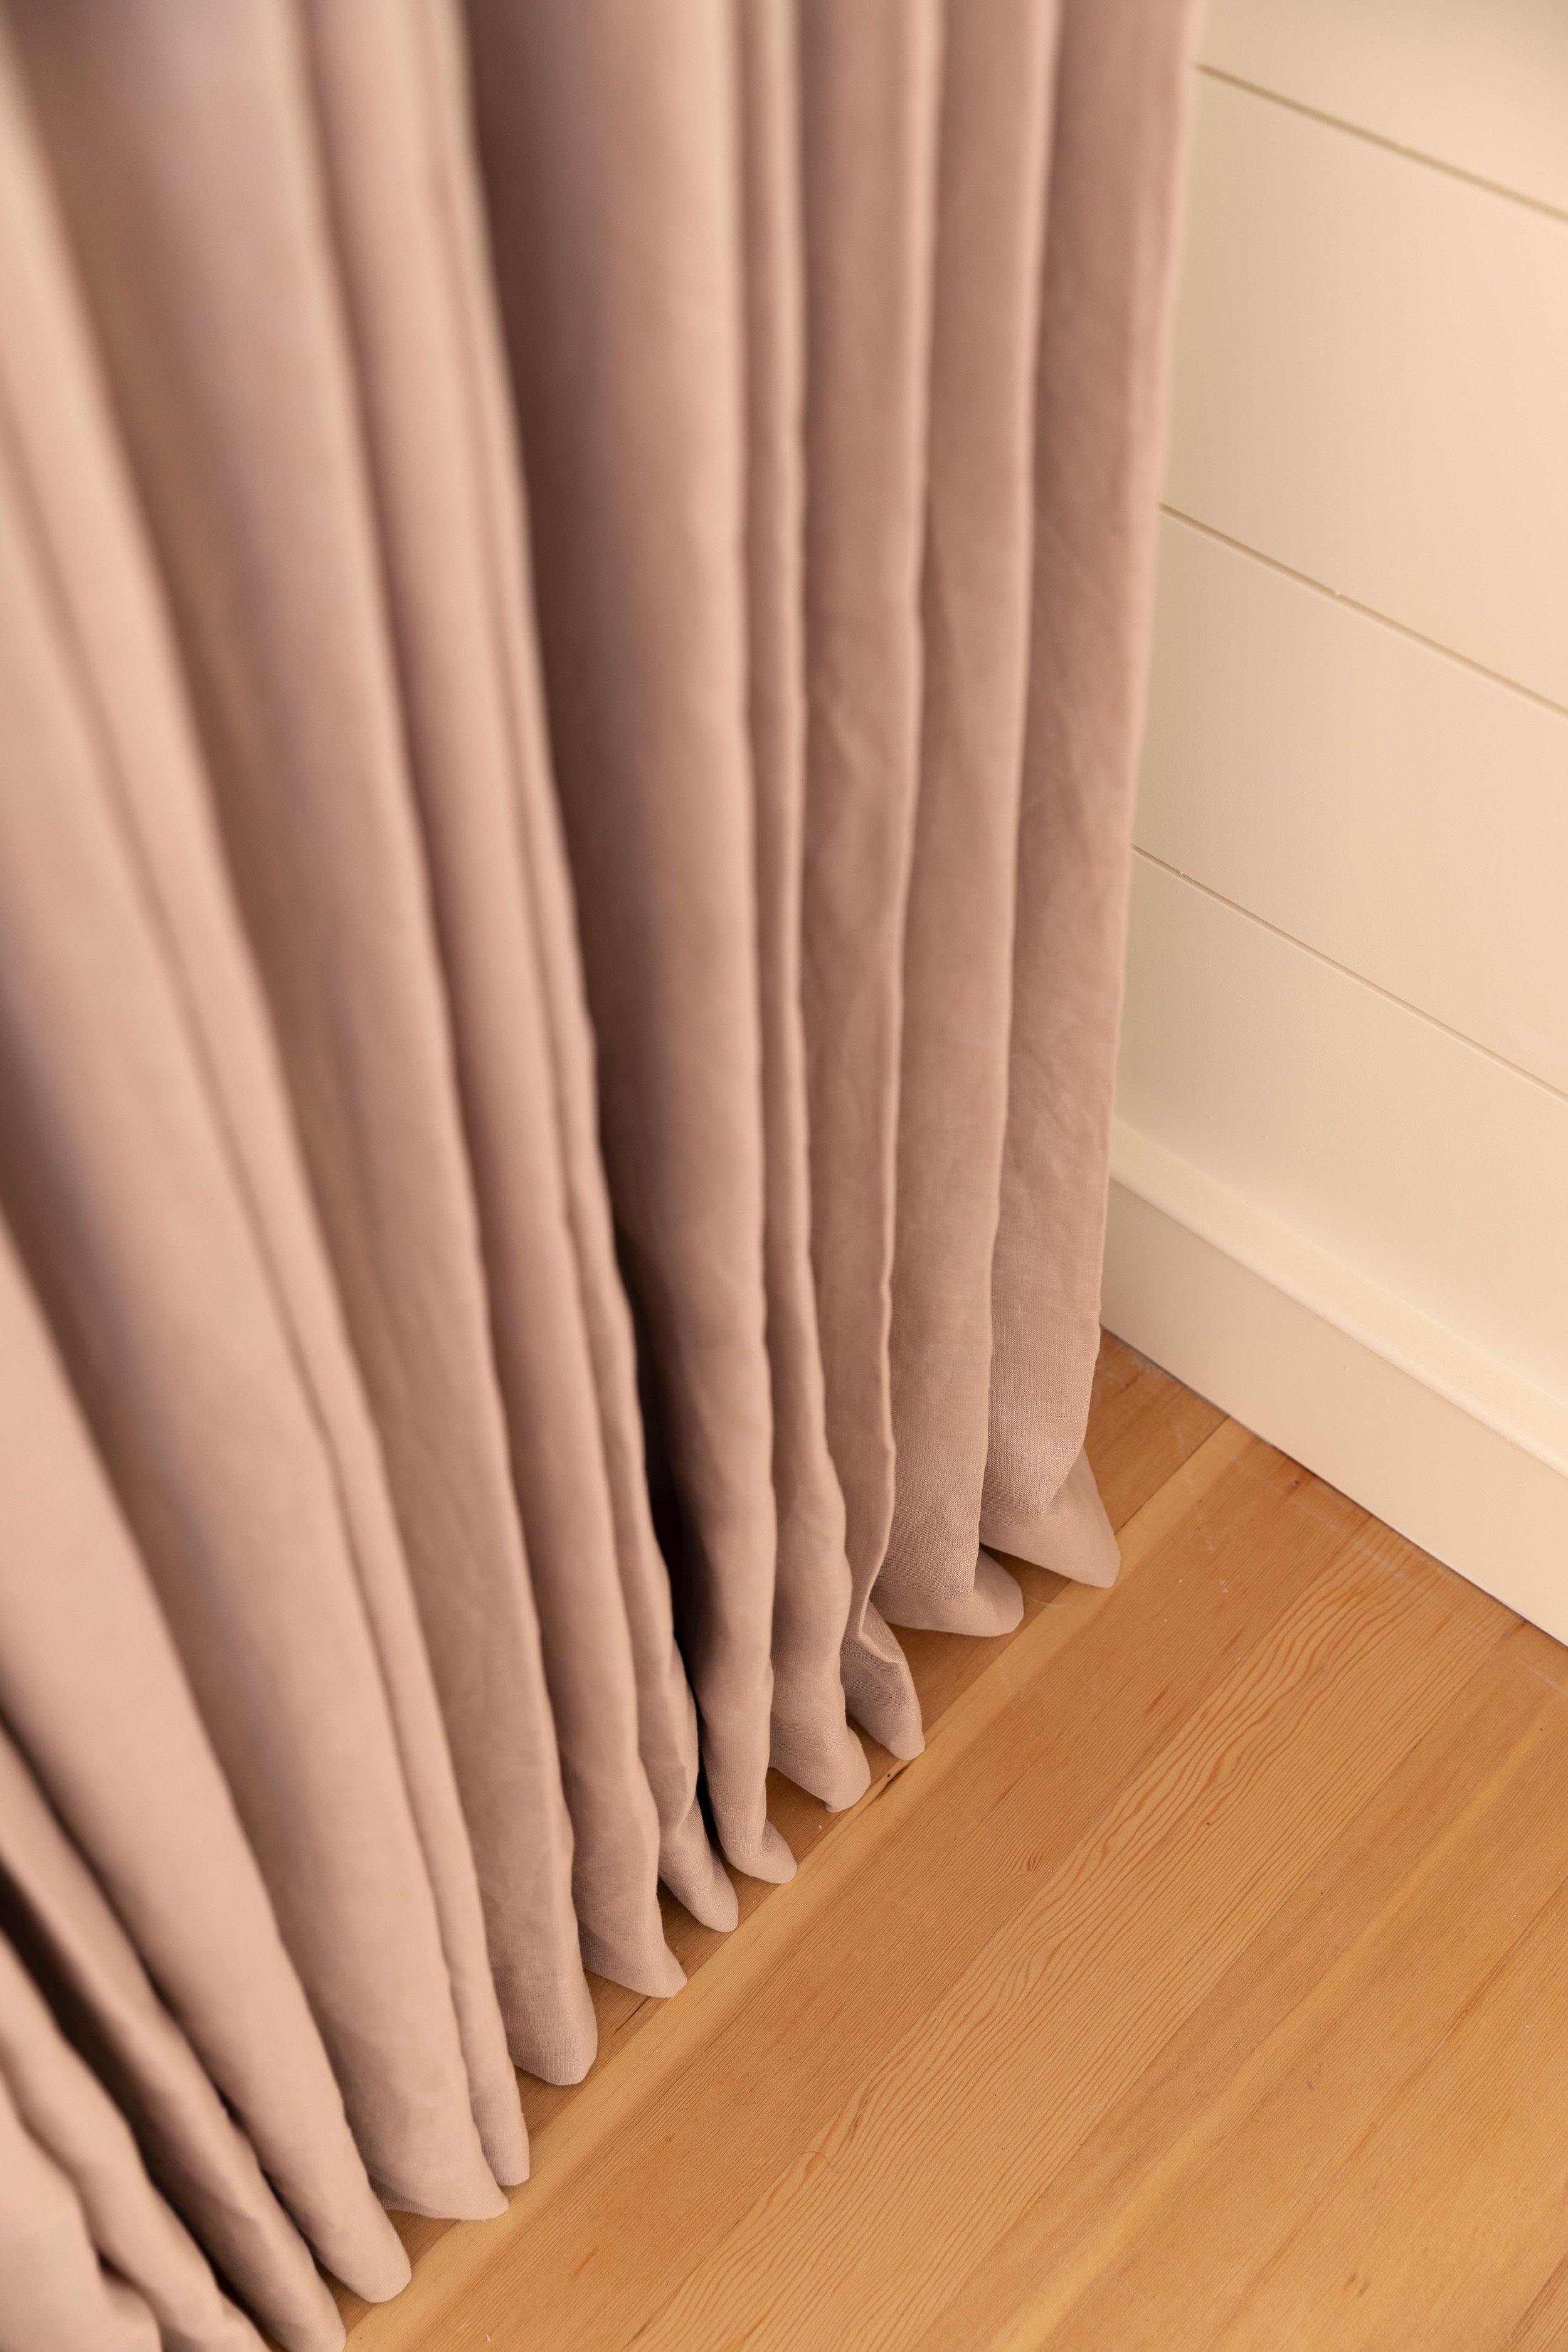
3. Steam Every Single Crease
Out of the package, even beautiful linen curtains are creased and tired-looking. If you just hang them up, they’ll relax out a little and look okay, but if you want them to look their best, steam them! We have THIS basic steamer and while yes, it’s annoying to have yet another appliance it’s definitely been worthwhile for us.
Wrinkled curtains scream “just opened.” Steamed curtains feel high end.
4. Train the Pleats (This Is the Secret)
This is the secret sauce. While steaming the curtains, I watch how they drape and then ‘train’ the pleats I want. Once I’m happy with how they’re looking, I loosely tie them using a cotton ribbon. When you remove the ties a day or two later, the fabric has memory. The panels fall into clean, tailored folds instead of spreading out randomly. It’s such a small step, but it’s the difference between “curtains” and “drapery.”
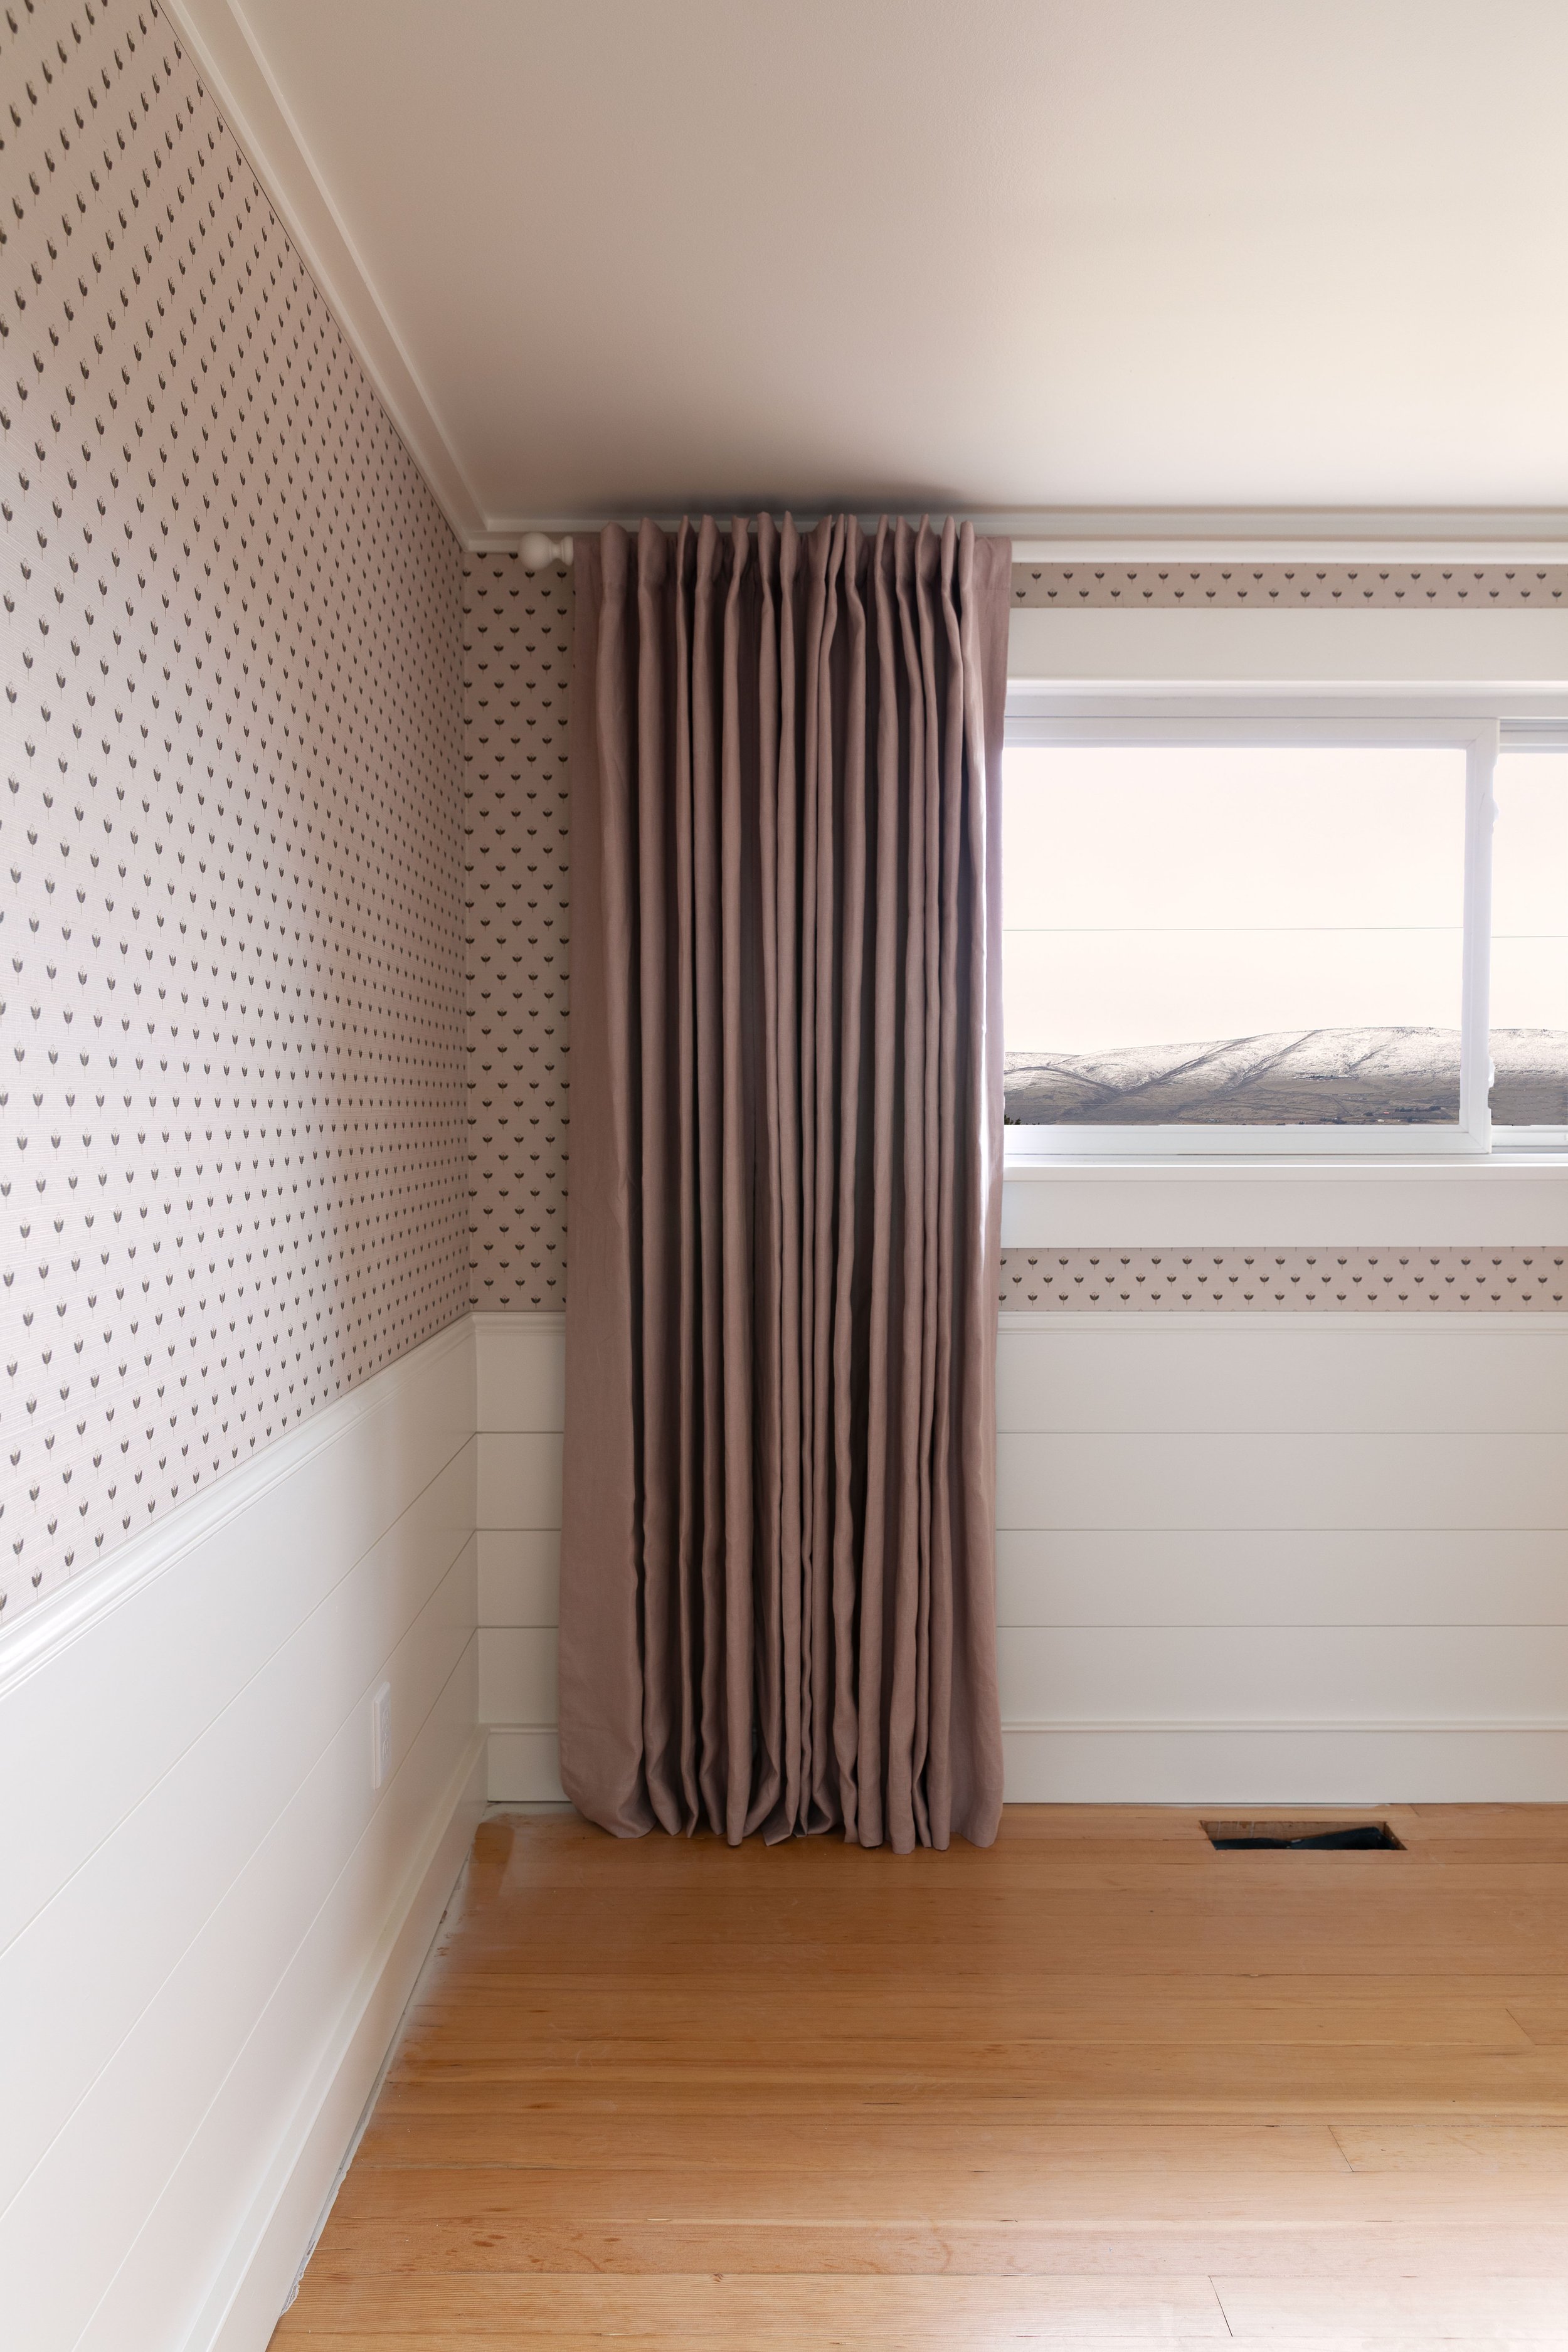
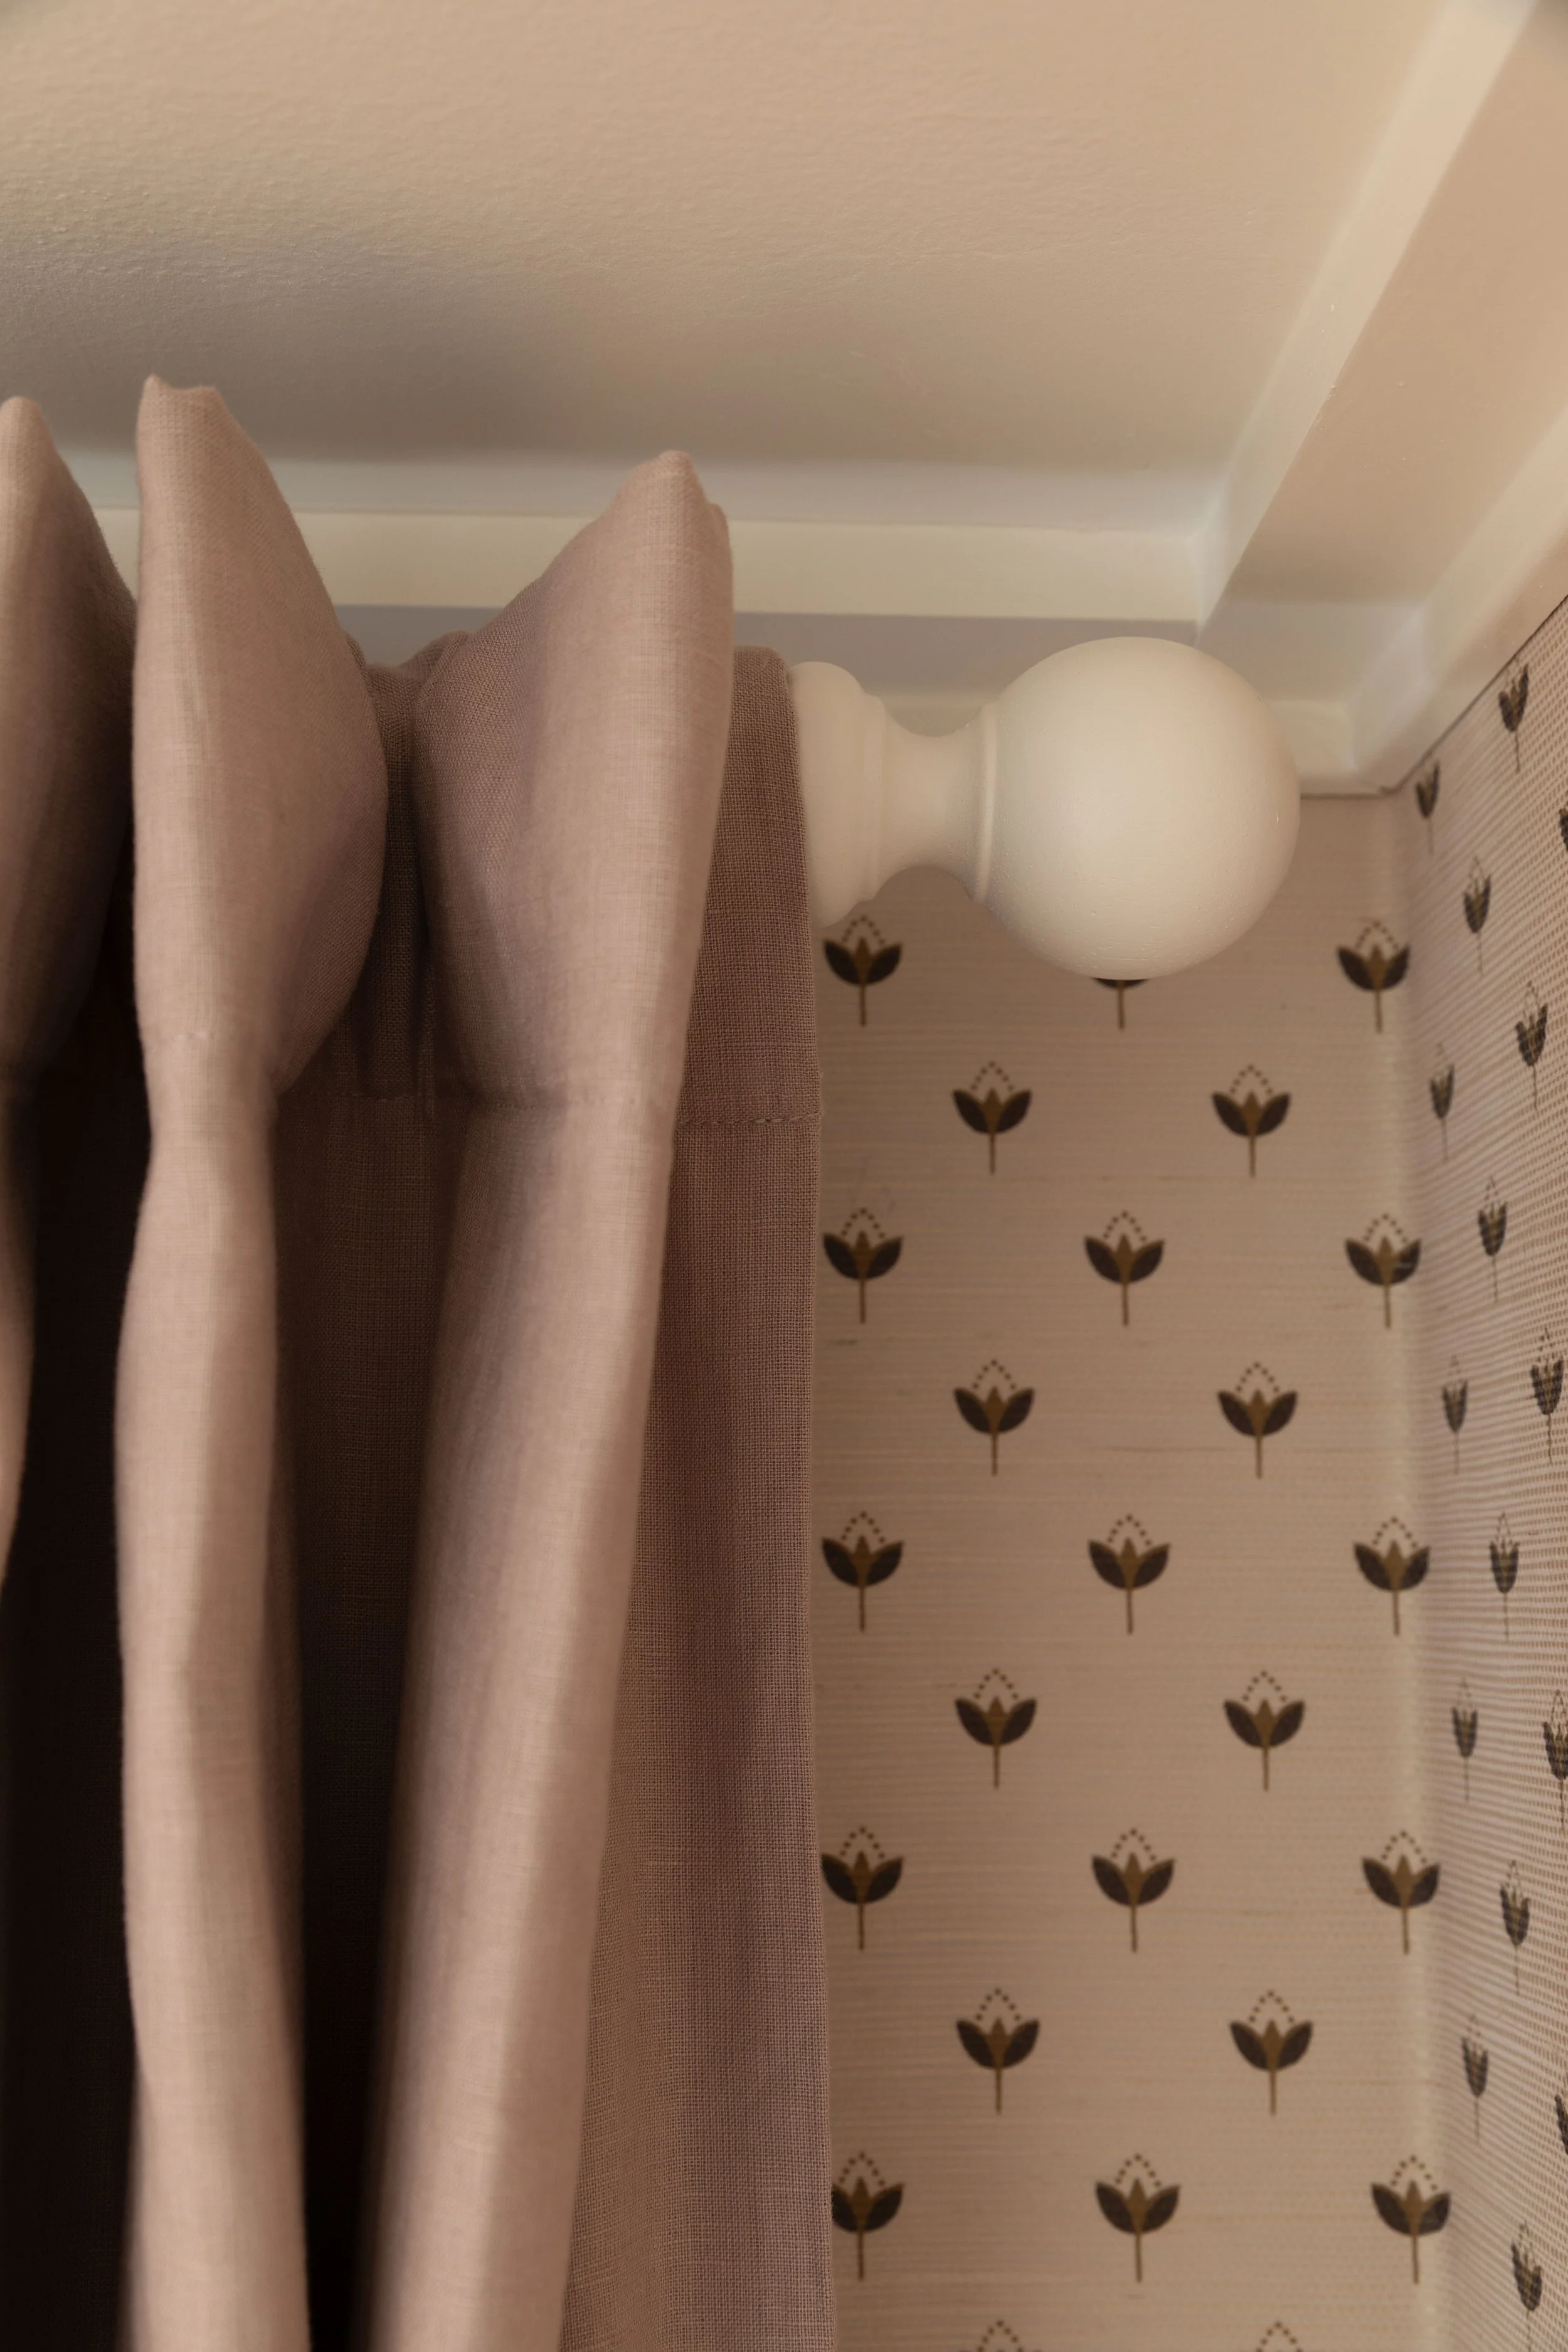
5. Choose the Right Hanging Method for Your Ceiling Height
In Daphne’s room, our ceilings are just 7 feet tall, making every inch important. Usually we’d hang the curtains on rods with rings and clips, but there just wasn’t room for that this time. So we kept it a bit more casual with painted-wood rods and hung the curtains via the hidden loops at the back. There isn’t a ‘right’ method but the loops allow for a nice casual drape and rings with pinch pleats would give a fancier look. In general we avoid grommets, though I’m sure the right person can make those look cool too.
We used the following wood hanging rod/hardware: wood rod + bracket + ball post
6. Hang Them High and Wide
While we’re here, where you hang your rod matters a lot. We like to:
Mount the rod several inches above the window trim or just below crown molding. Quince recommends 6” above trim for a casual look and 10” for a more dramatic look, but your exact number will depend on the ready made panel height
Extend the rod 8” beyond the window trim so panels can stack back cleanly (we added 18” and 21” on either side of the window trim in Daphne’s room for extra drama)
Let the curtains just kiss the floor
High and wide makes windows look bigger, and bigger windows make rooms feel grander :)
We’ll be sharing more on the paneling design and profiles soon! And don’t mind the overspray around the edge of the floor, that’ll come up with some Goof Off.
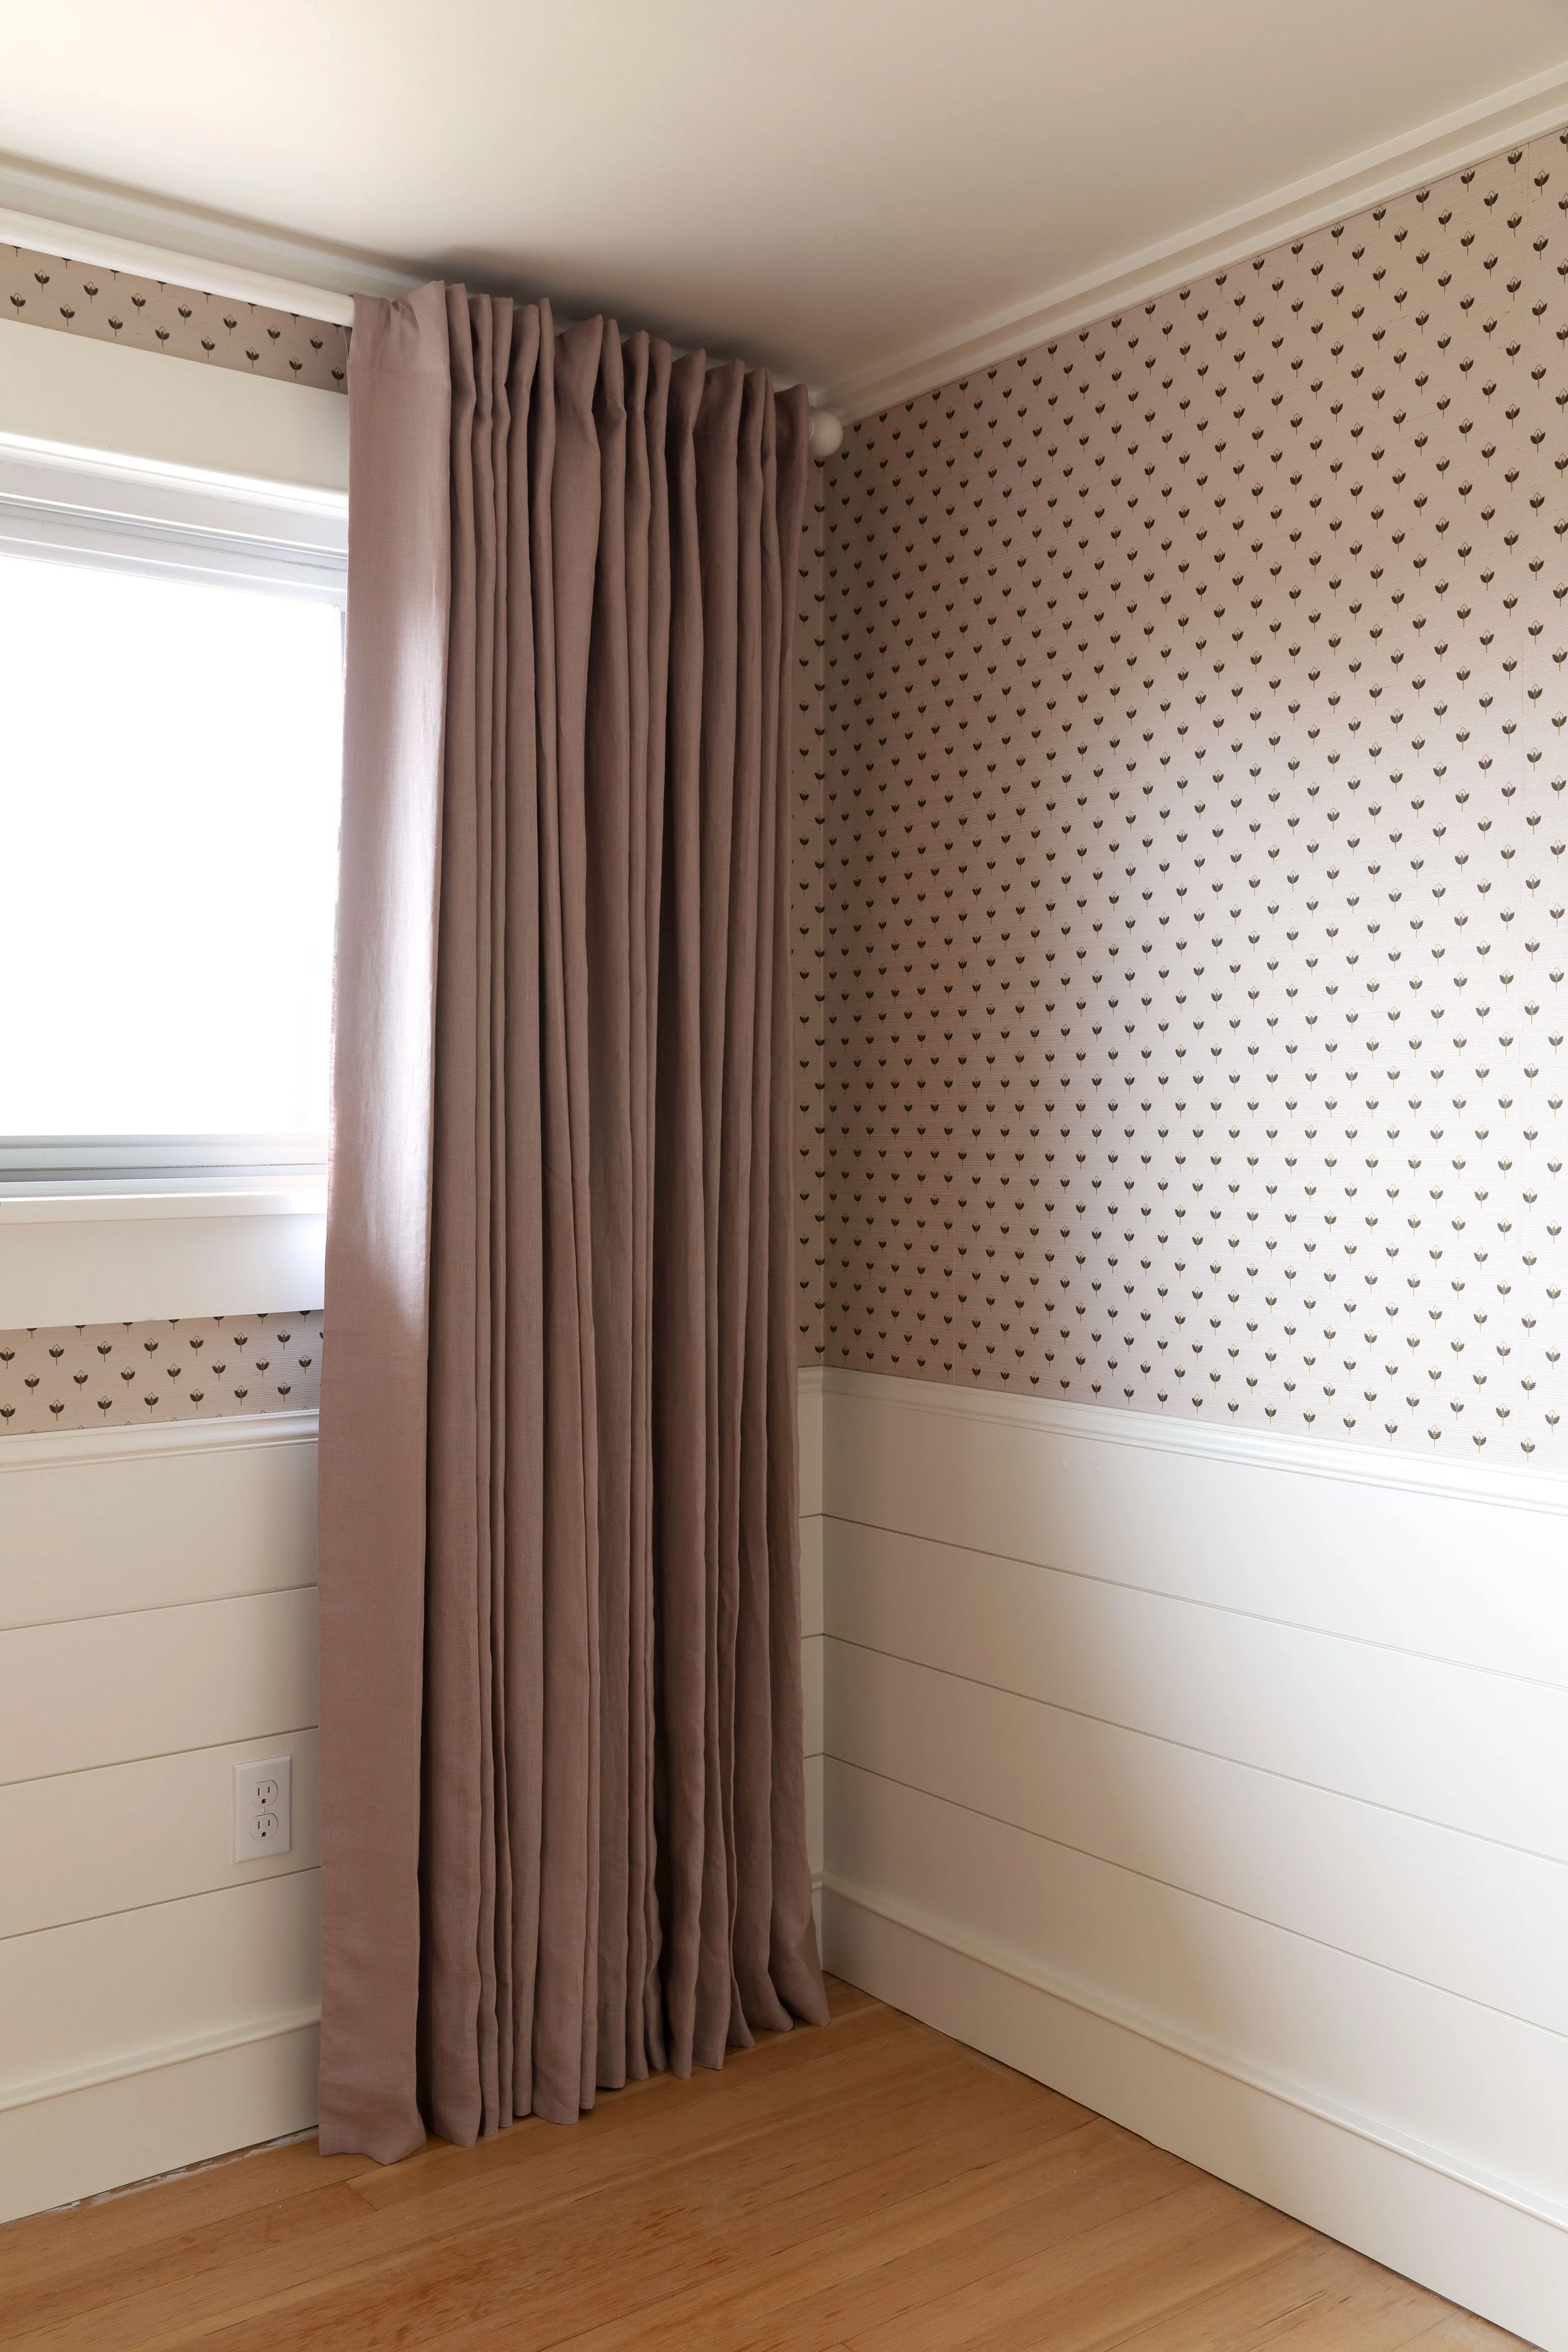
Daphne’s room is really starting to come together! The fullness of the curtains with the trained pleats gives this whole wall a tailored look. And nothing about it says “budget curtains”, which is exactly what we’re going for.
Again, if your curtains don’t look like the ones in magazines, it’s usually not the curtain’s fault. It’s the fullness and finishing. A little extra fabric. A little steam. A little patience. And voila! Curtains that sing.
ps we may receive a small affiliate commission if you purchase something through our links, at no cost to you. Thank you for supporting the Grit and Polish!
pps Quince kindly gifted these curtains to us as part of an IG campaign but this post is not sponsored.