
Our Favorite Bathroom Grout (Plus a comparison of 3 bathroom grouts we've used)
THE HILL HOUSE
After renovating this many bathrooms, we have apparently become people who have a favorite grout :) We’ve tried nearly every type over the years, and after using LATICRETE SPECTRALOCK PRO Premium in both upstairs bathrooms at the Hill House, we’ve finally landed on the one we’ll keep reaching for.
It may not be the most glamorous renovation opinion to hold, but it is a surprisingly useful one. Grout outlines every tile, affects how an entire room reads, and then spends the next several decades dealing with water, dirt, soap, cleaning products, and bare feet. A beautiful tile installation can be made considerably less beautiful by the wrong grout color or by a product that is difficult to maintain.
So today I’m sharing the grout we used in both of the Hill House bathrooms, the color that won us over, how it compares with the other high-performance grouts we’ve installed, and the grout-color lesson I wish we had learned sooner. Let’s get into it…
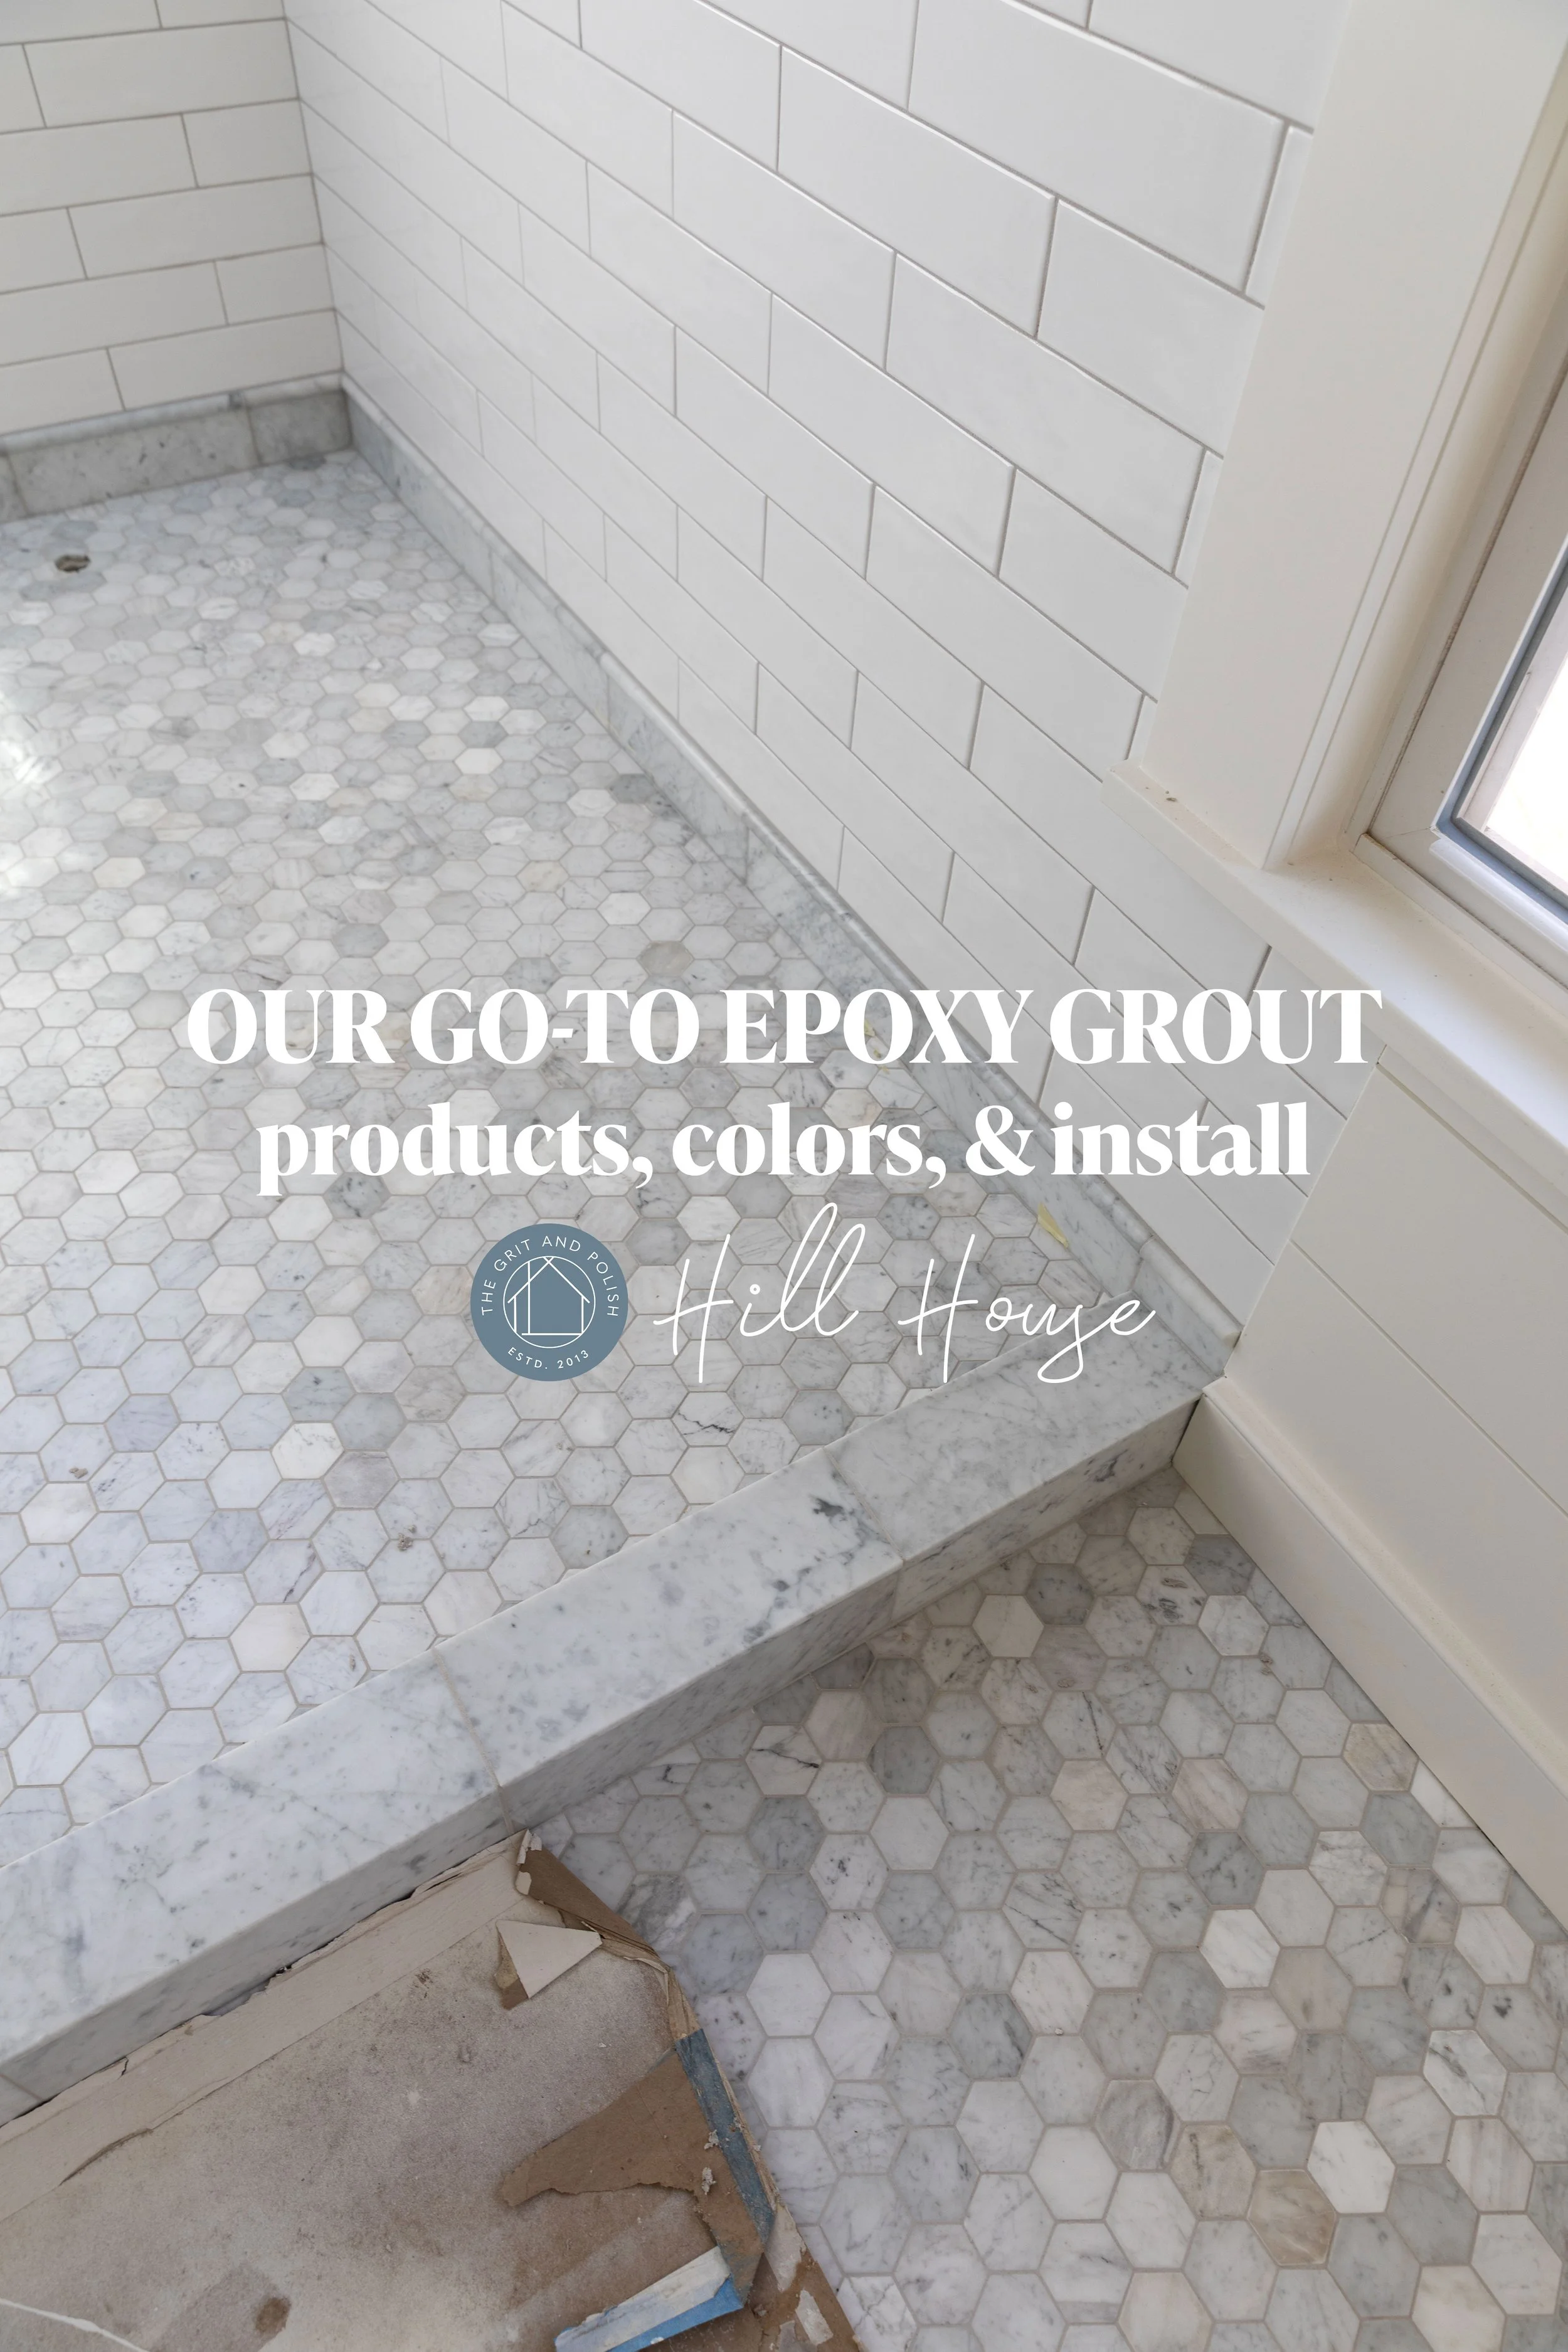
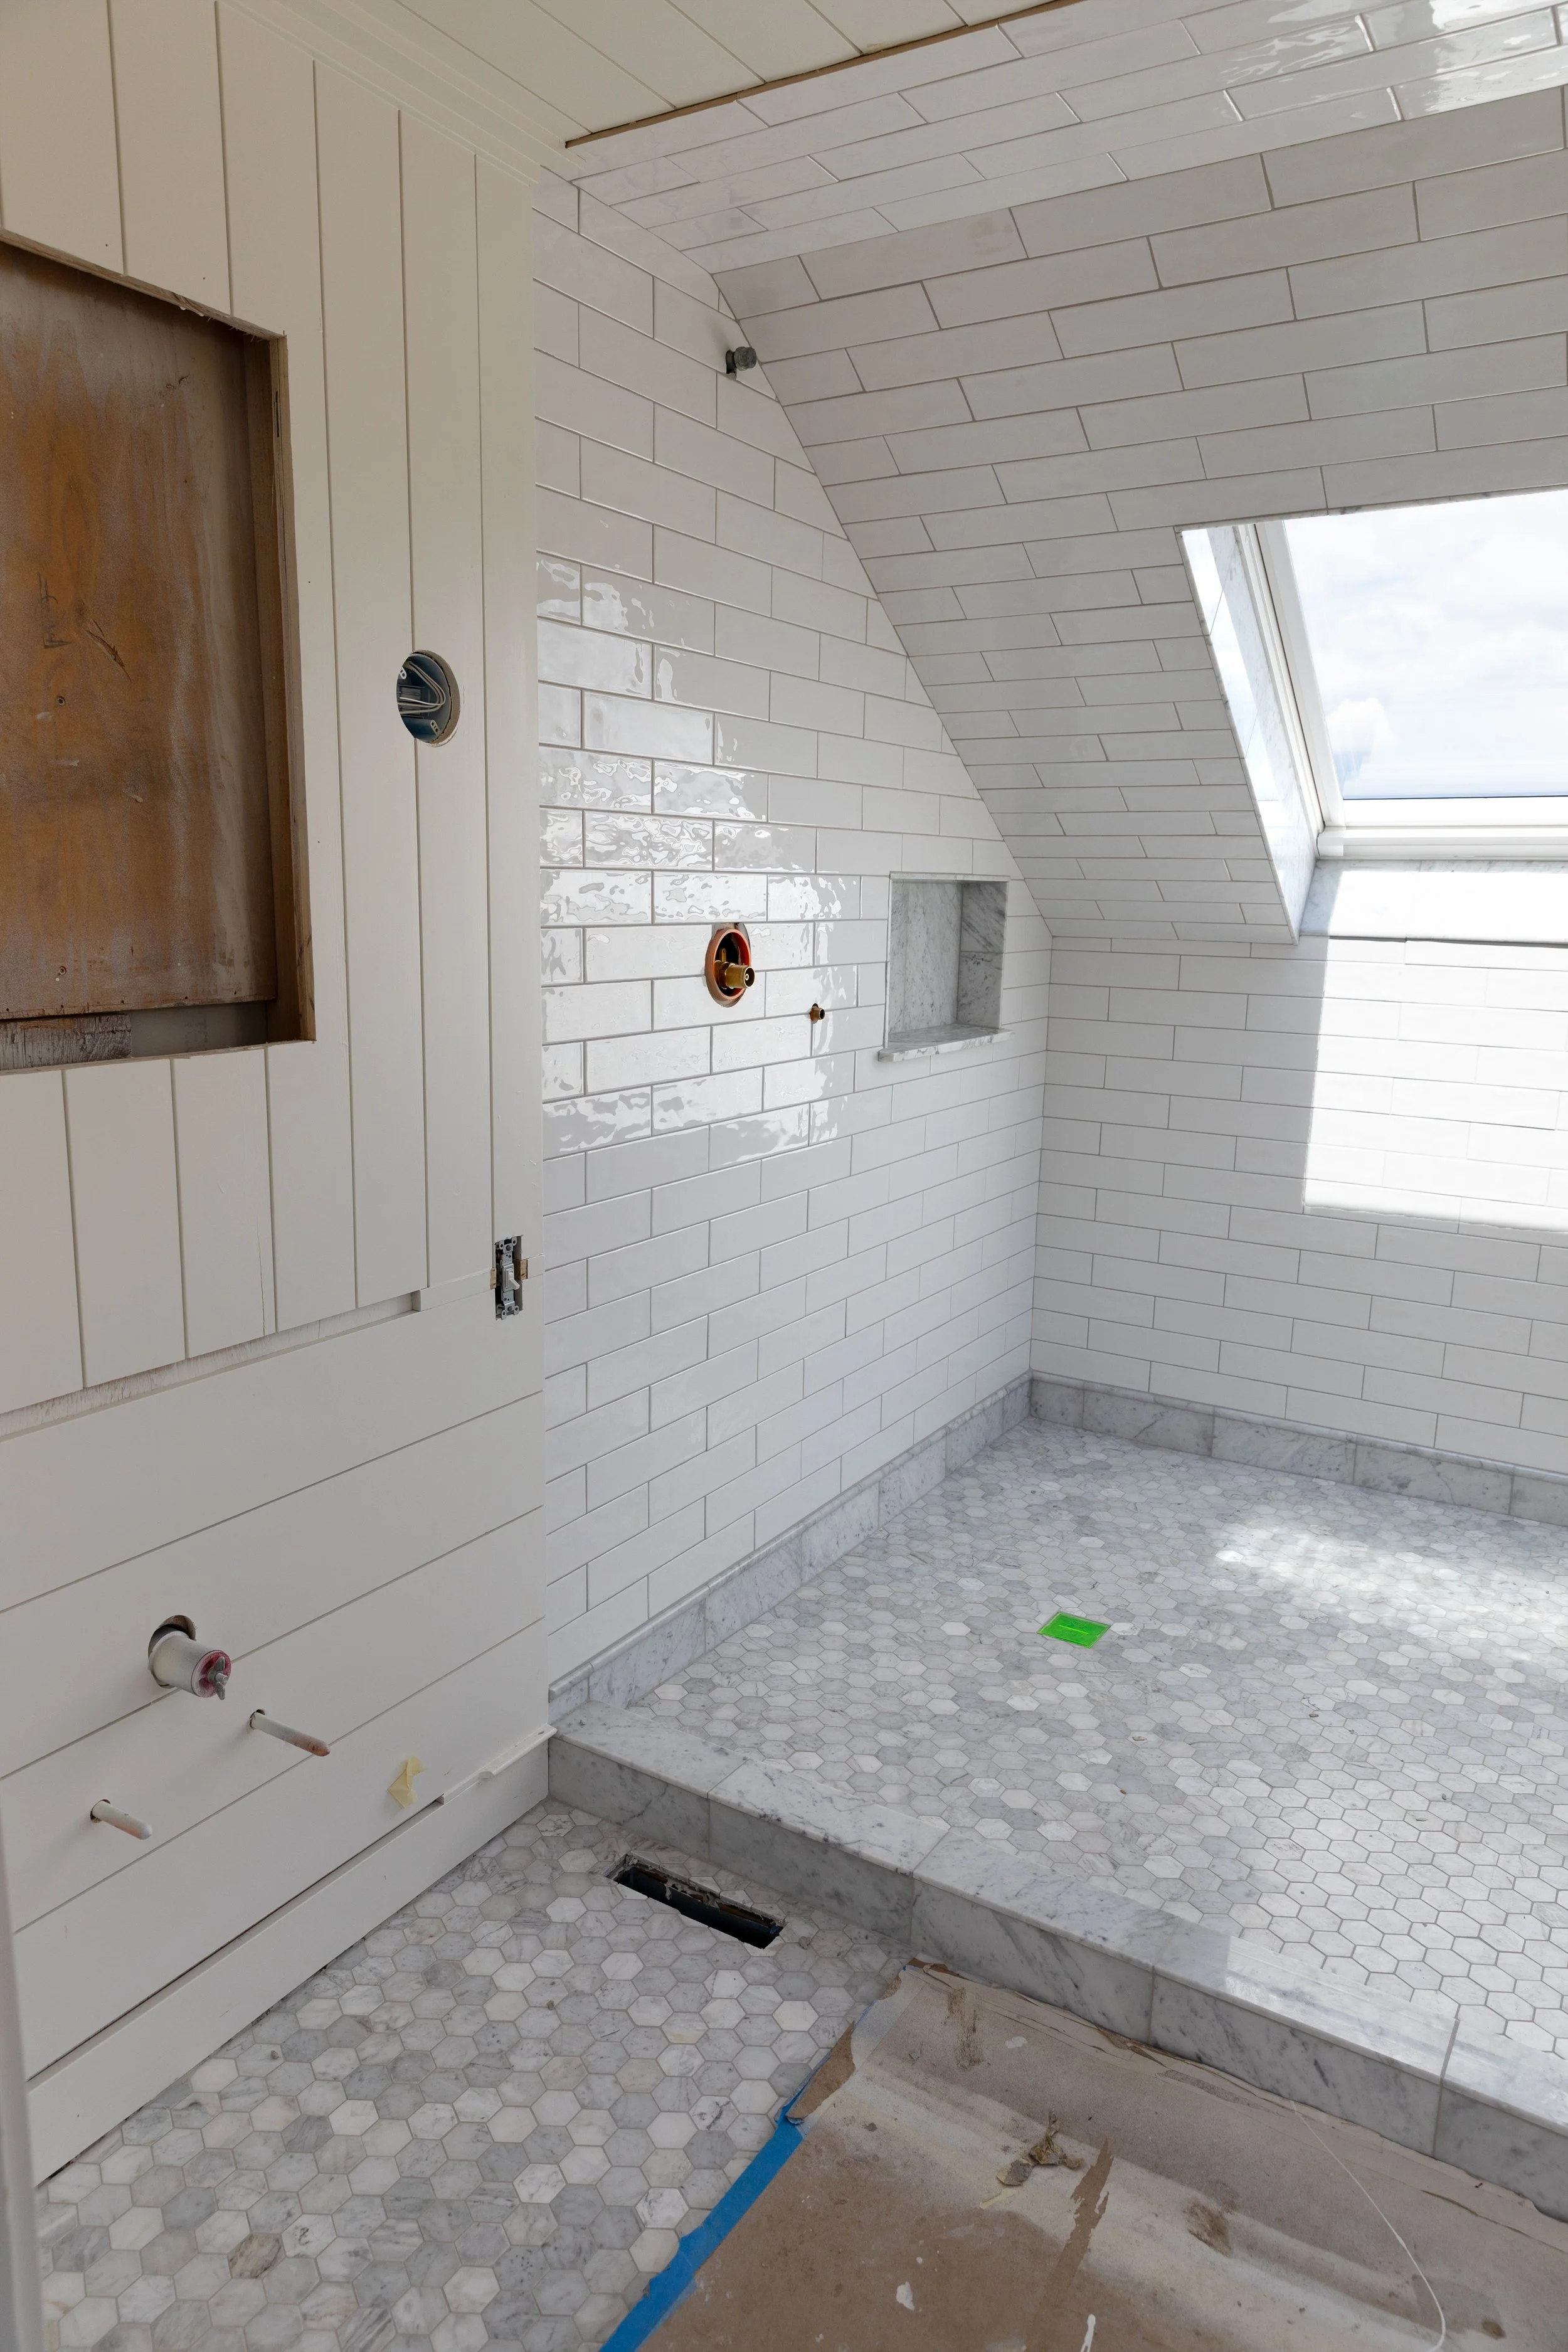
The Grout We Used in Both Hill House Bathrooms
We used LATICRETE SPECTRALOCK PRO Premium throughout both upstairs bathrooms at the Hill House. It’s an epoxy grout, which means it’s a resin-based grout that cures extremely hard and offers greater water and stain resistance than traditional cement grout, without needing to be sealed. Spectralock comes in a 3-part system that you buy in 2 parts (Part A&B together and then Part C) and then you mix everything together.
Part C is the color additive and here’s what we chose in both bathrooms.
In the ensuite, we used:
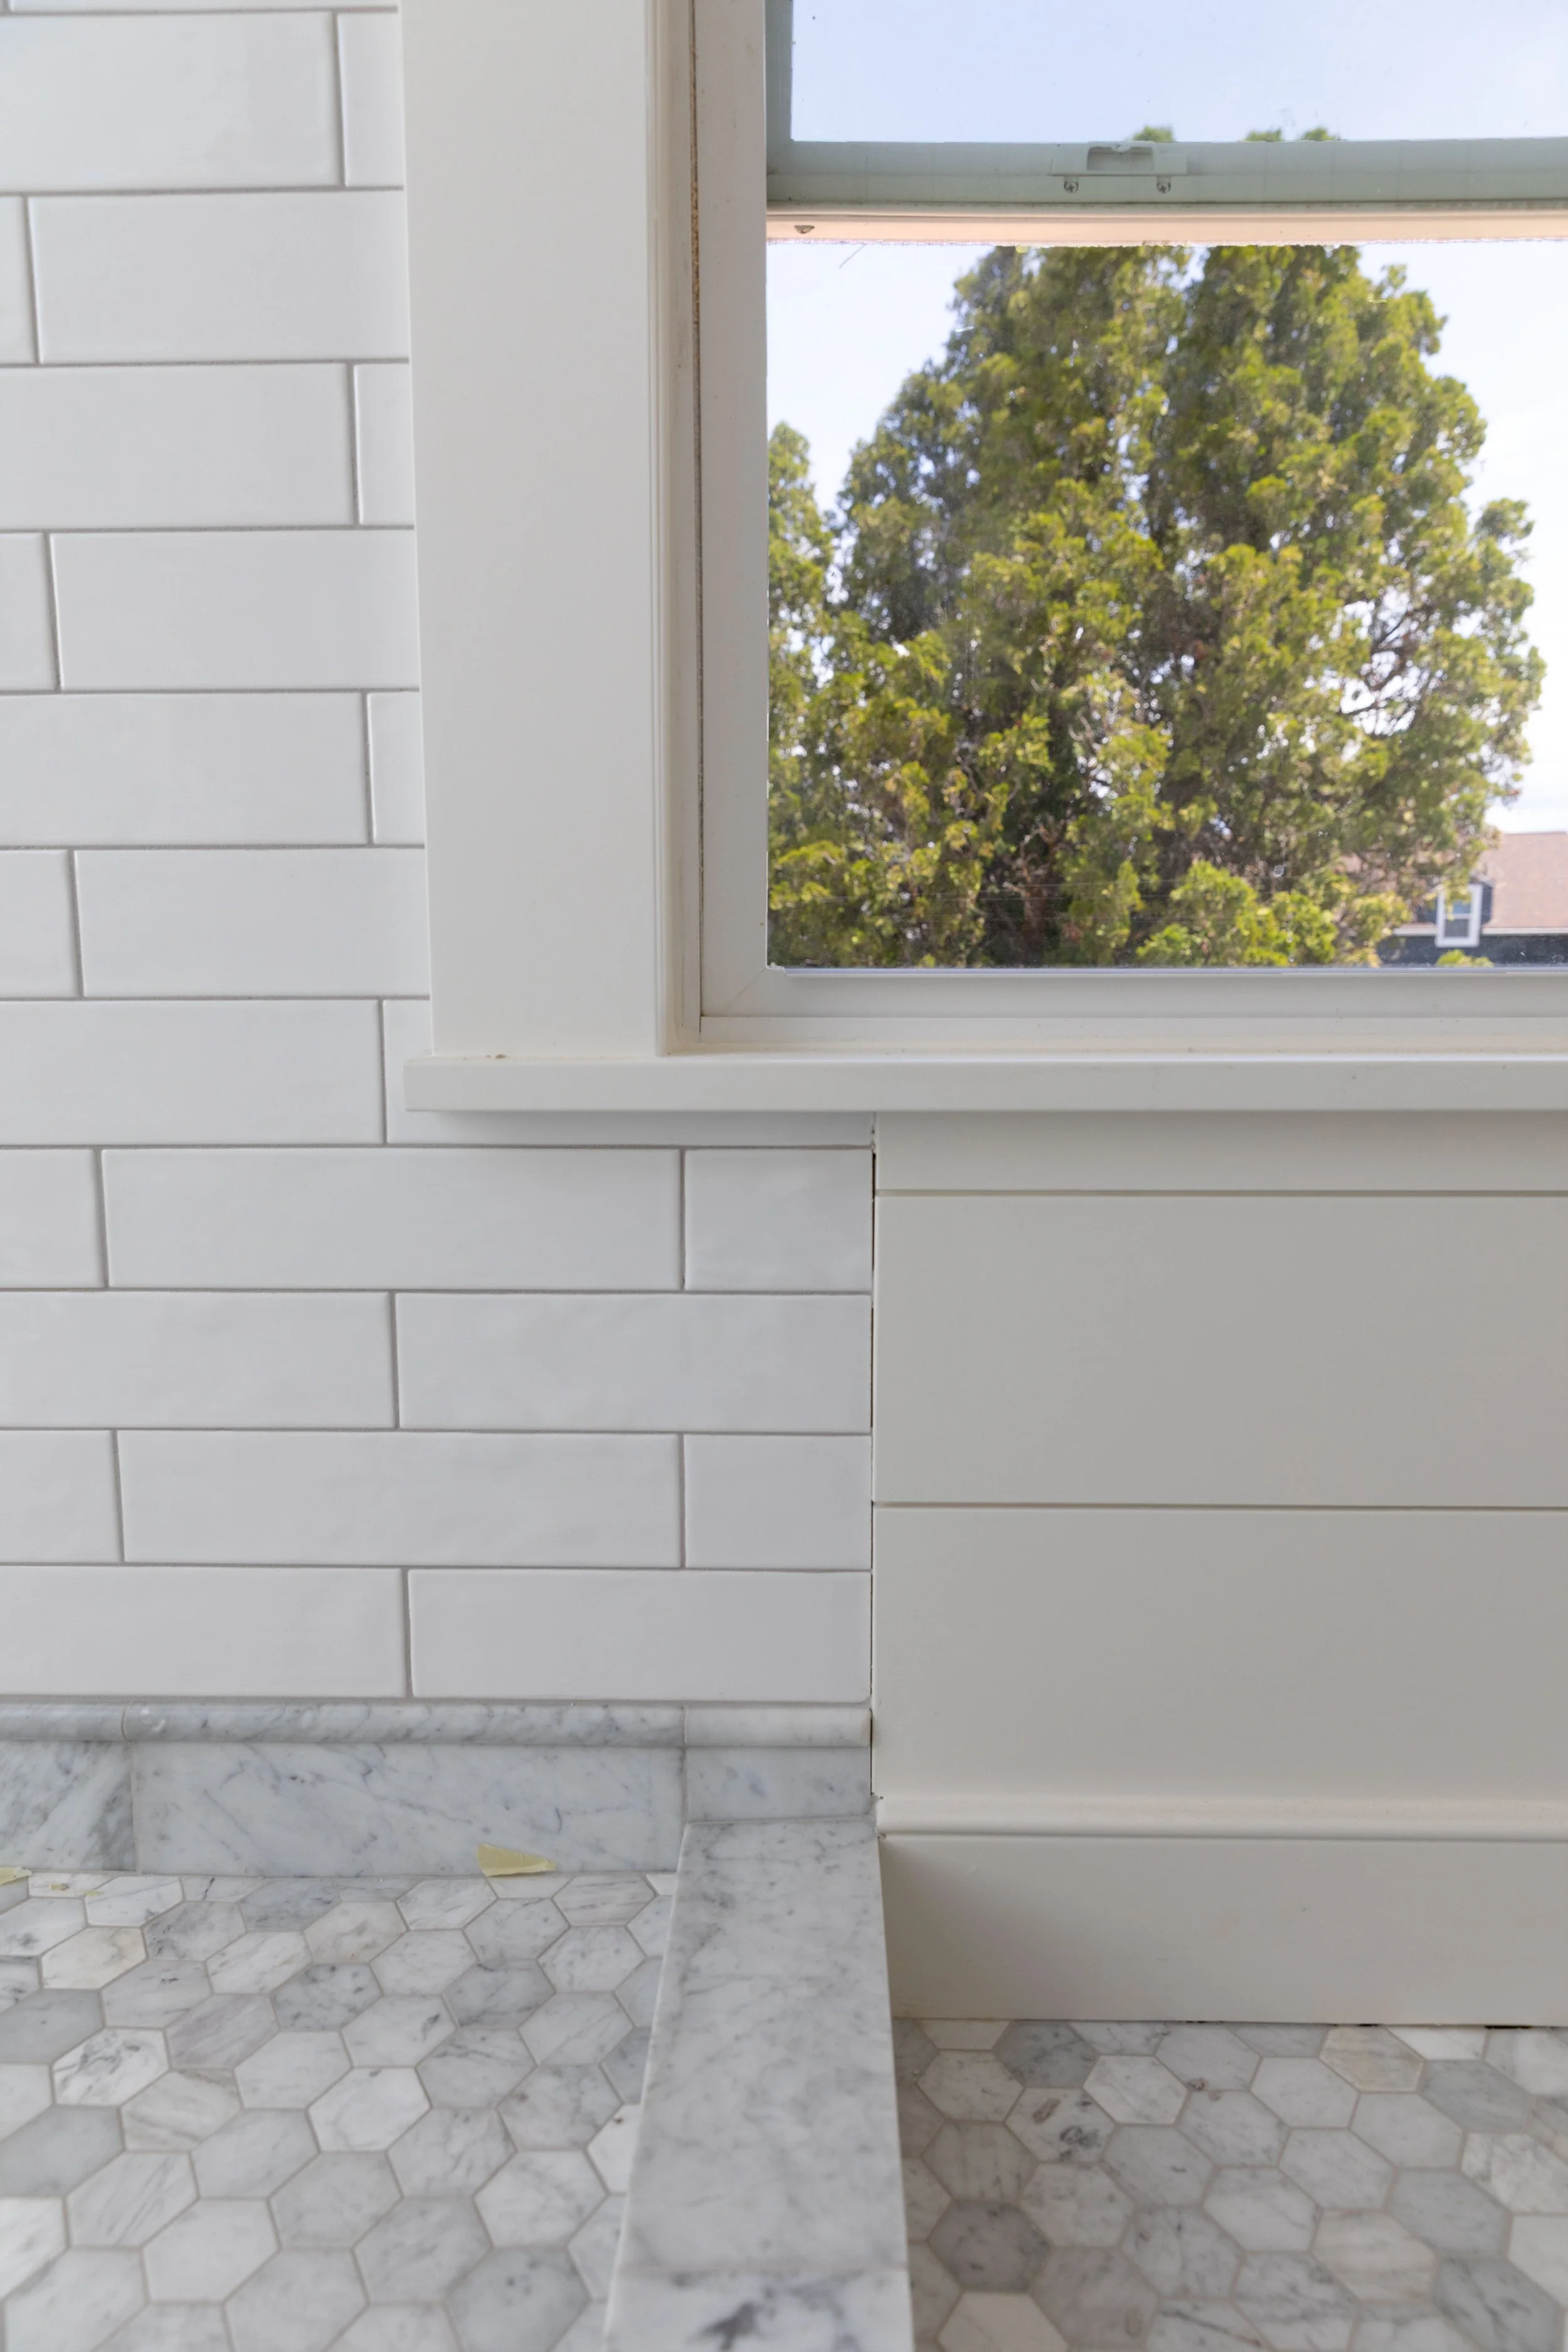
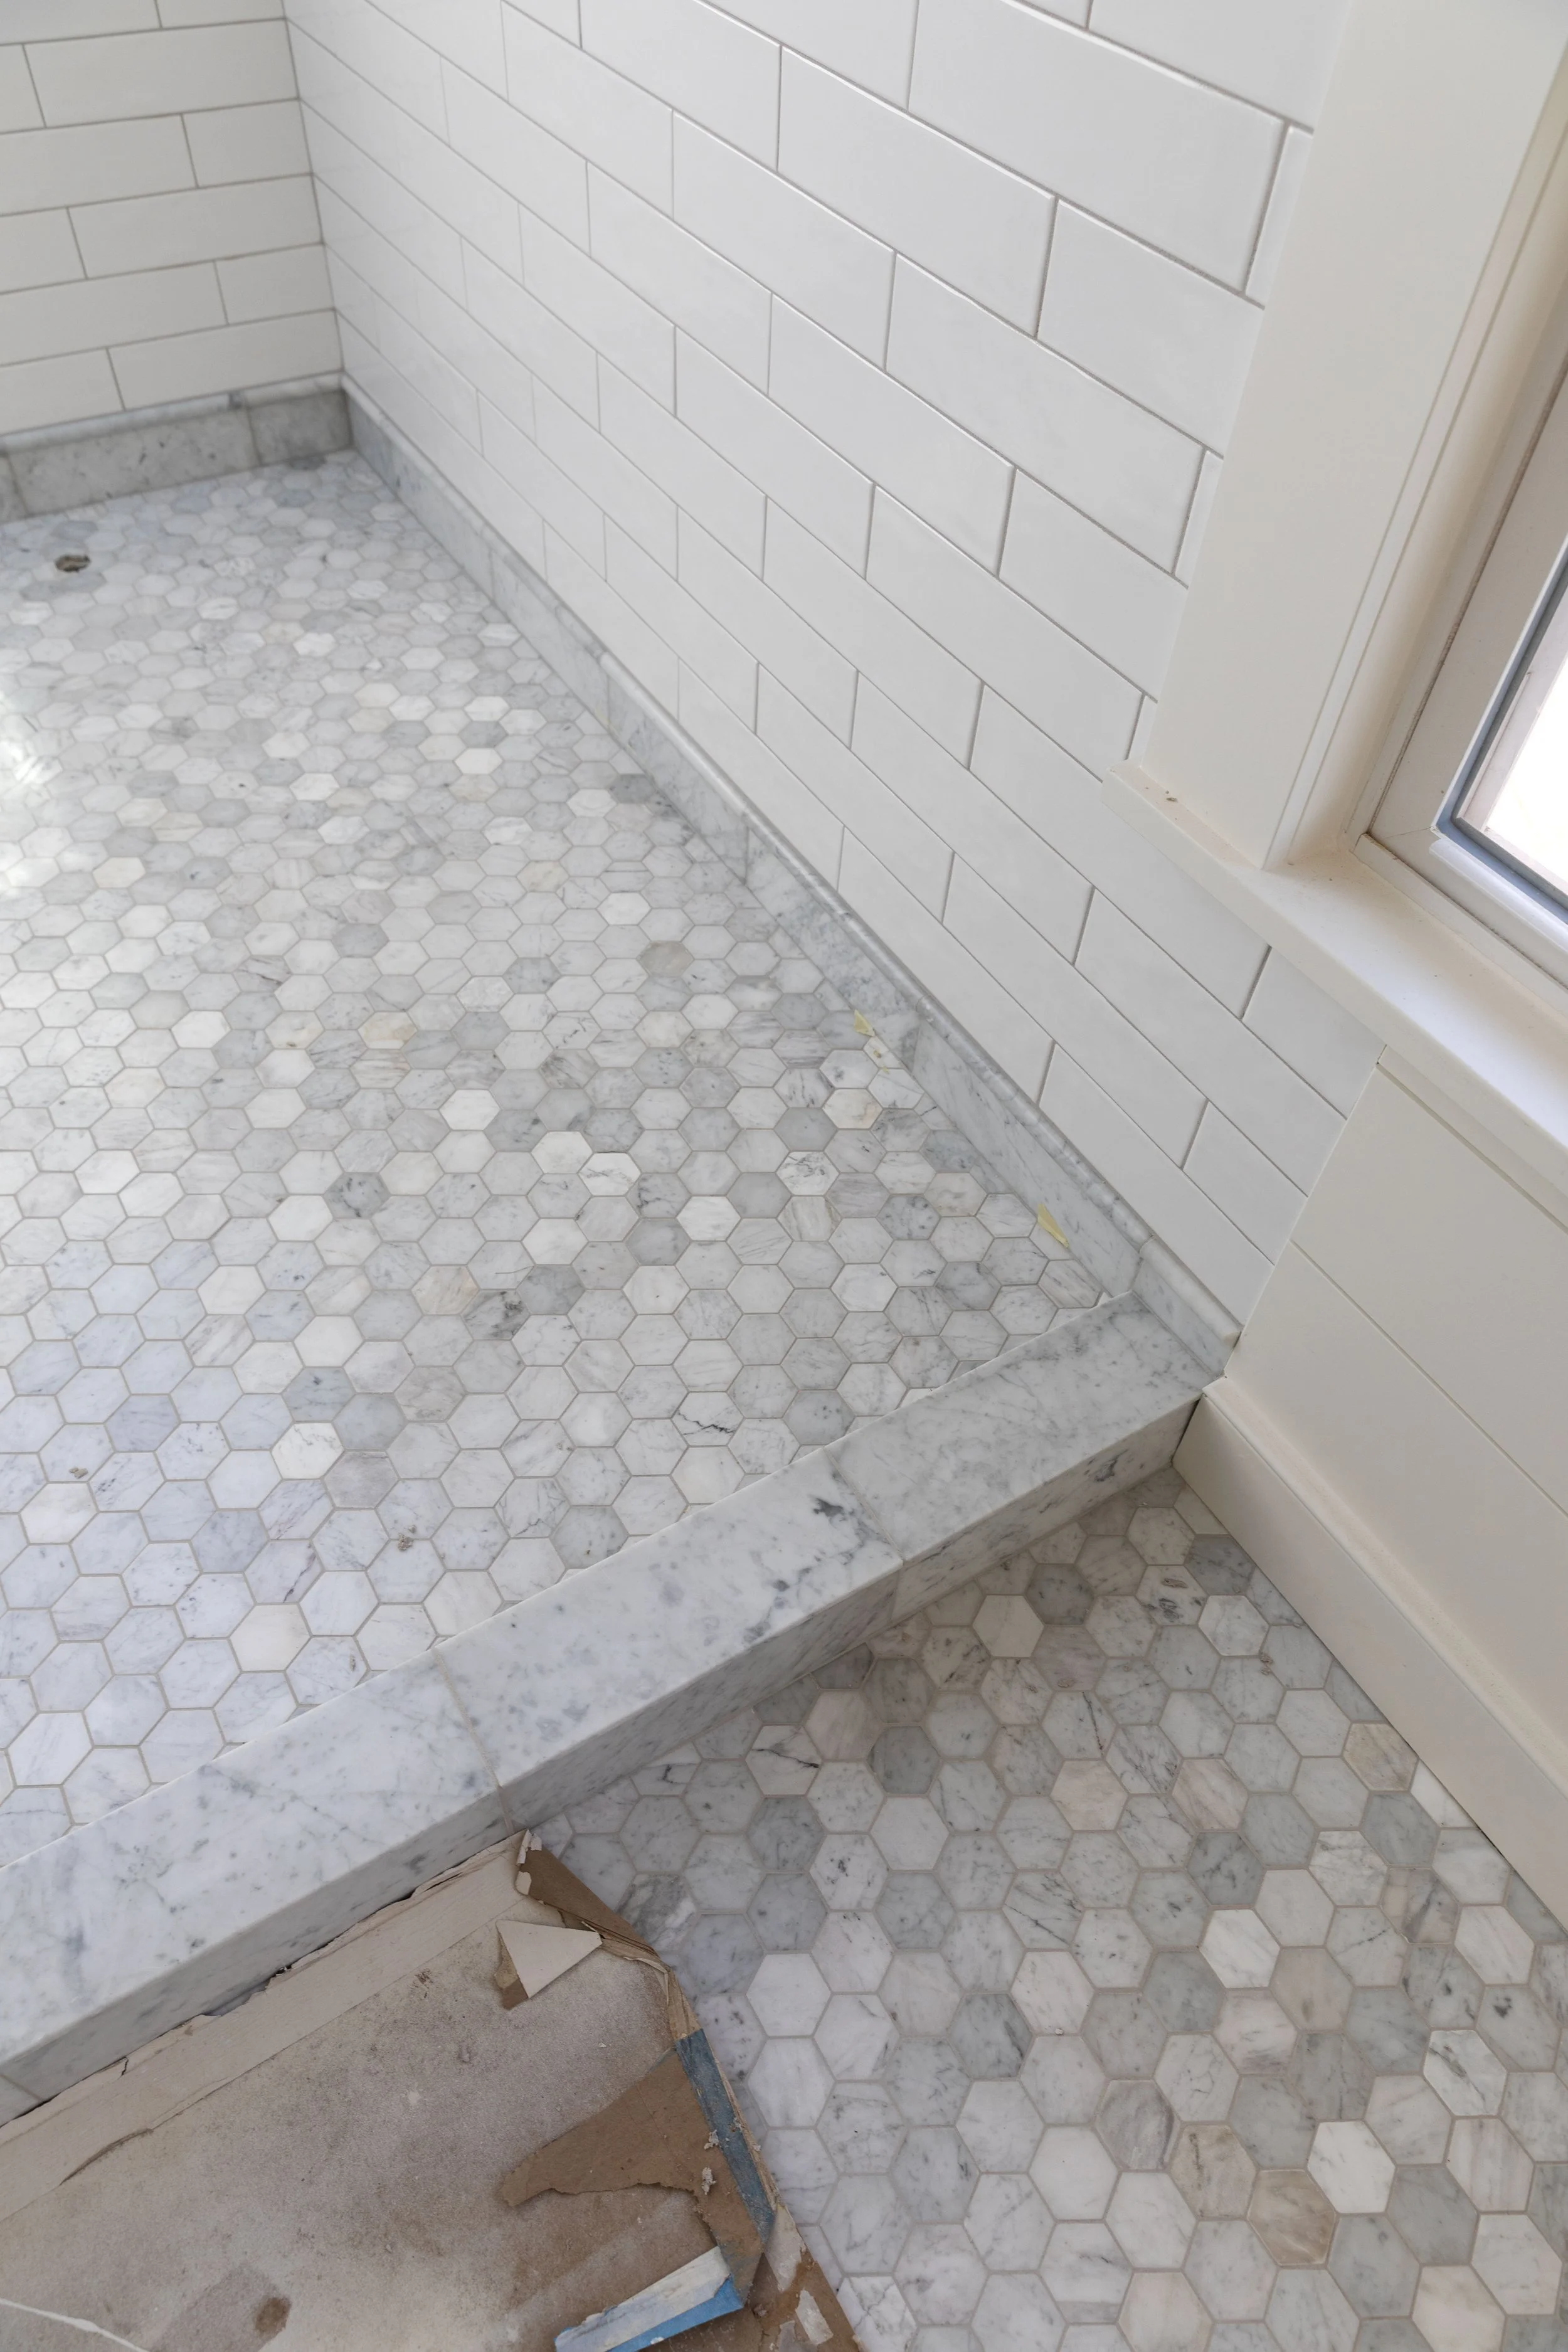
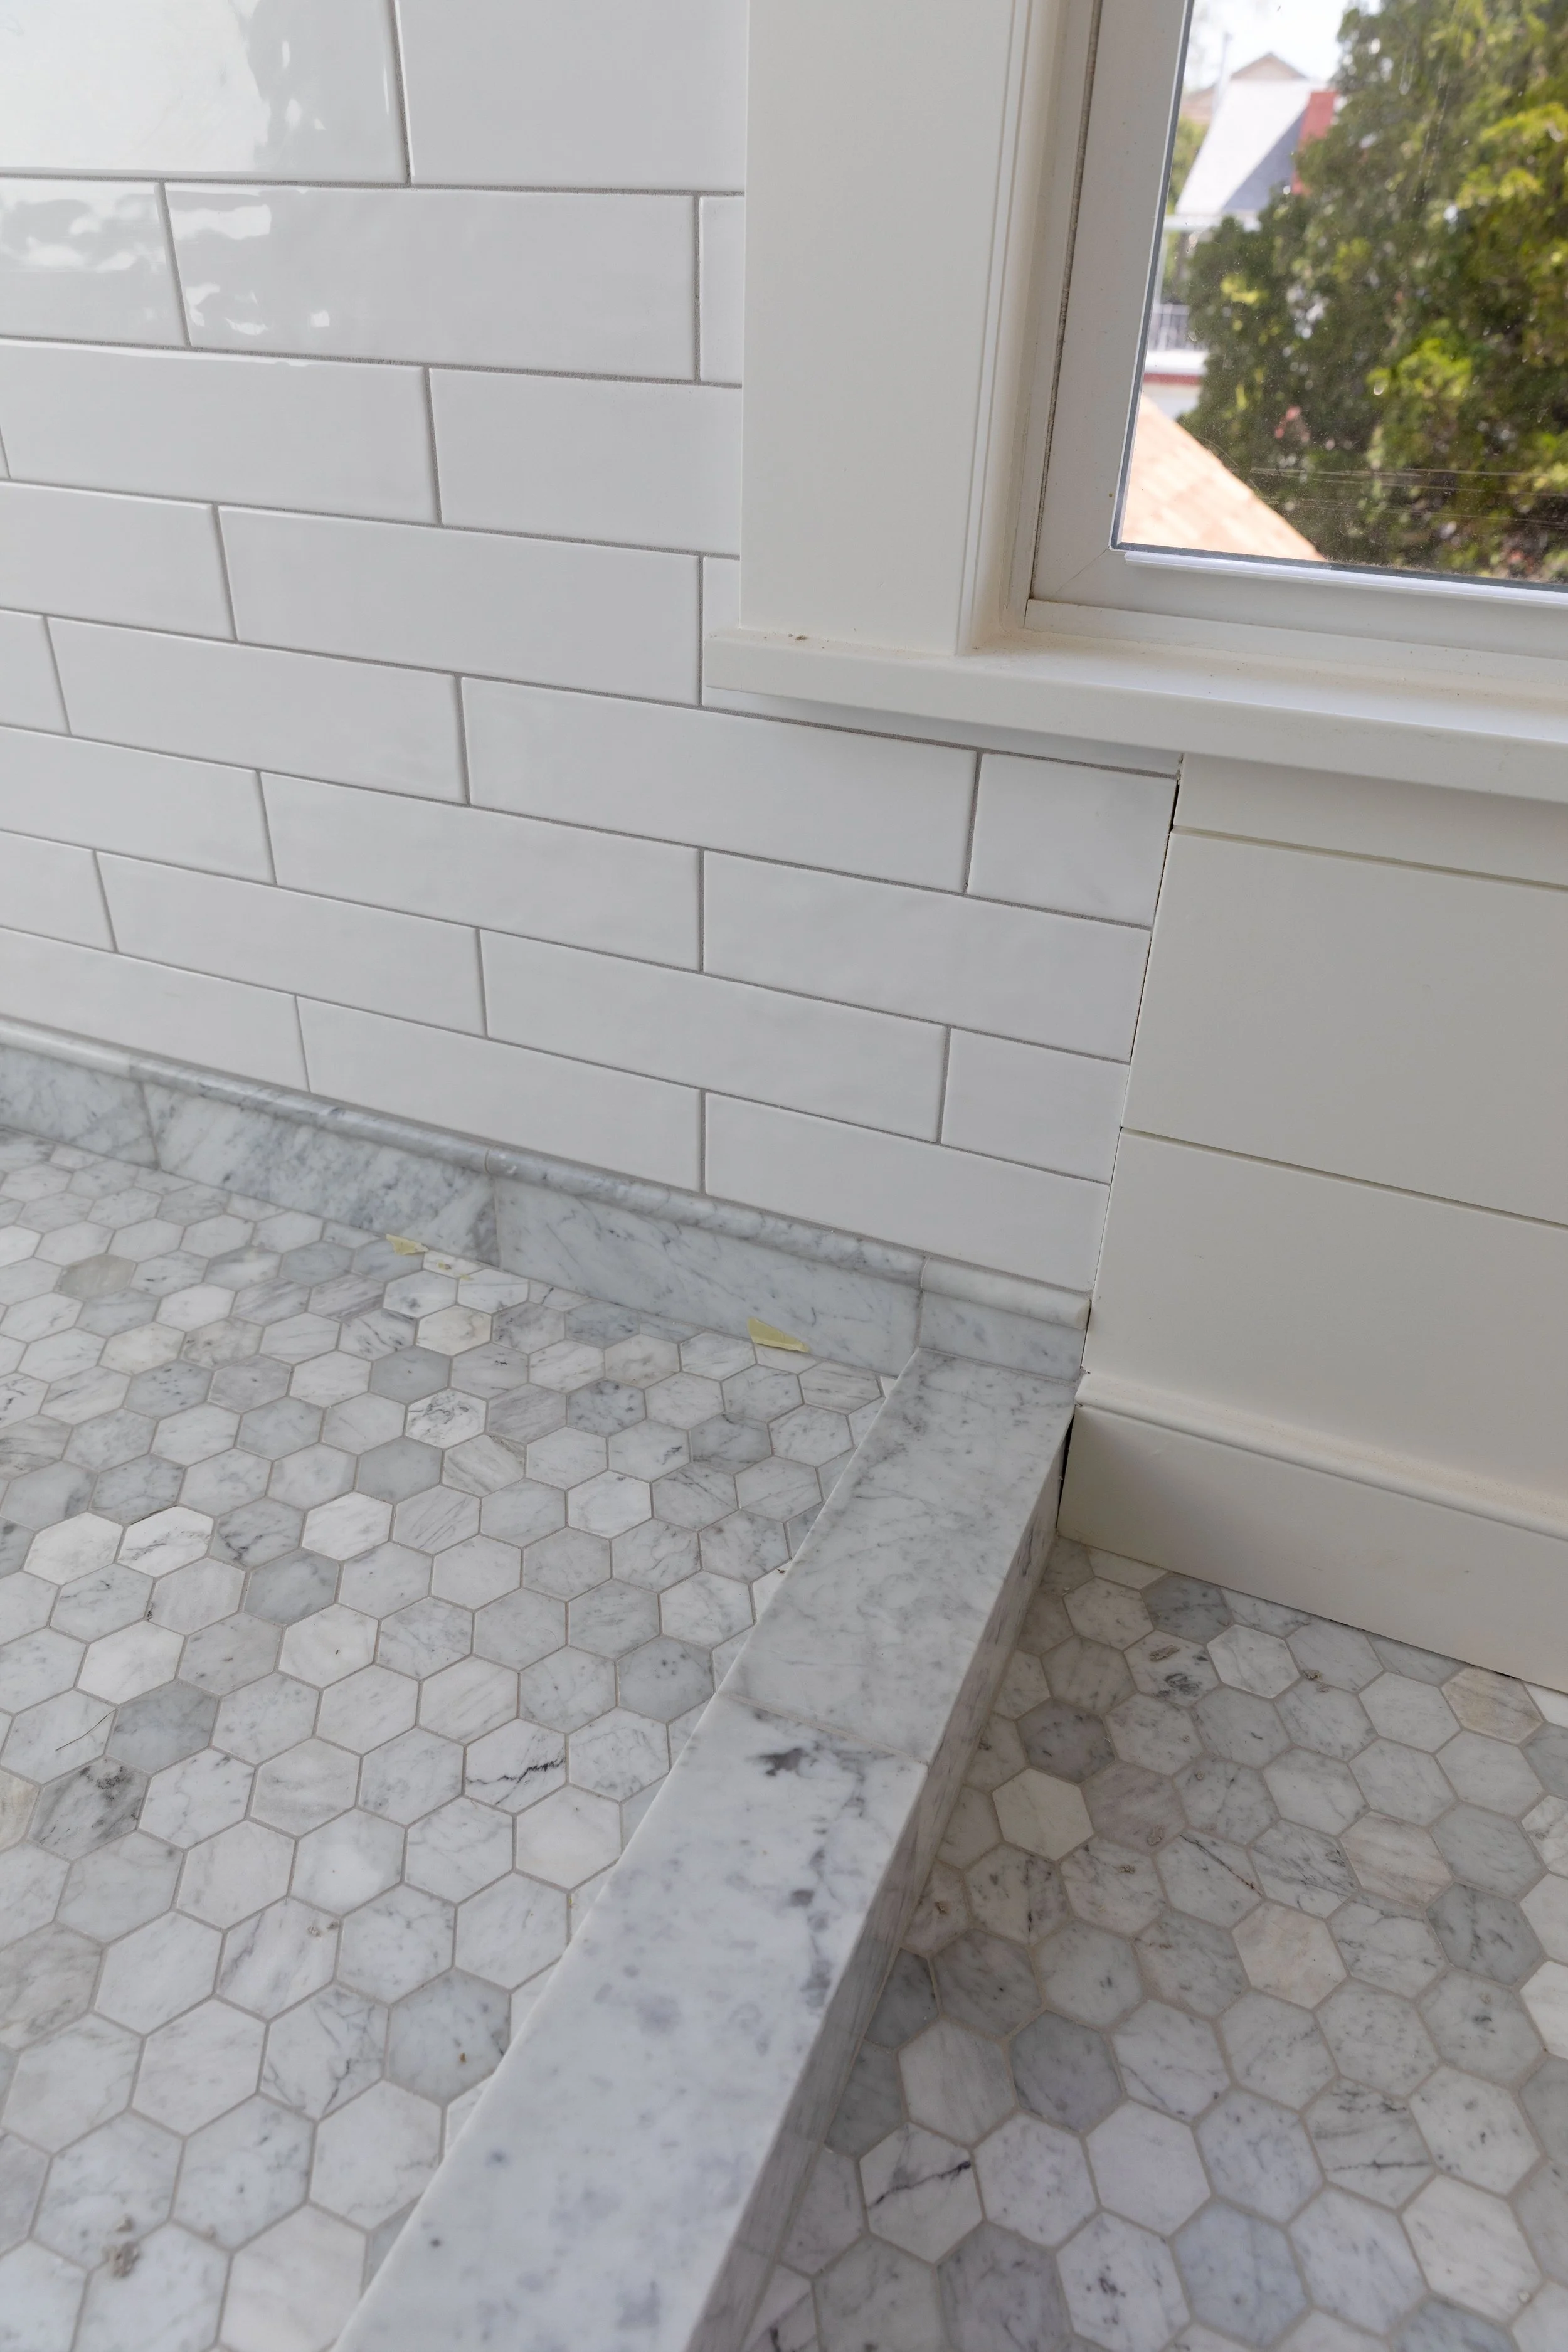
Iron grout on the glossy white subway-tile walls
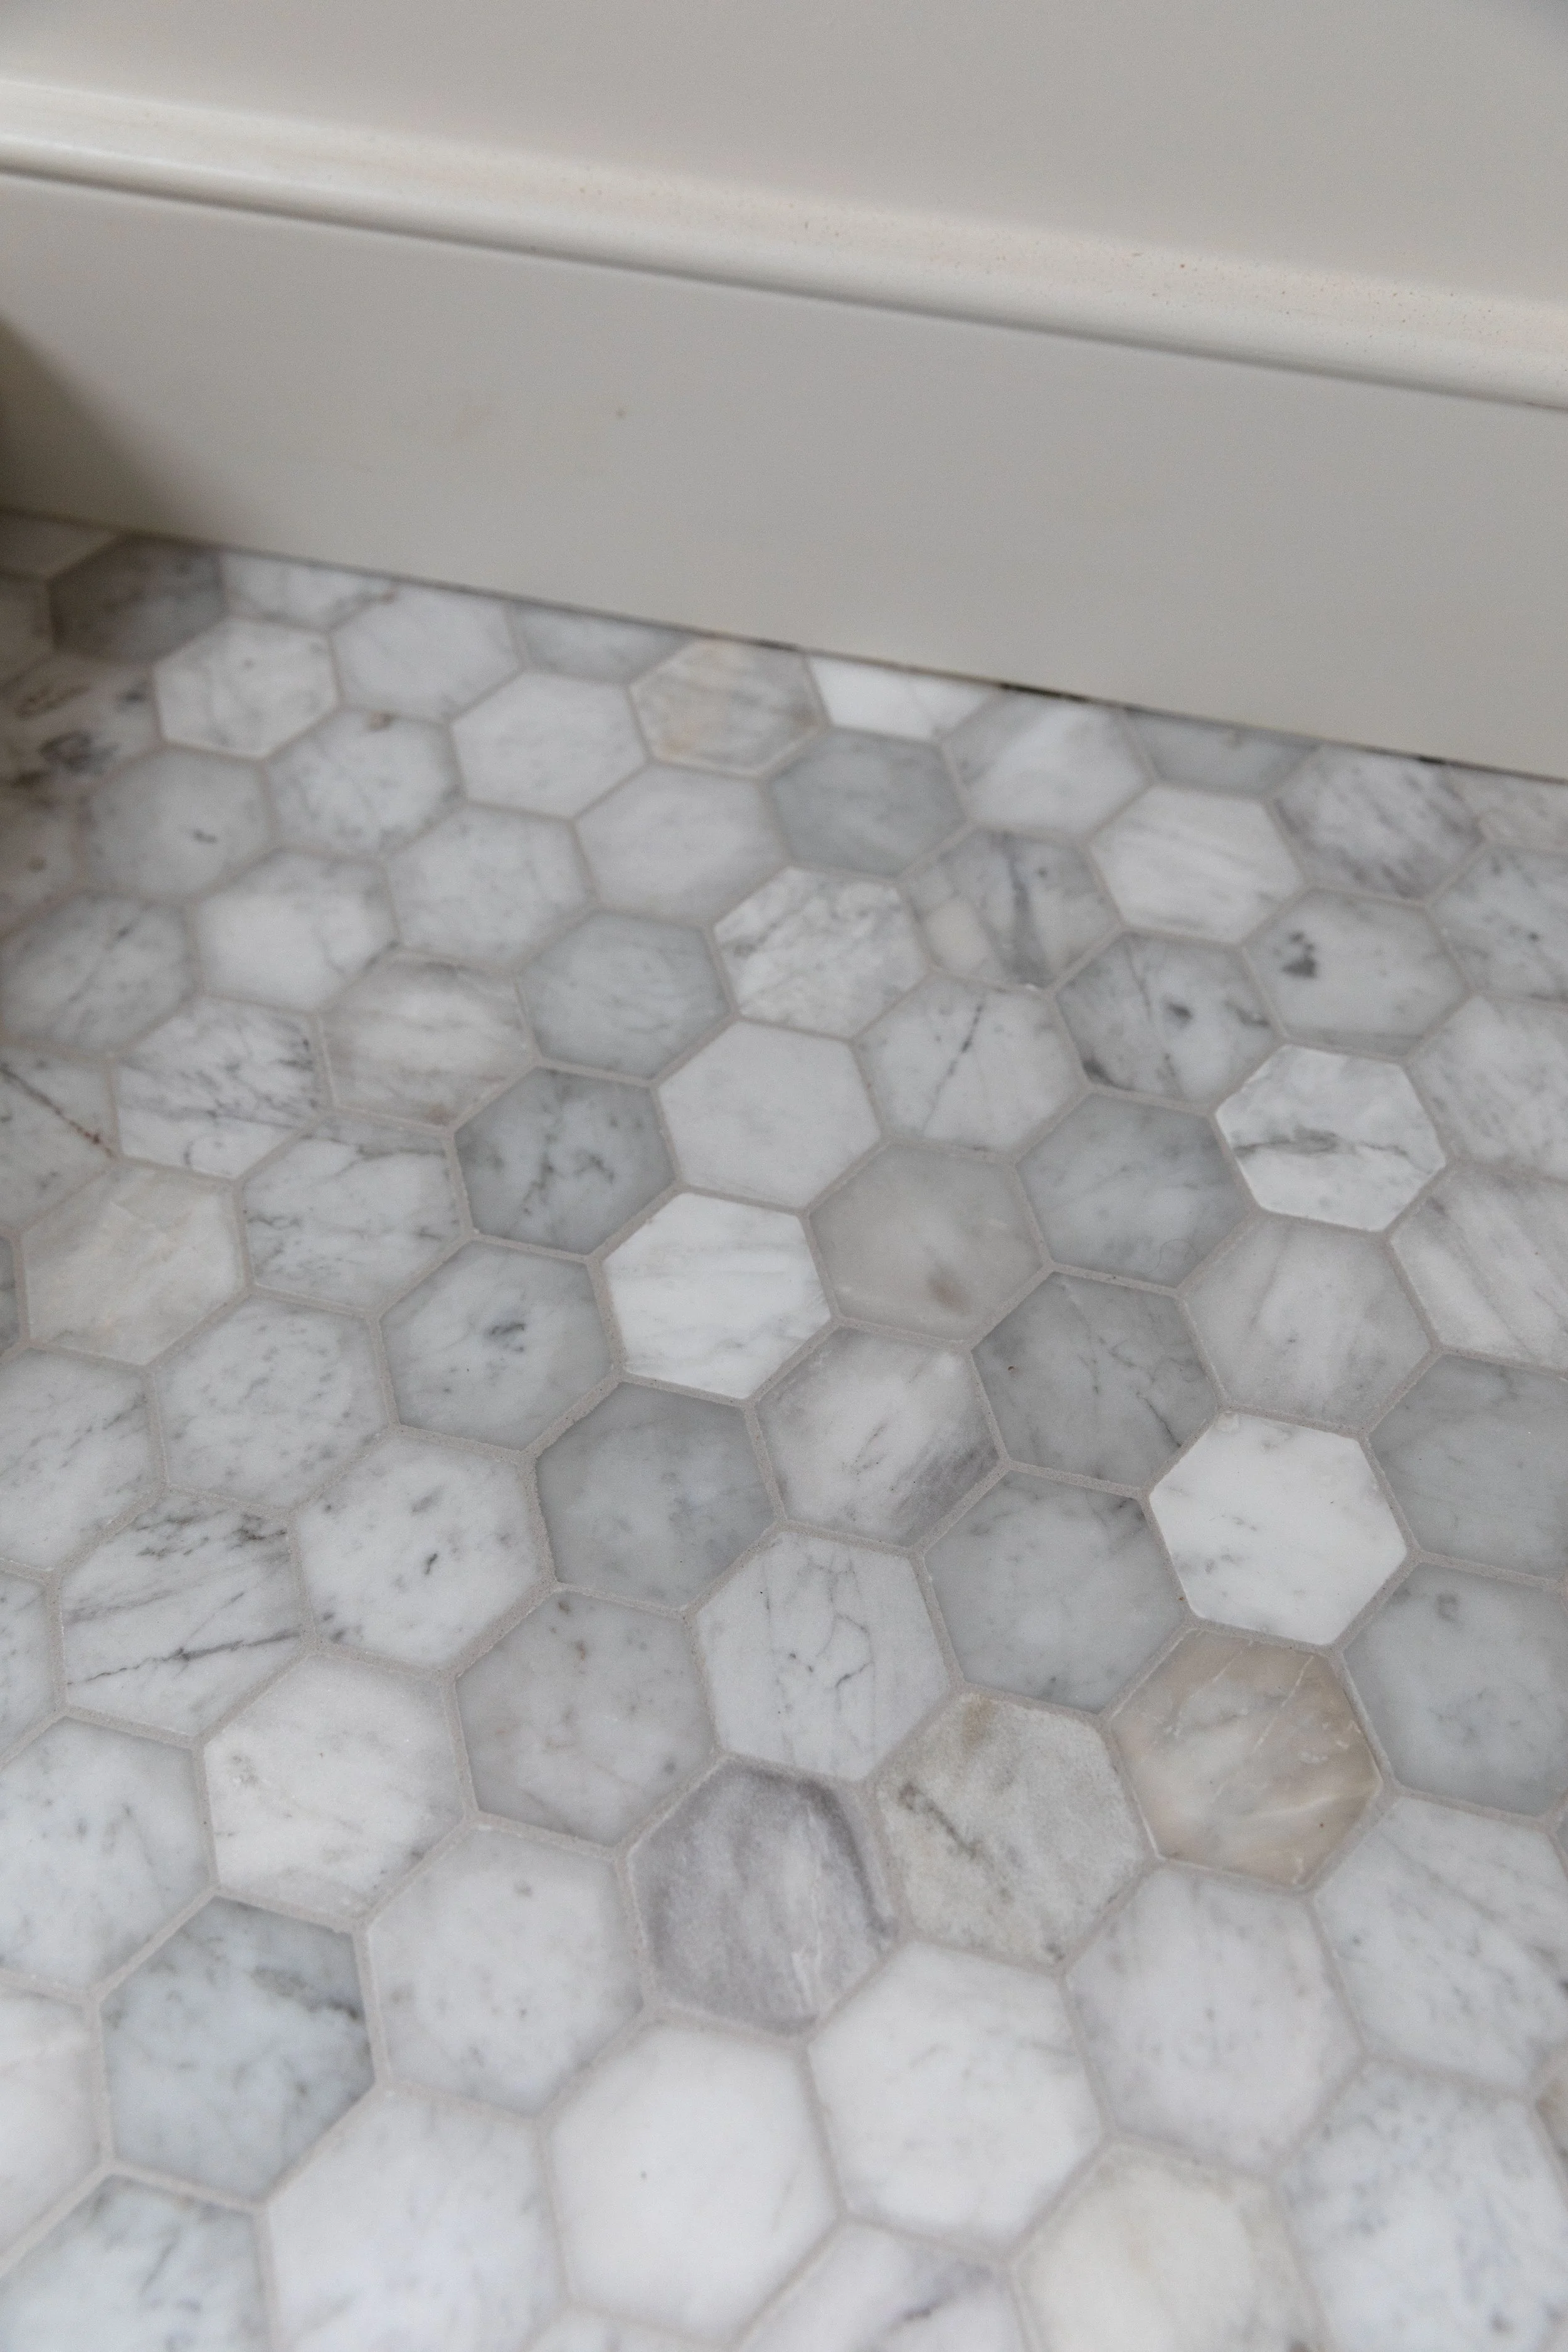
Iron grout on the honed marble hex floor
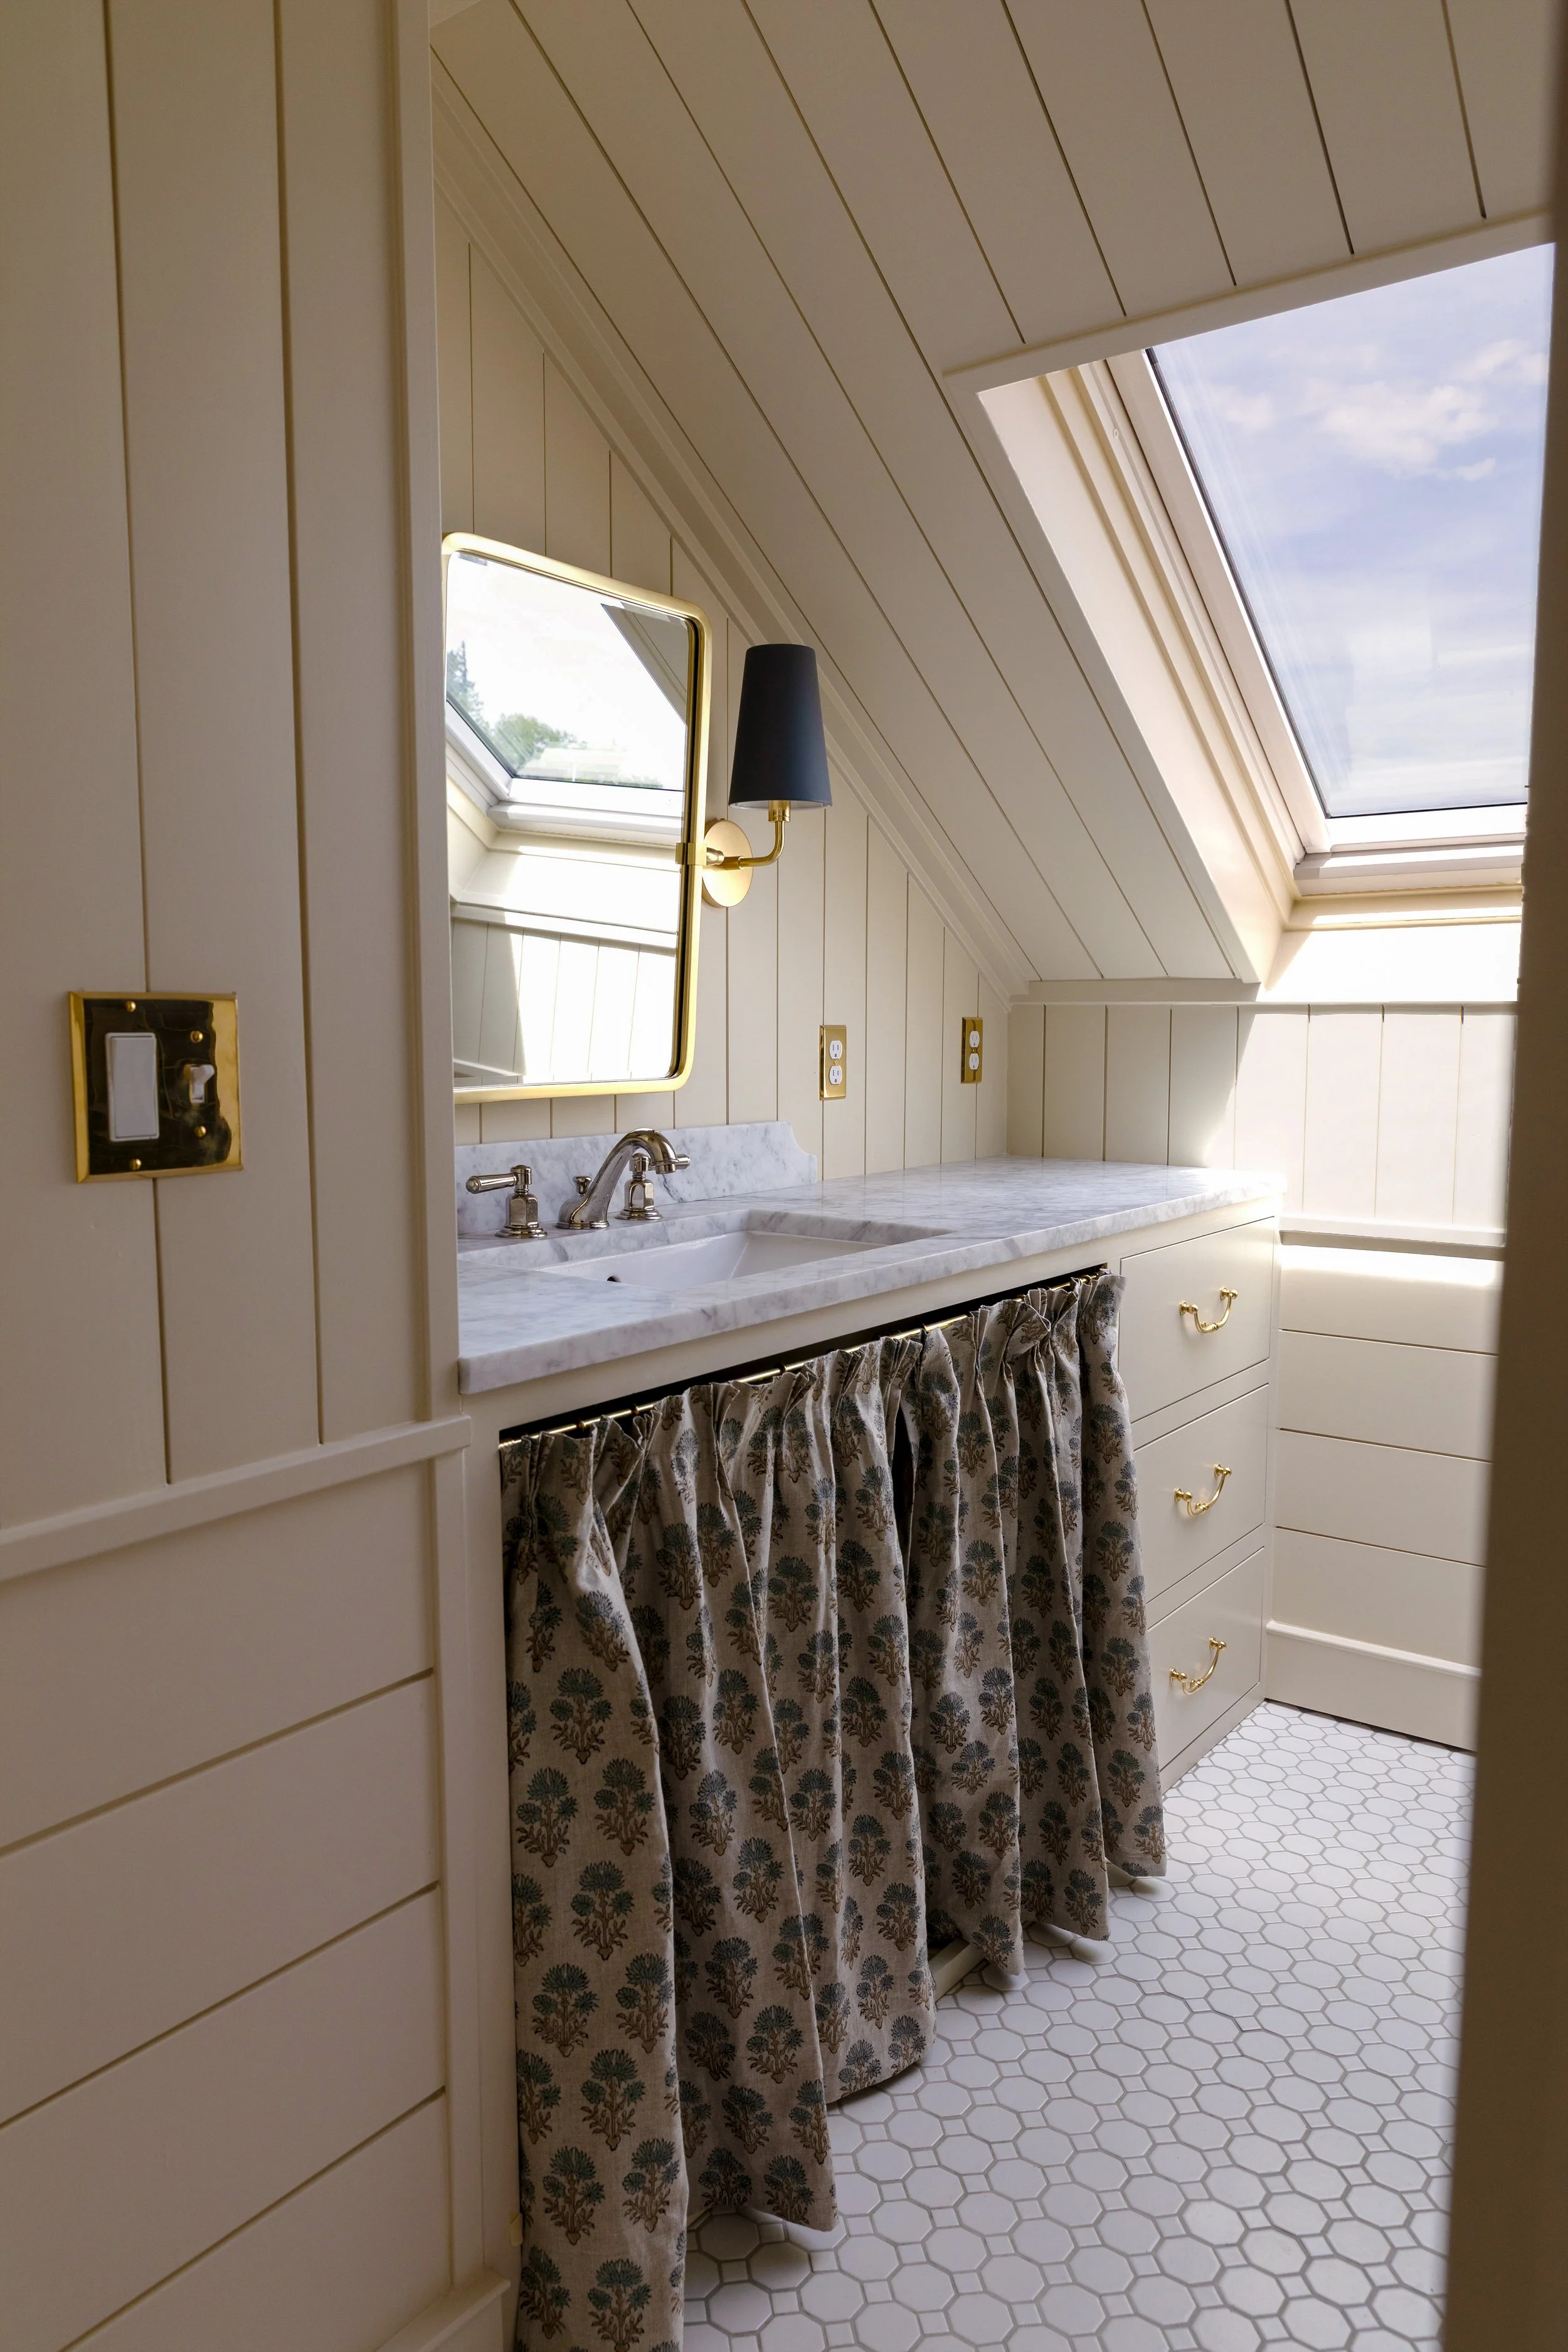
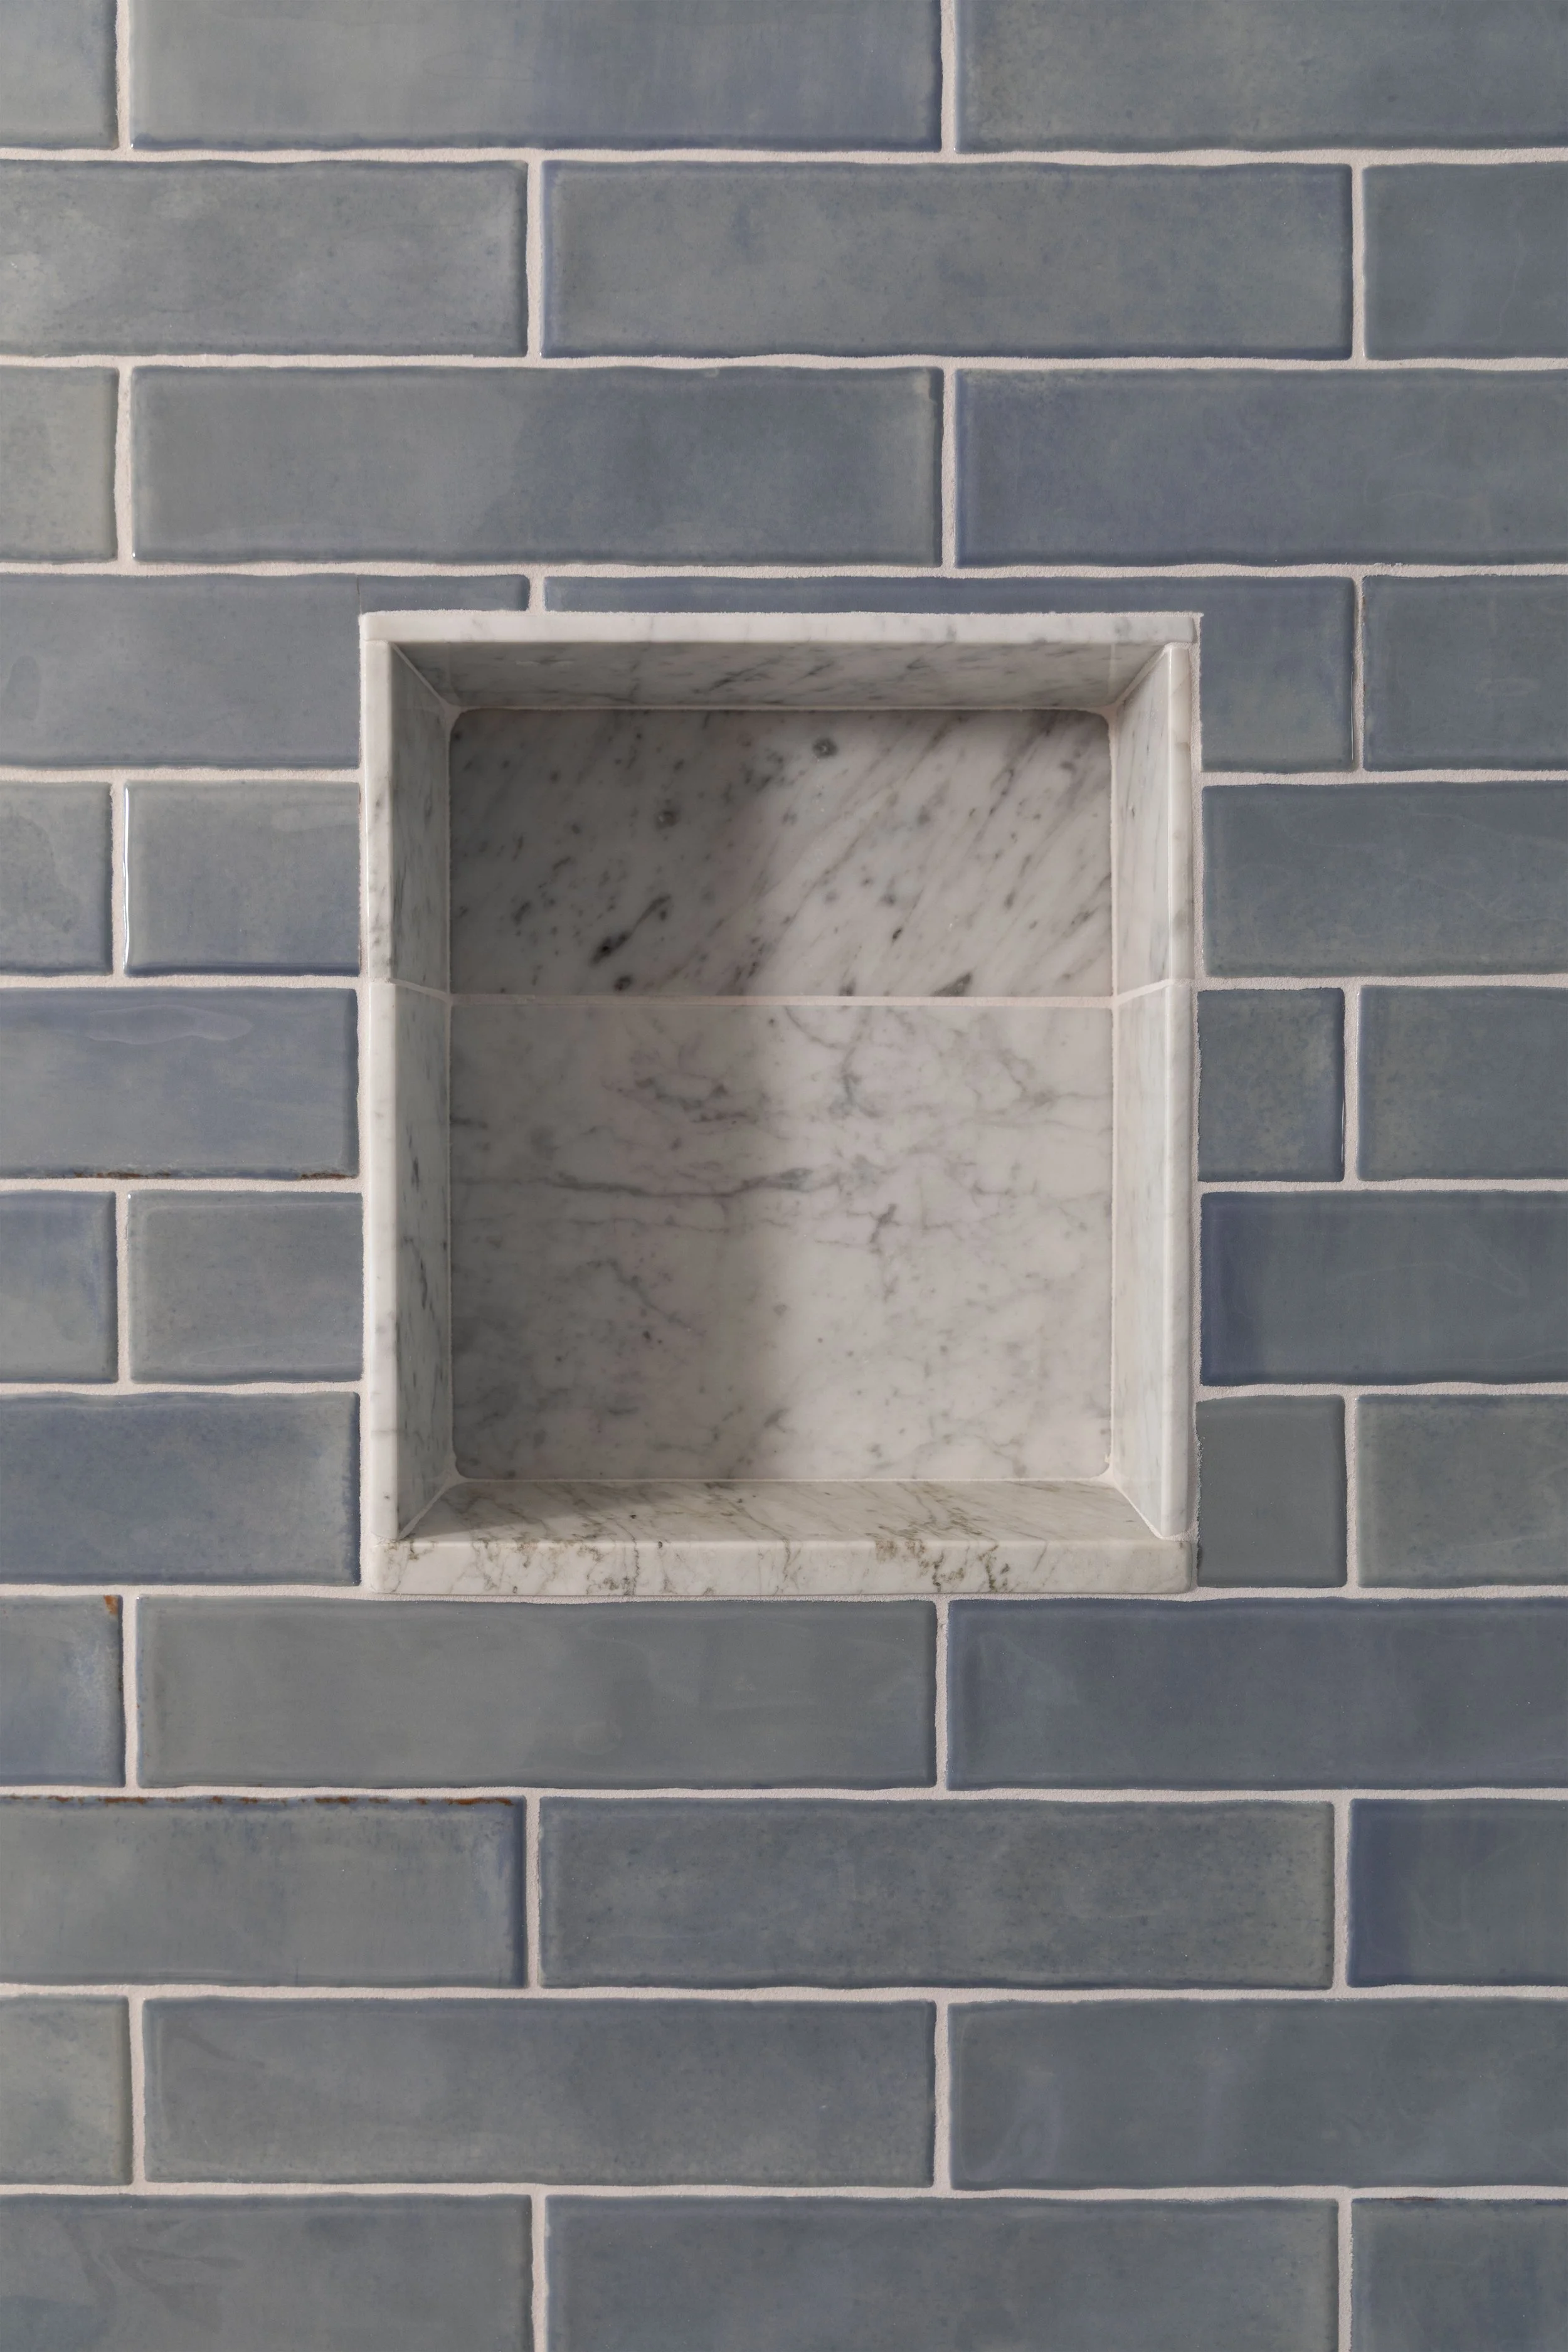
In the hall bathroom, we paired:
Frosty grout with the blue subway-tile walls
Smoke Gray grout with the white octagon-and-dot floor
The two rooms use different tile and have very different personalities, but SPECTRALOCK gave us the durability and low-maintenance finish we wanted in both.
We’ve been fans of epoxy grout for a while now, but the hall bathroom was our first time using SPECTRALOCK, and while that installation came with one frustrating lesson in color variation we liked it so much we tried it again here. And this ensuite bathroom installation has turned SPECTRALOCK into our new default!
Why We Chose the Iron color for the Ensuite
The Hill House ensuite has simple materials: glossy white subway tile on the walls, honed marble hex on the floor, and marble details at the niche, threshold, and base. And simple tile can put a surprising amount of pressure on the grout color. I wanted enough contrast to define the running-bond pattern on the walls and show off those little marble hexagons, but not so much contrast that the room became a graphic grid of dark lines. We also wanted one color that could work across both the white tile and the naturally varied marble.
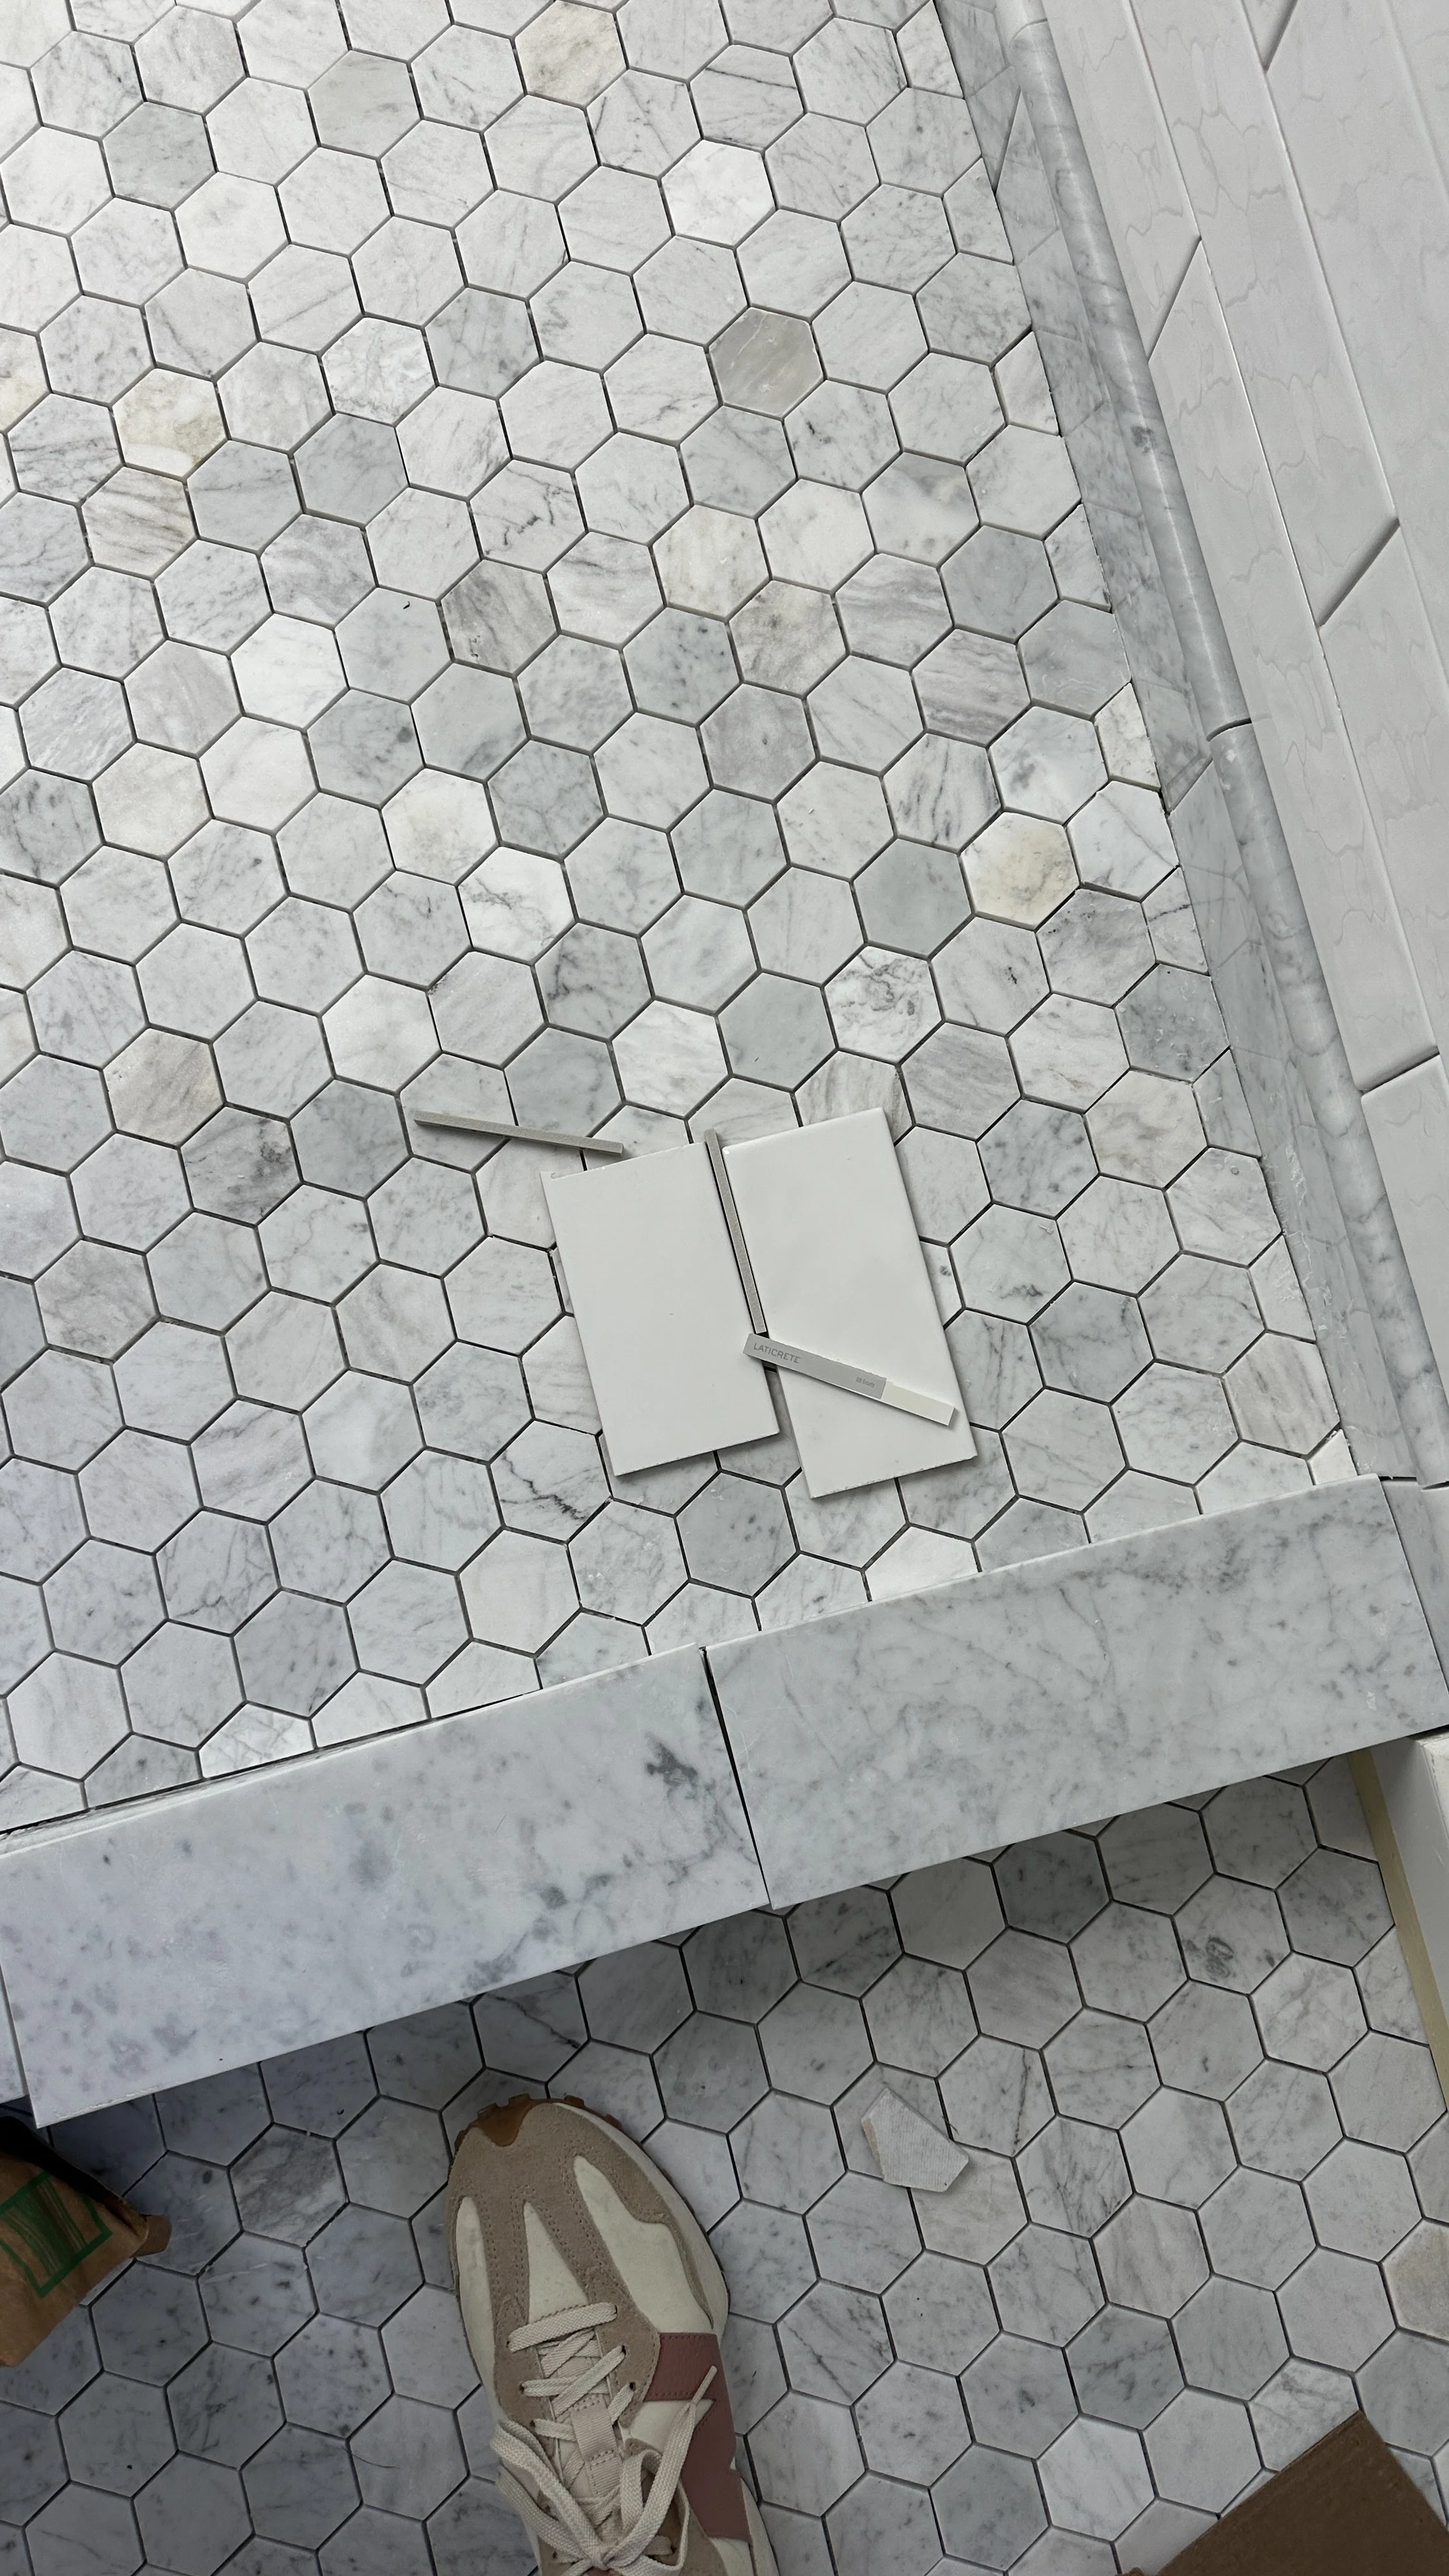
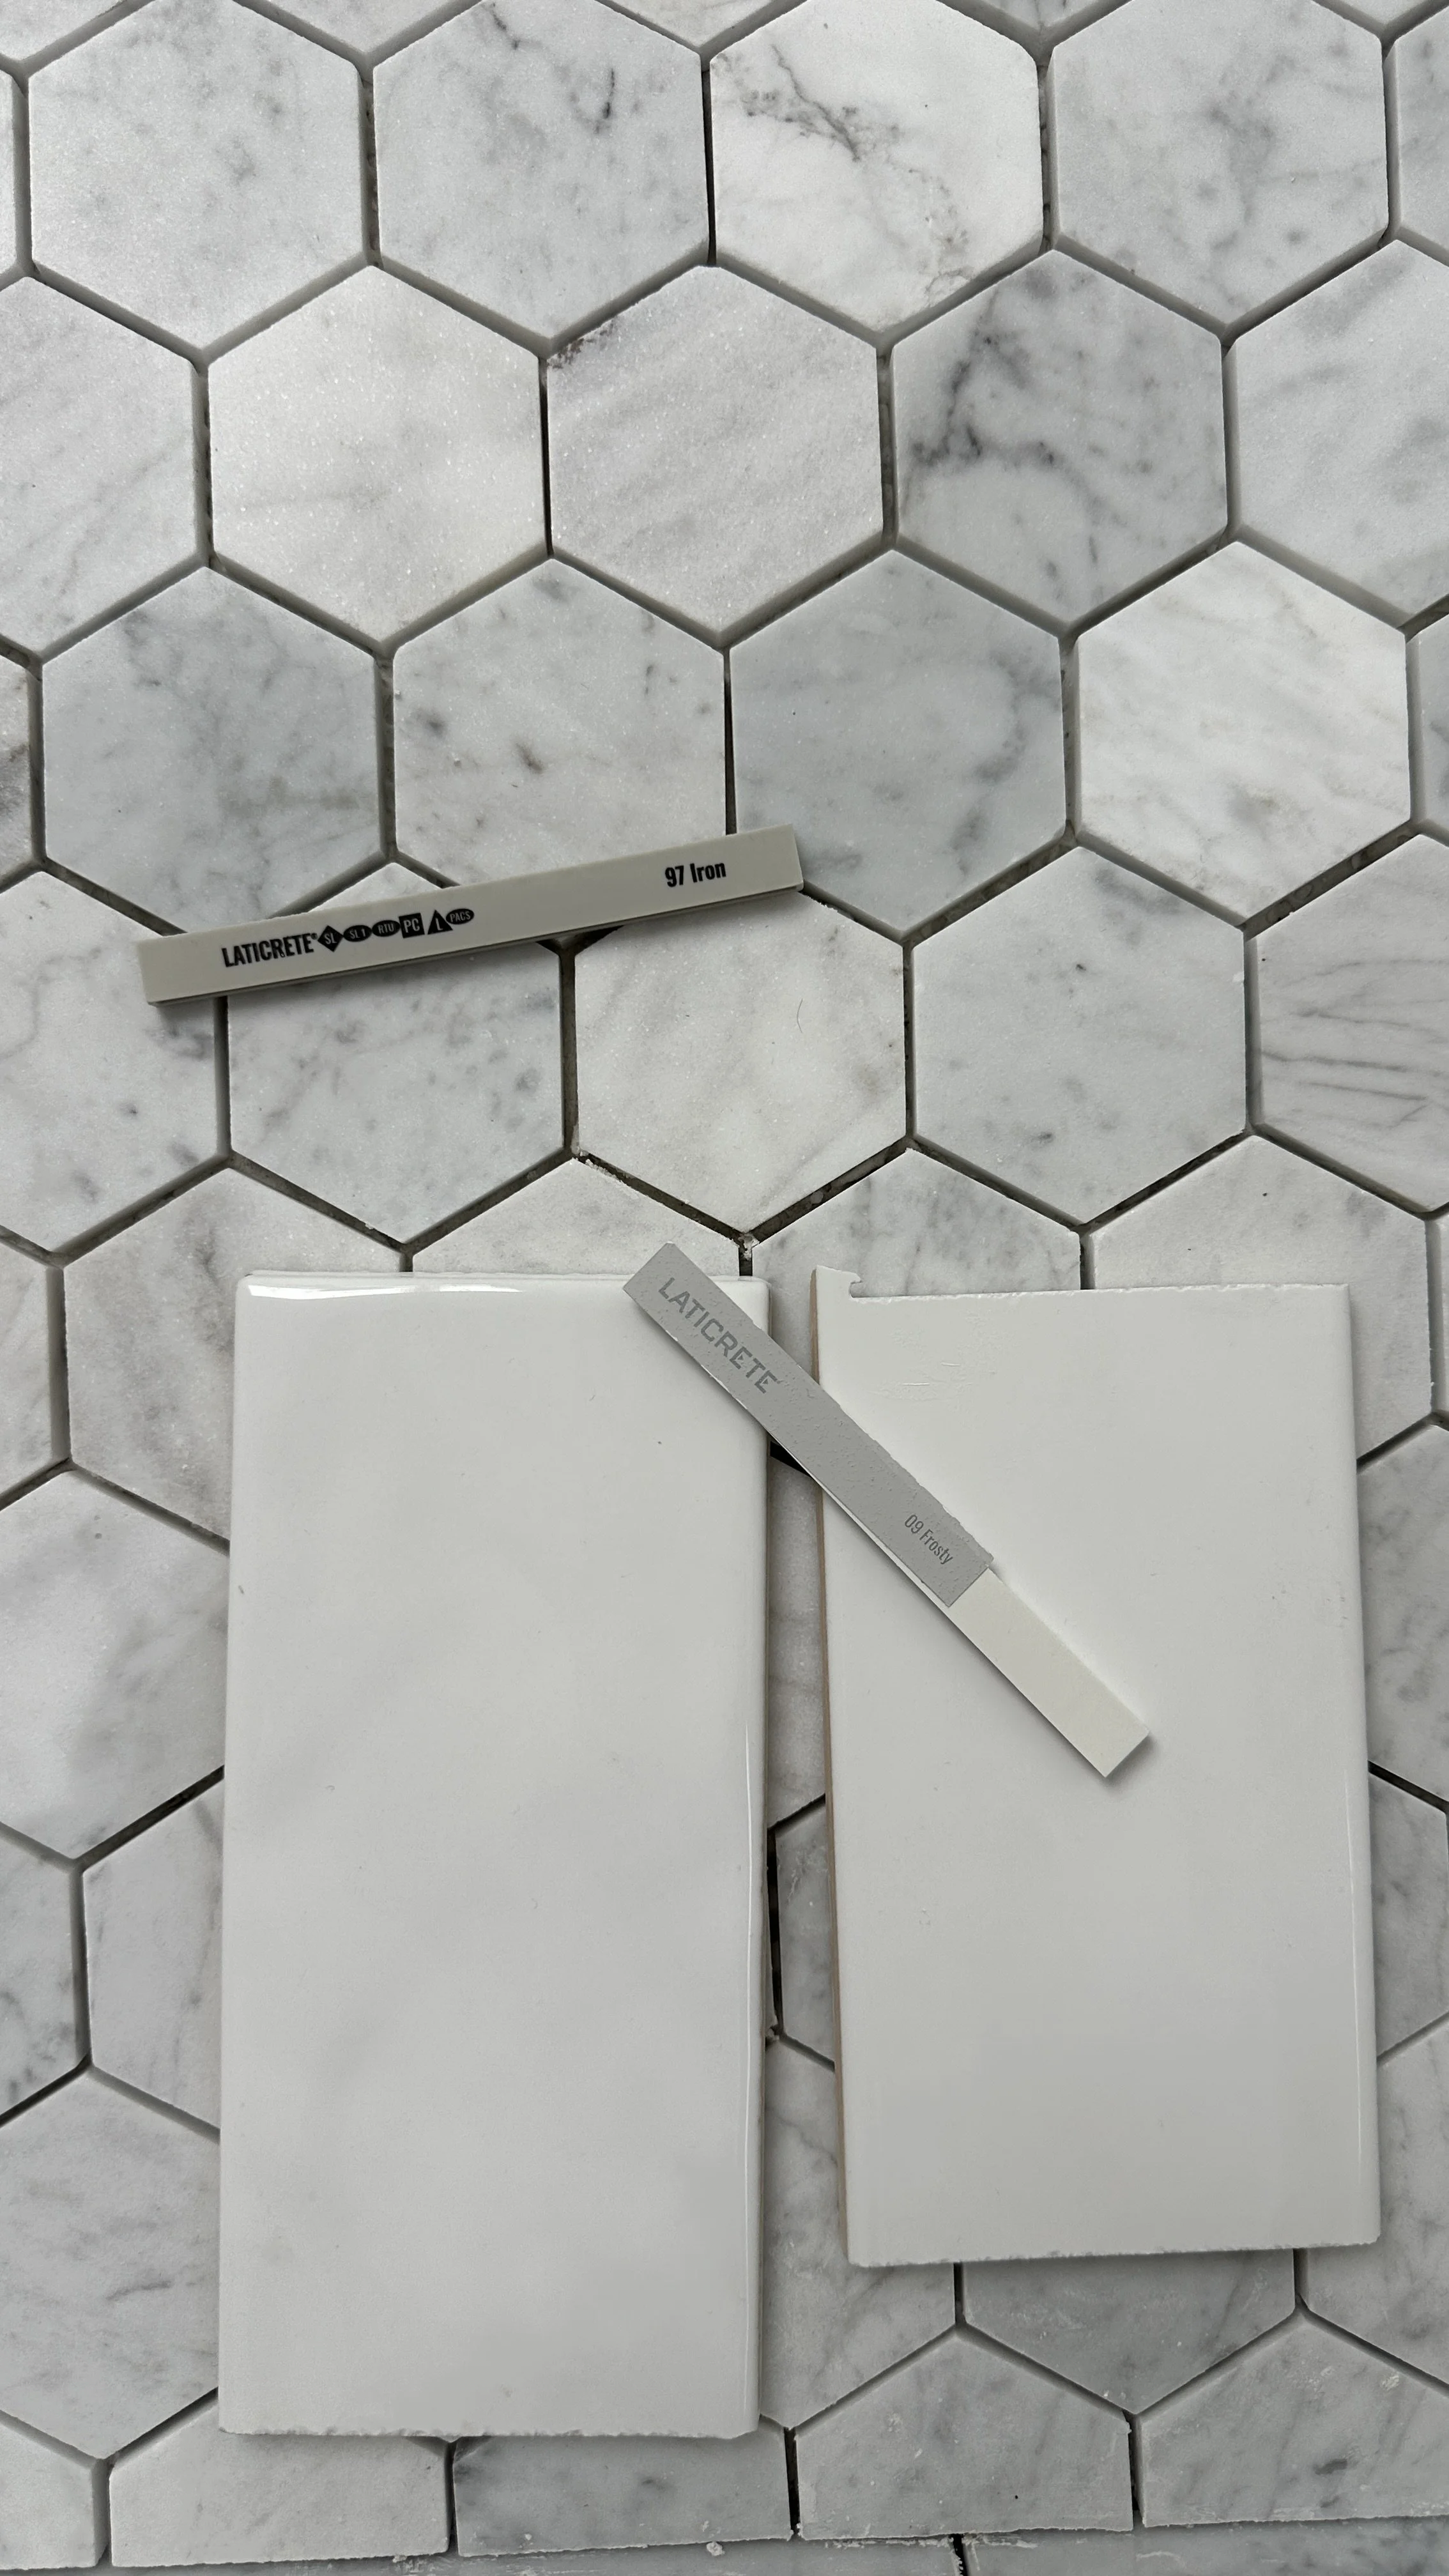
SPECTRALOCK Iron is a medium gray that gives the white tile definition without overpowering it, and it relates naturally to the gray variation in the marble. Using the same grout throughout also helped connect the floor, walls, and marble details rather than visually dividing the room into separate surfaces.
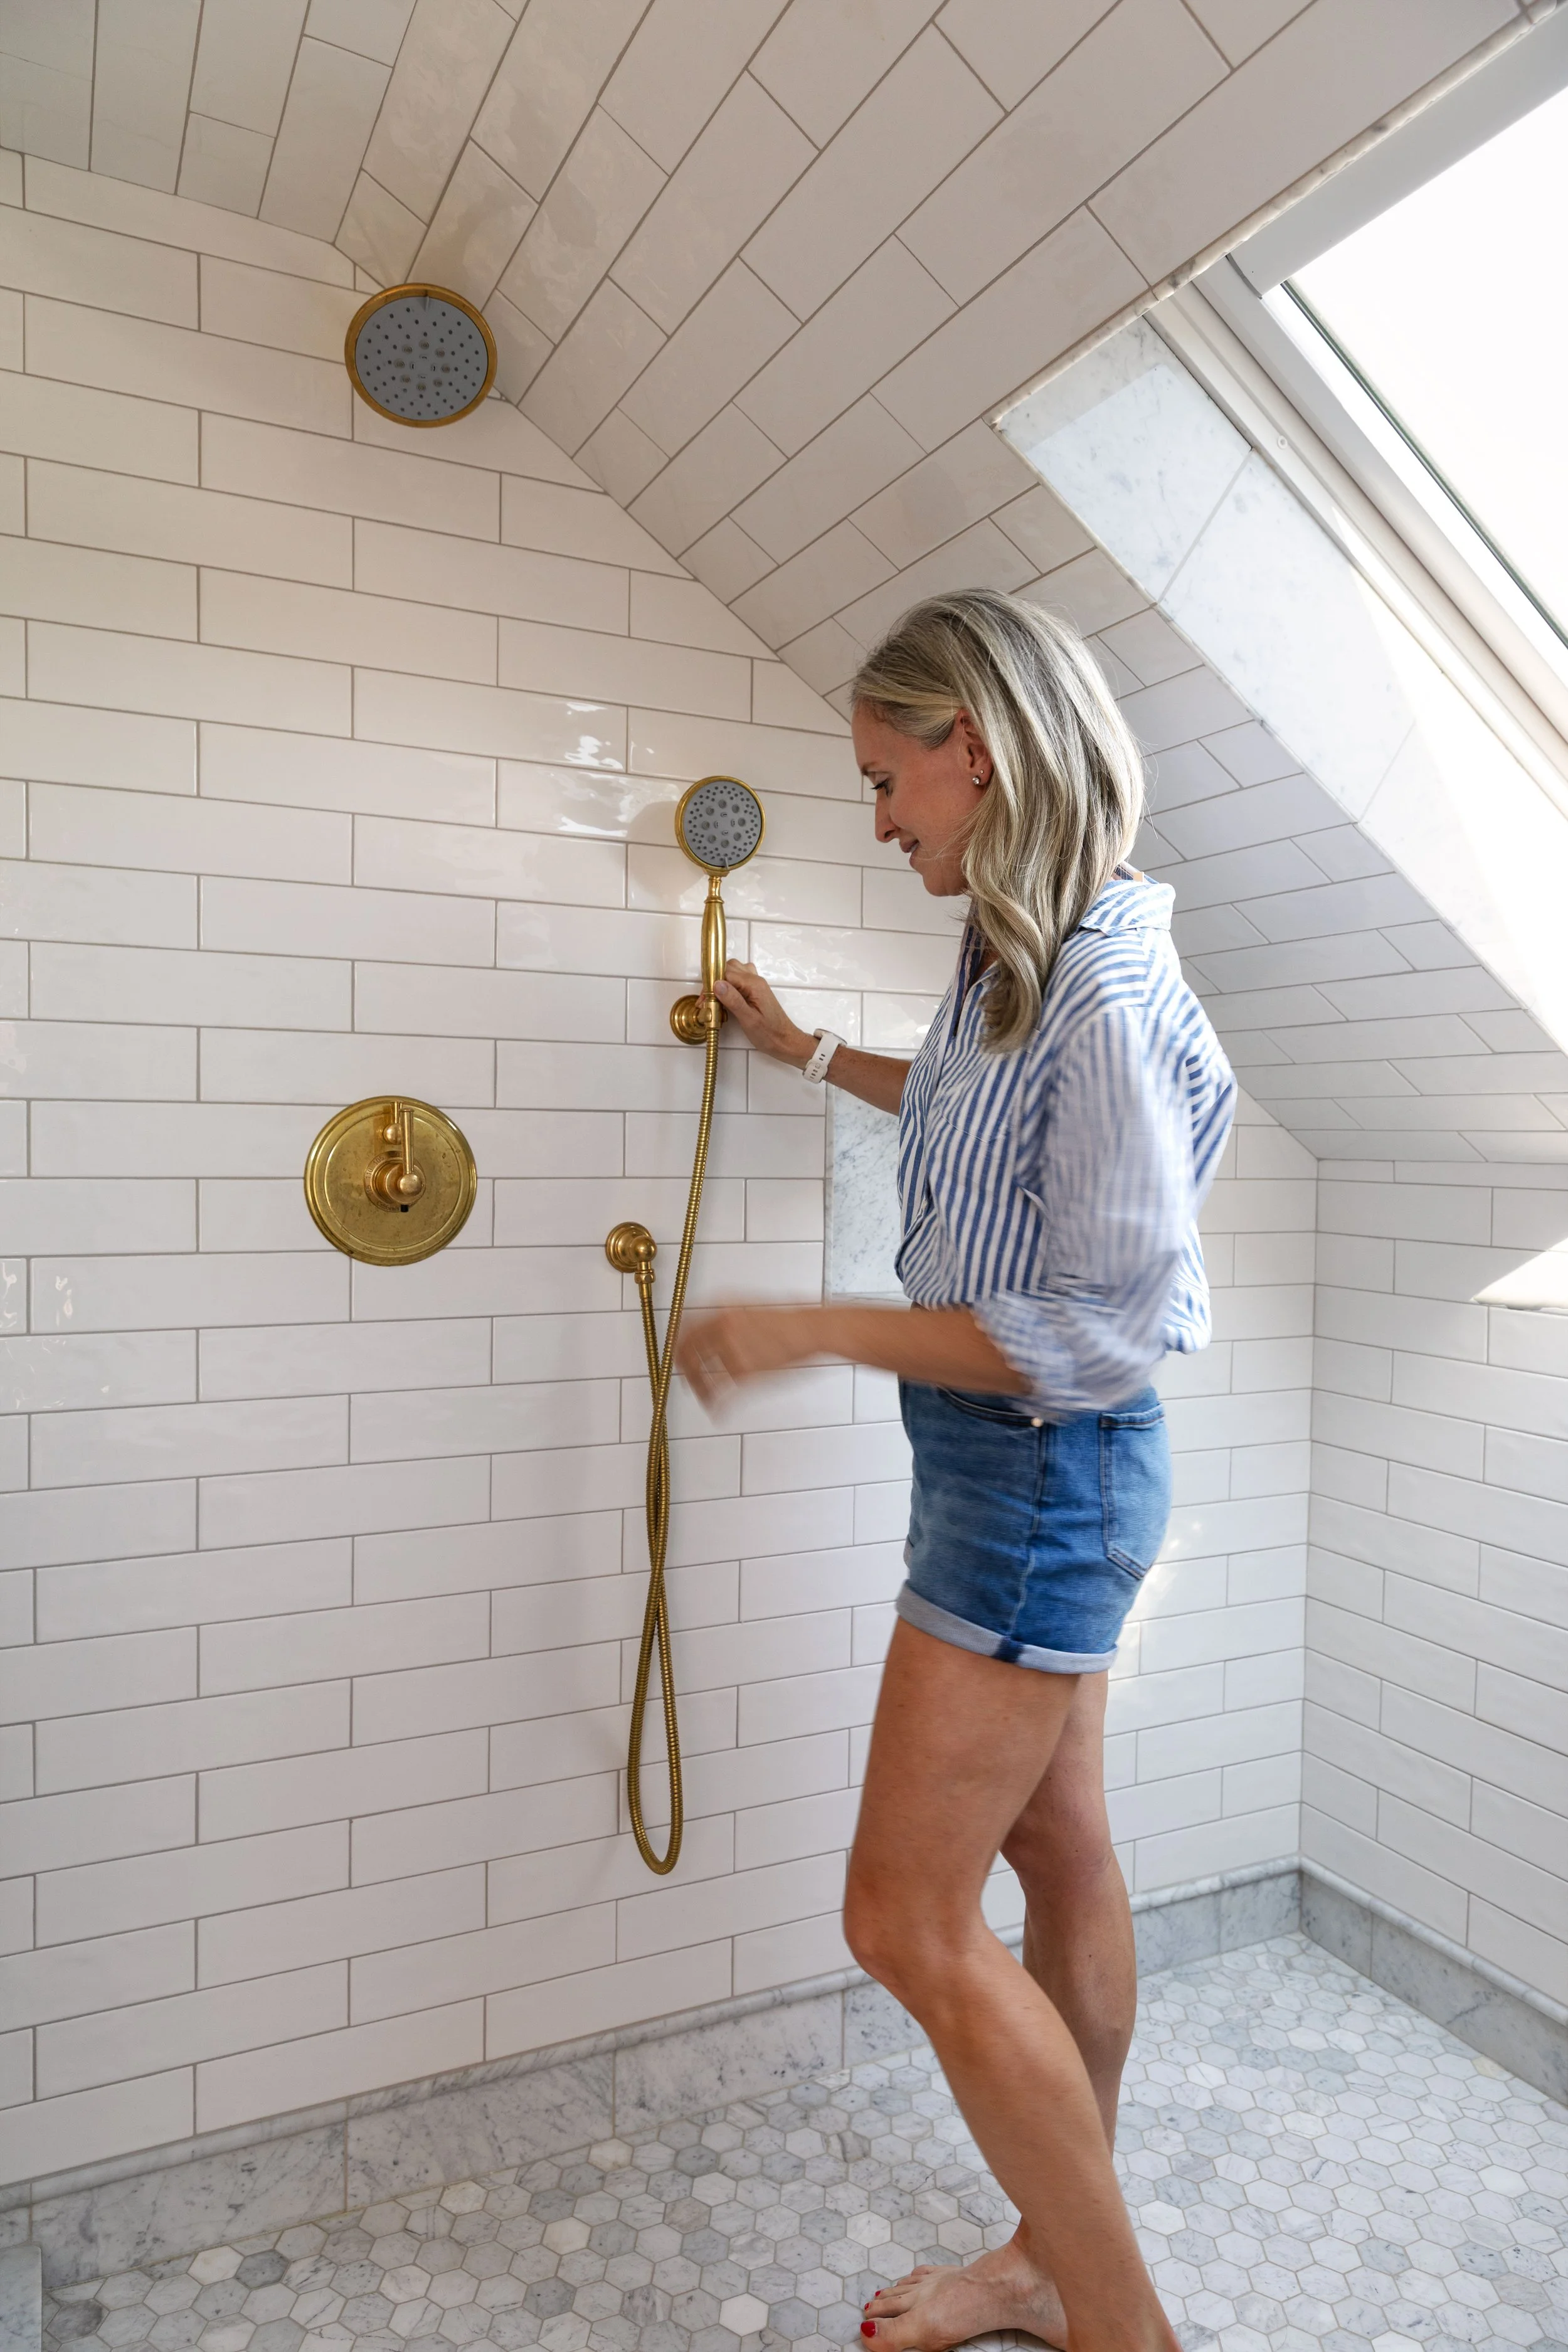
There is already plenty happening in this small bathroom: a sloped ceiling, subway tile, marble hex, pencil trim, a custom marble base, brass fixtures, and a clawfoot tub. One consistent grout color means one less thing competing for your eye.
Another color concern with grout is dirt. Because floors always get dirty. Iron is dark enough to disguise normal dirt and use, but not so dark that every dried water mark or bit of mineral buildup will stand out. Middle tones are always a win when it comes to grout IMO.
Installing SPECTRALOCK in the Hill House Ensuite
Note that we have lots of marble in here, so we did pre-seal the marble tiles and let the sealer dry before starting in on grout.
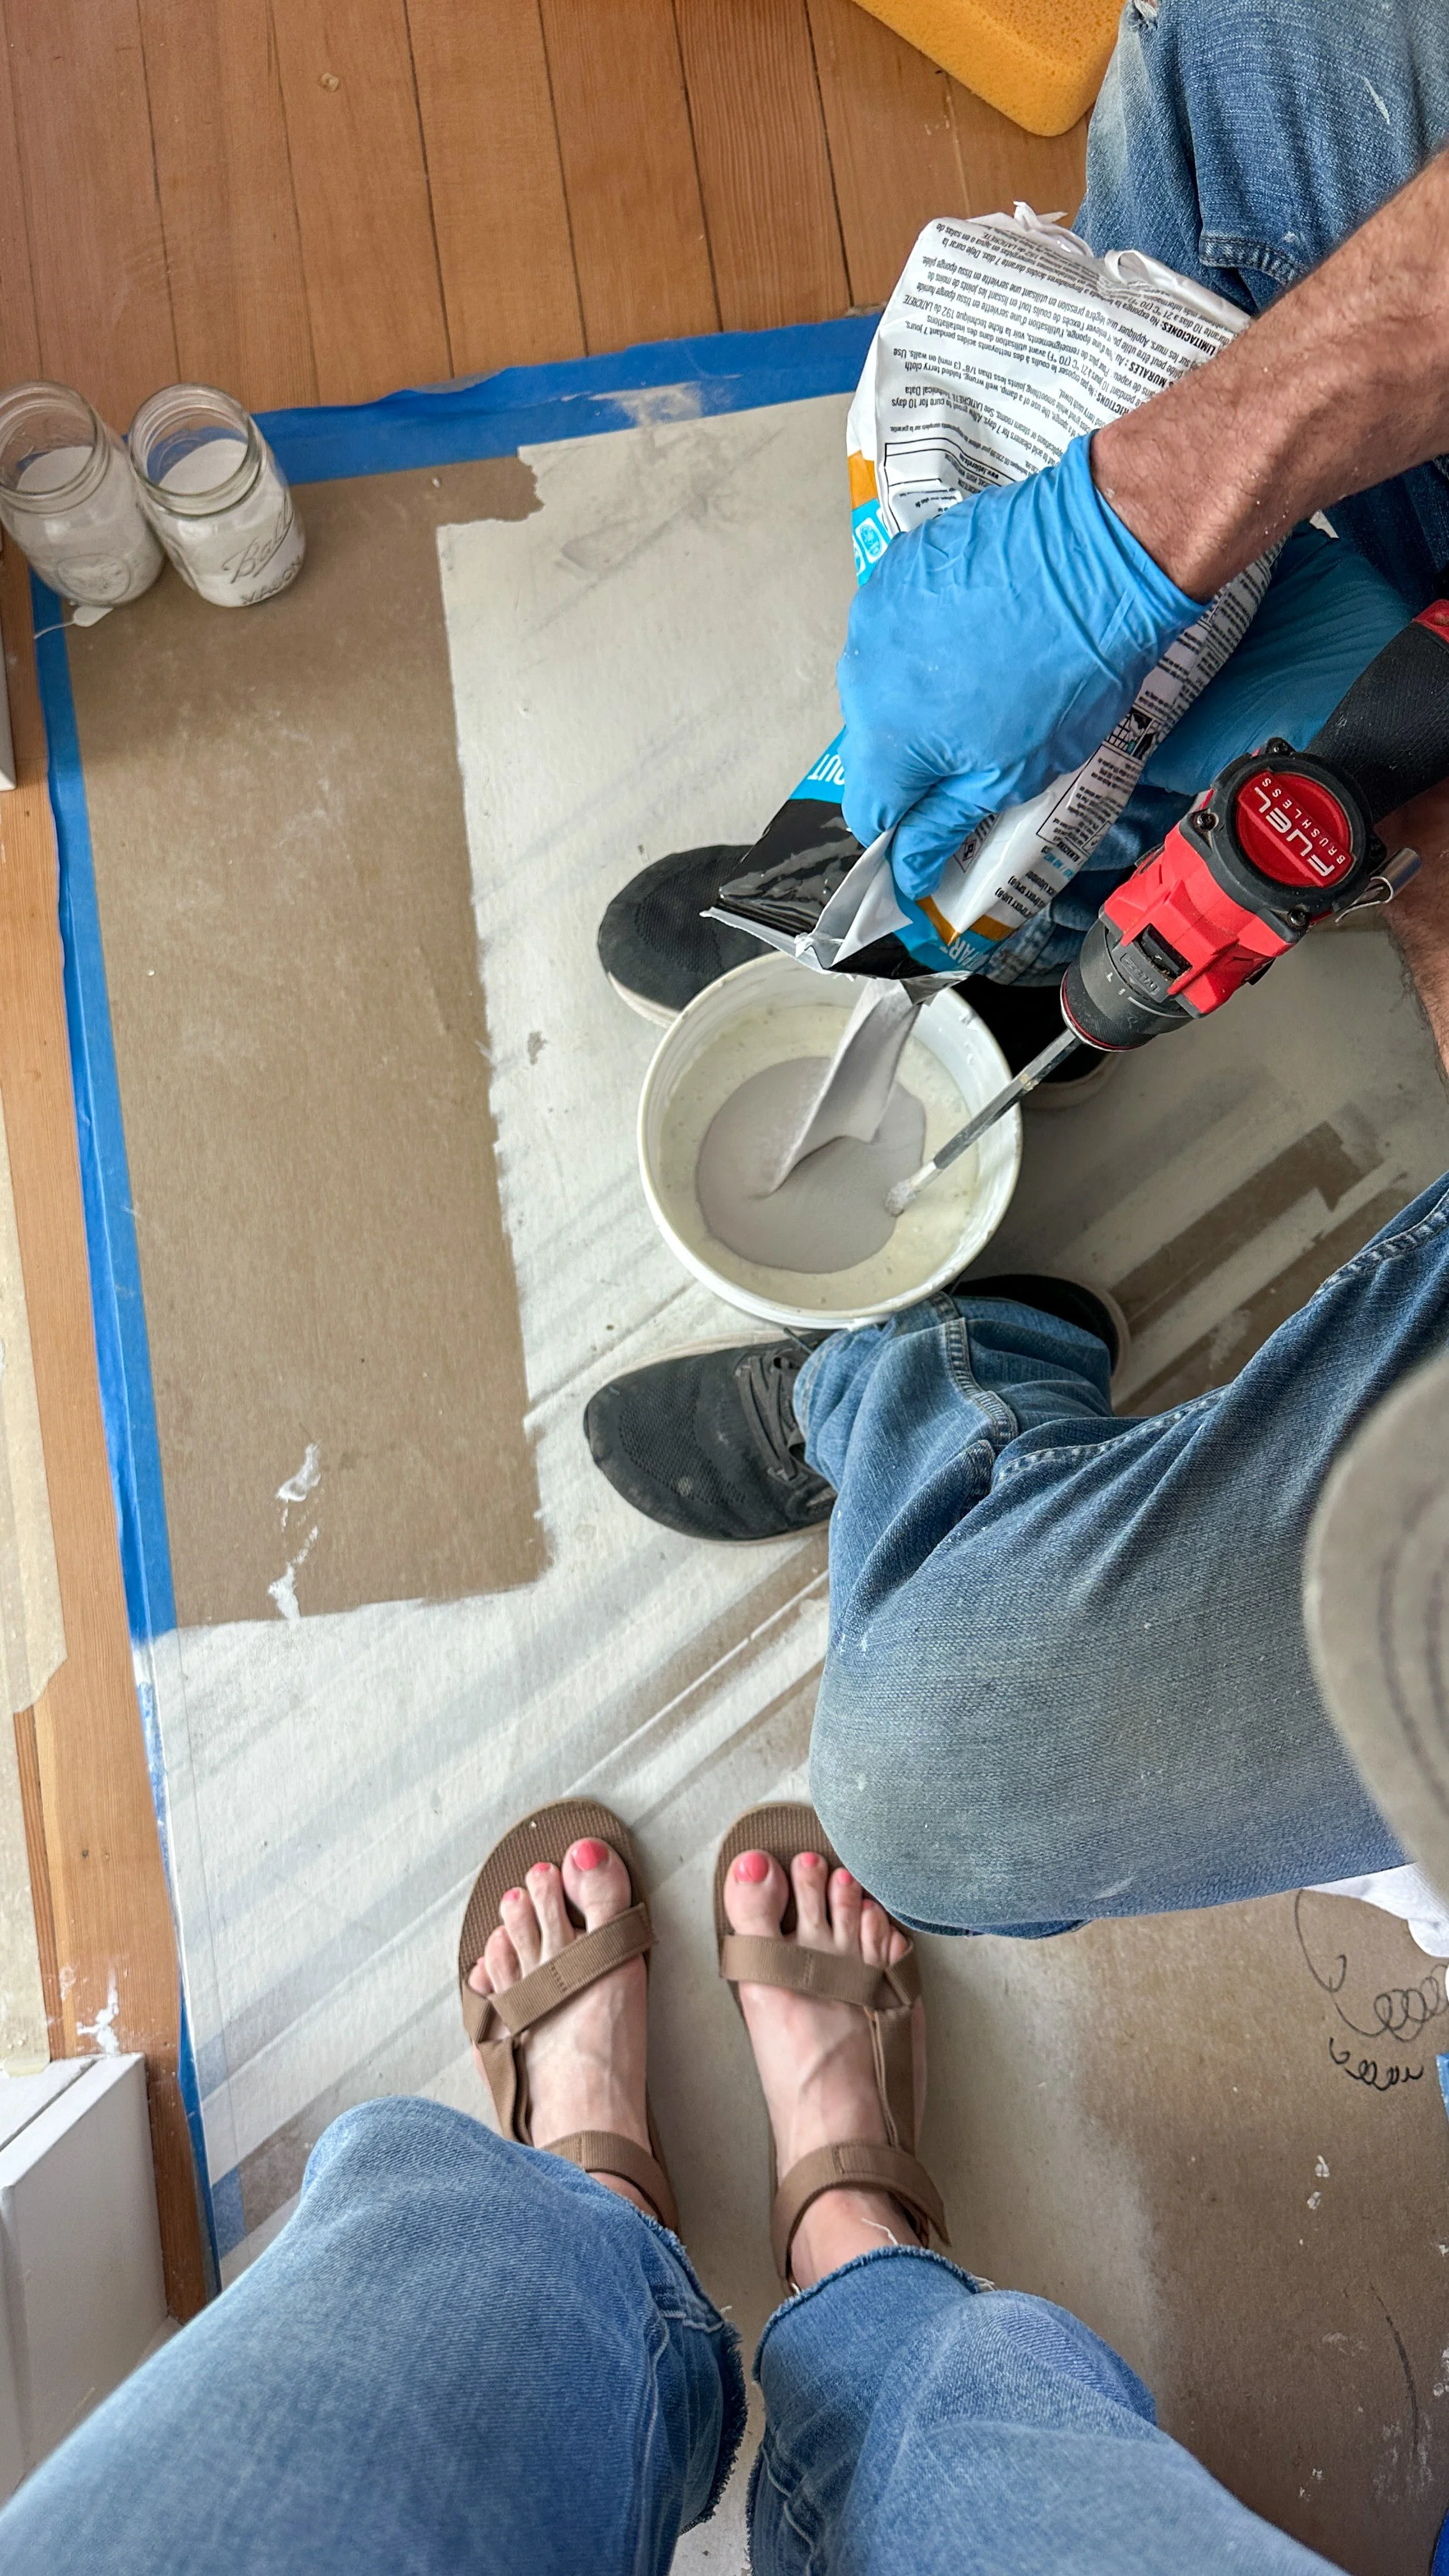
For the SPECTRALOCK install, Garrett mixed half units at a time for the walls and full units for the floor. The smaller wall batches gave us enough time to pack the vertical joints carefully and complete the required washes without racing through too large an area. Note that I said ‘us’ - epoxy grout is best done with two people!
Epoxy grout isn’t necessarily difficult to install but it does require a tight schedule. Once the components are mixed, the working time begins. The waiting period before washing matters. The initial wash matters. The final wash matters. You can’t wander off for a long lunch and pick it back up whenever you get back. It requires carefully following the instructions, serious time management, and using the proper epoxy-grout float and cleanup sponges. Highly recommend watching a YouTube video or two before starting to flatten the learning curve!
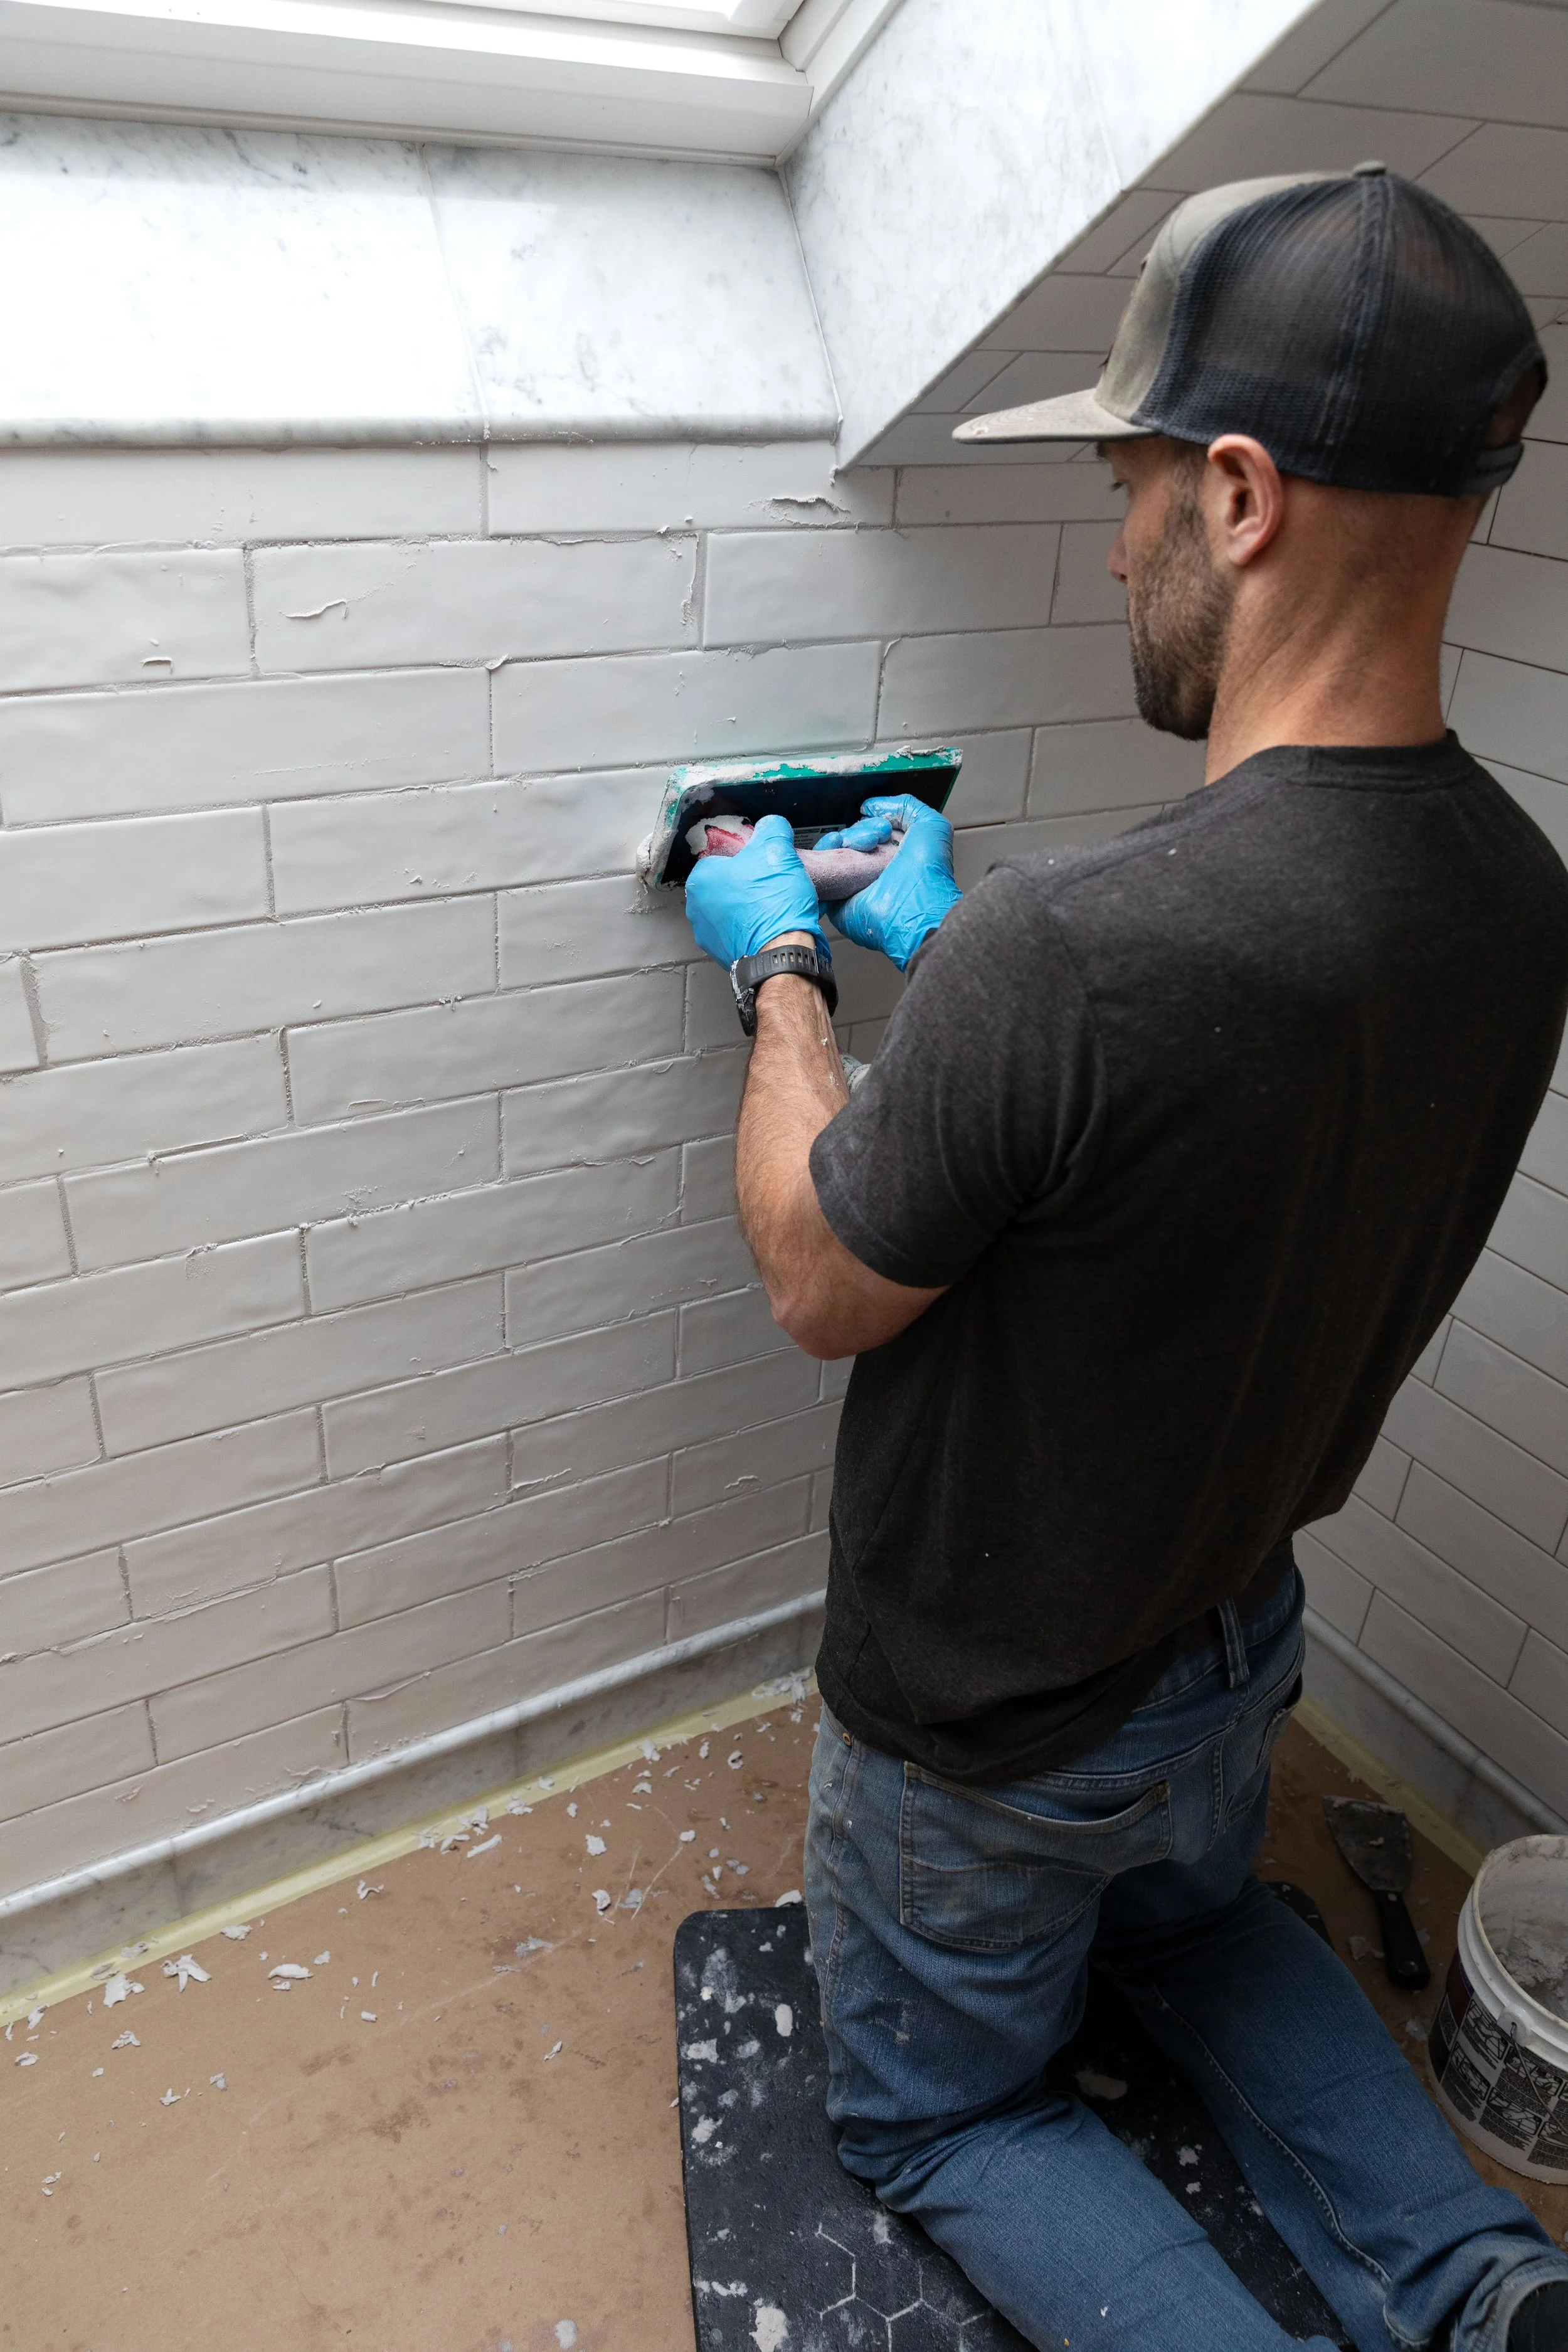
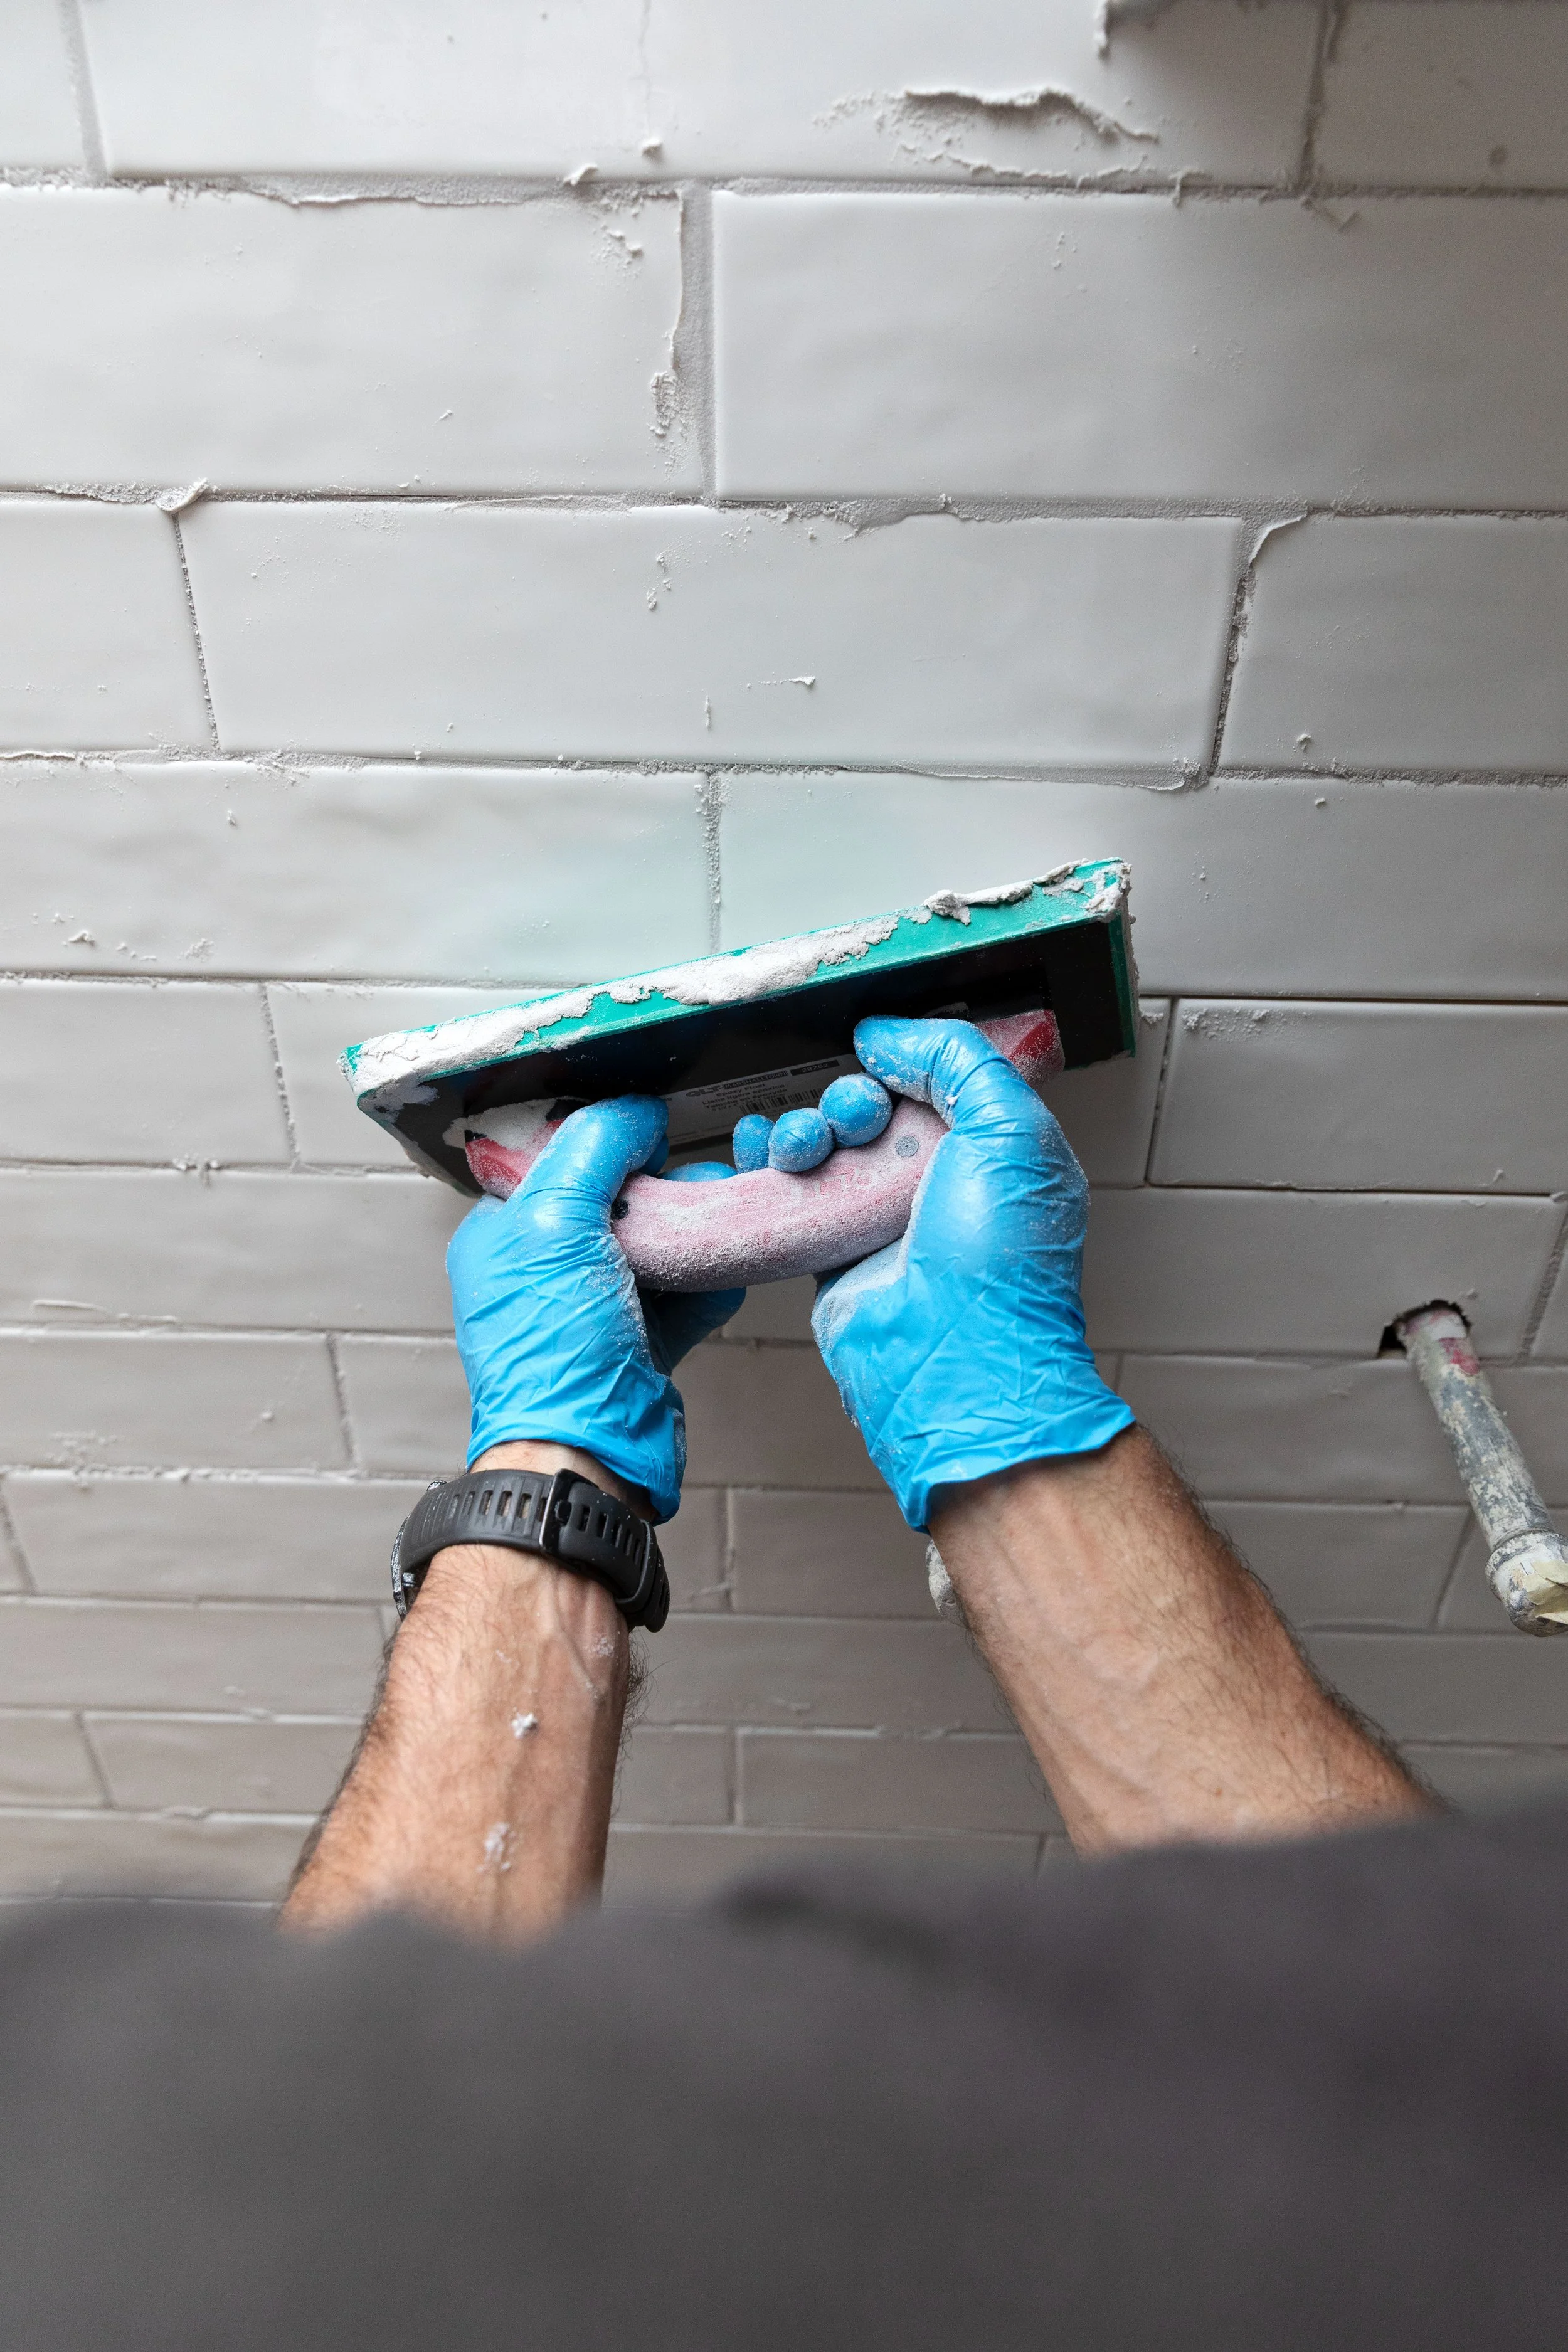
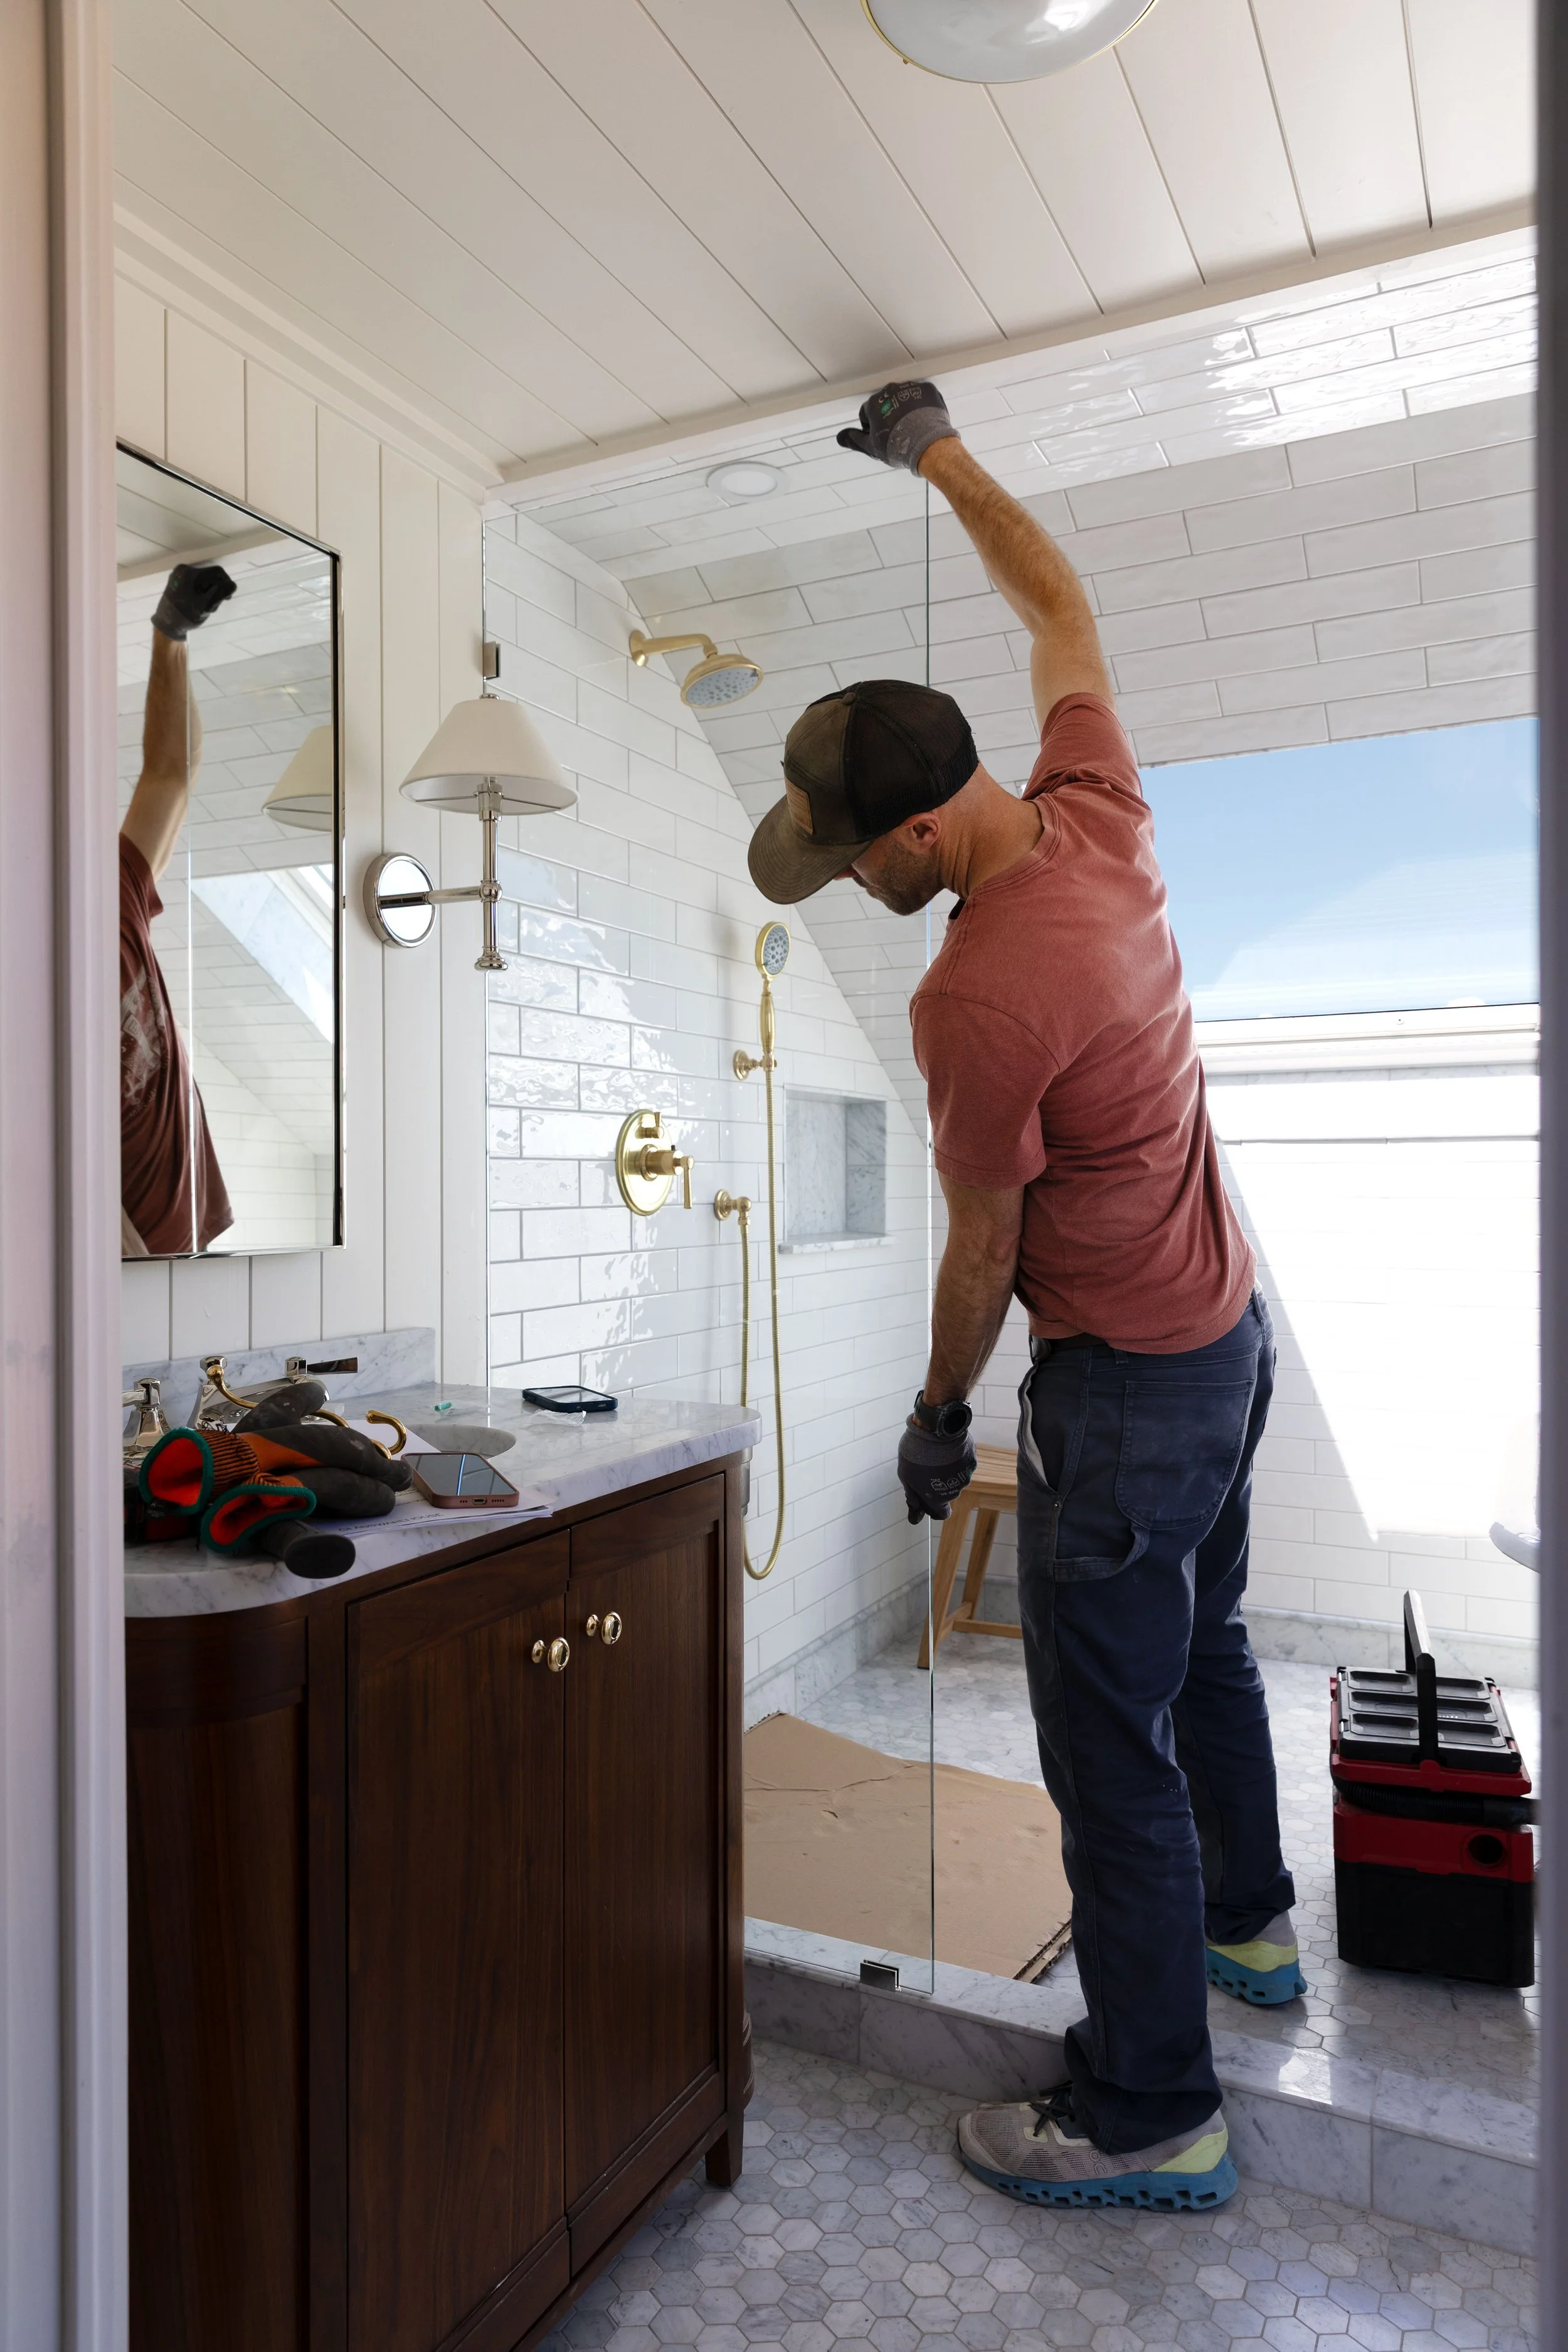
I was a little too busy assisting with the grout to get many pictures, but trust me when I say that our grout packed nicely into both the wall and floor joints, stayed in the vertical joints, and cleaned off the glossy tile and pre-sealed marble without leaving lingering haze. The finished joints look full, even, and consistent throughout the room. We’re really happy with how it turned out!
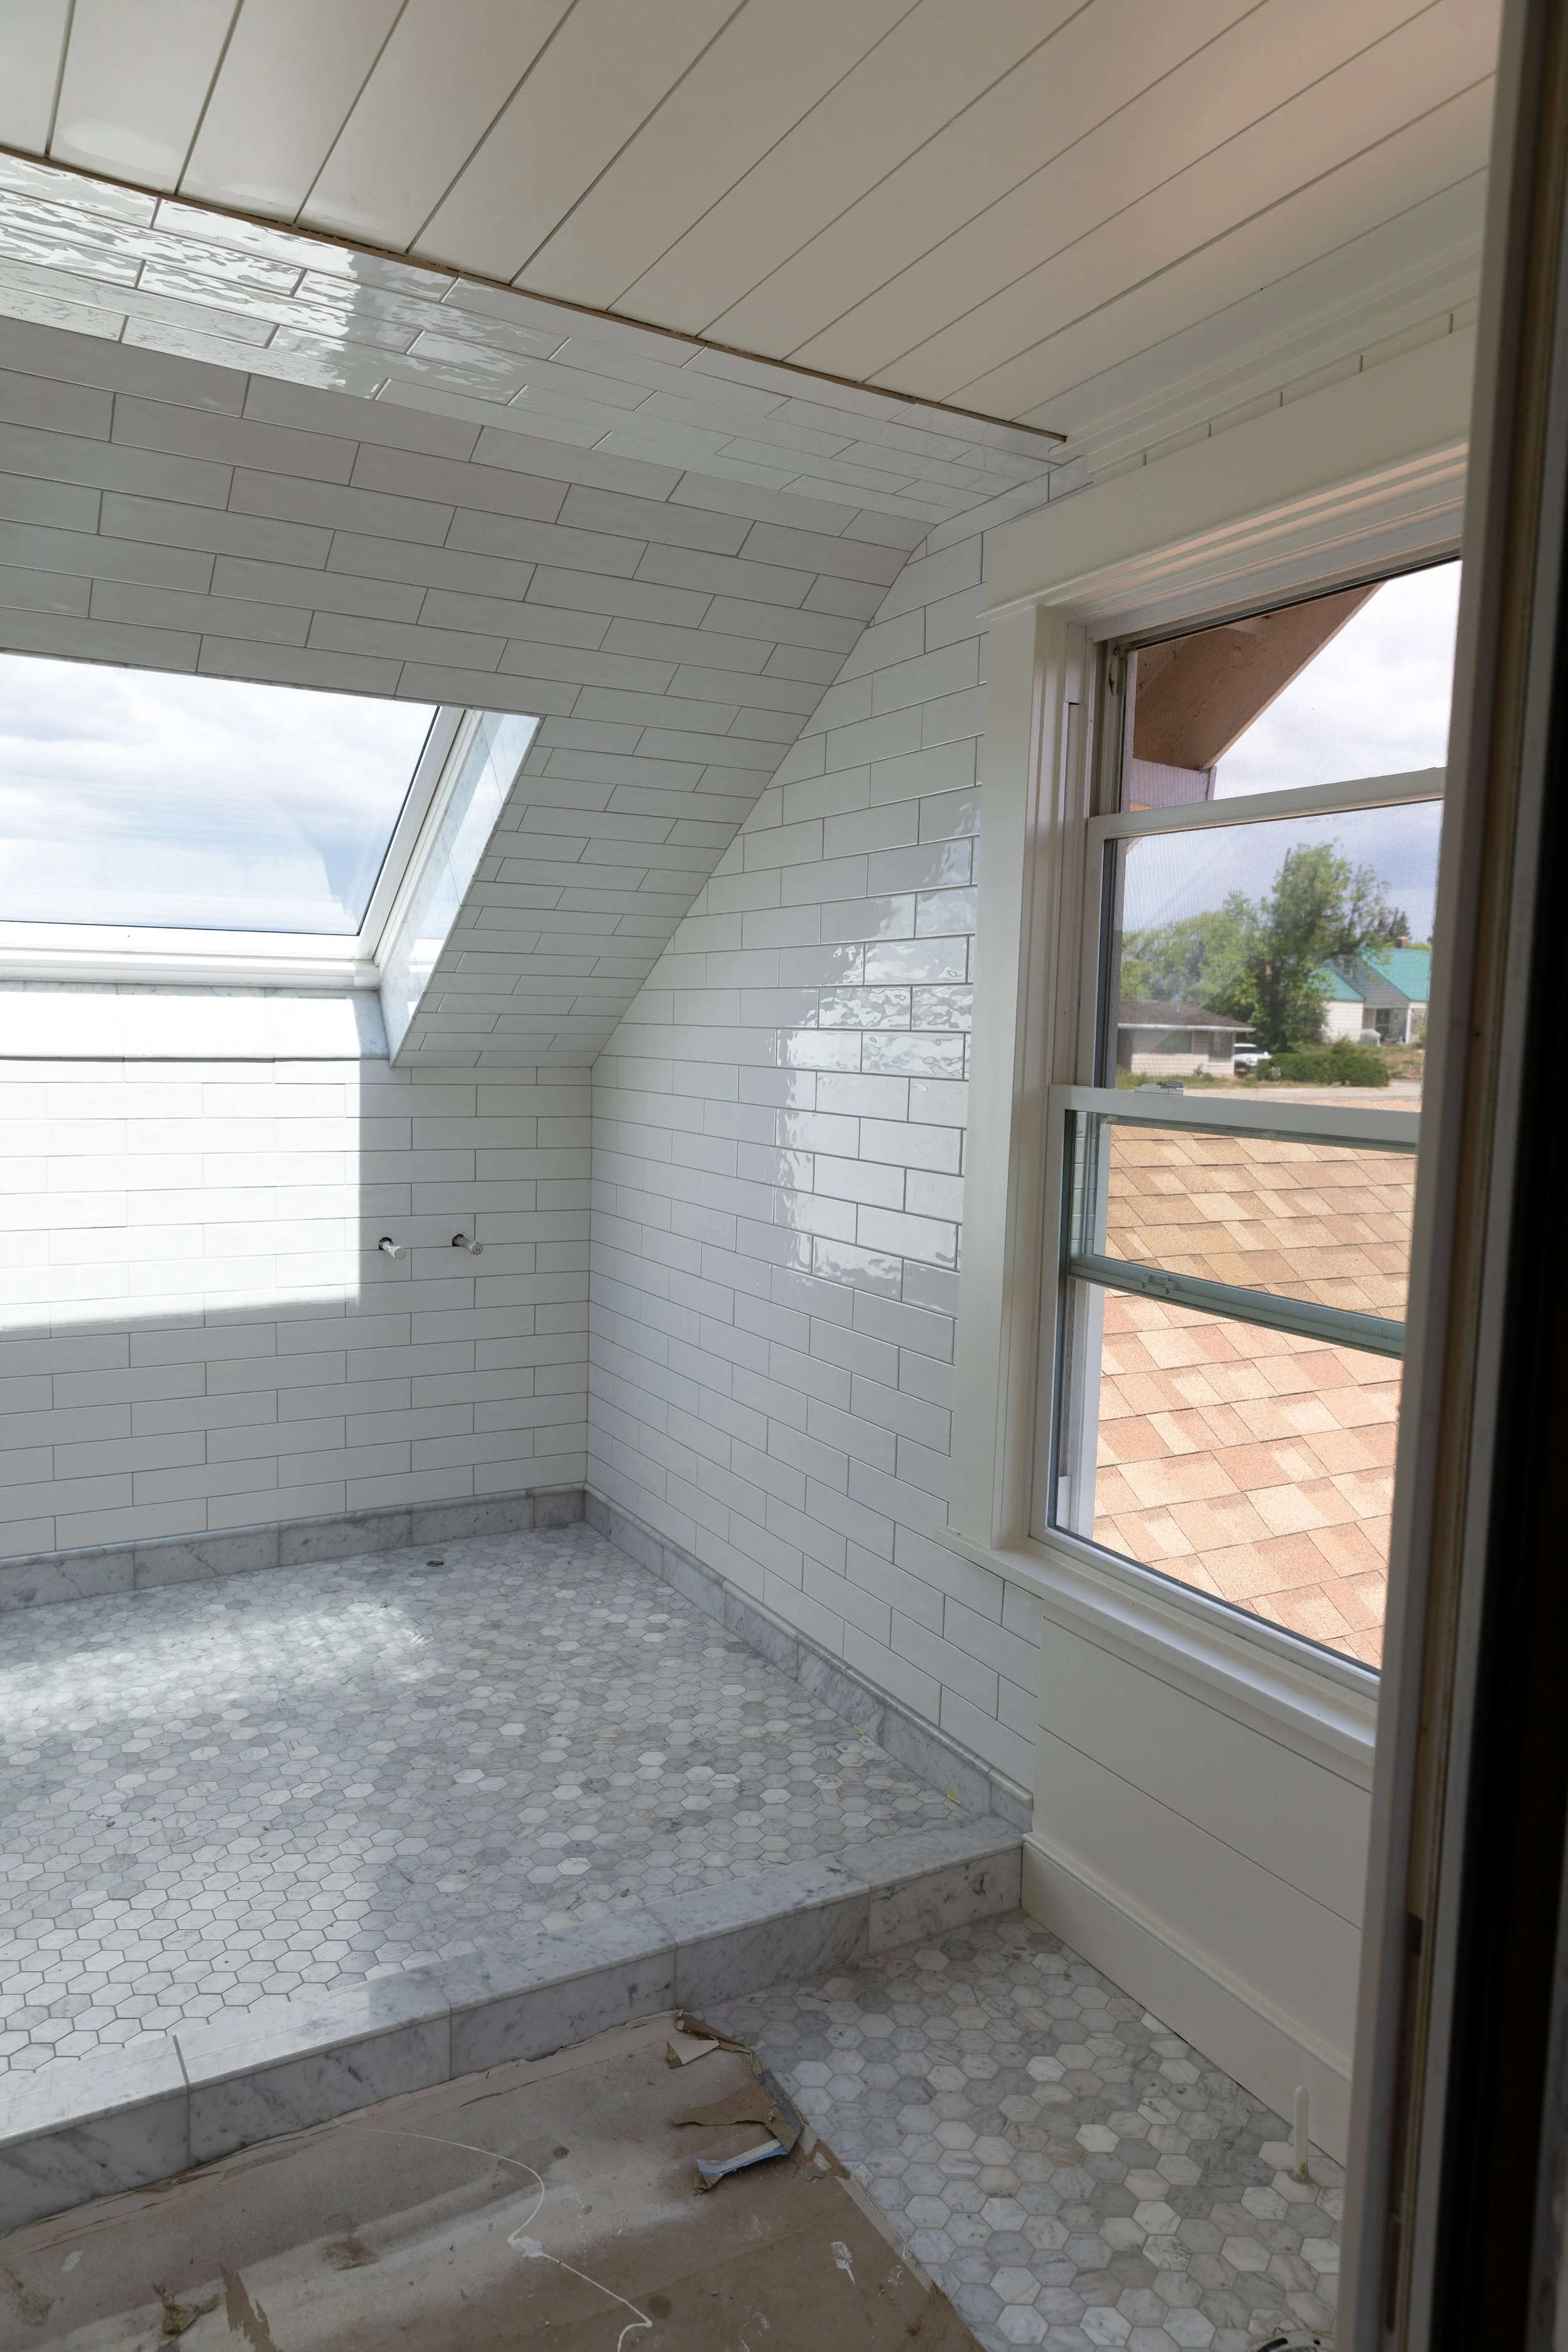
But one reason we were especially careful this time goes back to the hall bathroom…
The Important Lesson We Learned in the Hall Bathroom
In the Hill House hall bathroom, we ran into an unexpected color consistency problem! We used SPECTRALOCK in Frosty on the blue subway-tile walls and Smoke Gray on the marble floor. We came up approximately two square feet short while grouting the floor and bought another unit of the same product and color from the same supplier. We even had the same batch number. But second area cured noticeably darker!
When we compared the remaining dry Part C color powder from the two units (SPECTRALOCK allows you to hold back a portion of the dry powder in order to make install easier), we could see that the powders were visibly different before they were ever mixed.
That experience didn’t turn us off SPECTRALOCK - the rest of the grout installed well and has performed beautifully - but it permanently changed how we approach multiple units of colored grout.
Before starting the ensuite, we opened all of the Iron powder, compared the color, and made sure everything looked consistent. We also planned our quantities and batches before beginning rather than relying on a coverage estimate to land perfectly.
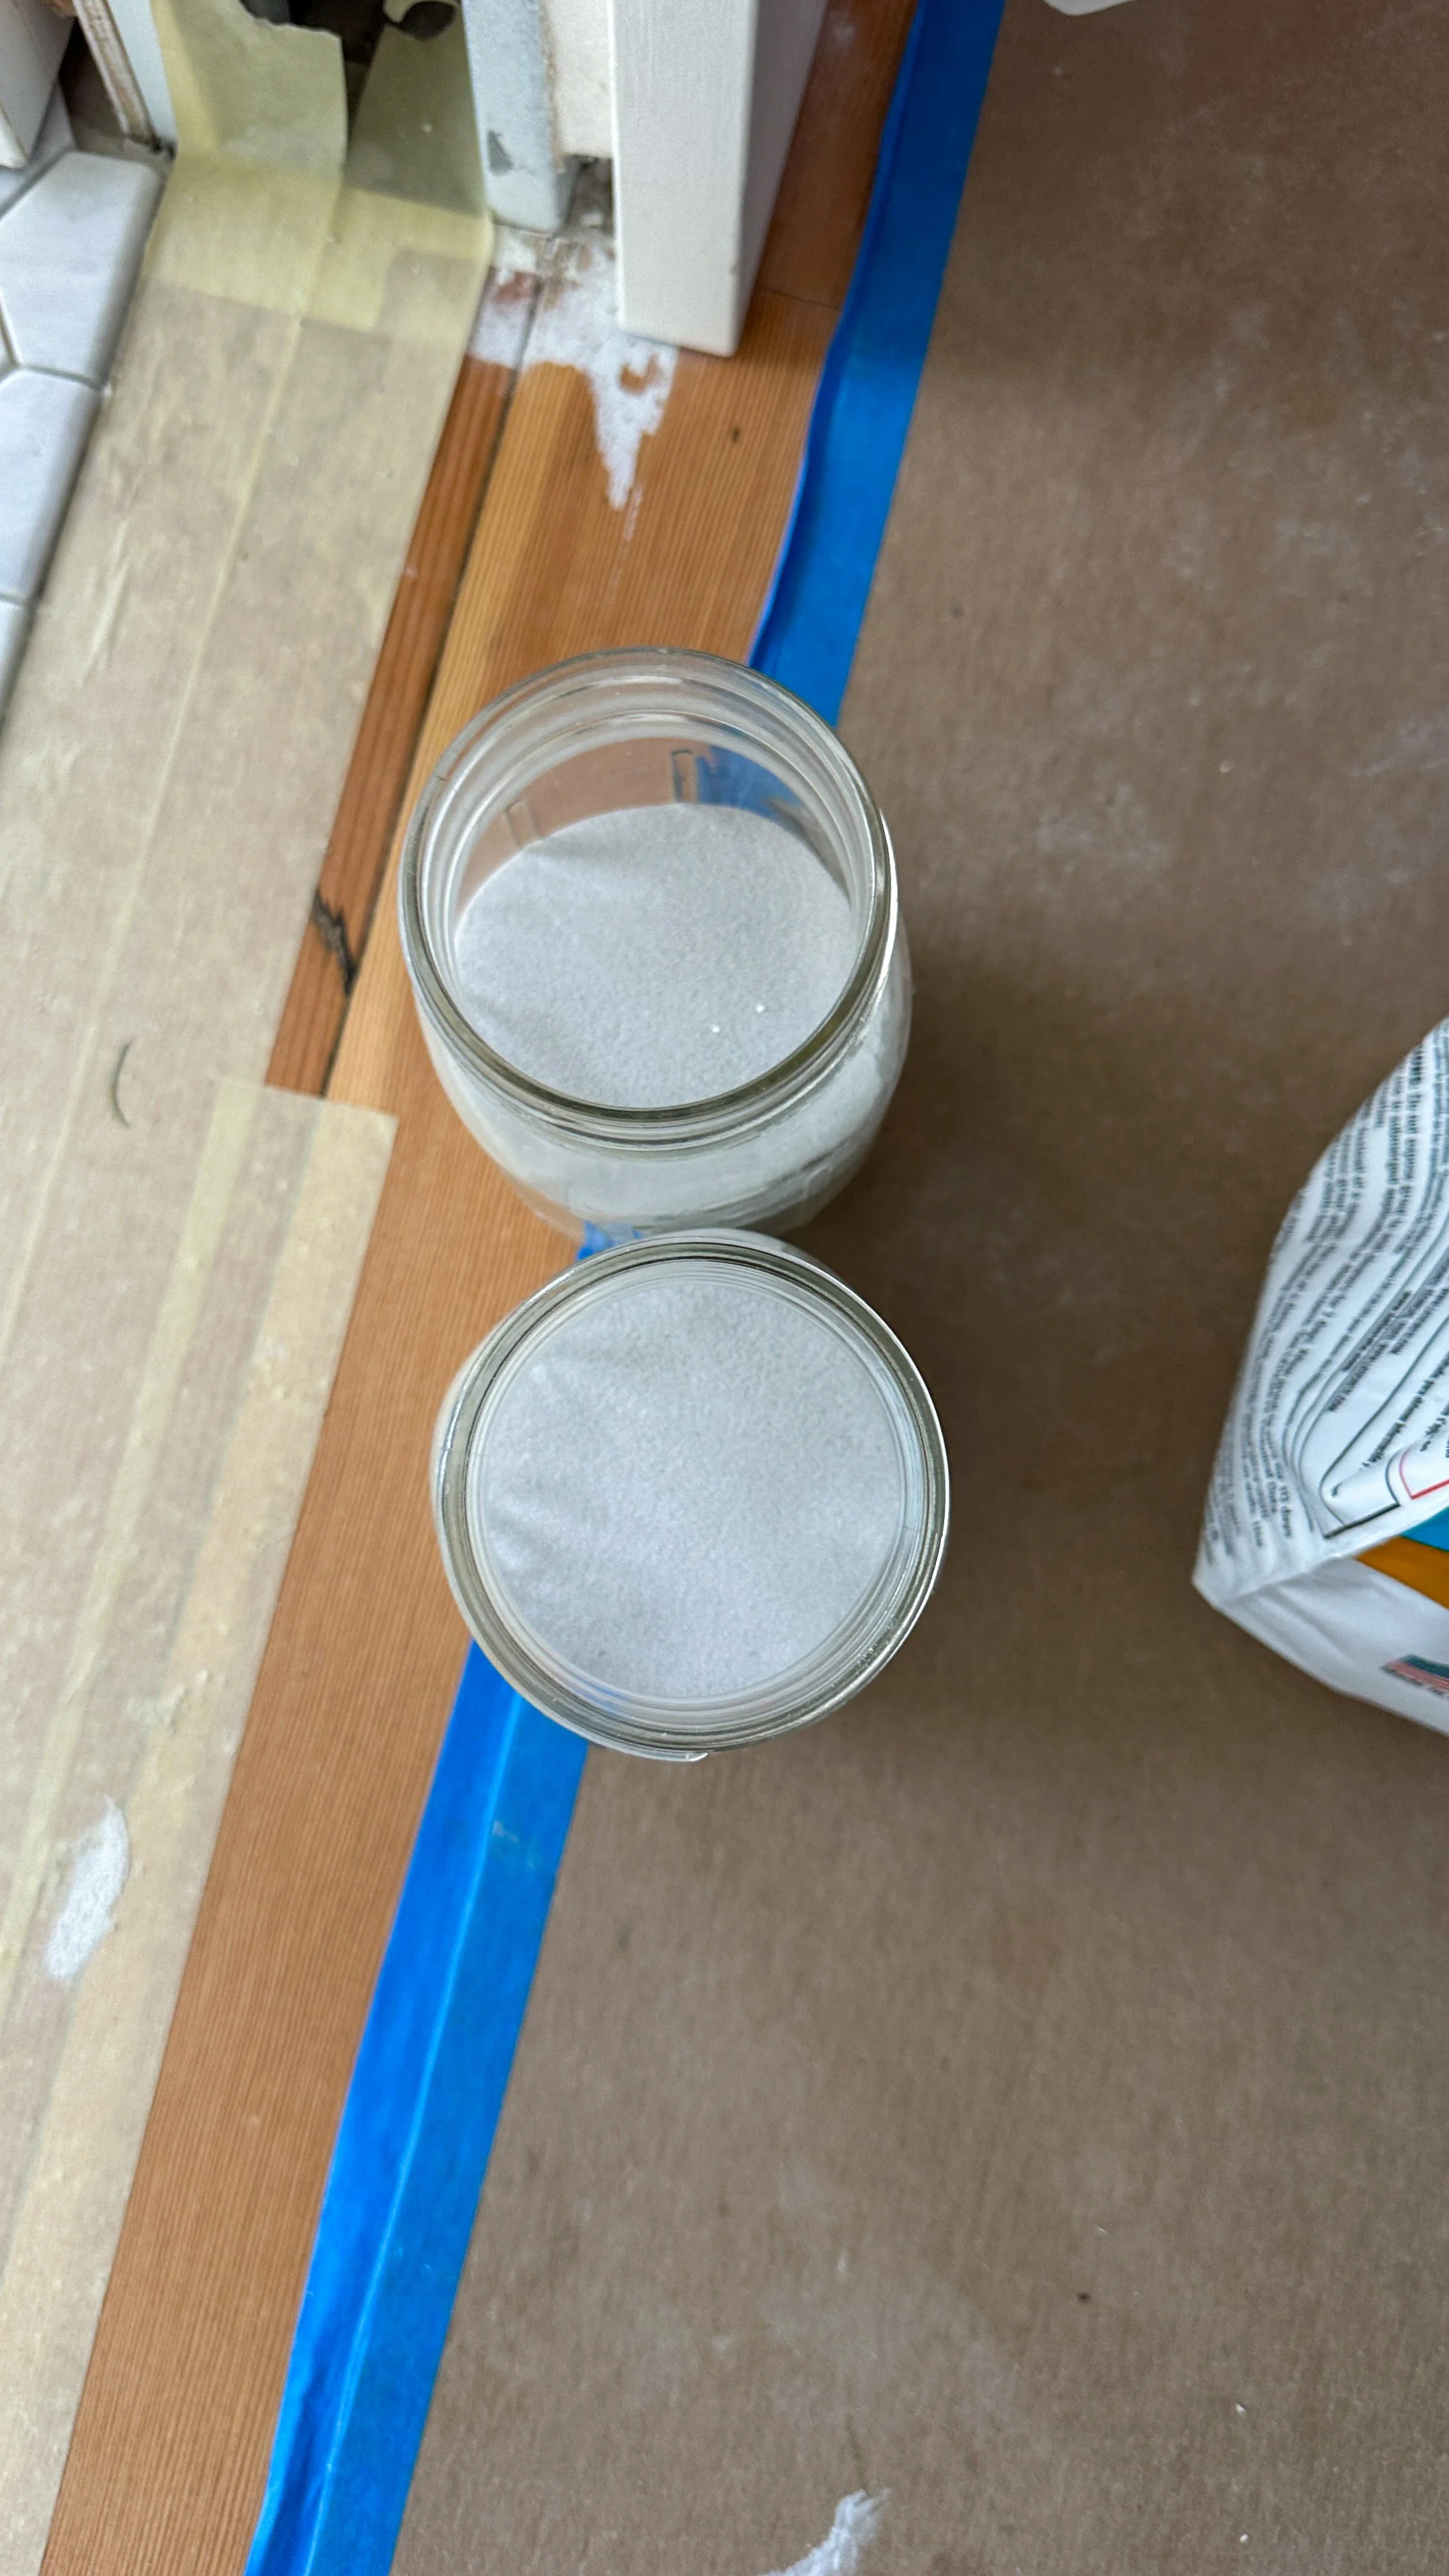
Thankfully, the Iron powder looked the same between batches and cured evenly throughout the bathroom.
Our takeaway isn’t “avoid SPECTRALOCK.” It’s this:
Buy enough grout before starting.
Inspect the color component from every unit.
Compare all units before any grout goes onto the tile.
Follow the mixing ratios and timing precisely.
Don’t assume two separate units will be visually identical at a prominent transition.
So that’s our caveat when using SPECTRALOCK - verify color consistency not with batch numbers but with your own eyes!
The Three High-Performance Bathroom Grouts We’ve Used
We’ve now installed three high-performance grouts in our own bathrooms: LATICRETE SPECTRALOCK PRO Premium, ARDEX WA, and Fusion Pro. All three have strengths, but they differ in installation, availability, and convenience. Here’s a little comparison between the three…
LATICRETE SPECTRALOCK PRO Premium Epoxy Grout
Used in: Hill House upstairs hall bathroom and ensuite bathroom
Colors: Frosty, Smoke Gray, and Iron
Best for: Our current overall pick
SPECTRALOCK is the grout we expect to keep reaching for. It produced full, consistent joints in the ensuite, has a durable and low-maintenance epoxy finish, and is available from a supplier in our town.
The Iron color was especially successful. It defines the white subway tile, relates naturally to the marble, and feels forgiving enough for a hardworking family bathroom.
Our one caution is the possibility of color variation between units. We would absolutely use SPECTRALOCK again, but we will always inspect every color component before mixing.
What we like:
Durable, low-maintenance epoxy finish
Doesn’t require sealing
Works on walls and floors
Good color selection
Full, consistent-looking joints
Available to us locally
What to consider:
Mixing and wash timing must be followed carefully
Multiple color units should be inspected before installation
It costs more than standard cement grout
Once it is mixed, the working clock is running
ARDEX WA Epoxy Grout
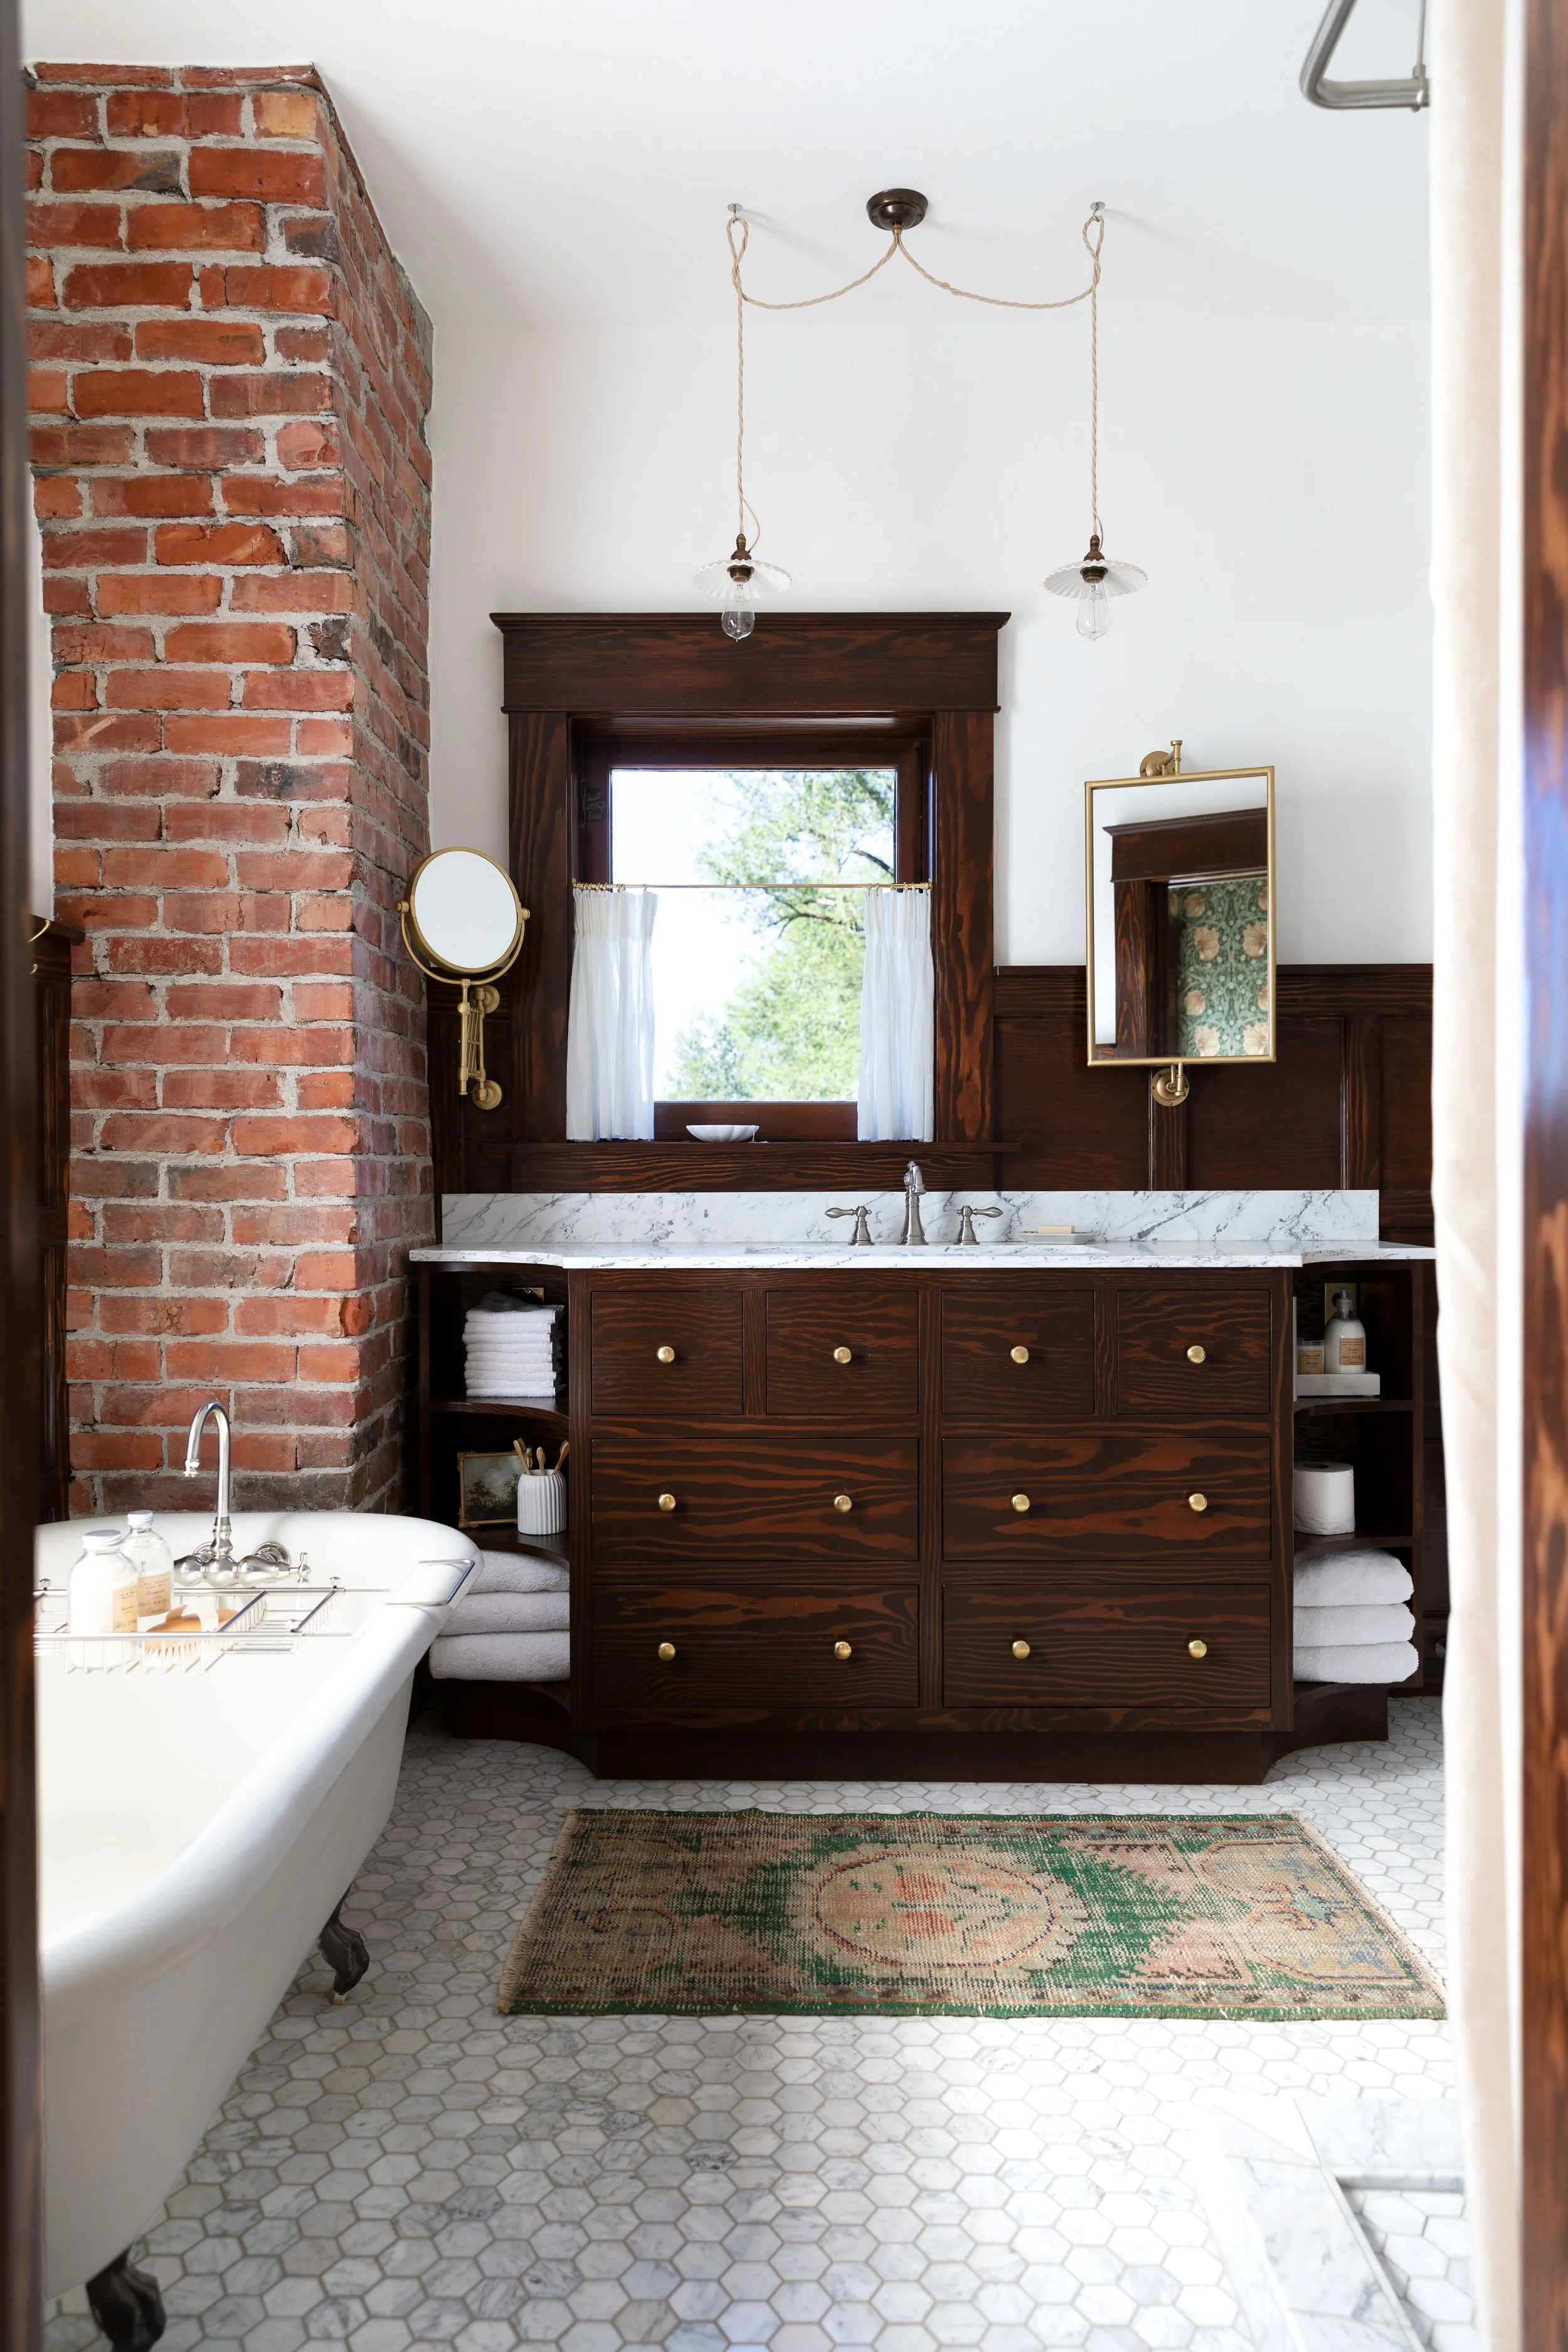
Used in: The Farmhouse primary bathroom
Colors: Fresh Lily on the walls and Smoke on the marble floor
Best for: An equally good installation experience
ARDEX WA was our first major epoxy-grout installation, and at the time we called it our favorite grout to date. I still stand by that review.
The consistency was creamy and easy to work into the joints, cleanup went smoothly with water, and the finished colors were remarkably close to the physical samples. We had heard plenty of epoxy-grout horror stories before installing it, but ARDEX was much more manageable than expected.
We carefully divided the components using a scale so Garrett could work in smaller batches and completed the bathroom over a couple of half days. Fresh Lily gave the white subway tile a soft outline, while Smoke was dark enough to be practical on the honed Carrara-marble floor. Several years later, that middle-tone floor grout still feels like the right decision.
You can read all about our experience with ARDEX here.
What we like:
Smooth, workable consistency
Straightforward cleanup
Accurate grout-color samples
Excellent performance on walls and floors
Durable, low-maintenance finish
Good warm-gray color options
What to consider:
Partial batches require precise measuring
Availability may depend on local tile suppliers
Working and washing times still matter
It costs considerably more than standard cement grout
We would happily use ARDEX WA again.
Fusion Pro Single-Component Grout
Used in: The Poplar Cottage upstairs bathroom
Color: Bright White
Best for: Projects where you don’t want to mix components
At the Poplar Cottage, we used Fusion Pro in Bright White on the subway-tile walls and patterned penny-tile floor.
Unlike ARDEX and SPECTRALOCK, Fusion Pro arrives ready to use. There is no resin, hardener, or separate color component to measure, making it convenient for a DIY project completed in smaller sections.
The product itself has held up. The color is what I would change.
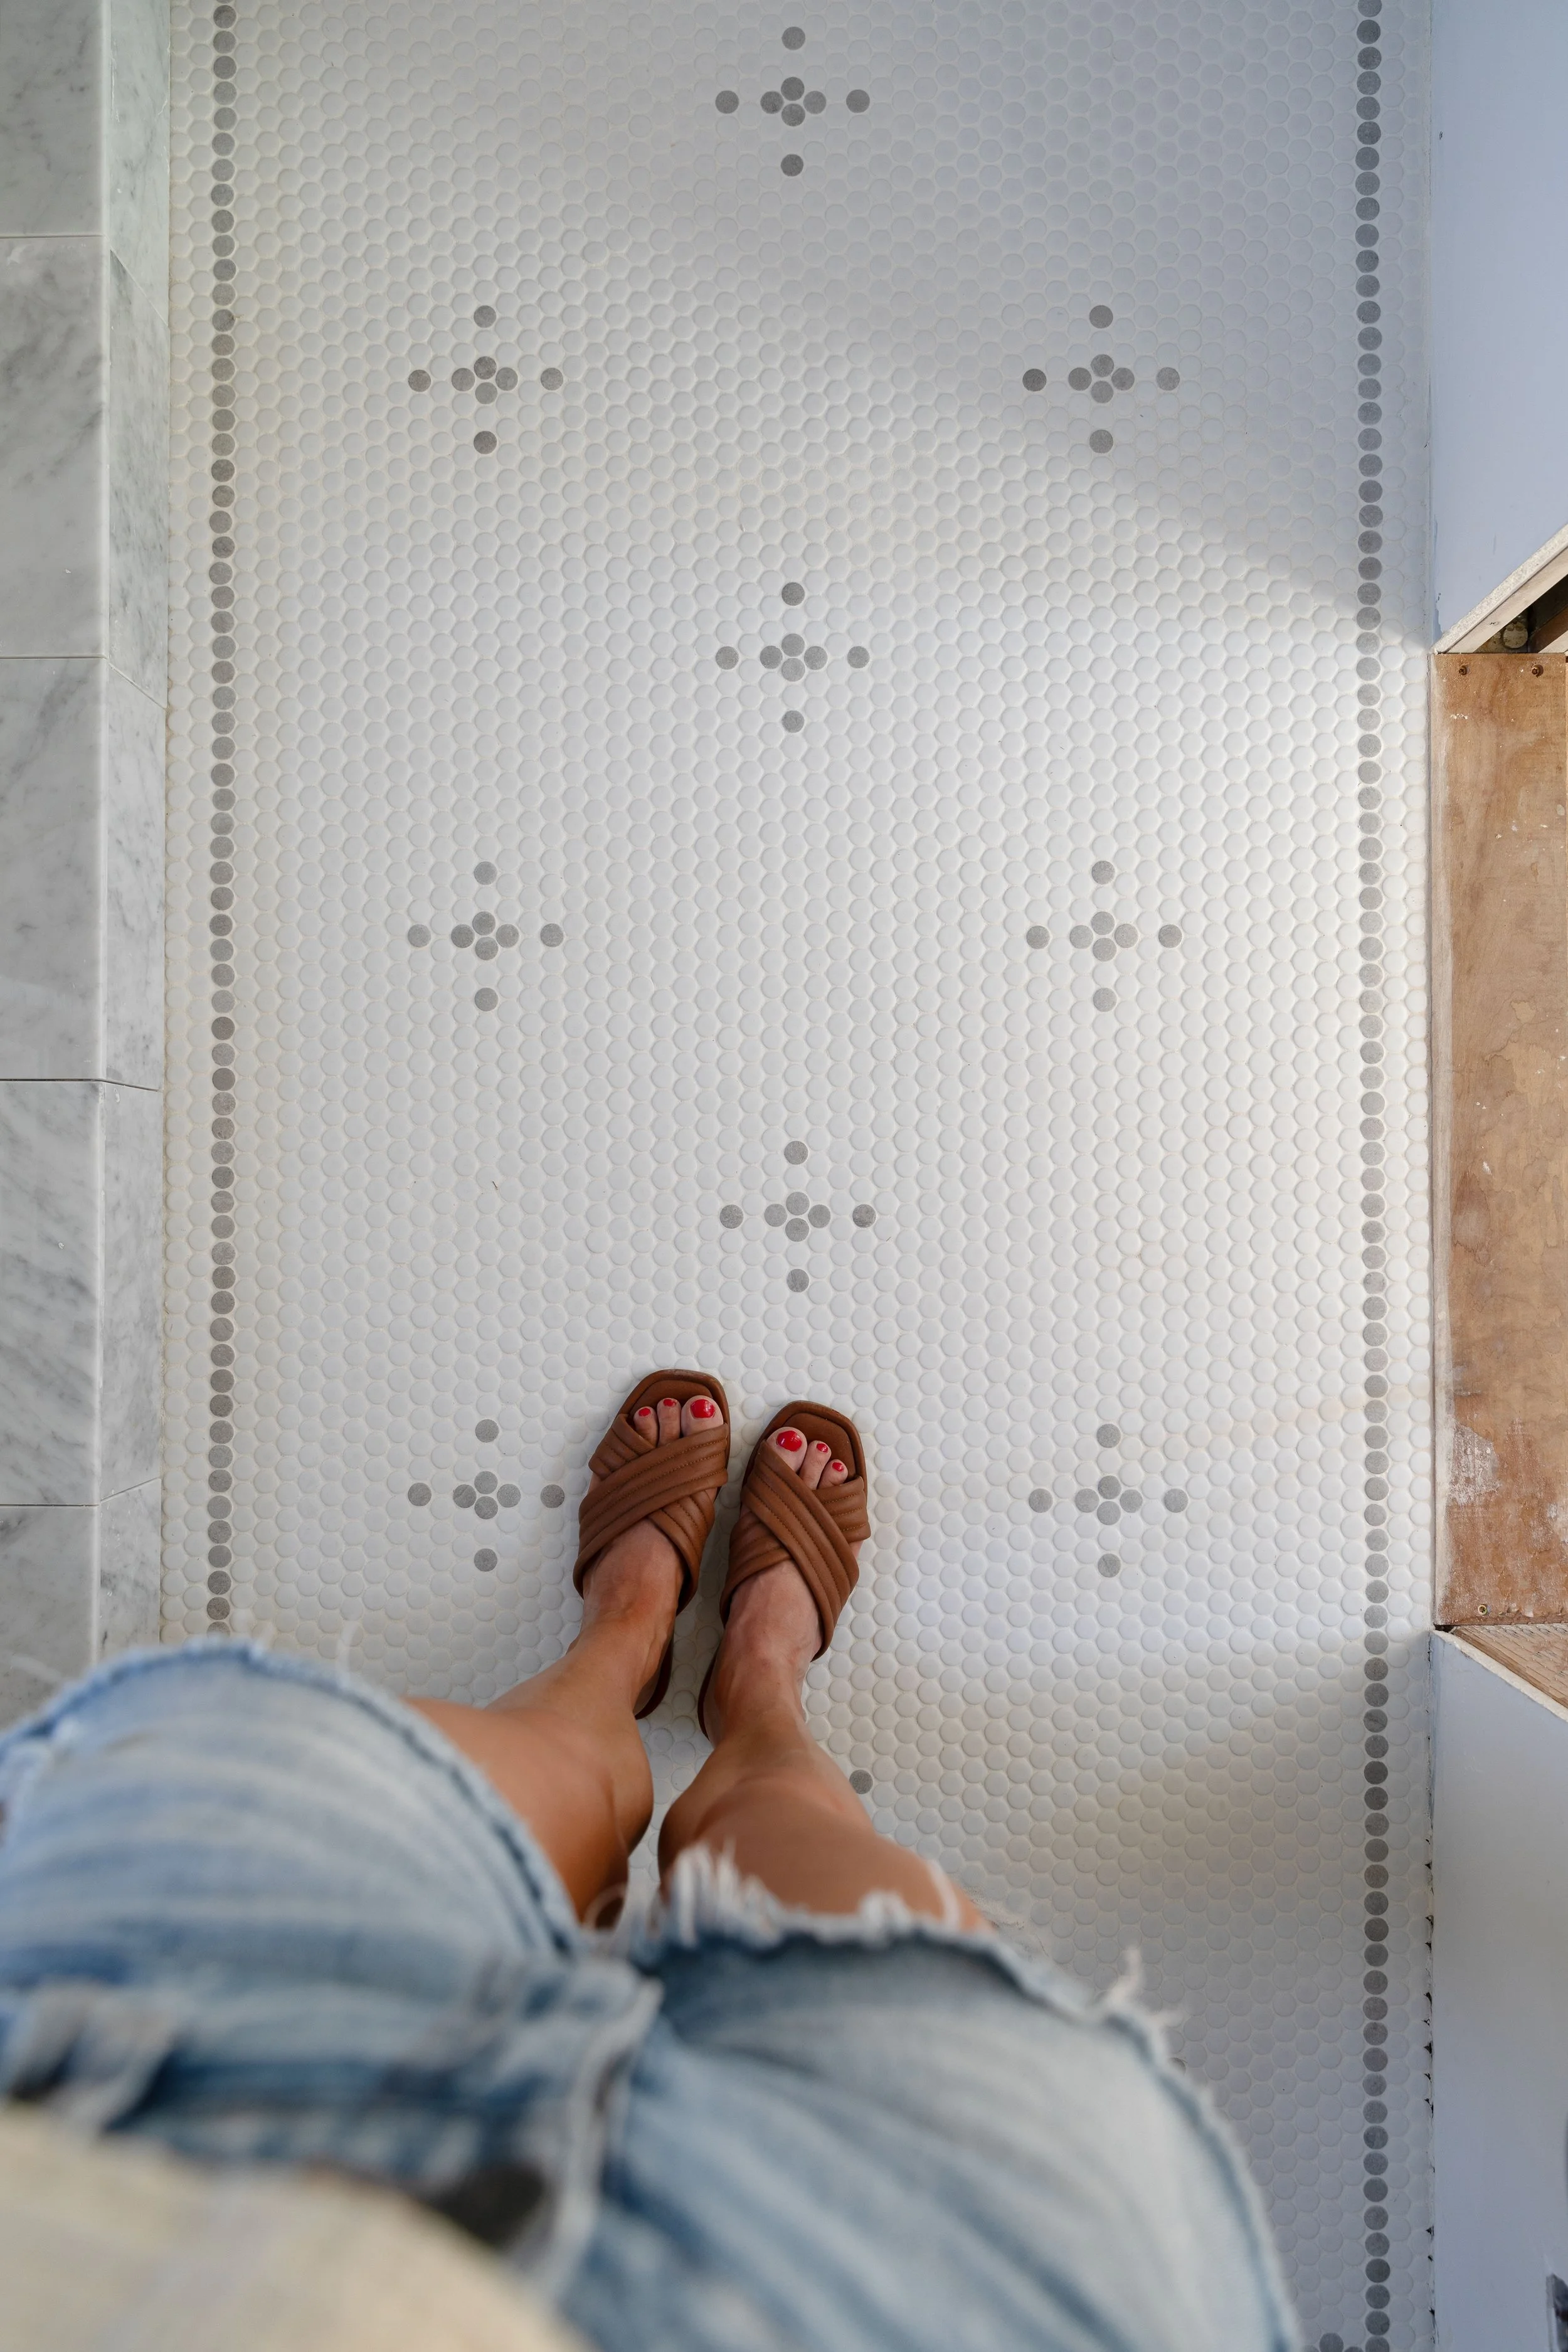
Bright White looked lovely when the bathroom was new. It allowed the grout to disappear into the white subway and penny tile and gave the room a clean, seamless look. But white grout shows dirt, traffic patterns, soap residue, and the pink buildup we sometimes see in wet areas. All grout gets dirty. White simply shows everything and keeping every line looking freshly white is not a realistic use of anyone’s time, especially in a rental. A soft gray or medium neutral would have maintained the classic appearance while being considerably more forgiving.
That is primarily a color complaint rather than a product complaint. Fusion Pro was convenient, required no component mixing, and doesn’t need to be sealed. I would consider using it again - but not in Bright White on a hardworking bathroom floor.
Epoxy Grout Versus Single-Component Grout
Both epoxy grout and high-performance single-component grout can offer better stain resistance and lower maintenance than traditional cement grout, but the installation experience is different.
Epoxy Grout
Separate components must be combined accurately.
Working time and wash timing are important.
It is extremely durable once cured.
The grout itself doesn’t need to be sealed.
It works well in showers, wet rooms, and hardworking floors.
It is usually more expensive and less forgiving during installation.
Single-Component Grout
Comes ready to use.
Can be convenient for small projects or work completed in sections.
Doesn’t require measuring resin and hardener.
Often provides good stain resistance without sealing.
Still requires careful installation and cleanup.
Performance and installation instructions vary by product.
For our most hardworking shower floors and wet rooms, we continue to lean toward epoxy. For a smaller or simpler project where mixing partial batches would be inconvenient, a good single-component grout can be a great choice.
so Which Grout Would We Choose Now?
If we were starting all over again today with a shower, wet room, or hardworking bathroom floor, we’d definitely use LATICRETE SPECTRALOCK PRO Premium again. It’s a great epoxy grout that checks the boxes when it comes to install and maintenance. It’s relatively easy to get and we’d pick it again in a heartbeat (with the one color uniformity precaution mentioned above).
All the materials, tools, and supplies you need for epoxy grout install
Epoxy grout it definitely DIY-able but it does require some basic tools and supplies. Here’s what we used for the ensuite bath install…
LATICRETE SPECTRALOCK epoxy grout part AB + color powder part C
Mixing paddle (drill attachment)
Would We Use White Grout in a Bathroom Again?
Personally, I wouldn’t use pure white grout again on a bathroom floor or in a frequently used shower. White grout can be beautiful in a low-traffic area, especially when the goal is to make grout lines disappear into white tile. But bathrooms are wet, soapy, and busy. Even stain-resistant grout still collects surface buildup and needs routine cleaning.
A light-to-medium gray can provide a similarly quiet look with considerably more forgiveness. My grout-color rule after all these bathrooms is pick a color in the middle. Not bright white. Not super dark. A middle tone that relates to the tile and can handle real life. There are always exceptions, but it’s where I recommend everyone start.
Does Epoxy Grout Need to Be Sealed?
Nope. The epoxy grout itself doesn’t need to be sealed. Natural-stone tile surrounding it may still need to be sealed, however. We pre-sealed the honed marble in the Hill House ensuite before grouting to reduce absorption and make the epoxy cleanup easier.
You can read our complete sealing process, including our favorite stone sealer, here.
Our Best Epoxy-Grout Installation Tips
After installing epoxy grout in several bathrooms, these are the things we would tell anyone preparing to use it:
1. Read all the instructions before mixing anything
Working time, waiting periods, and wash schedules vary by product. Read through the entire process and understand it before the clock starts.
2. Make a grout-and-tile sample
Grout can look surprisingly different once it surrounds an entire room of tile. If at all possible, test the color with the actual tile before committing.
3. Buy enough material and inspect every color component
Mosaics and deep joints can consume more grout than expected. Buy enough before beginning, then compare the colored powder or aggregate from every unit before anything is mixed.
4. Measure partial batches precisely
Never eyeball epoxy components!! Use a digital scale when dividing a unit and keep the proportions exact.
5. Use the appropriate tools
An epoxy-grout float, cleanup sponges, chemical-resistant gloves, and the correct washing supplies make the installation considerably easier.
6. Work in manageable sections and follow the wash timing
Cleaning too early, too late, or too casually can affect the finished joints and leave residue behind that’s impossible to get off later. Smaller sections are especially helpful on walls and intricate mosaics.
7. Seal porous natural stone when appropriate
Always test the complete tile, grout, and sealer combination first. And choose a grout color suited to your actual life - a hardworking family bathroom deserves a forgiving color!
psst: we shared more on epoxy grout and pricking colors here
The Grout We’ll Keep Recommending
Grout isn’t usually the part of a bathroom renovation that gets people excited. But it covers a surprising amount of visual space, outlines every tile, and has to withstand years of water, dirt, cleaning, and bare feet. It deserves a little thought!
For the Hill House ensuite, SPECTRALOCK in Iron was absolutely the right choice. It defines the simple tile without overpowering it, works beautifully with the marble, and feels practical enough for daily family life. After our experience with bright white grout at Poplar and the unexpected color variation in the Hill House hall bathroom, an even, medium-tone installation feels right.
We’ve learned the lessons the hard way. So we checked the powder. We followed the clock. And this time, the grout did exactly what we wanted it to do: quietly make all of that tile look even better. And it should be easy to maintain and live with for years to come.
More from the upstairs bathrooms soon!
xx
ps this post contains affiliate links, meaning we may earn a small commission if you purchase through our links, at no additional cost to you. Thank you for supporting The Grit and Polish!






I’m obsessed with this before-and-after ✨